Waddlemarsh
Posted

Full Member
Somewhere SW of London. Somewhen before today
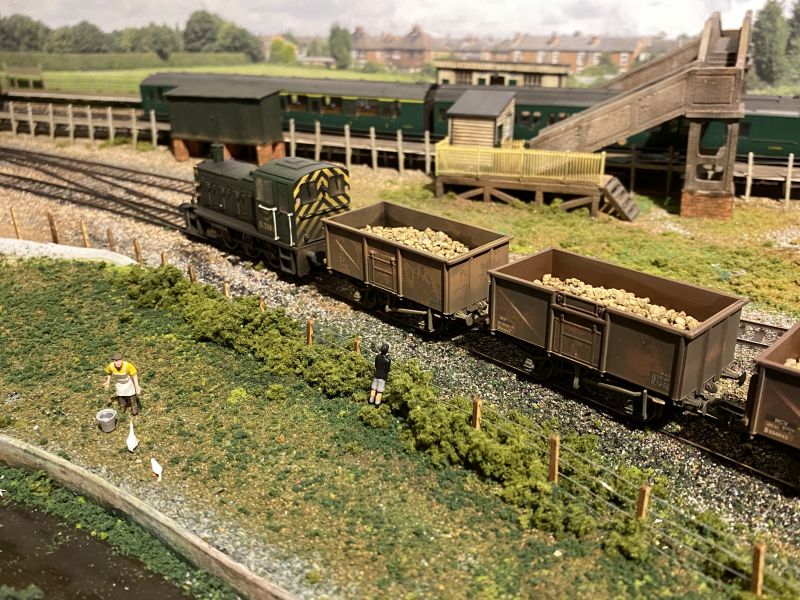
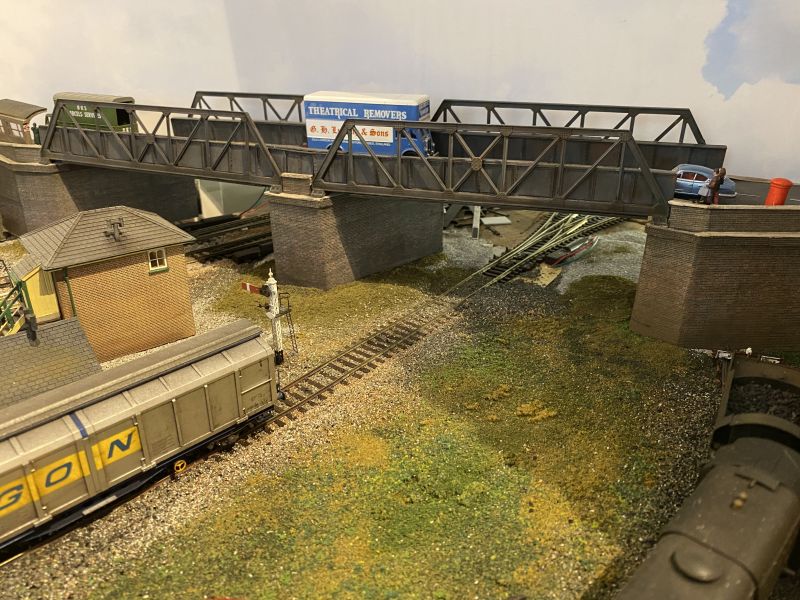
More fences going in. And a somewhat protective gander.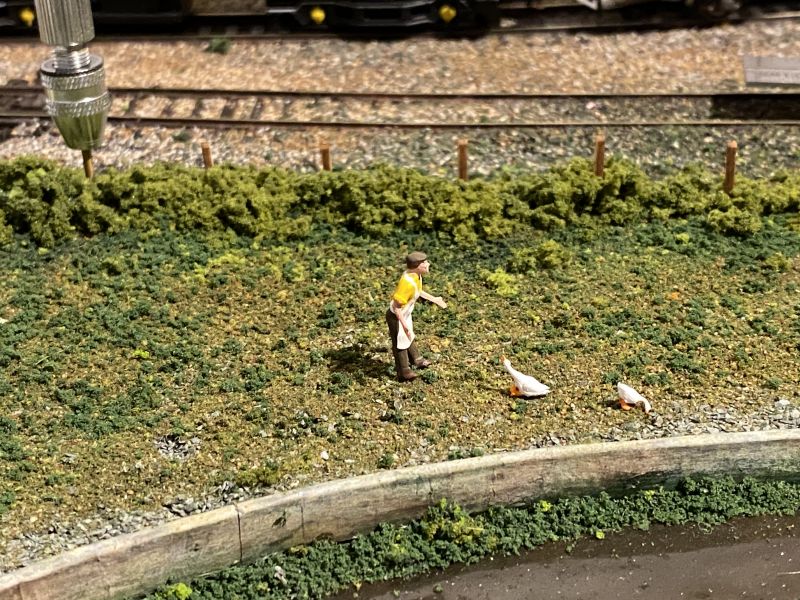

Posted

Full Member
'Petermac
Posted
Full Member
Posted

Full Member
Staying on the thread Kevin.
Posted
Full Member

Posted

Full Member
Phil
Posted
Full Member
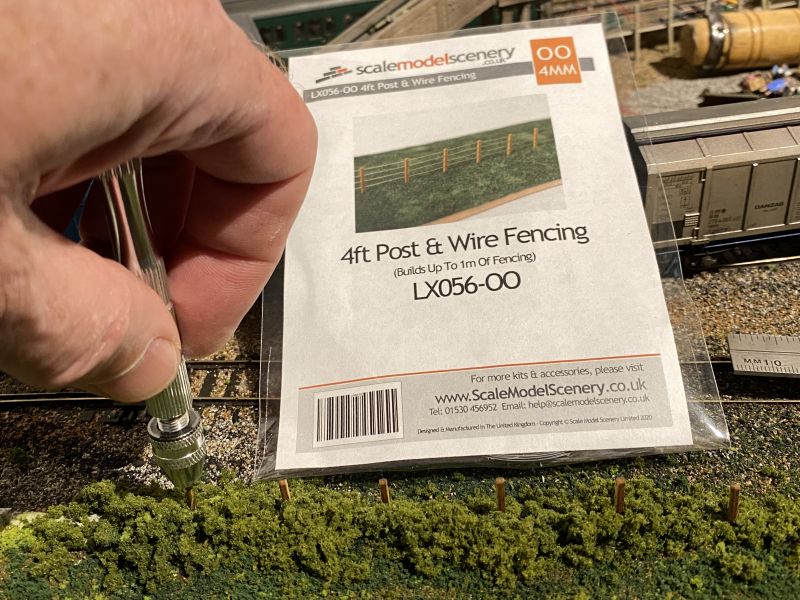
Hi KevinI have mine already , but, I need to do the back scene first .although the wire looks a bit dodgy Best wishes Kevin
Threading the wires through the post holes wasn't too bad. A lot easier than with the barbed wire fence I attempted before which just wouldn't pull through. The instructions are easy to follow. Secure the posts with superglue before wiring. Start threading with the bottom wire. I found that using the phone's torch-light pointing directly at the holes helped me to locate the wires when the time came. When threaded through secure the ends (at least) with a dab of superglue; you can also secure at any or all intermediate posts if you wish but take care not to allow glue to stray into the holes needed for the next wire!
The wires pulled through all the way along a 1-metre run including around some slight curves without much of a problem. Just ease them along and work any kinks or bends you get carefully through each post in turn. There are some bends in my wires as the pictures show. Despite them being a bit over-scale they don't bother me because fence wires are seldom taut and dead straight anyway. They usually sag a little.
Posted
Full Member
Staying on the thread Kevin.
Posted
Full Member
An intermediate landing has been fitted, upon which a lady in blue is standing, to break the long flight which in turn necessitated changes to the brick abutments to incorporate a horizontal area
With that done cap stones have been fitted where needed.
The steps themselves require painting then final detailing and fitting will see this piece become integral with the road bridge.

Posted

Site staff
Cheers
Matt
Wasnie me, a big boy did it and ran away
"Why did you volunteer ? I didn't Sir, the other three stepped backwards"
"Why did you volunteer ? I didn't Sir, the other three stepped backwards"
Posted
Full Member
Posted
Full Member

Posted
Full Member
Best wishes Kevin
Staying on the thread Kevin.
Posted
Full Member
'Petermac
Posted

Site staff
and I agree :thumbsVery nice Rick - the whole scene looks great. :pathead
Ron
NCE DCC ; 00 scale UK outline.
NCE DCC ; 00 scale UK outline.
Posted

Full Member
:cheers :doublethumb
 Last edit: by SRman
Jeff Lynn,
Amateur layabout, Professional Lurker, Thread hijacker extraordinaire
Amateur layabout, Professional Lurker, Thread hijacker extraordinaire
Posted
Full Member
Posted
Full Member
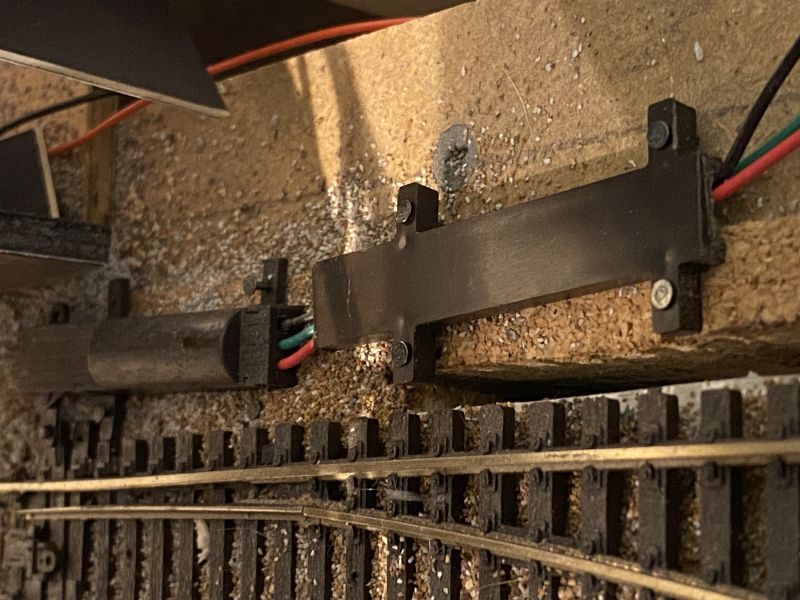
But slice the ends off and you have handy little cable troughs ready-made with four-pin fixing which can be used to manage or conceal surface wiring where needed.


Wires are visible through the backscene
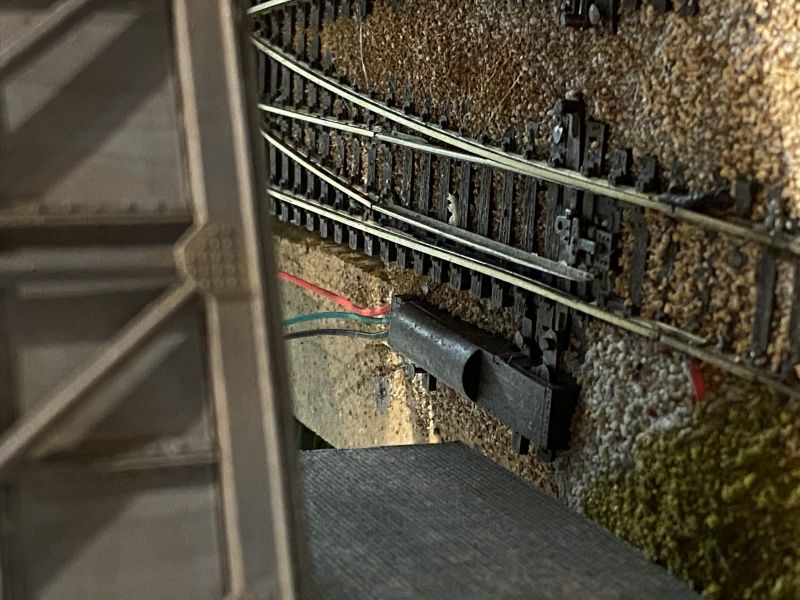
And now covered. The cover could have gone right up to the motor but lacked purchase for the track pins on one side; as can be seen there is a baseboard joint and a slight gap there.
Posted

Full Member
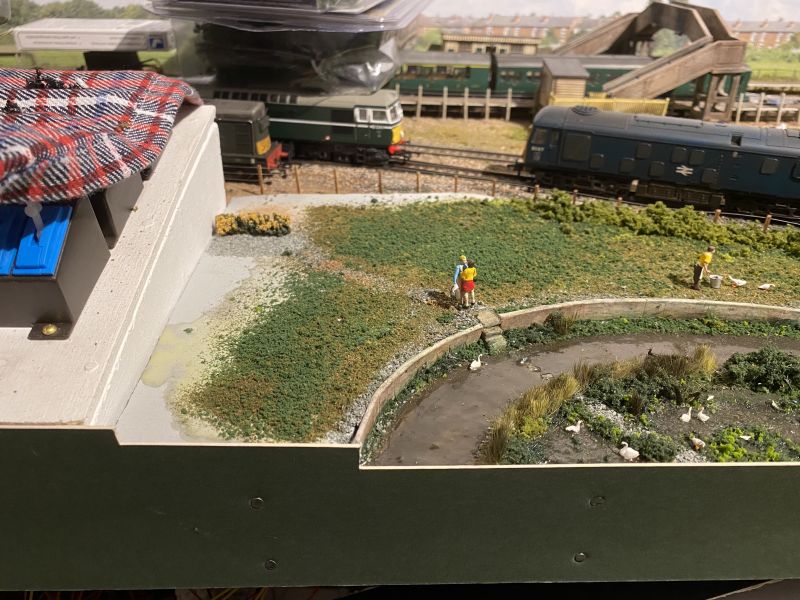
Waddlemarsh has come a long way and its scenics and cameos bring it to life.
Best,
Bill
At 6'4'', Bill is a tall chap, then again, when horizontal he is rather long and people often used to trip over him! . . . and so a nickname was born :)
Posted
Full Member

1 guest and 0 members have just viewed this.