Waddlemarsh
Posted

Full Member
Somewhere SW of London. Somewhen before today
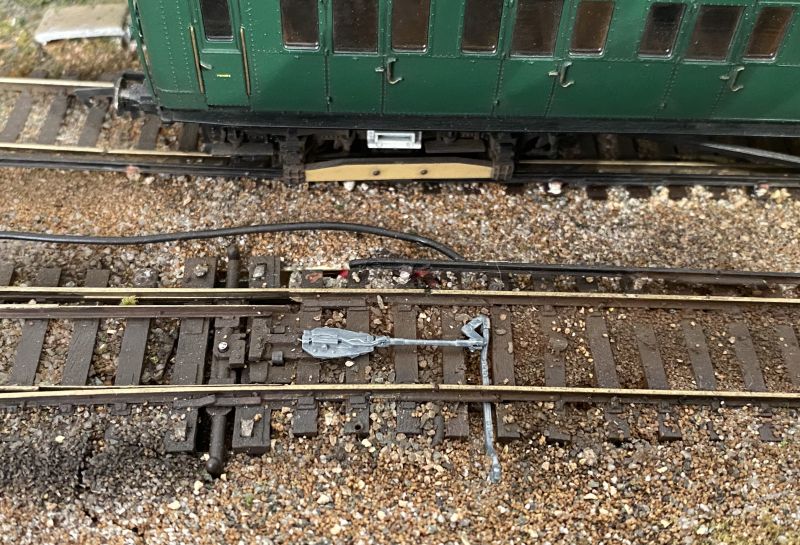
Next step - the facing point lock for the Down Passenger line. Non-passenger lines don’t necessarily need these so this fiddly piece of asssmbly which includes getting the rod between the rail and sleeper base will be a one-off.Prototypically the lock would be on the tie-bar but as I am unwilling to disassemble the Peco spring mechanism this will have to suffice.

Posted

Full Member
How do these point locks work ? Never really noticed them before amongs all the usual clutter between railway lines.
What have you use for ballast ? Looks very realistic. :thumbs
'Petermac
Posted

Full Member
Shed dweller, Softie Southerner and Meglomaniac
Posted
Full Member
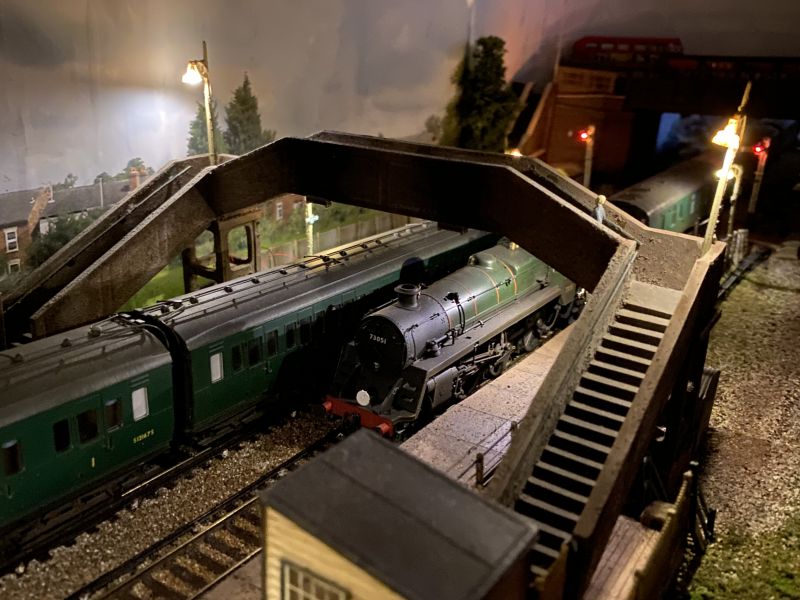
The Down end now has its full rodding and locking. The “London†end was going to be very tricky; getting rodding underneath both the track and the bridge would have been a challenge in dexterity indeed.
Instead I have made use of what was already there namely two surface-mounted point motors. Black wire has been stuck to them and fed back to the ‘box to represent motorised points.
The SW Division had some of these from early on, both electric and pneumatic, so it isn’t outside the scope of modeller’s licence to use this set-up here.


Posted
Full Member
Posted

Full Member
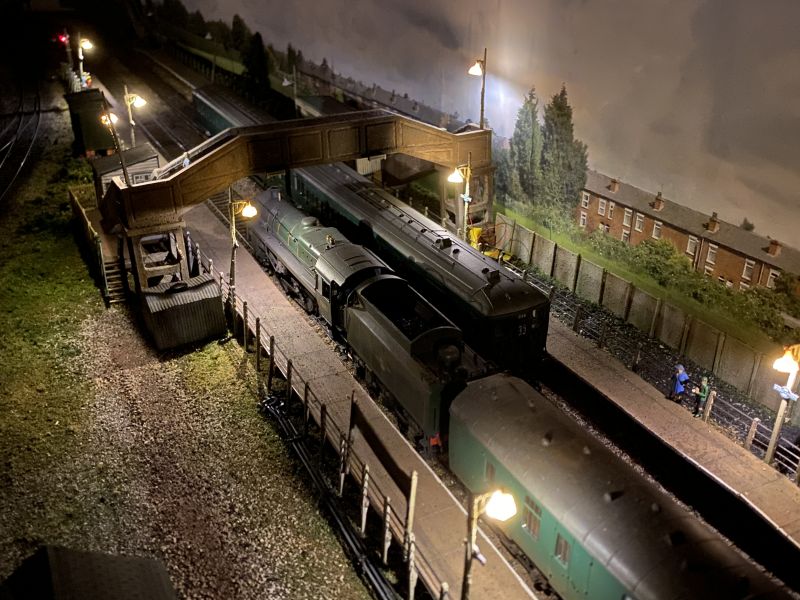
The layout is looking good, Rick, more and more detailed.
Jeff Lynn,
Amateur layabout, Professional Lurker, Thread hijacker extraordinaire
Amateur layabout, Professional Lurker, Thread hijacker extraordinaire
Posted
Full Member
Necessity very much the mother of invention here Jeff and thank you (and others) for your kind comments.I like that idea for the cables to the actual point motors.
The layout is looking good, Rick, more and more detailed.
I tried to tease point rodding under the tracks first but it just wasn't going to play nice. Or indeed at all. I might have done more harm than good.
So I hatched Plan B with a few lengths of black wire. "Simples" as a meerkat might say.
Posted
Full Member

….. came on!!!!!
Not bad for a Ratio plastic kit which is definitely not designed nor built as a working model.
Posted
Full Member
Posted
Full Member
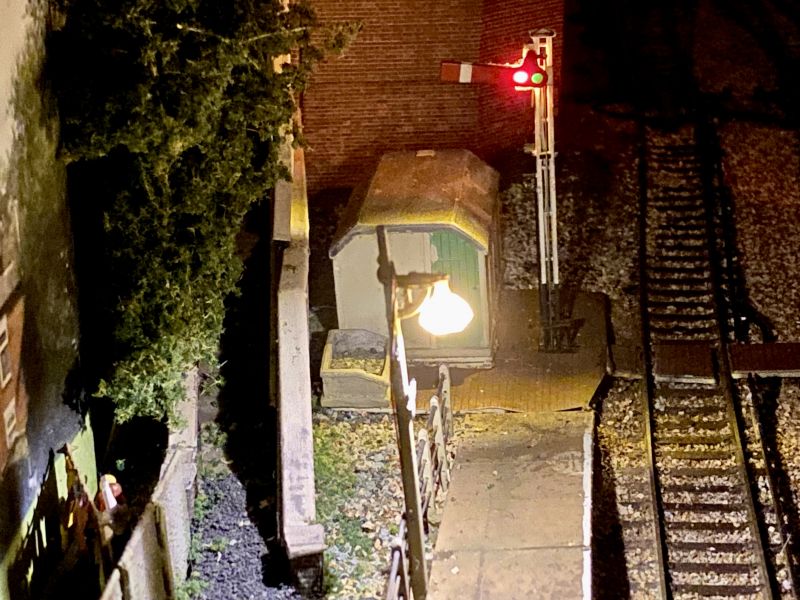
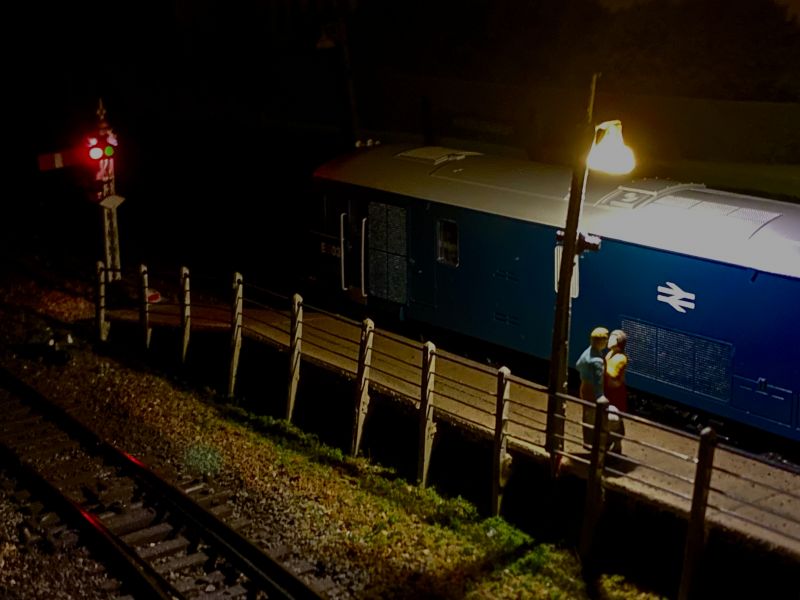
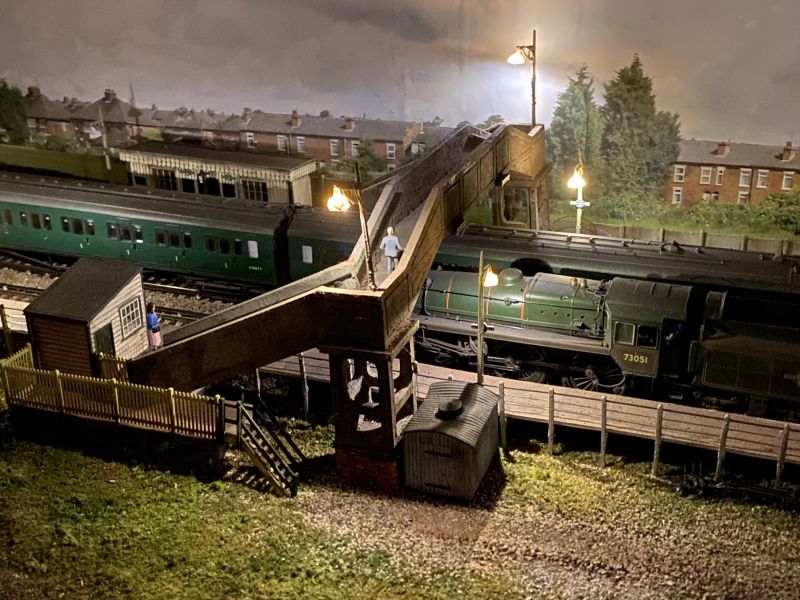
When you get around to it, the shadow of the odd passenger or two waiting on the platform will complete what is already a wonderful scene. :thumbs
'Petermac
Posted
Full Member
Cheers Pete.
Posted
Full Member
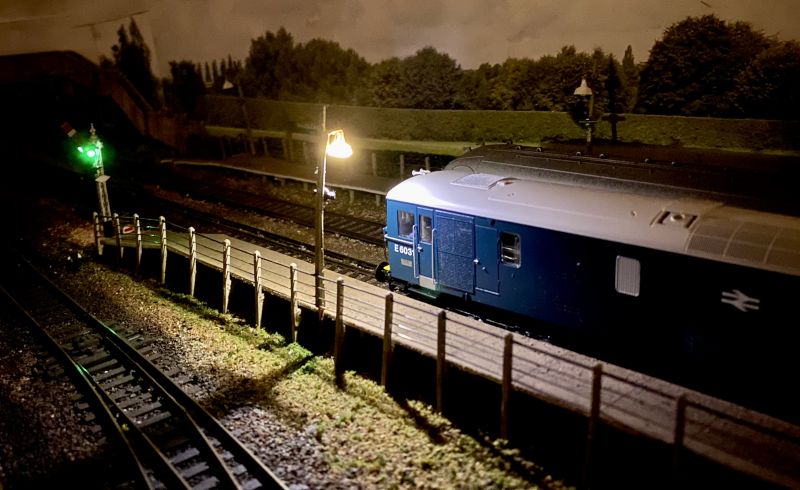
Something like this?That really does look authentic Rick - brilliant !
When you get around to it, the shadow of the odd passenger or two waiting on the platform will complete what is already a wonderful scene. :thumbs
Posted
Full Member
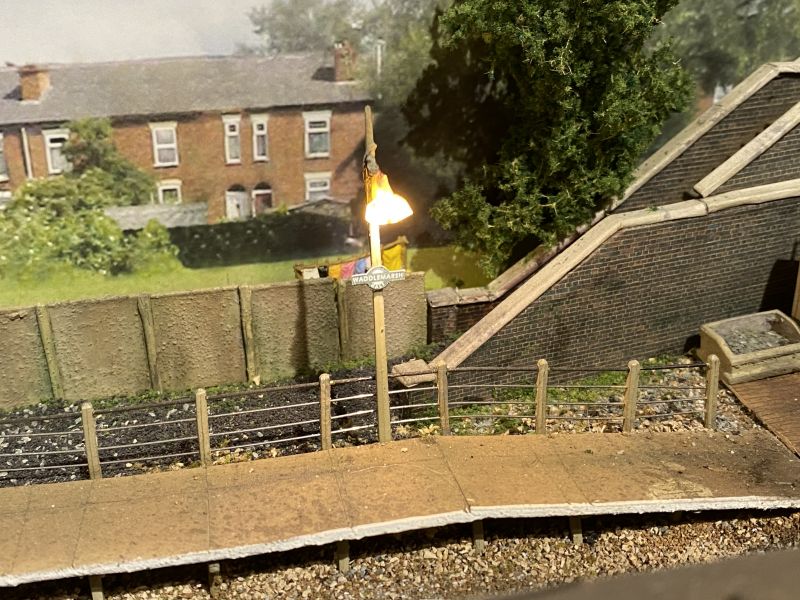
I haven’t been able to find pre-wired yellow nanoLEDs but I suspect were I to use them they would appear pale yellow rather than an incandescent glow. I have the regulator fitted now which has brought the intensity down somewhat.Wot 'e said. Would yellow or orange led's get you where you want for the glow of incandescent lamps?
Posted

Full Member
A less decent man would lead the lady to the slightly darker end of the platform ;-)[user=6]Petermac[/user] wrote:Something like this?That really does look authentic Rick - brilliant !
When you get around to it, the shadow of the odd passenger or two waiting on the platform will complete what is already a wonderful scene. :thumbs
Cheers,
Claus
www.flickr.com/photos/ellef/
Claus
www.flickr.com/photos/ellef/
Posted
Full Member
'Petermac
Posted

Full Member

Nice lighting effect there, good atmosphere :)
Phil
Posted
Full Member
Terry
Posted
Full Member
Following completion of the lighting the next step will be to remove all the stock parked on the layout, give everything a thorough dusting-down, complete the small amount of track weathering yet to be done and then see how it all runs.
I haven't had a full running session yet. There are some improvements I would like to make to the track wiring arrangements. I am stuck with one circuit for the two passenger lines because they merge off-scene through a short length of single track and at the other end they pass through the crossover-with-slip piece which was specially made. To keep the wiring relatively simple I haven't used isolation through the diamond or slip preferring to switch the various sidings in and out as required.
The yard is divided electrically into three with blending between controllers necessary at the changeovers. Not too hard in a slow-speed environment but it may be possible to make some moves easier than they are at present by altering the isolation.
And then …..
….. the next project has already begun. The baseboard has been built for a small and portable OO-9 / OO project intended for exhibition use. This also has to be as light as possible in order to be lifted by just myself in and out of the room and around two right-angle corners in the hallways if it is to get through the front door. No mean feat when height is involved from harbour up to cliffside …..
Watch this space through next year.
Posted
Full Member
It might. The shades are painted warm white and will have a little weathering added. I could try the same colour on the LEDs though too rich (into the creams / yellows) and it will look wrong.Would a dab of appropriately coloured paint on the LED reduce the brightness?
Terry
Another option I have had suggested is a dimmer but I don't think dimmers and LEDs work together. With all the lights wired in series the worst of the brightness will be dealt with electrically. It wasn't too bad last night when I turned the room lights off and took photos with only the platform and signal lighting available.
Posted
Full Member

1 guest and 0 members have just viewed this.