Tinkers End
Posted

Full Member
East Coast Main Line - in the sun
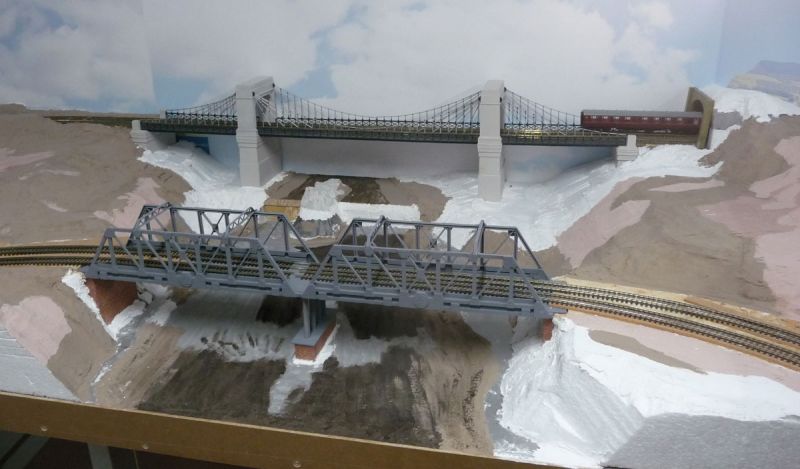
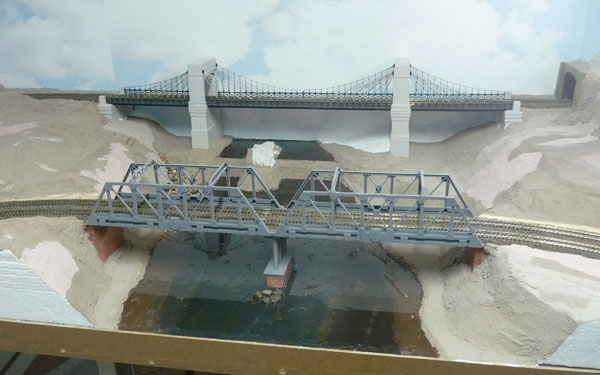
Just realised how long it is since I posted an update on here. Needless to say work has been progressing at a slower pace than I would like but given it is getting to well over 30 deg C by 11am it's not really condusive to getting lots done. So much of the ballasting is now complete and polyestyrene is being cut to form basic hills. The main stumbling block to getting the ballasting finished as trains running again is bridges. I need to finish some (well quite a few actually). Anway here is the current state of play of three that have been in progress for quite a while.1. The Hornby suspension bridge for the branch line, modified for double track and shortened.
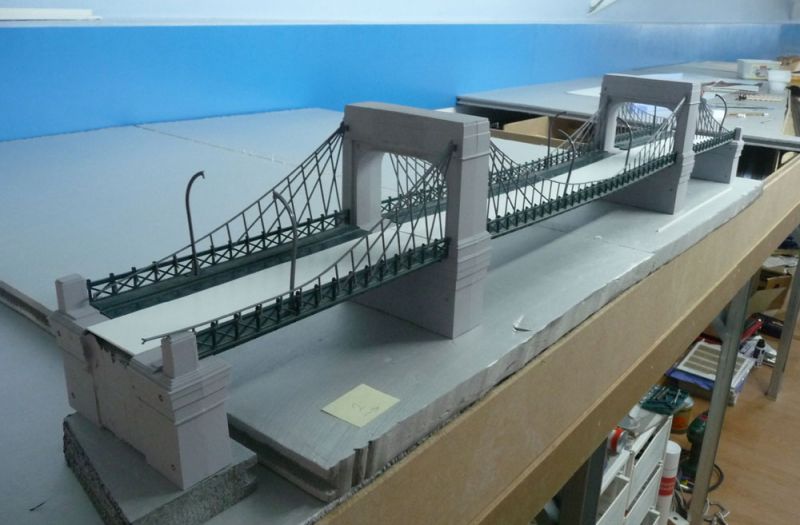
As you can see not yet finished but getting there. This photo shows it drooping a bit in the middle as I haven't inserted the aluminium support bars yet.
2. The girder bridge for the east coast main line (will be in front of the suspension bridge).
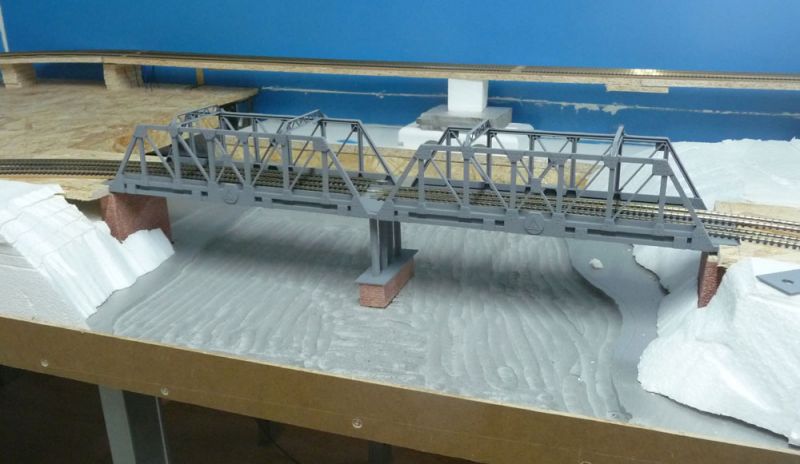
I think this is OK now although it needs weathering.
3. Girder bridge taking the branch line over the main line after leaving the station.
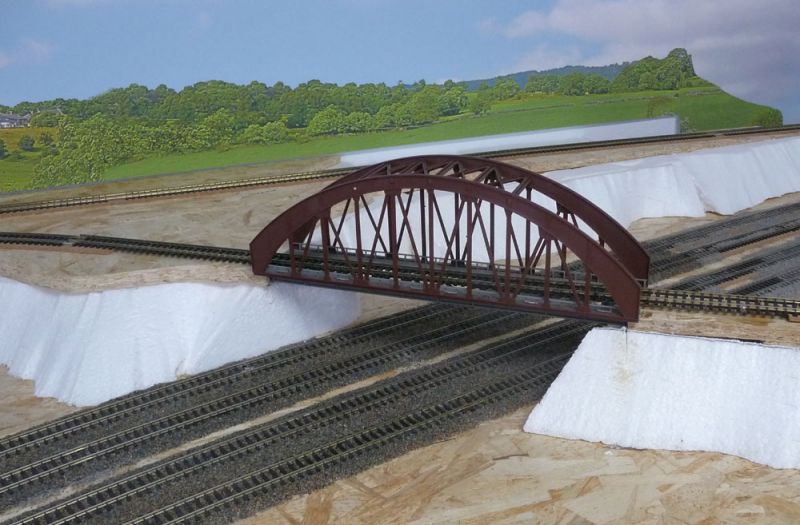
Needs painting and weathering.
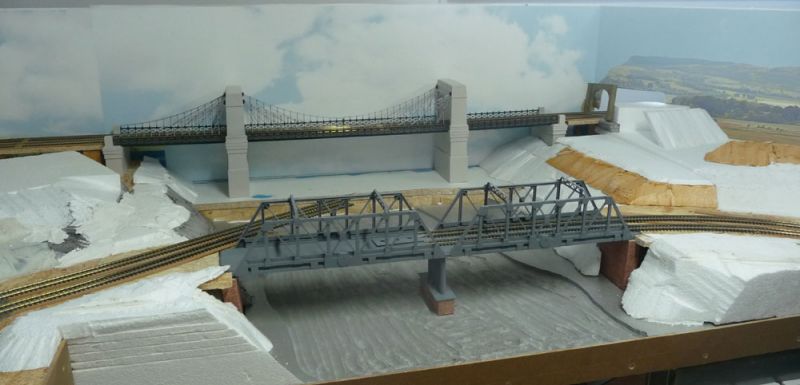
So hopefully by the end of August I will have the last of the backdrops fitted and these three bridges in place if not fully finished with the scenics around them.

Posted
Full Member
Posted
Inactive Member
Well done
Evan
Posted
Full Member
Posted

Full Member
I'm flying back next month - for that very reason !!! Every time I go by car, REsolve seems to DISolve and I end up having to eat bread and water for 3 months after I get back ………………………….
'Petermac
Posted
Legacy Member
reg
Posted
Full Member
Switching between different jobs as and when I feel like it so progress in various places. Walls being sorted on the main scenic leg along with much cutting of polystyrene and plaster bandage work. I think I need to do a work plan for the next few weeks as I have members of the model railway club from down near the coast coming up in November and I would really like trains running again by then.
Posted

Site staff
Ed
Posted

Full Member
Best wishes
John
Posted
Full Member
Firstly there was the suspension bridge widening and shortening as above - bleep bleep.
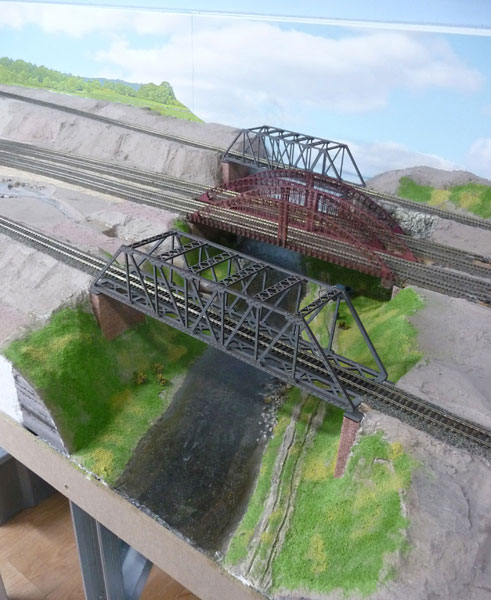
That is the river on the left hand side of the board. The river on the right hand side needed four bridges. As the photo shows they are all now built but need end supports and fixing in place. Being a gluten for punishment the two centre bridges are from Modelux and are supposed to be single track. They are made of many tiny delicate pieces and, with some bits missing, needed "adapting". I do like them just now need something like red-oxide spray paint to give them a final coat.
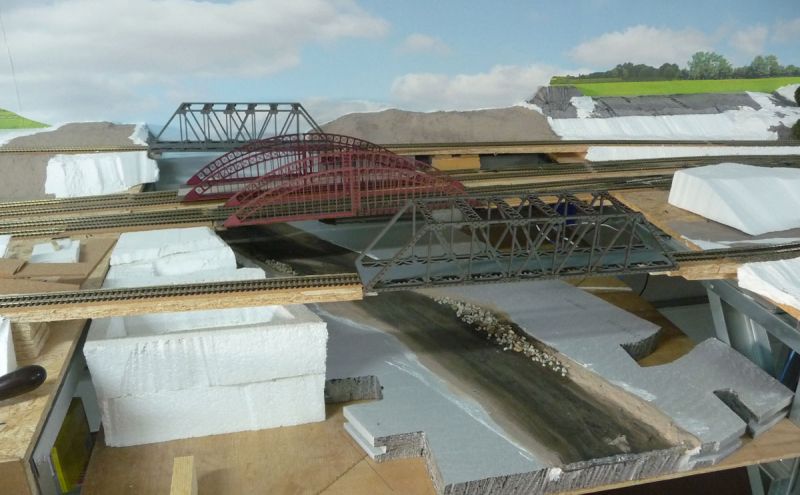
At least once I have these bridges fully installed trains can once again run on the layout and I can build up scenery around the river without having to disturb it all again.
And finally, in case anyone can suggest modifications, I am conscious that reaching to the back endge of the layout when all buildings are in place may be an issue so have come up with the trestle below.
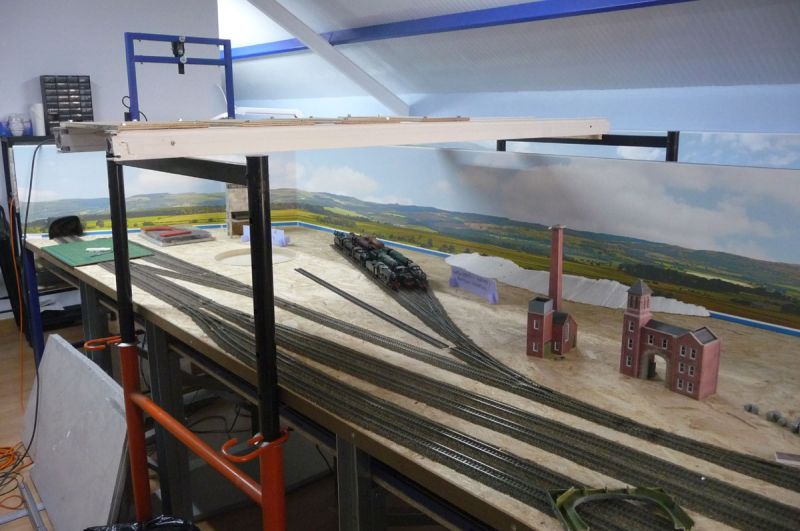
It has to be so high in the centre to go over the backdrop but I am thinking about getting the local fabricators to make a span that has a centre section that is like an inverted U so that the rest can be lower when I am lying on it.
Oh well - back to the bridges. A happy Christmas and New Year to all - and hopefully goodies as requested.
Posted
Site staff
and a Merry Christmas and Happy New Year to you and yours as well.
Ed
Posted
Full Member
What a great idea….I could do with something like that.
The layout looks great Dave……..although the Metcalfe buildings look a bit lonely
 Lots of cutting out to come?
All the best for Christmas
John
Posted

Full Member
Micro Mark over here has a cantilevered step ladder allow you to work over the track in relative comfort. You might have a look and borrow the design.
Nigel
©Nigel C. Phillips
Posted
Full Member
John. I hadn't realised bits of the factory were in view. The main factory is around somewhere almost (like most stuff it seems) ready to put on the layout. I am trying to put tiny smd lights in houses and other buildings although they are a bit small to work with - just glad I bought the pre-wired versions. I found that 4 in series along with a resistor can be powered from a 12v supply. By varying the resitor I can adjust the brightness a bit.
Nigel. Thanks for the pointer. Had a look at the creeper and it does look very useful - maybe talk to the local fabricator and see what he thinks.
On another subject - just poured the first river yesterday with hot air gun at the ready to assist in getting rid of bubbles. 20 minutes later and what a fantastic surface on the two part Fantasy Resin. Cover it up and leave to dry. Yesterday evening went to see how it was getting on only to find areas of bubbling that had now almost dried. Not sure if I can dig them out and put on a thin top coat or if the board is now scrap. Just glad it wasn't the river that is fixed in place.
Posted
Full Member
Bubbles in resin. You need a deairator. Cheapest simply attach to the cold tap, creates quite a vacuum. Use a largish air brush conical reservoir that has an air-tight seal and gently swirl for 15-30 seconds depending on the set time.
The other thing to watch out for is dust. The surface you are pouring into needs to be dust-free. Otherwise microscopic bubbles will congregate and get bigger.On
Nigel
©Nigel C. Phillips
Posted
Full Member
Posted
Full Member
'Petermac
Posted
Full Member
Blue insulation board as in HD closed cell styrene? I see you use a lot of it. Yes, it will bubble on contact with most solvents. Fastest way to make a ploughed field that I know, Most liquid water resins are epoxy based. Unmarked styrene surfaces are usually resistant, once cut it's a different story. You could try a couple of coats of rattle can urethane or acrylic varnish before adding the resin. Test patch first of course.
Nigel
©Nigel C. Phillips
Posted
Full Member
Anyway lesson learned, I'll prepare the 2nd river with a thin layer of plaster and paint prior to pouring the resin.
Posted
Full Member
The bottom one has had another layer of resin poured since the picture and is ready for ModPodge surface texture. I have also built a quarry building, photos another time, and done more ballasting and painting basic brown on the exposed plaster.
One thing I have been pondering for a while is how to do the row of terraces close to Grantham (in name only) station. I found this on ebay and thought I would buy one to investigate.
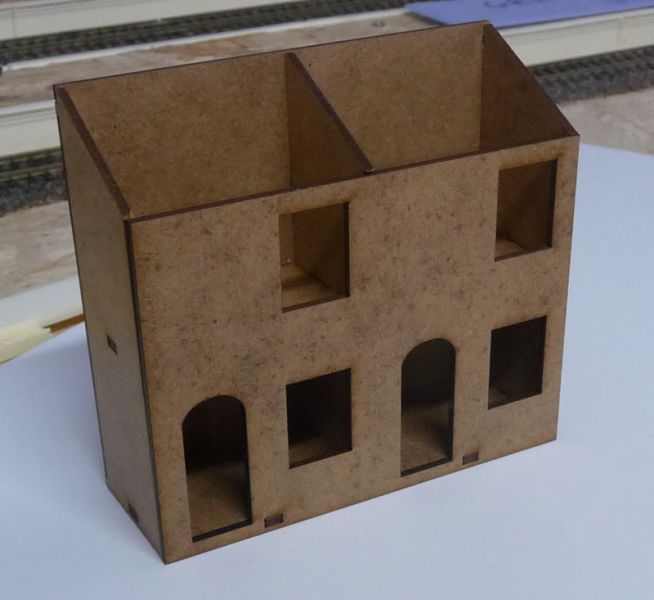
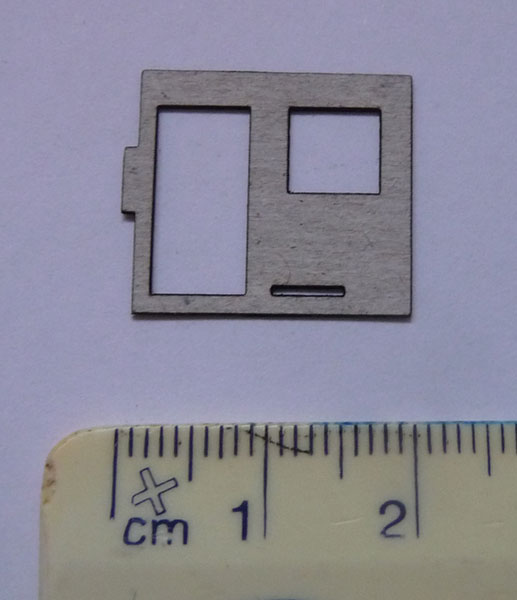
Clicks together quite nicely and covered in brick paper would look the part except for the fact mine need to be on a slope going down a hill. Well I contacted the supplier and Justin at Scale Model Scenery but no joy. So what to do? I bit the bullet and bought a laser cutter to have a play with and this is as far as I have got.
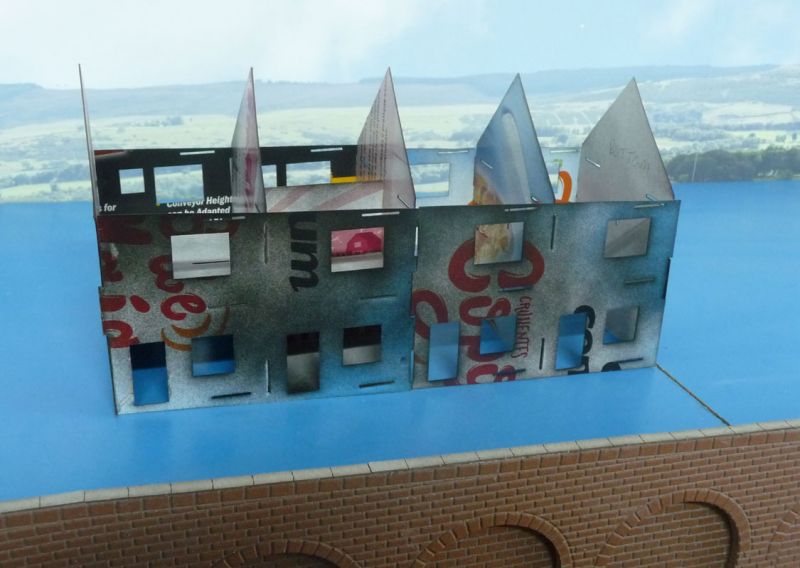
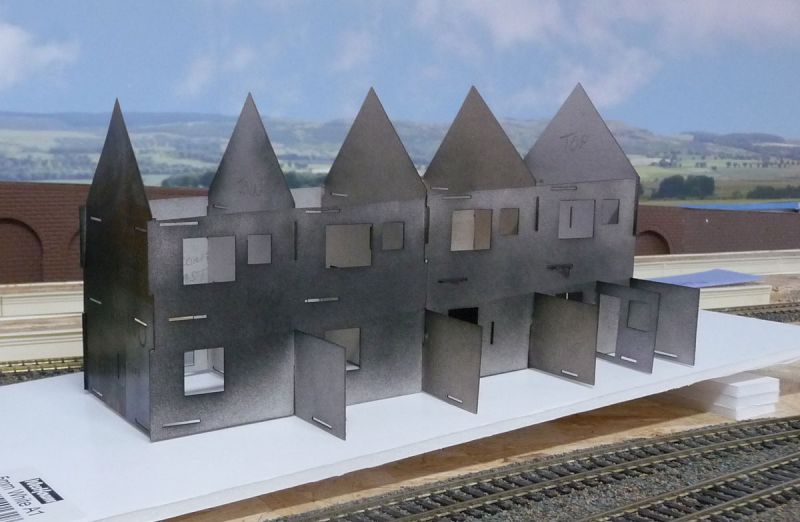
The cut outs are for floors and interior walls of which I have only done a couple to check the design. The main outer shell will be in 2mm MDF or similar whilst internal walls and the kitchen extension (part shown on the last house on the right above) will be in 1mm card. Presently it is all cut from scrap cereal box card to check the design. The design is for a slope of 5mm in 100mm (1 in 20) and if anyone has a laser cutter and can make use of the design files let me know. I am also working on a half relief version. And there was I thinking model railways - a loop of track and a bit of scenery - it's worrying how involved you get with these diversions. Station canopy roof supports may be next although maybe get this finished first. What I need to remember is the cheap laser only has a cut area of 160mm x 160mm and it auto scales to 45% if you go outside this. Here is part of a print that I forgot to check.
Now who do I know who works in n-gauge?
Oh and as a final note I finally managed to clean the track and tidy things up to get a train running again - it's only been 14 months since I could last do that.
Keep safe and enjoy your extra hobby time.
1 guest and 0 members have just viewed this.