Teasel Bay
Posted
Full Member
Early construction of a simple 00 garage layout
Hey Matt, that looks like a really good product. One worth having in my back pocket!
Posted
Full Member

Posted

Full Member
Posted

Full Member
If so, I'll eventually get it via "Readly" where I can read several online magazines.
'Petermac
Posted
Full Member
Not as grand as yet. It was a post on the Hornby Facebook page for their ‘feature Friday’.Was that in Hornby mag. Chris ?
If so, I'll eventually get it via "Readly" where I can read several online magazines.
Posted
Full Member
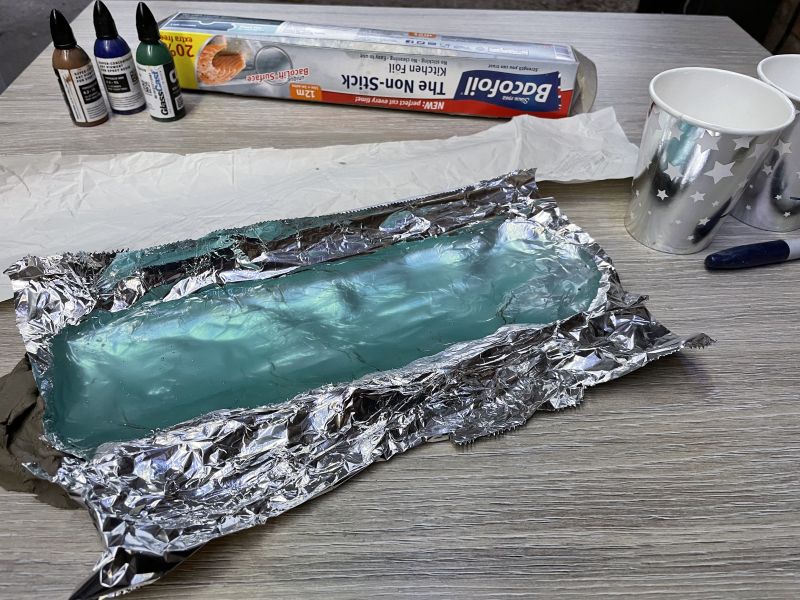
I had to throw my first batch of resin as my neighbour distracted me at as vital moment and I added too much green, so resembled more of a marshy bog. It’s a shame to waste it but I’d rather get it right! Second attempt was better.
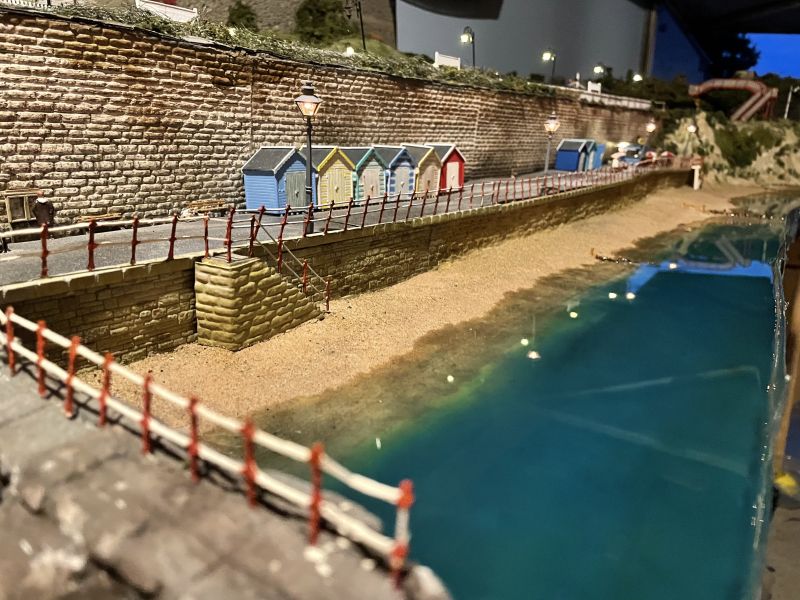

Started to see some nice reflections as the light fades.
I think I’m at the right level now, it ties in the two shores as the beach isn’t perfectly level. I am going to see if I can make a few little waves to add on top. To do this I’m going to made a waved shape template with some more resin. It will only be small but I think it needs a little wave before the ripples and white water are added.
Posted

Full Member
Shed dweller, Softie Southerner and Meglomaniac
Posted
Full Member
Thanks Barry. You can come for a paddle any time!Looks good Chris - time for a paddle!!
Posted
Full Member
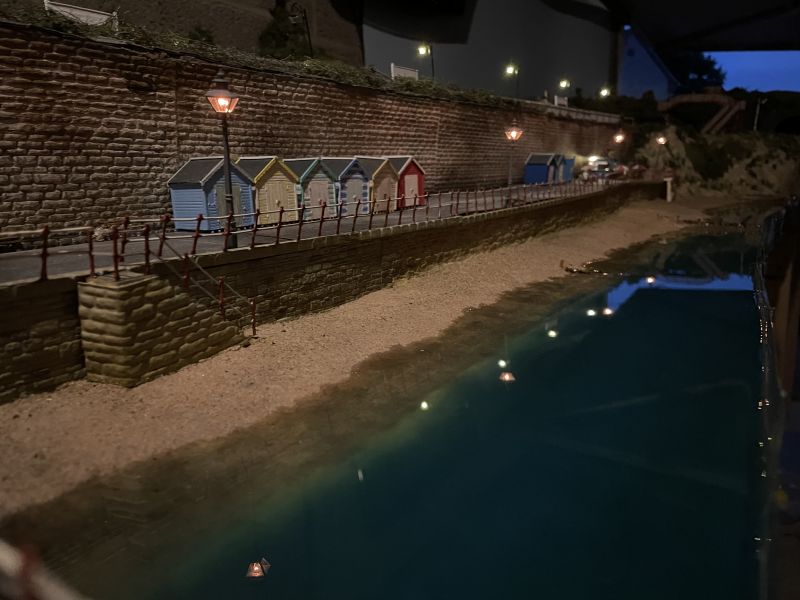
Here is a short video of the bay now the dam has been removed.
[yt]6cMQ5CYGNzg[/yt]
I tried an experiment this evening to make a little wave. I made a mild using clay and foil before pouring some resin to make a small wave. I’m worried the foil won’t release the resin but it’s worth a try!
Posted
Full Member
Also loved the express rushing through. Well done on all counts Sir :thumbs
'Petermac
Posted
Full Member
Completely accidentally and unnoticed until I published the video! It is simply the reflection of the LED strips in the roof and as the camera pans they seem to move across the water!How did you manage the waves ? I'm guessing it was strip lighting but how did you manage to get it to roll in like waves.
Posted
Full Member

Once dry the kind of look like rather large jelly fish sat on top. I needed a few more, so I’ve made a second pour tonight so they can be added tomorrow.
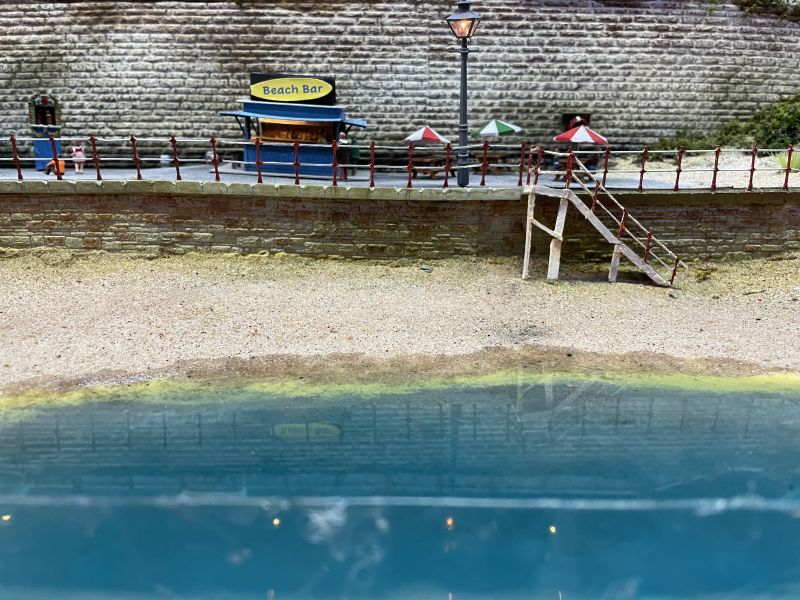
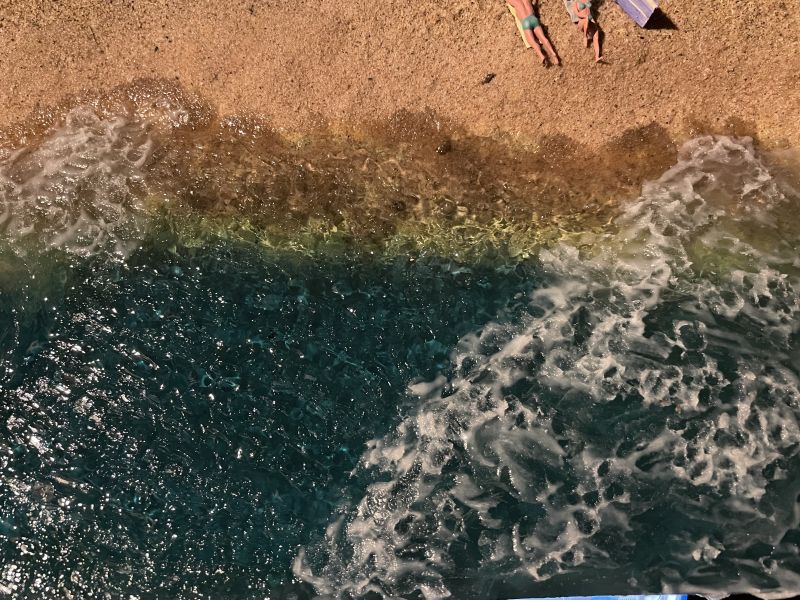
On the areas which I’d added the waves I started on the ripples and white water. Looking at pictures for reference, on the locations of both.
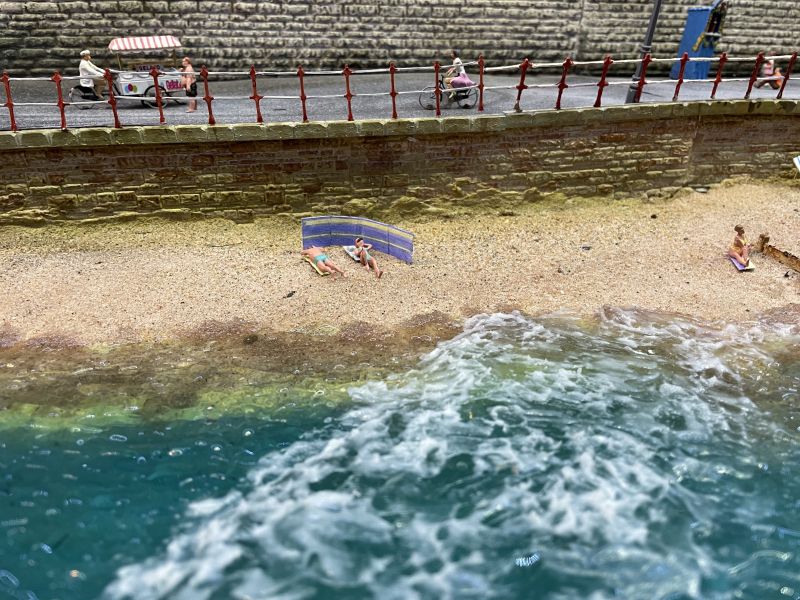
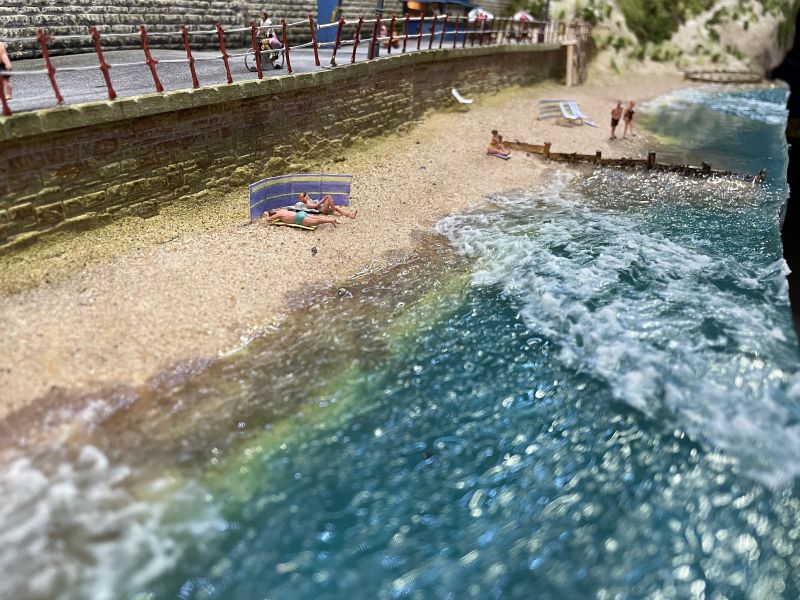
Layering the white water on thinly and in stages so not to over-do it. No longer looks like a sheet of flat ice.
It seems to be popular with the tourists, a new set arrived today!
 Last edit: by TeaselBay
Posted
Full Member
As you say, get a couple more well placed "jelly fish" and it will look the bees knees. :pathead
'Petermac
Posted
Full Member
Posted
Full Member
It’s a fine example on how you can copy other people’s techniques and ideas! Haha. A lot from this forum! But thank you.Teasel Bay is rapidly becoming a fine example of modelling Chris. Following the incoming waves with interest.
Last edit: by TeaselBay
Posted

Full Member
Michael
Posted
Full Member
The second view shows the ‘jellyfish waves’ which are not yet complete.

The ripples are using the Woodland Scenics water ripples product. Coating it on top of the resin and then gently playing with it as it dries to form ripples in the direction of the tide. You can still see through the layers as before but it now no longer looks like a frozen pond.
Posted
Full Member
Posted

Full Member
The video was pure magic…I spent forever trying to work out how you did it……I almost wish you hadnt spoiled the illusion with your explanatory post:lol:
Best wishes
Posted
Full Member
1 guest and 0 members have just viewed this.