Teasel Bay
Posted

Site staff
Early construction of a simple 00 garage layout
[user=1512]Headmaster[/user] wrote:That is superb, Chris - and all in a boxfile. I think you have proven that everyone has room for something model railway related. I might be tempted to have a go myself, if I can find a suitable scene. I think it was a stroke of genius, the topic you chose and the water looks outstanding,not only realistic but it has also captured everything about the original photograph. You have just the right amount of dirty water, and the colour is spot on. The road and worn road markings are excellent too. Good luck with the competition - it would definitely get my vote.
Michael
and I agree with Michael. :doublethumb
Ron
NCE DCC ; 00 scale UK outline.
NCE DCC ; 00 scale UK outline.

Posted
Full Member
It has allowed me to prefect techniques which I’ll be able to apply on the larger layout. Not sure I’ll have some broken waving track though, might not prove effective running conditions!
Posted
Full Member
[yt]M5wUhkxg-3U[/yt]
Back to the real layout from now on, I promise…. :lol:
 Last edit: by TeaselBay
Posted

Full Member
When do they present you with the cup ? :lol: :lol:
'Petermac
Posted
Full Member
I don't know about that, there are some brilliant entries on there. One of them is a working cabin lift, its pretty neat!When do they present you with the cup ? :lol: :lol:
Posted
Full Member
Posted

Full Member
Michael
Posted
Full Member
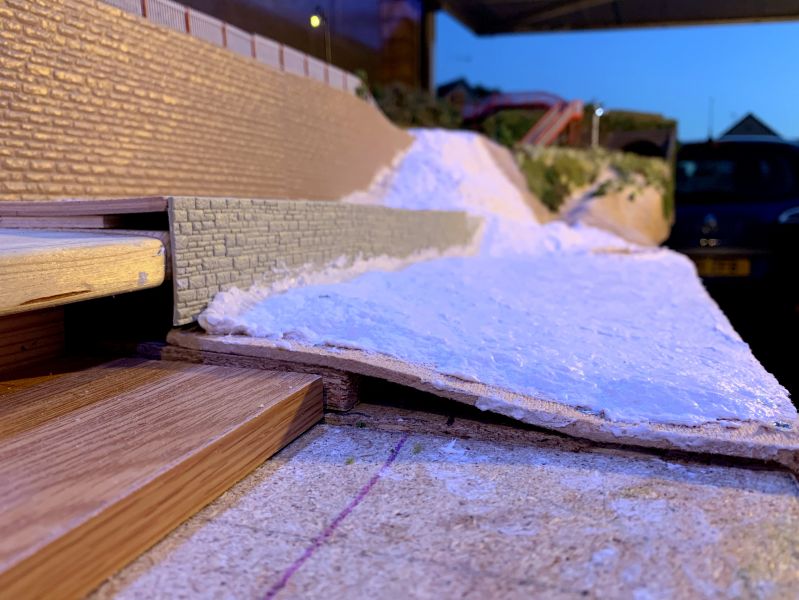
Had quite a few iterations over the last few weeks of planning how it fits together. I think I’ve finally got it together in my head. I’ve built up what will be the sea wall, adorned with beach huts etc. There will be steps form to the beach which is part of the laser kits above. The wall to the beach is a Wills Kit corse stone, cut to size.

The sea wall is Slater’s Plastikard over scaled to 0 gauge. I wanted the sea wall to have a large stone look. It has taken me since Christmas to find something that matched my plan!

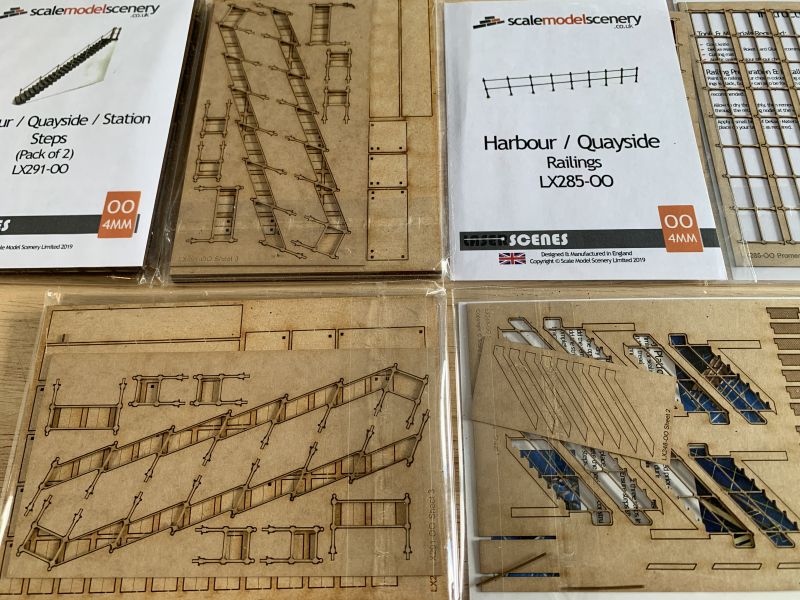
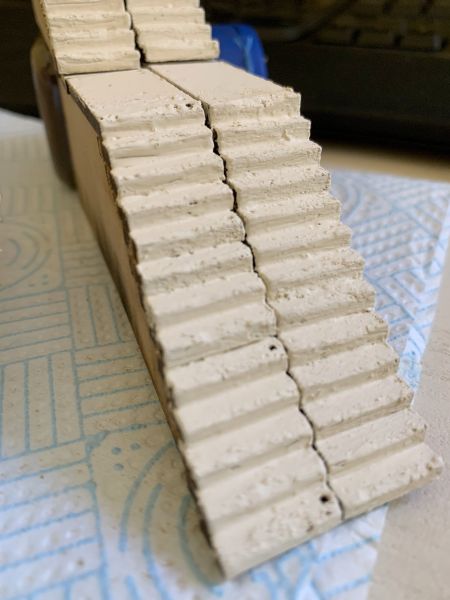
I’ve started to build the main staircase down to the bay. This will be a modified Scale Model Scenery Harbour steps kit. I am going to double the staircase width with the railings in the centre. I’ve also split the staircase as I think there were too many steps without a break. I halved the guide wall and cut the railings. You can see the two sections below.
The railings are just resting on top for now, need painting first. Just need to decide on the colour scheme! Any ideas?
Last edit: by TeaselBay
Posted
Full Member
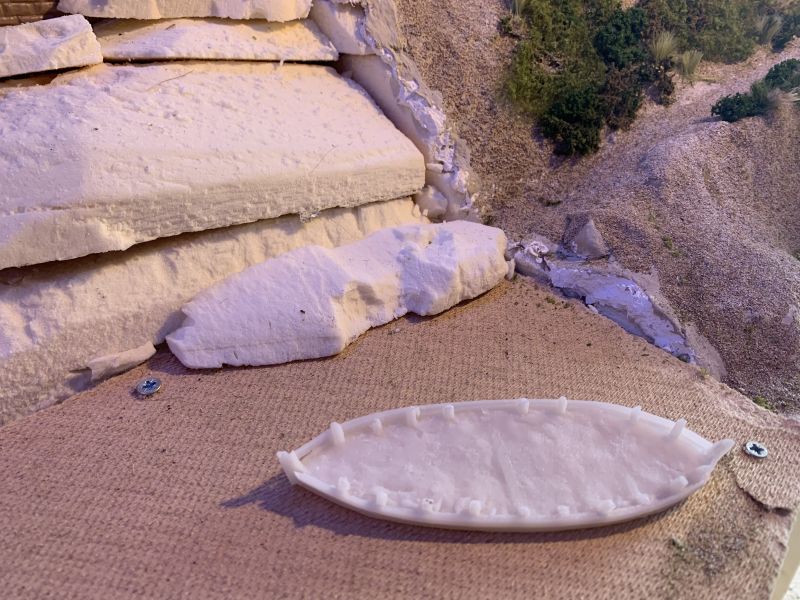
It is a resin from Any Scale Models. Once it is painted and just visible in the sand I hope it will look pretty good. At the moment it feels and looks a little like a dog toy! Haha
Last edit: by TeaselBay
Posted
Full Member
The boat skeleton is another great idea, I can just imagine it poking out of the sand with children digging for its lost treasure.You have to make a sandcastle too - what beach doesn't have a sandcastle?
Really looking forward to seeing it develop, I'm sure you will make it look great.
Regards
Michael
Last edit: by Headmaster
Posted
Full Member
Those steps look very impressive - were they fairly easy to make ? Mixing the scales of embossed sheeting is a clever move - it works well.
Regarding the colour, I think I remember white railings along the promenades - heavily rust stained !! I'll have a "Google" and see if I'm right ………………..
The sunken boat is a masterpiece - who'd have thought of incorporating one of those !!?
'Petermac
Posted
Full Member
I've seen sandcastles as part of beach figures, but they are very plastic looking. I'll have to do some experiments on how to create one of them. I am constantly holding on to photos of other people's ideas, I found a great scene with windbreaks etc. As with all of Teasel, the beach scene won't have a permanent population and will change with the season. I don't want sunbathers in the dead of winter! haha!You have to make a sandcastle too - what beach doesn't have a sandcastle?
Posted
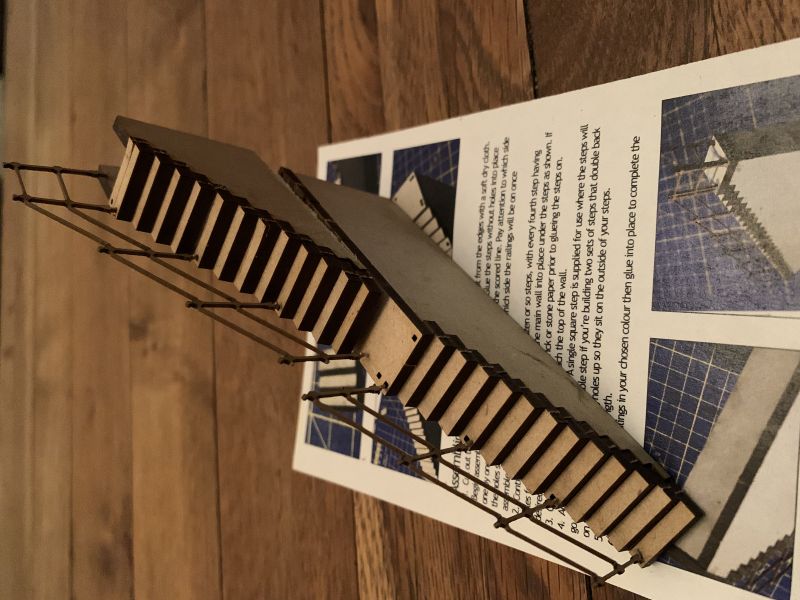
Full Member
They are a little fiddly for the first few steps, but once you've added about 4 it becomes pretty stable for the rest. As I'm using my trusted PVA, I was then able to reposition and align the bottom steps once stability was achieved. Going to cut some card for the walls and add the Plastikard to cover. I might even try and be smart to add the spare railings to the walls…!Those steps look very impressive - were they fairly easy to make ?
Posted
Full Member
'Petermac
Posted
Full Member
I use a really advanced method…. of an old paintbrush which has been used for every gluing project since day 1 :oops:Do you use one of those "fine tip" glue applicators Chris ? They're absolutely brilliant for PVA.
I simply tip some PVA onto the plastic wrapping and the spread using the now very glued together paint brush! Sometimes the simplest thing works best! haha
Posted
Full Member
Your paintbrush technique is worthy of the very best thrifty Yorkshire/Scot ……………… I'll bet your brush was priced in £.s.d. when new …………. :thumbs :thumbs
'Petermac
Posted
Full Member
A close up of the beach's gentle slope. I have made the section so in an emergency either side could be lifted off. I plan to hide this with a wooden groyne.
This section might stall a little as I don't think I've got any paints. Plenty of other things to do while I source some though :)
Last edit: by TeaselBay
Posted
Full Member
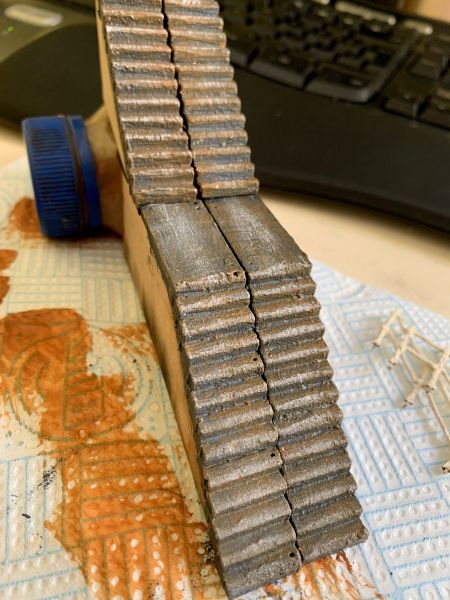
If you look a few posts above you can see the sharp shapes in the steps. So I have filled down the steps a little, concentrating in the middle of each step where footfall would be higher. (No one will notice, but its one of those nice to know things!) I've then given them a once over with my favourite chalk paint. I like the bulk it adds, espectally to the railings which looked a little square.
Once dry.. (it was a long meeting!) I roughly mixed some grey/black and painted into the steps, this with the chalk paint starts to give them a stone like feel. Here you can see them with the railings temporary placed.
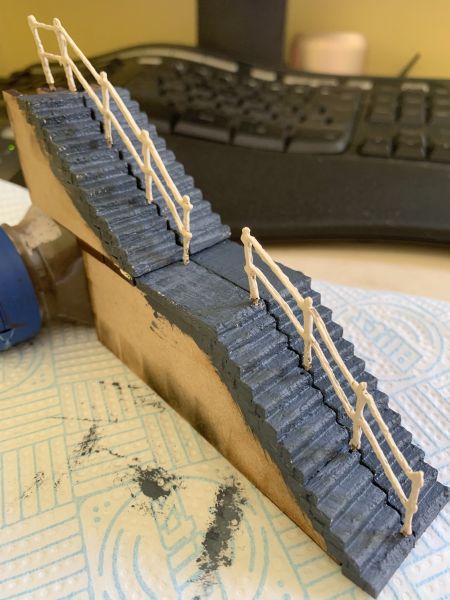
There will be a wall on the near side, which I've started crafting out of the box they arrived in.. recycling and all that!
Posted
Full Member
Posted
Full Member
Can I come to your beach when the lock-down is over please ……………. :cheers
'Petermac
1 guest and 0 members have just viewed this.