OO Gauge - Latton Fields
Posted

Inactive Member
Branch Line - Roundy, roundy with some shunting
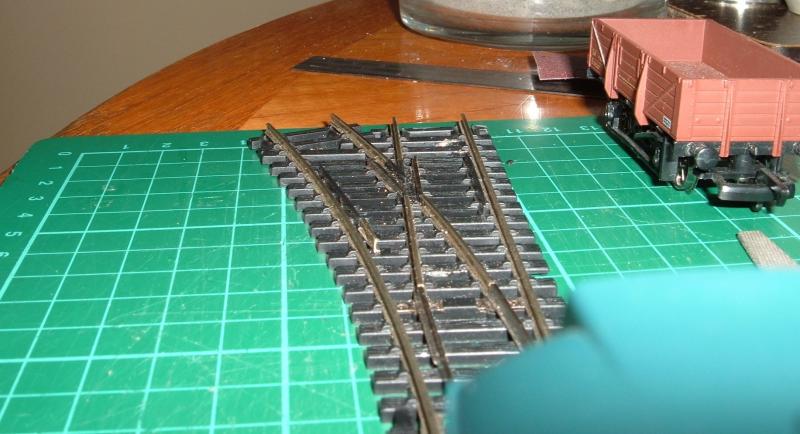
G`day Ed,In some cases, I`ve found that the check rail is not actually long enough as standard. In the past I have removed check rails on tight radius points and replaced them with longer rail ,with good results. I think the trailing wheels on the bogies were not quite following the same path as the leading wheels thus causing the leading wheels to catch on the frog and derail. The same has applied to a couple of my 0-6-0 locos as well.
The new check rails were at least twice, sometimes three times as long and Super glued in place. Of course when fitting them you need to place them carefully to avoid wheel binding.
If you want more info……just let me know….happy to help.
:cheers Gormo
 Last edit: by spurno
"Anyone who claims to have never made a mistake, never made anything!!"
https://sites.google.com/site/greatchesterfordmodelrailway/home
https://sites.google.com/site/greatchesterfordmodelrailway/home

Posted

Site staff
I am thinking the class 31 being a Co-Co, not all six flanged wheels quite go around the curve when going down the diverging route, hence the derailing.
More investigation required, before ripping up two possibly perfectible usable points.
Ed
Posted
Inactive Member
I first tried this idea on a Tyco point….18" radius….pretty tight!!….when my Co Co was derailing most of the time. This was a test track so modification didn`t matter. Well in a nutshell….it worked!!!
If you have some small radius throw away / damaged points, you could experiment with one of those to get the feel for it. Basically, you have to remove the plastic check rail down to and flush with the top of the sleeper and I also remove the chairs on the inner main rail behind the check rail as well. That allows the new check rail to be placed closer to the main rail. I then put a drop of Super glue on top of each sleeper that will sit under the new check rail. The glue usually spreads across the sleeper to the main rail as well and compensates for the loss of chairs.
:cheers Gormo
Last edit: by spurno
"Anyone who claims to have never made a mistake, never made anything!!"
https://sites.google.com/site/greatchesterfordmodelrailway/home
https://sites.google.com/site/greatchesterfordmodelrailway/home
Posted
Site staff
Sounds like a good solution, but I don't know how easy it might be with the points in situ.
It may be a bit easier to add an extra small piece of rail to each end of the existing check rail, and then put a shim across the inside of all of it.
I've got a spare Bachmann point, so I'll doing some experimenting.
Ed
Posted
Inactive Member
Testing is the way to go…..I mean….once you remove a check rail, you`re swimming in the deep end, so it`s better to practice and test on something first to gain confidence.
I have done a couple in situ and it can be difficult, depending on the location, however not impossible.
:cheers Gormo
Last edit: by spurno
"Anyone who claims to have never made a mistake, never made anything!!"
https://sites.google.com/site/greatchesterfordmodelrailway/home
https://sites.google.com/site/greatchesterfordmodelrailway/home
Posted
Site staff
I realised I only needed an extension at one end, as the Class 31 would run quite happily through the point in the opposite direction.
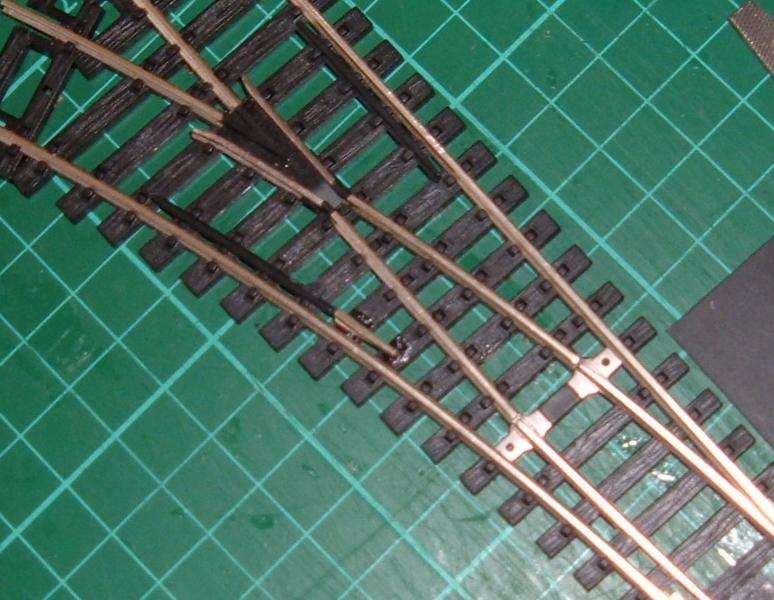
I could run a wagon through no problems, but the Class 31 still derailed.
I think the back wheel of the bogie was running through the new check rail ok, but it made the diagonally opposite front wheel ride up over the toe of the frog.
Gave up after that.
I found an old Peco setrack point in my spares box which I think I discarded because I had derailing probelms wich a couple of coaches, but the class 31 seems to like it, so it's now installed.
If I do get any more derailing problems I'll have to buy a new point, but it won't be Bachmann.
Ed
Posted
Inactive Member
You can`t win `em all……..unlucky……oh well…..back to the drawing board????:pathead
:cheers Gormo
Last edit: by spurno
"Anyone who claims to have never made a mistake, never made anything!!"
https://sites.google.com/site/greatchesterfordmodelrailway/home
https://sites.google.com/site/greatchesterfordmodelrailway/home
Posted
Site staff
Was reading something interesting on that other forum yesterday which said that, Roco make points for Bachmann UK using ex Hornby tooling, that was used by Hornby before they moved their manufacturing to China.
So Bachmann points are probably an older version of current Hornby points, even more suited to pizza cutter wheels.
Never mind, back to sanding the saddle tank on the pug today.
Ed
Last edit: by Ed
Posted
Inactive Member
That`s an interesting trail of manufacturing…….basically, old is new again but not necessarily compatible.
I think there is still a long way to go with model wheels and points. I think the current designs allow plenty of tolerance to suit a wide range of old and new rolling stock, especially in the frog and check rail area. The tolerance also allows less critical back to back measurements.
I can`t think of any point that is even remotely close to the real thing when looking at the frog area spacings, unless you build your own…….easier said than done.!!!!
In the meantime we do our best, with what we have.
:cheers Gormo
Last edit: by spurno
"Anyone who claims to have never made a mistake, never made anything!!"
https://sites.google.com/site/greatchesterfordmodelrailway/home
https://sites.google.com/site/greatchesterfordmodelrailway/home
Posted
Site staff
Bit odd though, that a Bachmann DMU had trouble with a Hornby point and I had to put a shim in and a Hornby Diesel just wouldn't go through a Bachmann point without derailing, yet they're both fine through their own brands of points.
Makes you think :hmm
Anyway going off at a slight tangent. Yesterday while waiting for glue to dry on the pug cab roof, I sat at the layout and thought I'd run the J11 from the embankment where I'd left it, round to Latton Fields.
I could have run it straight through but thought no, I'll do the proper route and run it round the loop through Potters Yard and then in to Latton Fields.
Set the points and sat down with my back to the storage area and as the J11 appeared over my left shoulder as it entered Potters Yard, I reached round behind me and switched the two points to change the route.
Sitting there all smug waiting for it to appear again over my left shoulder again as it entered Latton Fields, I was surprised when the Zephyr shorted out.
Realised I hadn't flicked the switch which swaps the frog polarity on the diamond crossing but instead of flicking the switch first, I pushed the track power button on the Zephyr and then flicked the switch.
System briefly shorted again, but the the J11 continued on it's journey.
However when the second short occurred, the Class 105 DMU sitting in a storage siding jerked forward and derailed, causing another short.
Once everything was back to normal, I found the DMU was dead and thought I'd blown the decoders.
It was only a while later after thinking that's going to cost me a few quid as there's two Bachmann decoders in that DMU, that I remembered reading that Bachmann decoders are notorious for resetting themselves when a short occurs.
Sure enough I could read the decoders in the DMU now reset to loco address 3 :thud
And the moral of this long winded post is either concentrate on what your doing when running the layout or…………..
buy a bl@@dy Frog Juicer :oops::oops::oops:
Ed
Last edit: by Ed
Posted
Inactive Member
Yes it does make you wonder???…..I think it`s a quality control issue or some sort of flexibility in the manufacturers standards……don`t know???? The quality of the rolling stock is ever improving but the track seems to be an after thought……Oh well….it`s up to the modeller to sort it out.!!!
Now your little adventure with short circuits has created some interesting images in my minds eye. As you know, I am a DCC illiterate.!! So when you started talking about Frog Juicers I imagined, Ed must be practicing some pagan rite with the local frogs and the kitchen blender…..Black Magic possibly.???
It wasn`t until I Googled " Frog juicers", that my fears were allayed, and I was informed that Frog Juicers protect crossings and points on DCC railways, from short circuits, by switching to the correct polarity…….or some such stuff??????
So based on what has happened and now what I know about Frog Juicers, I would suggest to you Ed old mate!!!!……that they would be a good investment and could save you some grief.
:cheers Gormo
Last edit: by spurno
"Anyone who claims to have never made a mistake, never made anything!!"
https://sites.google.com/site/greatchesterfordmodelrailway/home
https://sites.google.com/site/greatchesterfordmodelrailway/home
Posted
Site staff
True Gormo, but I should really be watching what I'm doing.So based on what has happened and now what I know about Frog Juicers, I would suggest to you Ed old mate!!!!……that they would be a good investment and could save you some grief.
:cheers Gormo
However one is on the low priority shopping list for the layout, too many high priority things needed at present, like a turntable.
Ed
Last edit: by spurno
Posted
Site staff
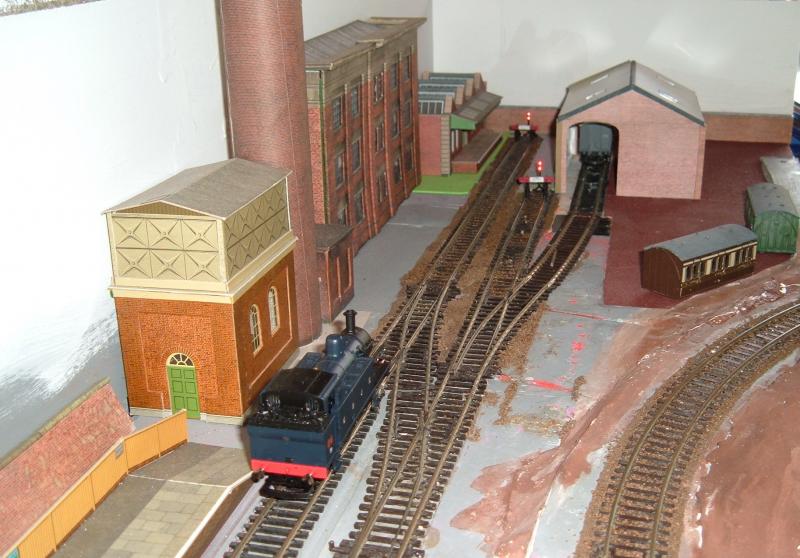
A small change in the track layout and a new goods shed.
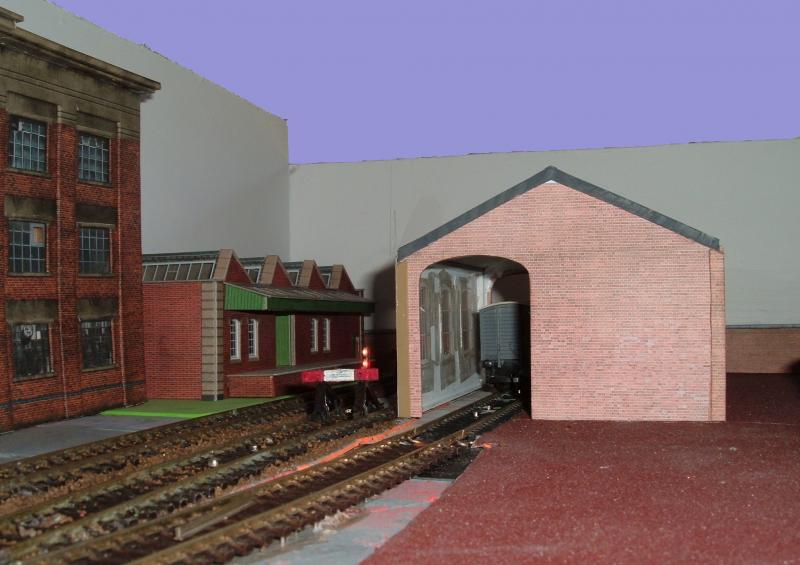

More work to do, such as some doors, guttering etc. but it's bigger than the Superquick version I had there at one point and I think it will fit better.
Also been playing with this.
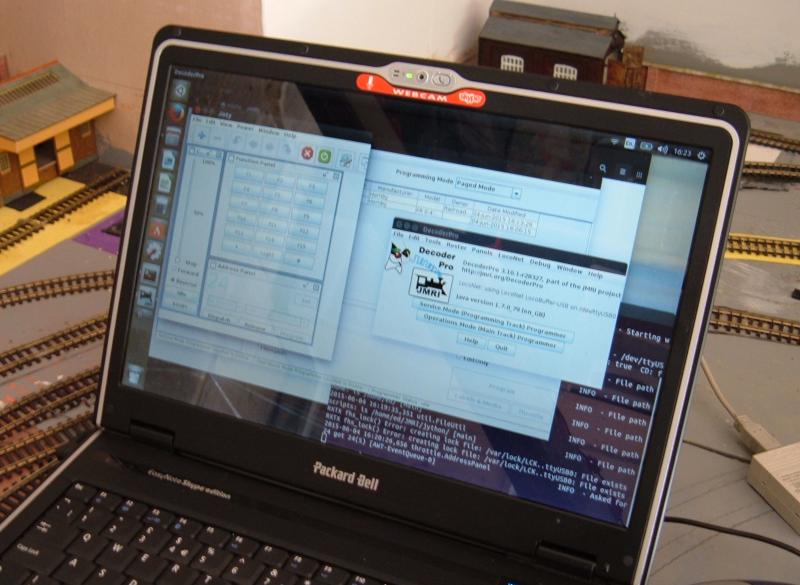
Not a very good picture, but a new use for an old XP laptop that's been stuck in a cupboard for about four years.
Ed
Posted

Full Member
My apologies if this has been asked before ……..but is there some reason the centre siding can't be extended to the wall like the others? It would give you a lot more shunting/storage space
Cheers
Posted
Site staff
The goods shed is a just a Hornby version covered with Scalscenes brick paper. I wanted something larger than the Superquick kit as the sheds often dwarfed the station building and it seemed to 'fit the bill'. (Not that I've built the Station buildings yet).
The centre line used to continue to the wall but it's not really a siding, it's more the end of the line from platform two. It's mainly there so that anything not stopping at the platform doesn't run into the goods shed.
In the same way there is a piece of rail sitting on the sleepers on the goods shed siding, which is where I hope to make a representation of a catch point to stop any runaways from encroaching on the main line.
Ed
Posted
Inactive Member
I like the goods shed. That`s a neat makeover / modification. I am assuming the software on your laptop is for programming decoders????. There are many uses for the older systems computers, especially when you strip Windows down to the bare bones, they run a lot faster too.
:cheers Gormo
Last edit: by spurno
"Anyone who claims to have never made a mistake, never made anything!!"
https://sites.google.com/site/greatchesterfordmodelrailway/home
https://sites.google.com/site/greatchesterfordmodelrailway/home
Posted
Site staff

As much as I like the Superquick and Matcalf kits unless you 'doctor' them a bit, you'll see the same building on lots of layouts.
The computer software is to programme decoders more easily than through the command station. It will also create a roster of all the locos and their settings which is a bit like having a database.
I can also use the PC to run multiple throttles to control trains, instead of changing the loco number on the command station to use it's own throttle.
If I ever decided to have more computer control, it could throw points and run trains much like RR&Co.
Difference is, it's free as you only have to buy an interface between whatever command station your using and the PC and it runs on Linux as well as Windows.
In my case Ubuntu 14.04
Ed
Posted
Guest user
It must be catching. A little at a time maybe ….. But catching none the less. I think it's a case of pick the bits you want. Good luck with it.
Cheers
Toto
Posted
Guest user
Well done on picture of the week.
Cheers
Toto
Posted
Site staff
1 guest and 0 members have just viewed this.