O scale 2 rail exhibition layout
Posted

Inactive Member
Max
Port Elderley
Port Elderley

Posted
Inactive Member
For now I'm focusing on a few weathering and detailing projects, I think. Though I did get some parts to get a couple of cabooses built up for the layout, so I'm hoping to have those done by the next show we are attending - the Winchester O scale meet on October 20th. :)
Posted
Inactive Member
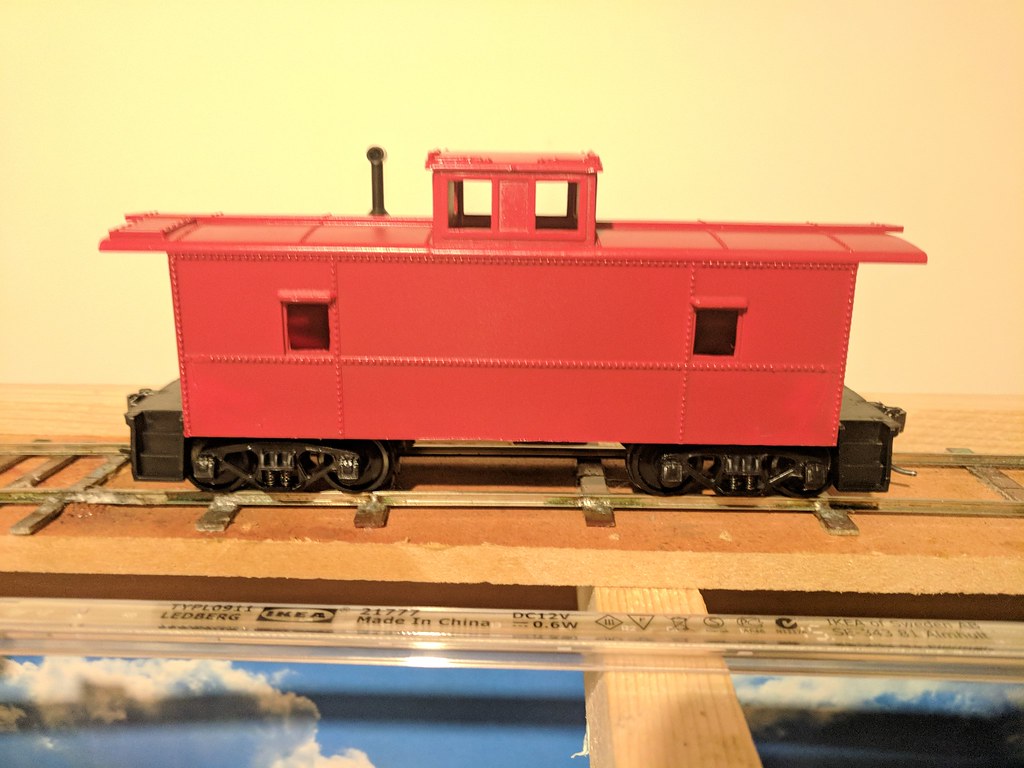
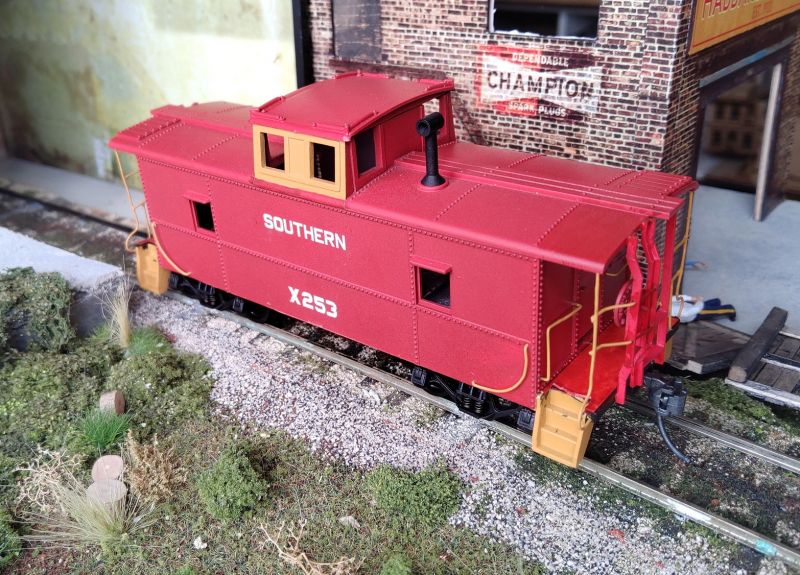
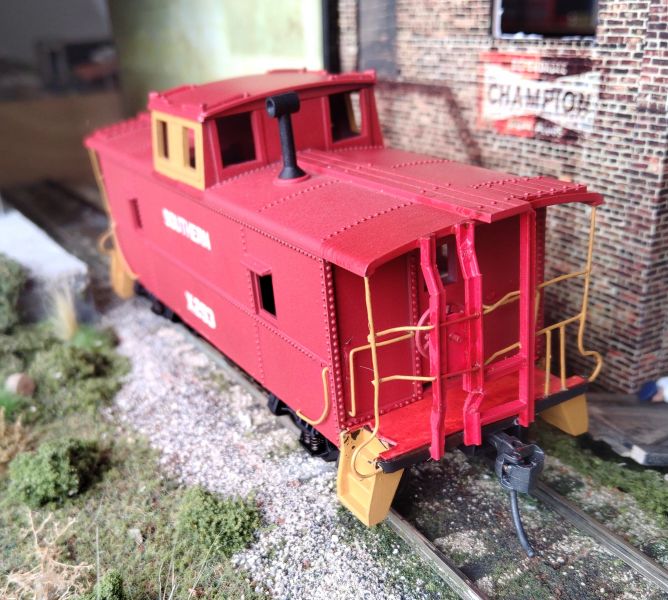
I also removed the cast on handrails and grab irons from a Williams centre cupola caboose kit and base painted it red. I also fitted some Intermountain (?) trucks. This will be getting some SOUTHERN decals to represent an ex-Savannah & Atlanta cab.
Posted

Full Member
Just caught up with this thread - your weathering work is superb!
Posted
Inactive Member
Posted
Inactive Member
I do have some photographs of some of my purchases from Seaboard Southern though. First, three TTX 86' flat cars from Jason Dickie:
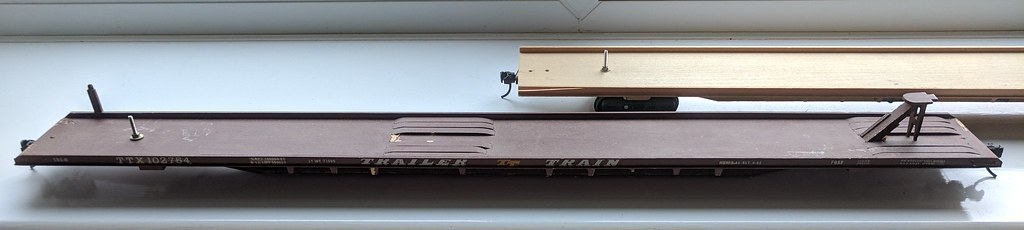


These will eventually become tri-deck open sided autoracks. Nothing like making life easy, eh? :D
Finally, a Lionel(?) truss bridge I got for £10 from one of the other traders at the show:
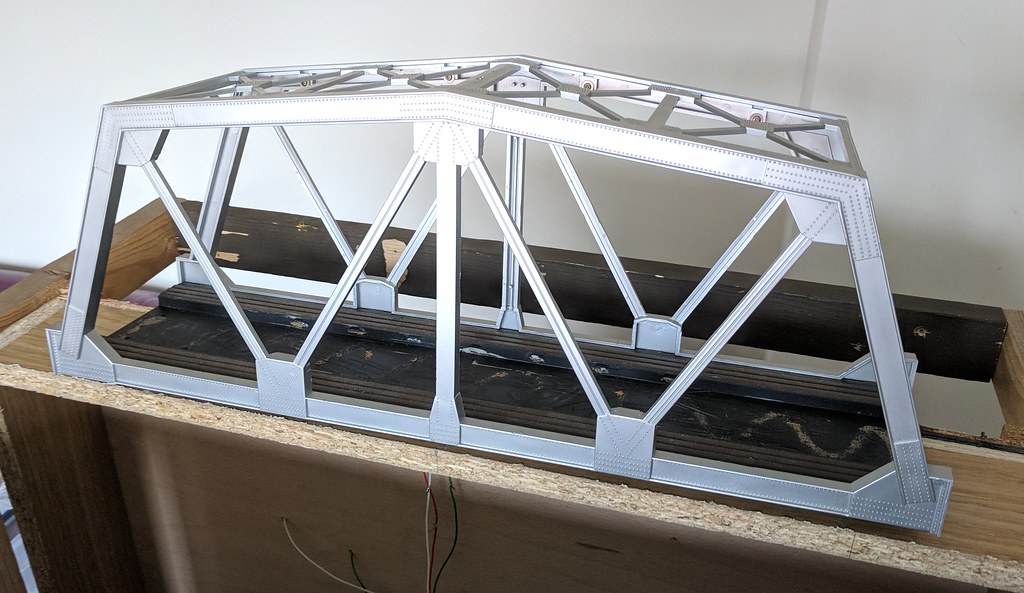
I'm going to have some fun with this one when the next stage of the layout comes along. :)
More updates when I'm able.
Posted
Inactive Member
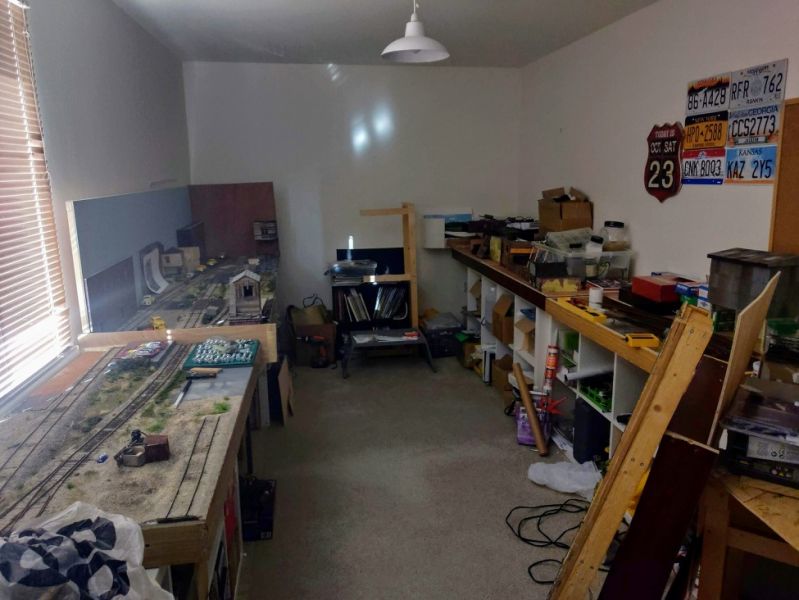
I've been working on the layout again, doing dozens of small, odd jobs as well as a few big ones.
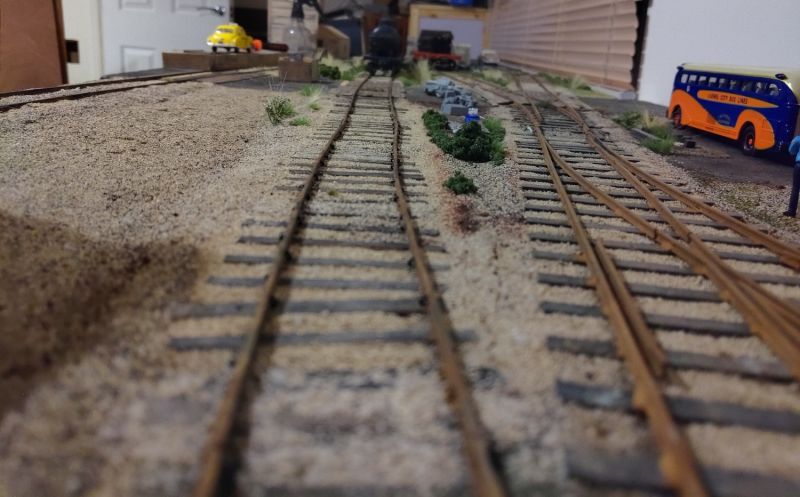
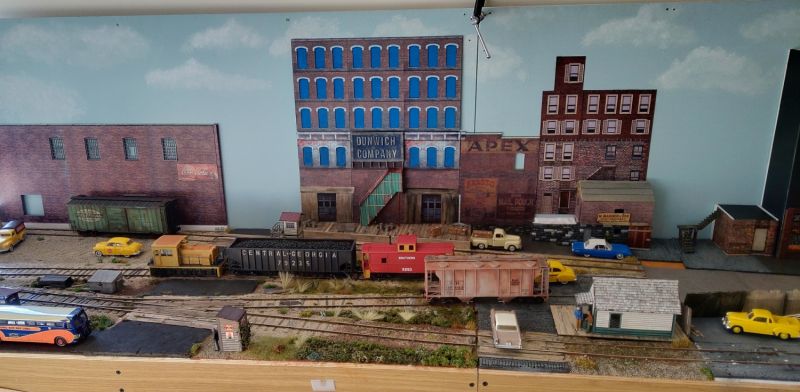
Biggest job so far has been starting to add a backscene to the layout. 2 boards have been added to the long edges of two of the layout boards, giving - so far - 8ft of backdrop, which has been painted sky blue and clouds have been added, though they don't show up too well in the photos.
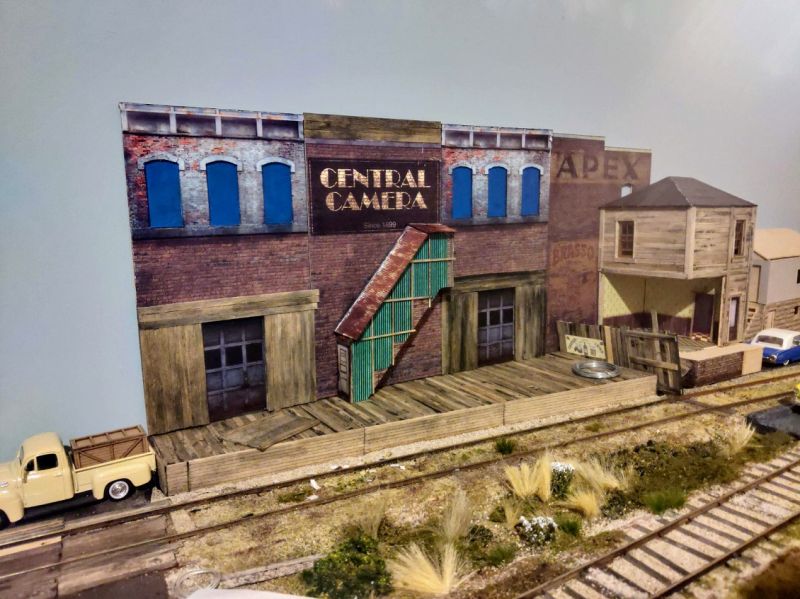
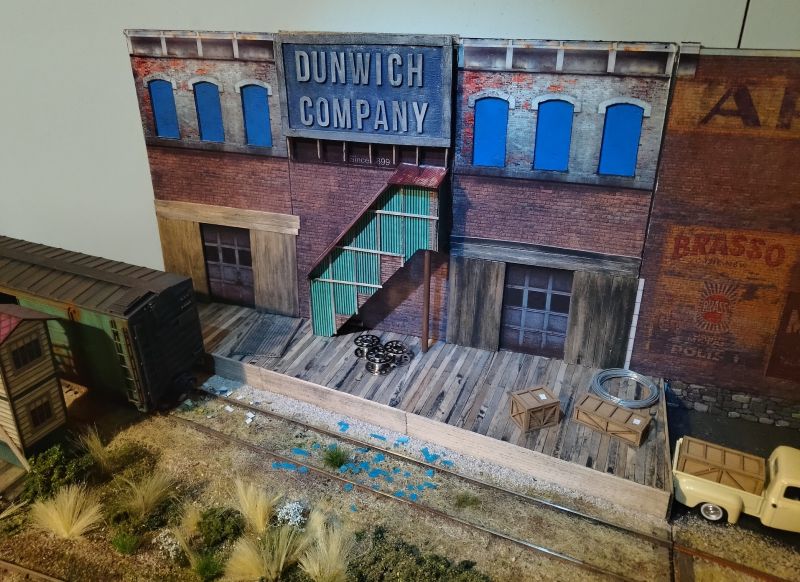
With those added, it's given me the space to start adding backdrop flats to the layout, starting with the temporarily named Central Camera building. I need to build a large sign for the front of the building so it can be named for a different business.
I've also been working on some smaller structures (including a bus shelter), adding detail, carved more cobblestones for the street running section around the sector plate, added a few new figures as well as a few more road vehicles.
There's a load of new structures I need to build, I've got to paint the concrete on a few sections, paint the asphault on the roads (for both of these tasks I have picked up some appropriately named AK Terrain texture paints which I am looking forward to experimenting with.
I've also painted the rail sides for the entire layout, and managed to get my GP35 running on DCC sound. I've still got dozens and dozens of jobs to do, but I've also made massive strides forward.
Anyways, enough waffle, here's some photos, including a couple of L&N #100 posing with some freight cars.
You can see the newly fitted backscenes showing on the left of the first photo:


 Last edit: by Danielb
Posted
Inactive Member
With the current state of the world, my wife and I are isolating at home with our dogs. Thankfully we can work from home, so the disruption is blessedly minimal for us.
As we can't go anywhere, I've been working on loads of smaller jobs for the layout. Visibly, it doesn't seem like much is happening, but the list of jobs is slowly turning from a mass of red to slivers of green on my task list in Excel.
So, enough rabbiting from me, here's some photos of what I'd been working on.
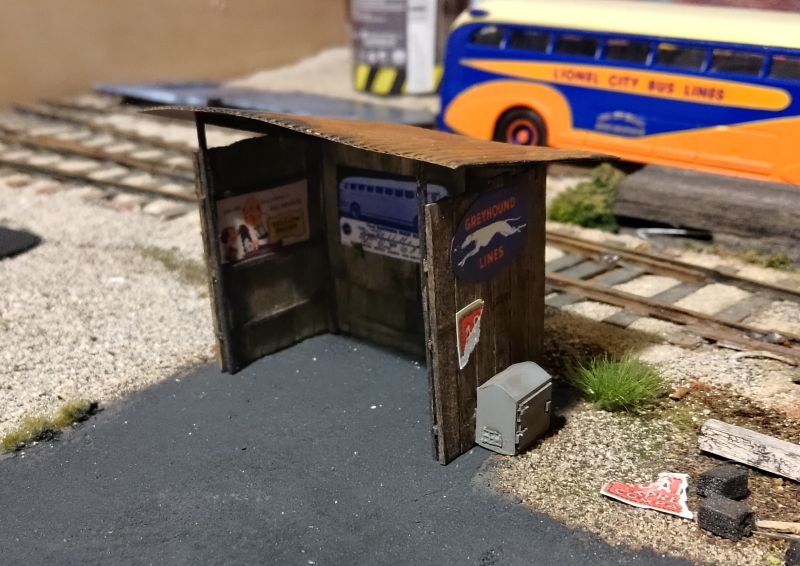
Bus stop and telephone booth:

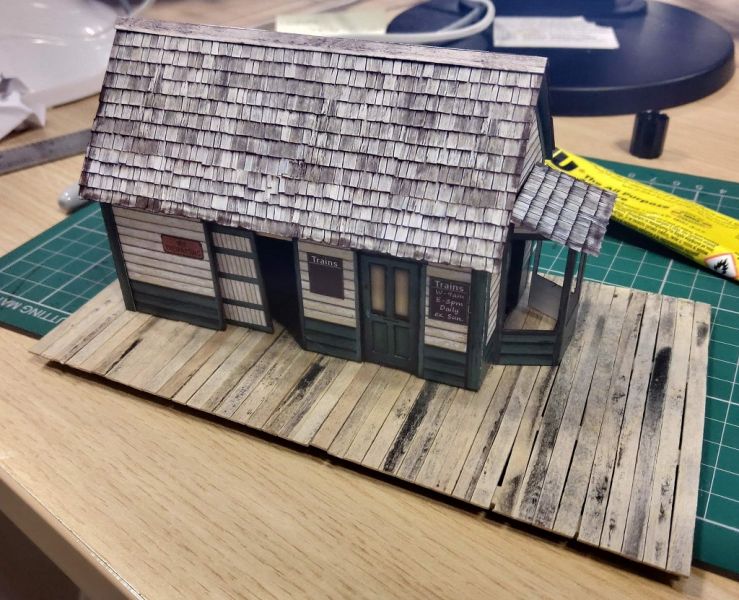
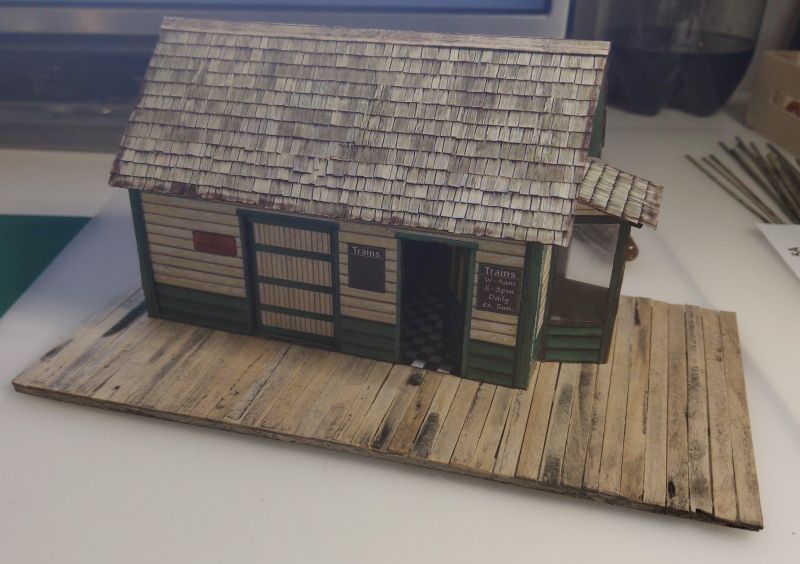
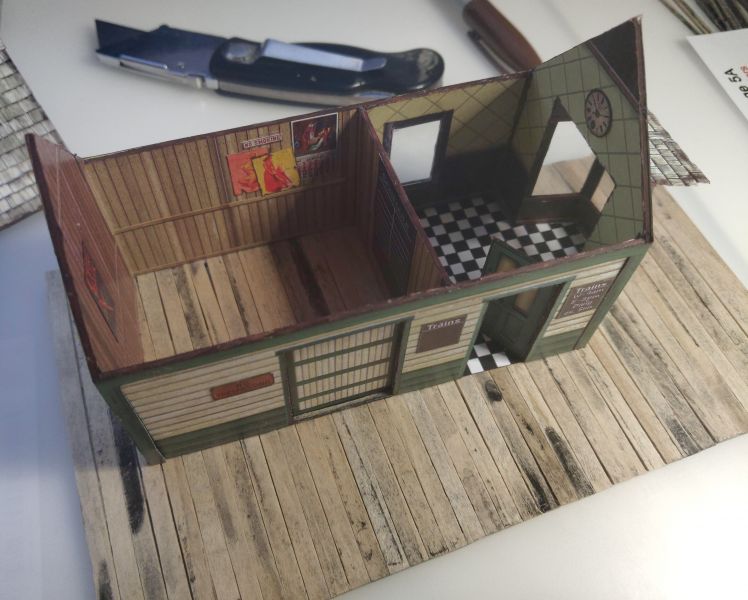
EL Moore Depot:

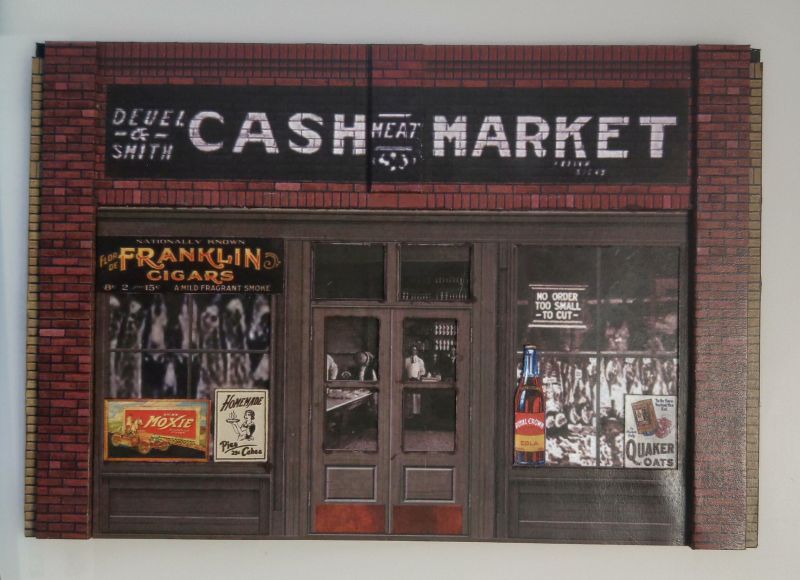
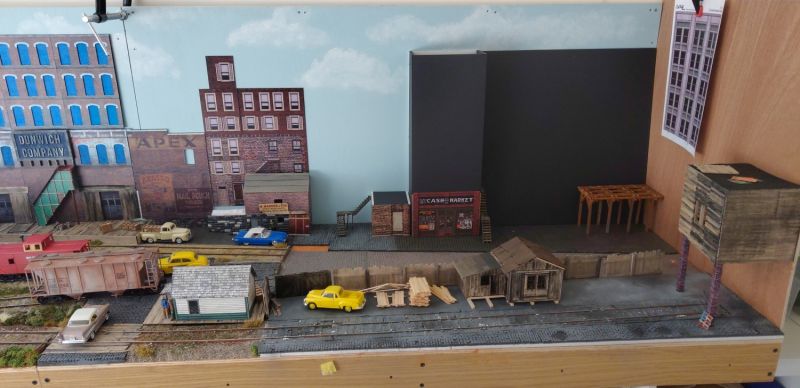
General store style shop front:
The Central Camera building kitbash, now known as the Dunwich Company:

Posted
Inactive Member
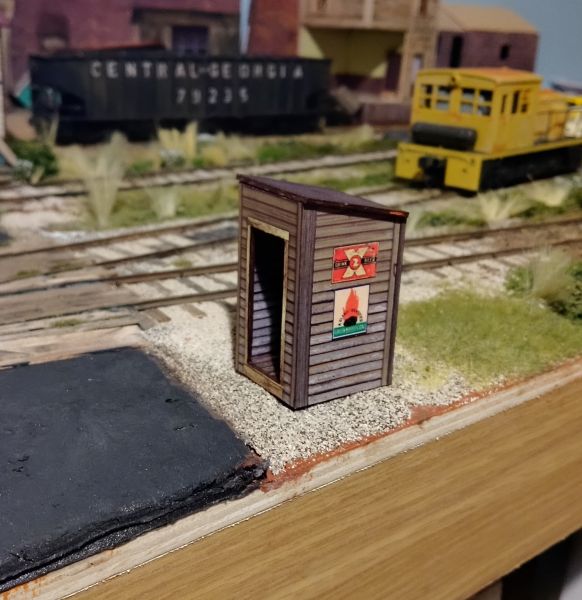
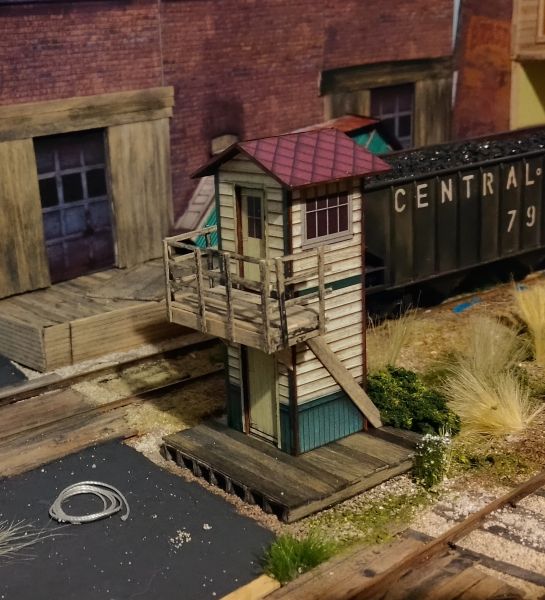
Crossing guard tower - almost complete now:
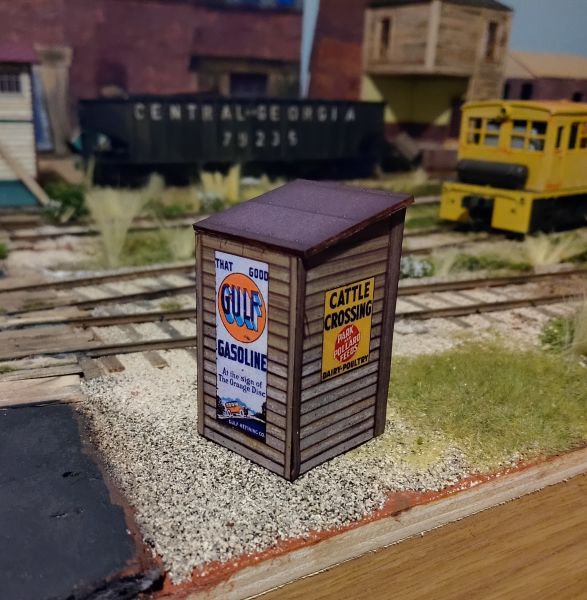
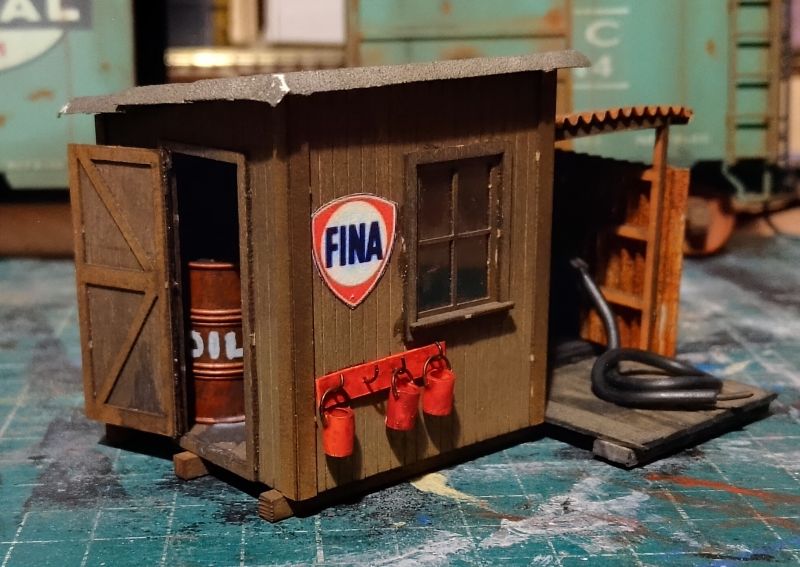
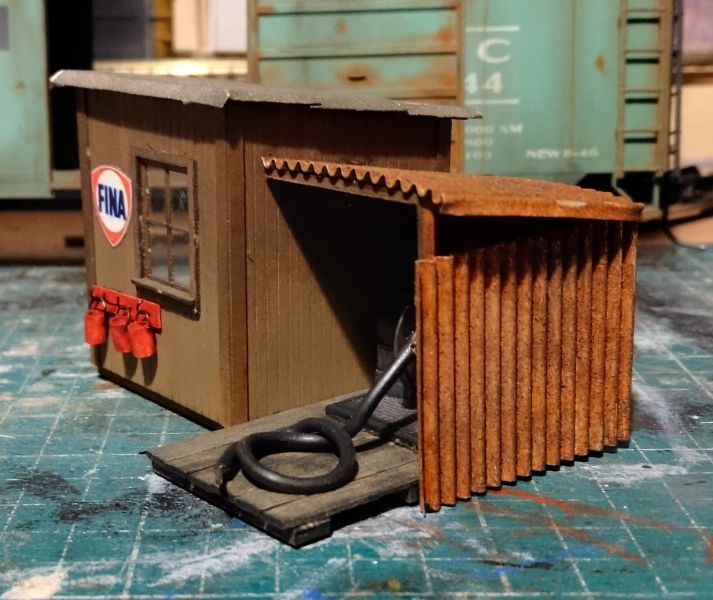
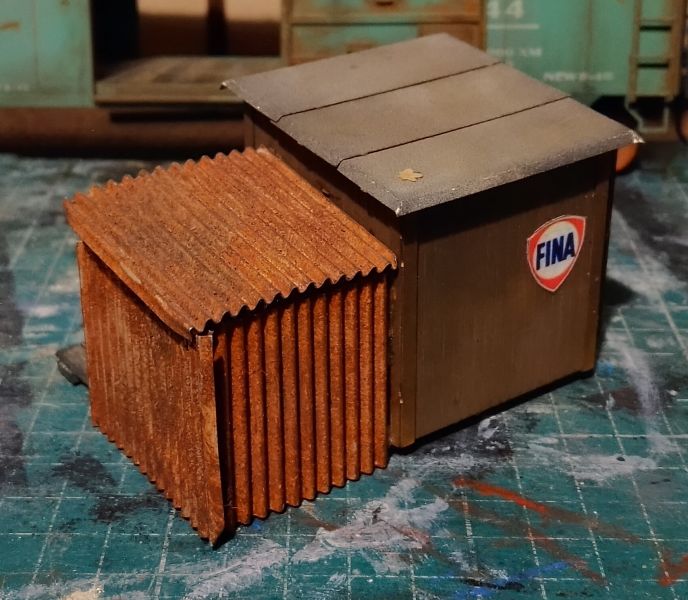
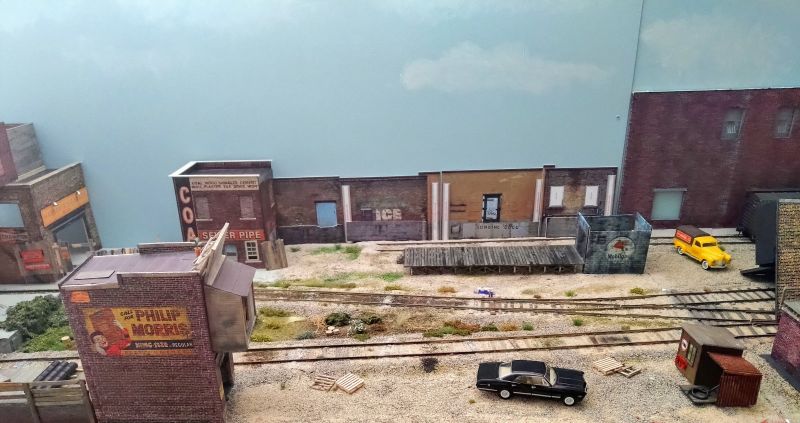
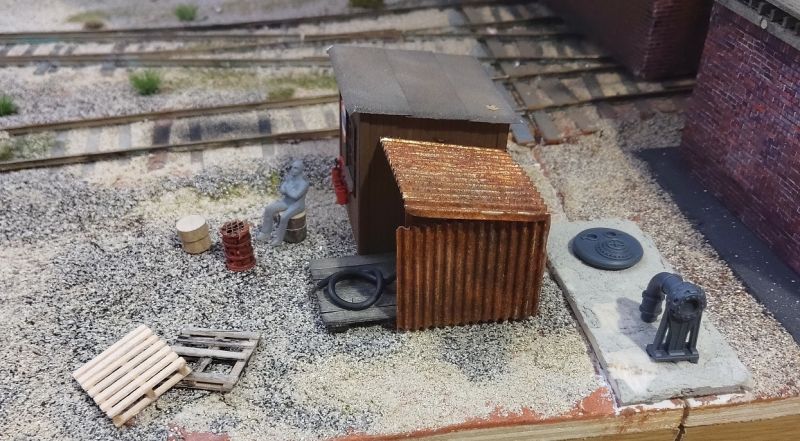
Tank car unloading platform to go on the team track. Oil drum added, signs added, scratchbuilt fire buckets added. I've also added to the inside a crate for the staff to sit on, and an electrical cabinet to represent the pumping controls. I still need to finish the pipework for the pump - it needs a locking valve adding to it to represent where it attaches to the tank cars when in use. The leaf on the roof is cut from brown parcel paper using a cutting tool from Green Stuff World:

Posted
Inactive Member
[yt]NE3de73s2v8[/yt]
Last edit: by Danielb
Posted

Full Member
It's always impressive seeing what can be built into "O" Gauge. I wonder why, when one moves up to "G" Scale, things so often begin to look "toy-like" - maybe G is just too big.
Some really fabulous weathering effects you've created - I'm absolutely green with envy !!!
'Petermac
Posted
Inactive Member
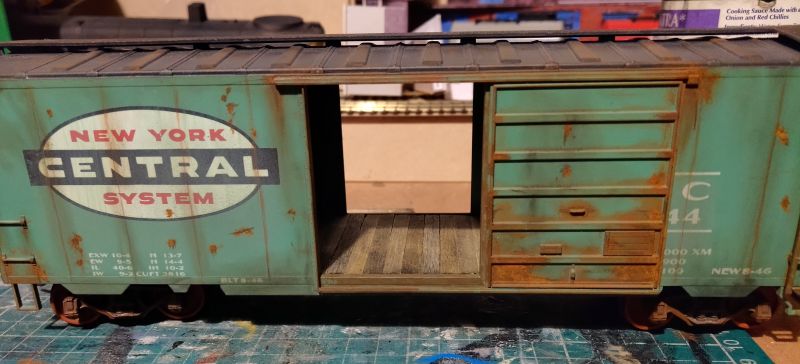
The weathering on the wood is entirely natural - I just soak the individual planks in a mix of india ink and isopropyl alcohol which I have in a jar - about half full. I put the wood in the jar, seal the lid tight, then give it a good old shake, leave it for a few hours, then use some tweezers to take the planks out and leave them on some newspaper to dry.
The rust is surprisingly easy too - burnt sienna oil paint stippled onto the target model, left to dry for a couple of hours, and then pastel chalks stippled into the still wet paint. Leave it for a few days to fully dry then seal it with dullcote and you're golden.
Further work this weekend, I've built a Kitwood Hill loading dock craftsman kit. Stained the planks whilst still on the sprue, then seperated them and mixed them all up to avoid a uniform appearence.

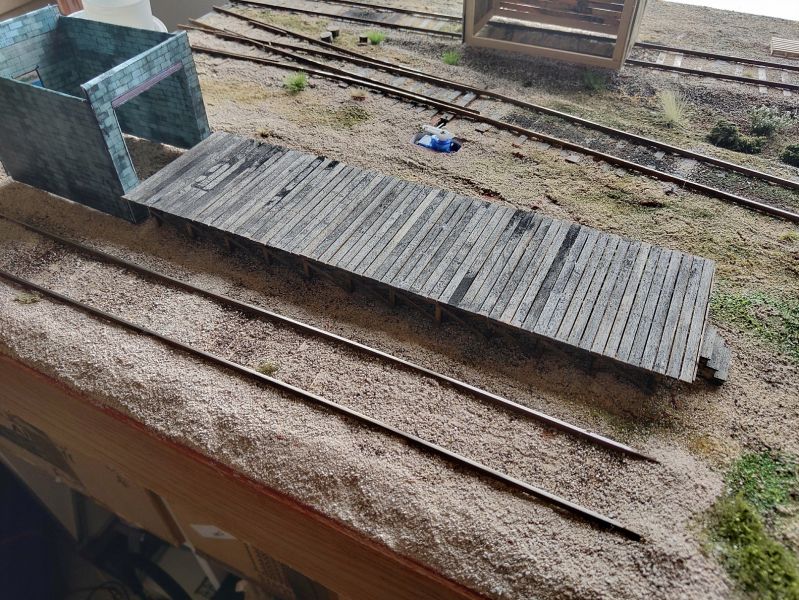


Posted
Inactive Member
Now it just needs weathering and glazing added.

Posted
Inactive Member
I've a few photos saved up that I've not shown off here yet, with some changes that have occurred on the layout - some big, some small.
I've mainly been on a mad detailing spree, crossing off smaller jobs all over the layout. I've got plenty to keep me going,after all!
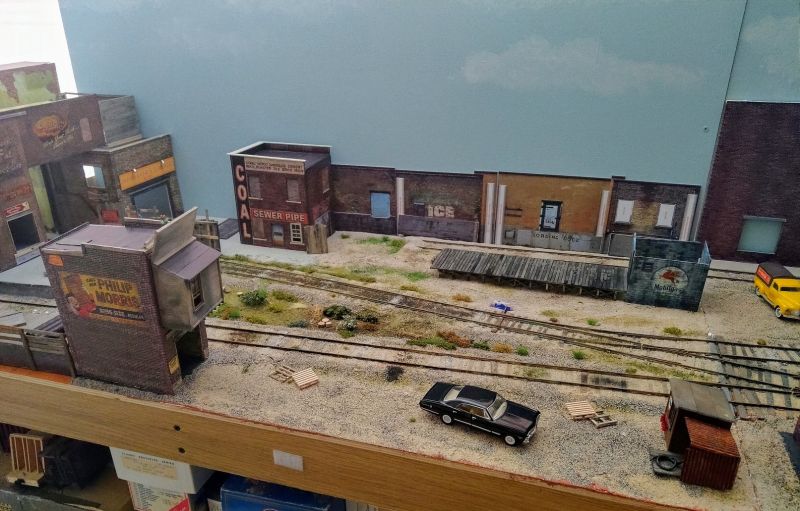
The biggest changes have been to board 1 - the board with the fabricators, team track, part of the bottling plant and the garage. I've added the main backscene to the board, and as such I've been able to spin it around at last and join all the boards up. Once a few broken wires get fixed I'll have a fully functional layout again. :)
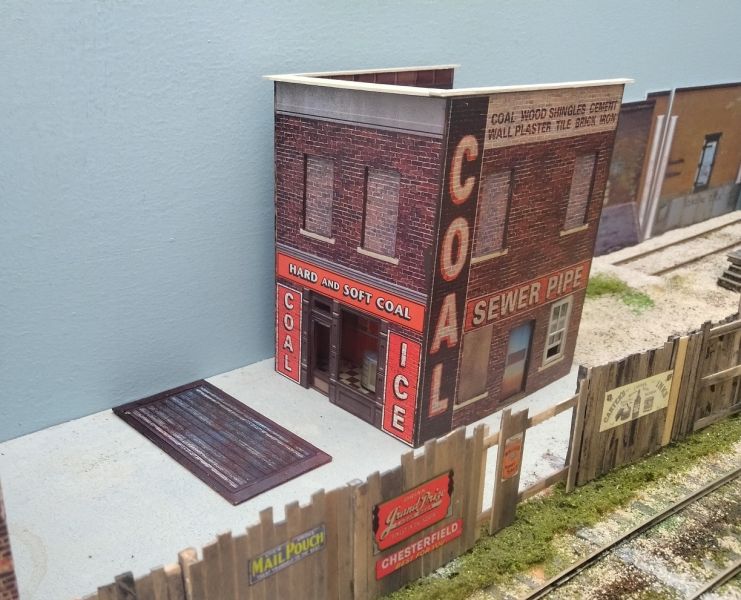
I've added a few bits onto the team track, added some wooden bumpers around the loading dock on the fabricators structures, and have shortened the garage building to provide space for a structure kit I built a while ago but never had any space for on the layout - the Clevermodels Coal Dealer. I'm planning on adding signs on the building to show that it's been purchased and repurposed by another company, but I'm not sure what just yet.
Anyways, enough of the wall of text, on with the pictures! :D


1 guest and 0 members have just viewed this.