O scale 2 rail exhibition layout
Posted
Inactive Member

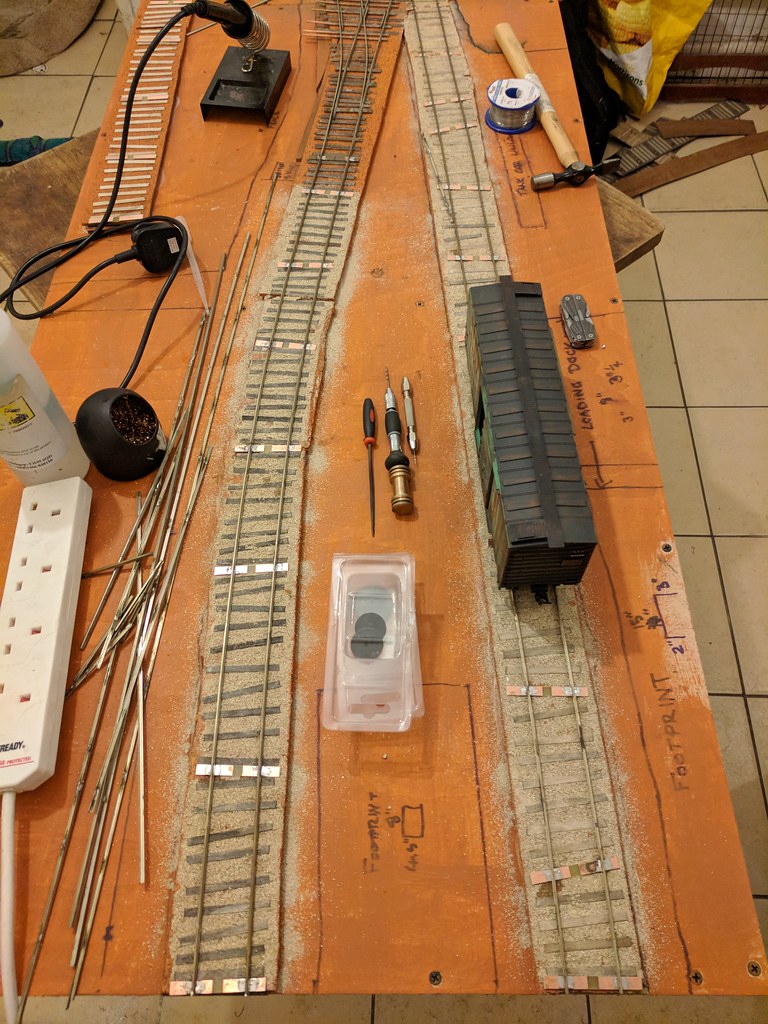


Hopefully I can get the trackwork finished before I go back to work on Monday night.

Posted
Inactive Member
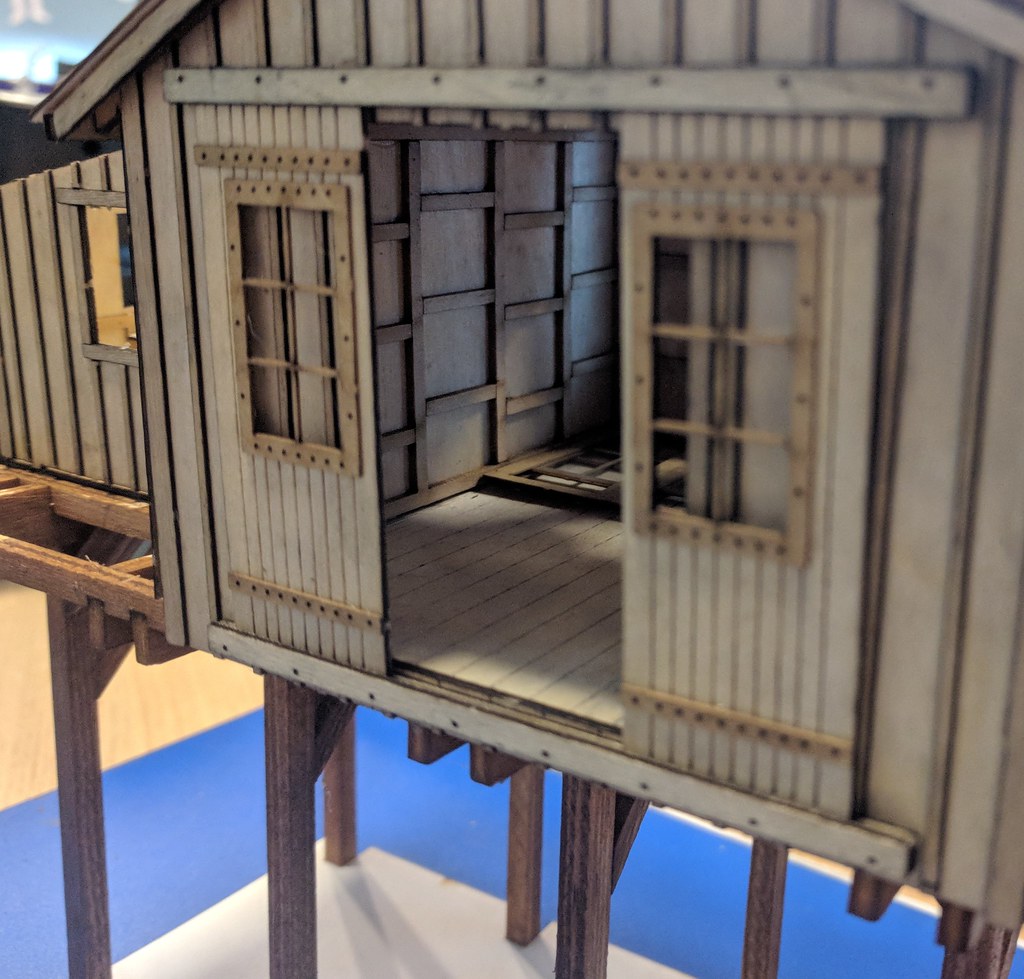
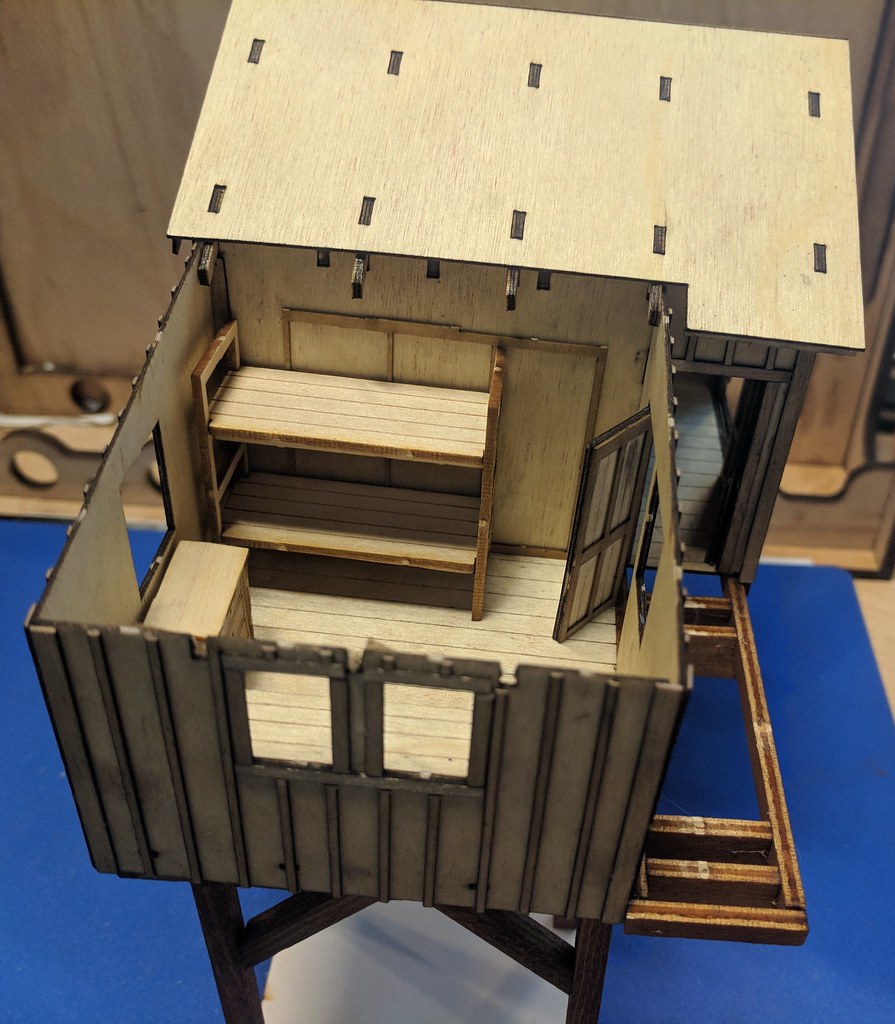
Verdict - it's a lovely kit, very interesting design, but it's been fiddly as all hell (even N scale craftsmen kits are easier than this!) and the instructions could do with a couple of improvements here and there. The functioning sash windows are definitely a highlight. :)
I've also added some of Kitwood Hill's furniture items to the annex of the building, make it look a little more interesting. :)

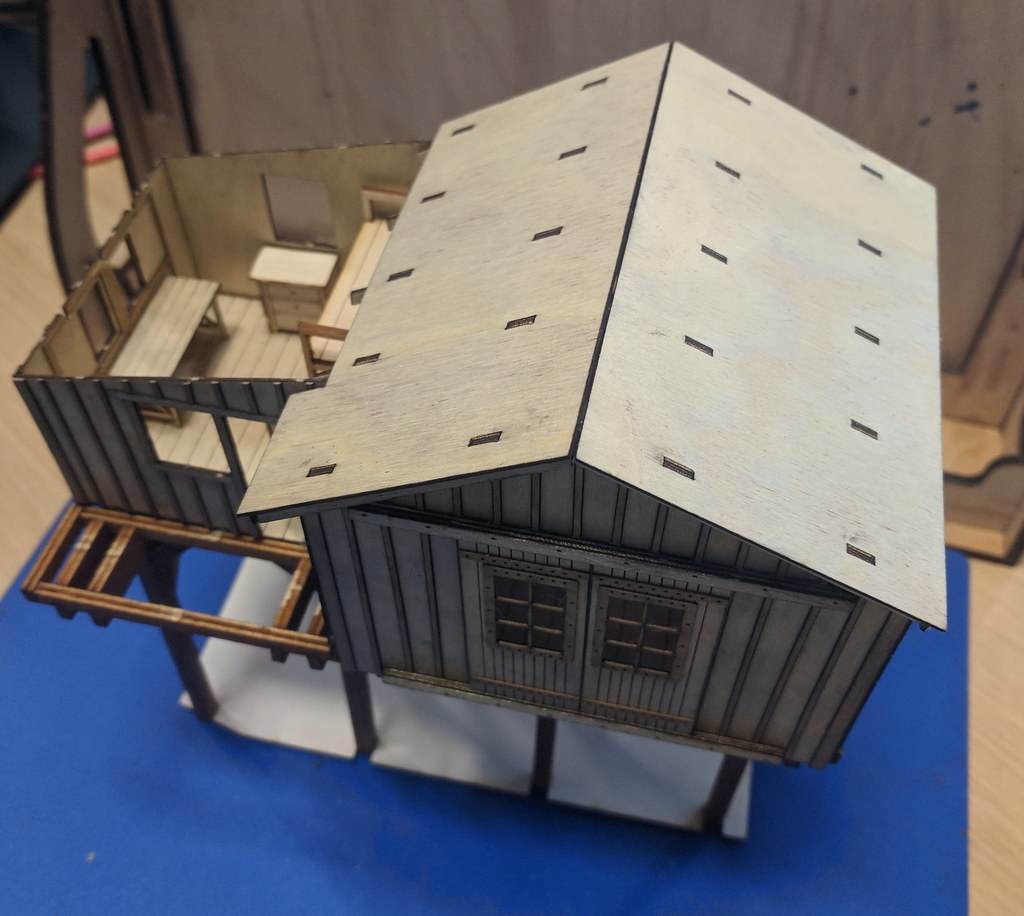
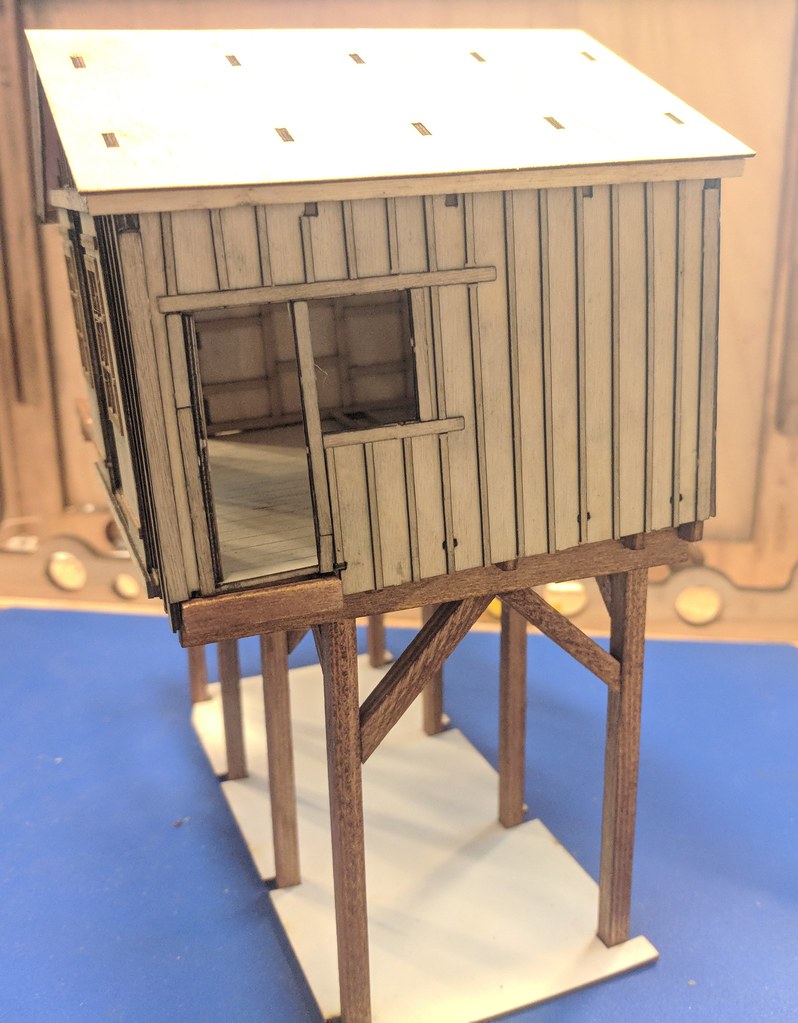
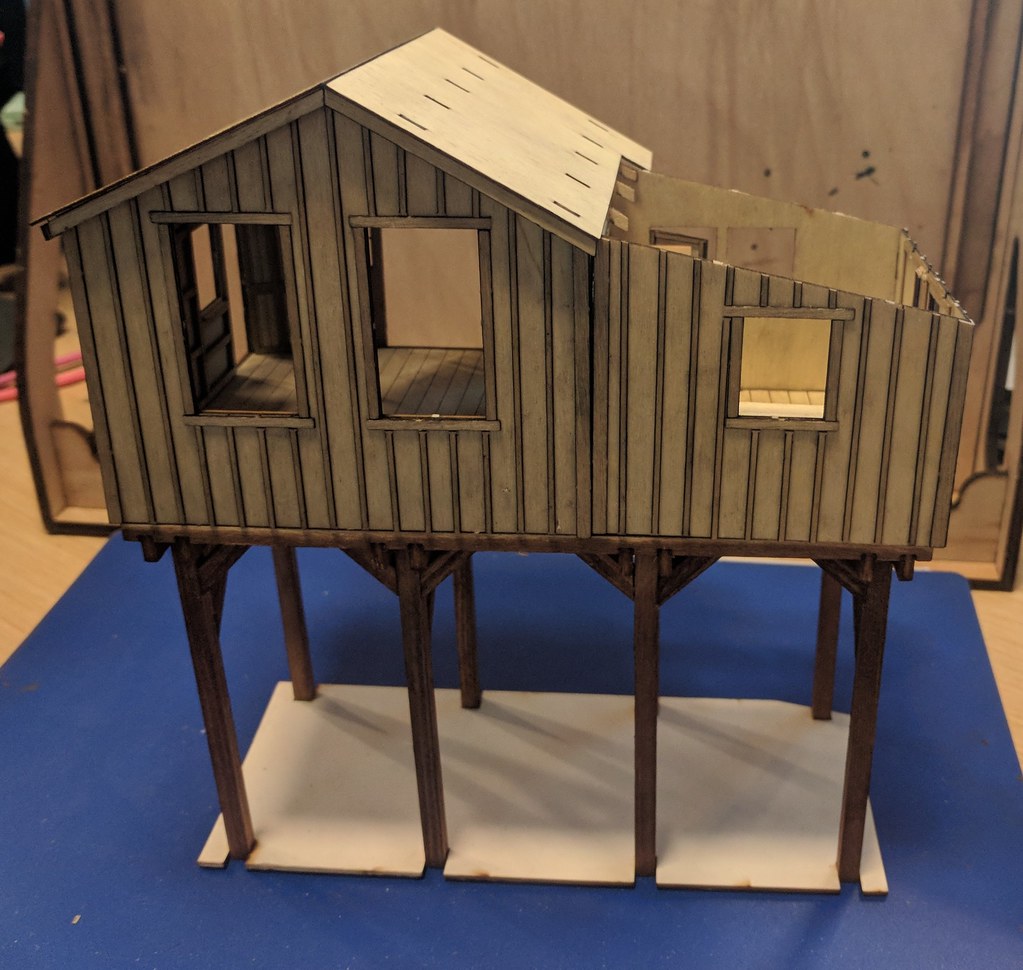

Not much further to go on it before I can start painting it up. :)
Posted

Inactive Member
What is it?
Max
Port Elderley
Port Elderley
Posted
Inactive Member
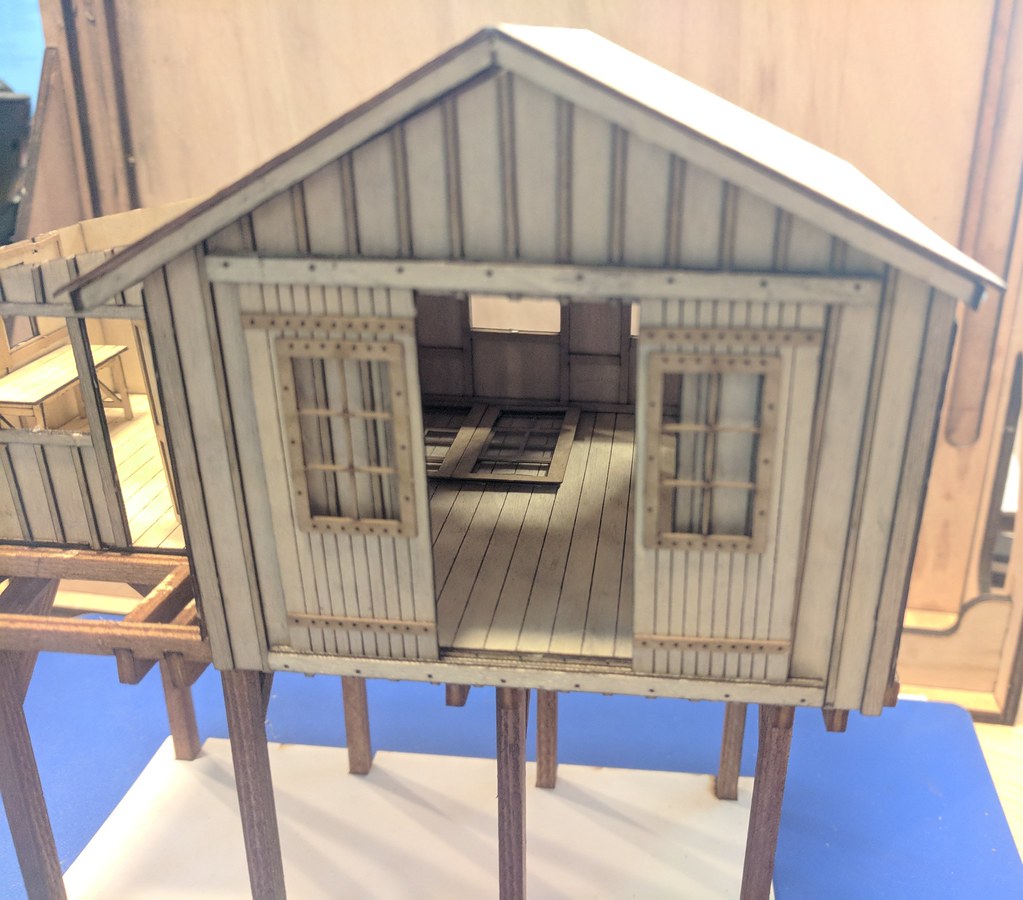
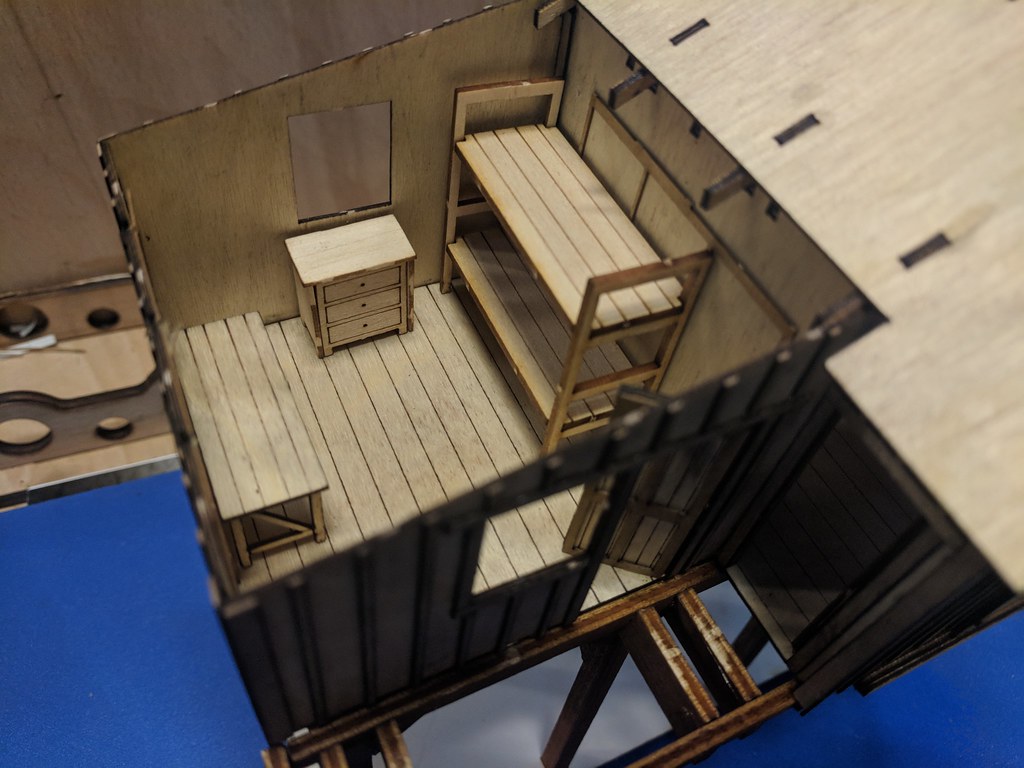
The stock model comes with a loading dock underneath the 'stilts', and a pair of staircases coming from either end of the building down onto the loading dock.
I'm omitting one staircase and the loading dock, and using it as a lumber merchants, with the office/warehouse being sat on top of the lumber storage racks.
The staircase and loading dock will be repurposed elsewhere on the layout.
The original kit can be found here:
Broach Supplies - Kitwood Hill Models Store
Posted
Inactive Member
Max
Port Elderley
Port Elderley
Posted
Inactive Member
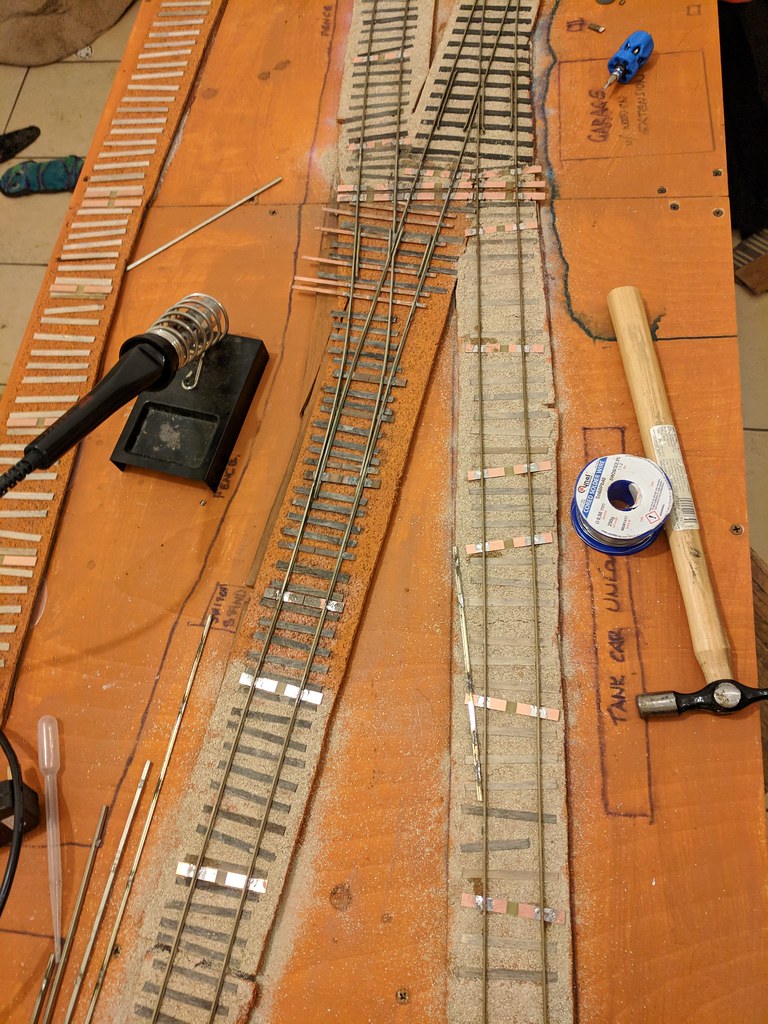
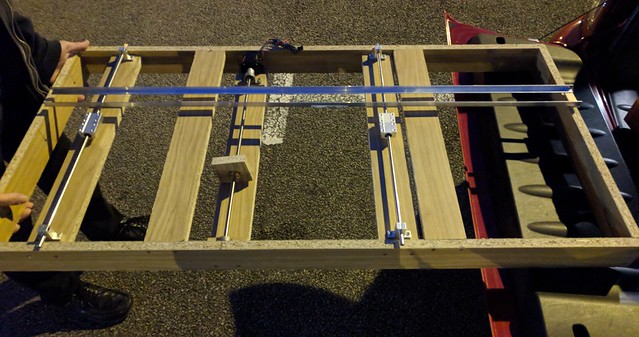
Trackwork is done done. I've soldered the power droppers to 2 of the boards, however Ford has taken the board that will house the sector plate away to build and fit that, and he's also working on building some servo-actuated switch machines for us. As such, the rest of the wiring will have to wait until the layout is back together.
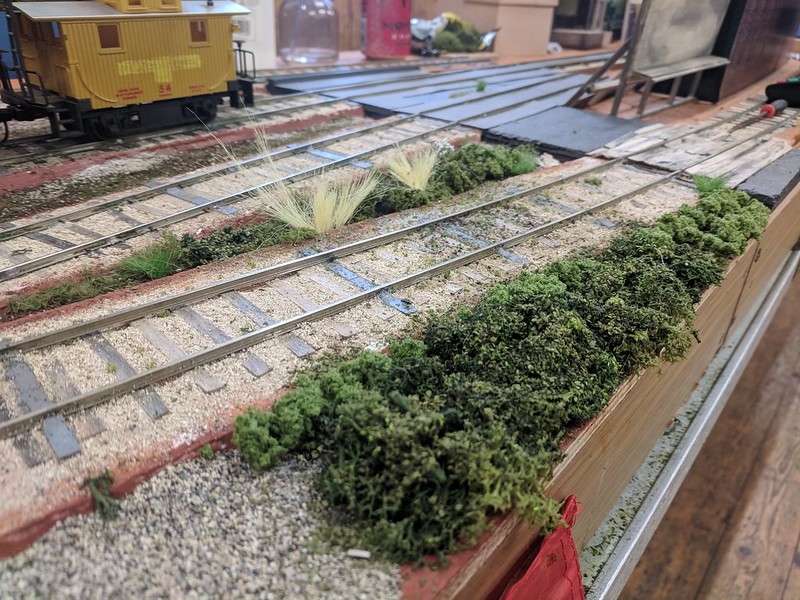
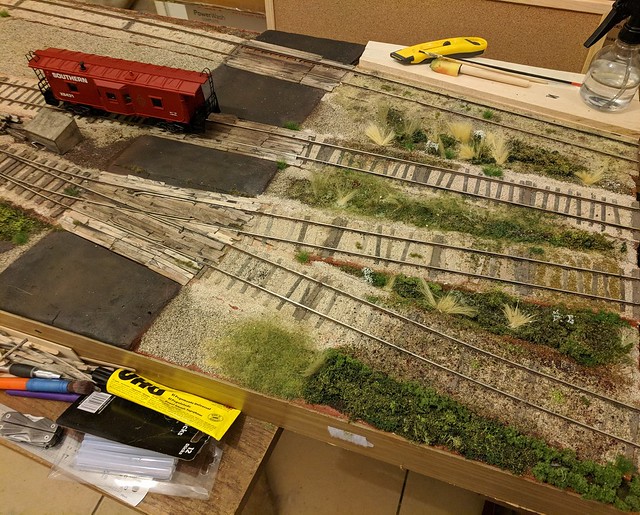
I've also made a start on the scenics, and have used lightweight filler to build up the ground contours on one of the boards. One down, two to go.
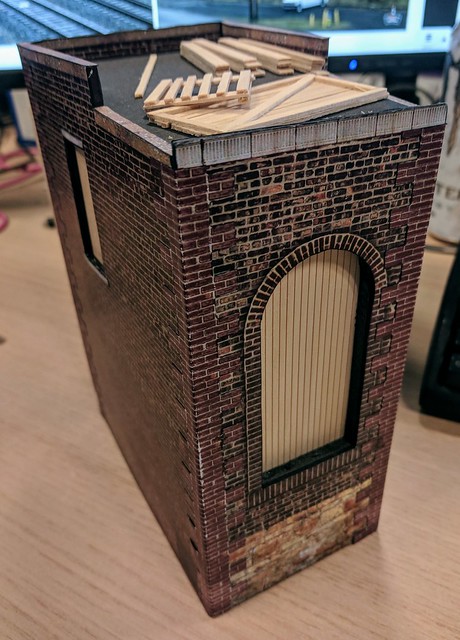
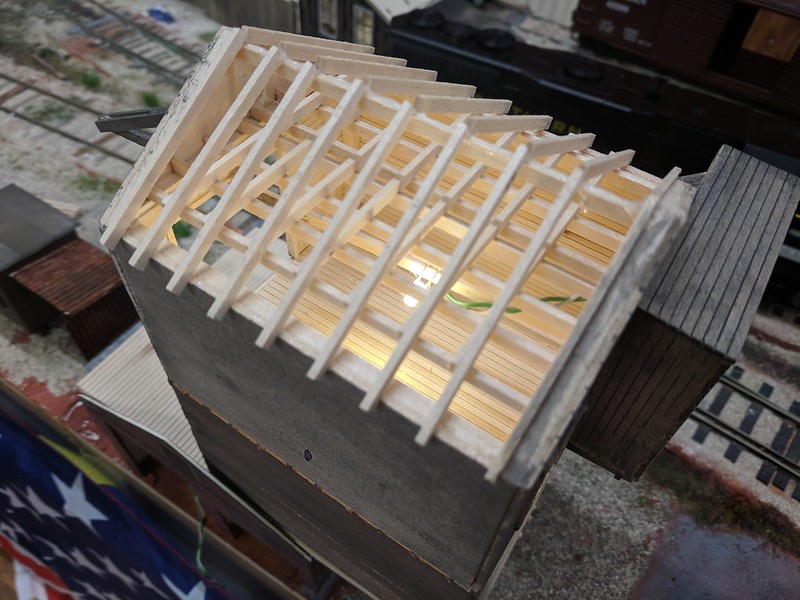
Structures have been started and the majority of them are in a state of the basic walls being complete, I just need to get some wooden beams that I can use to brace the corners before I build them up, but I need to wait until payday for that.
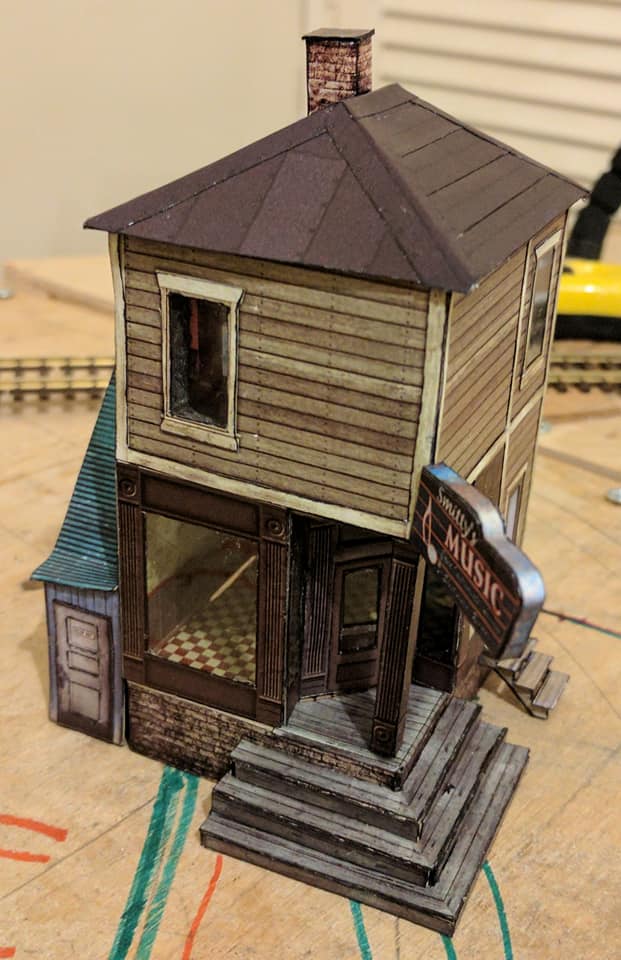
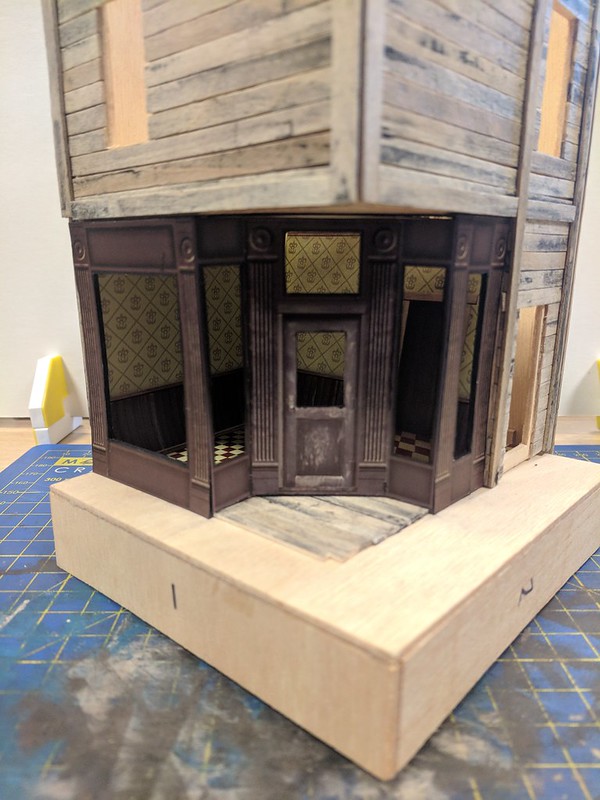
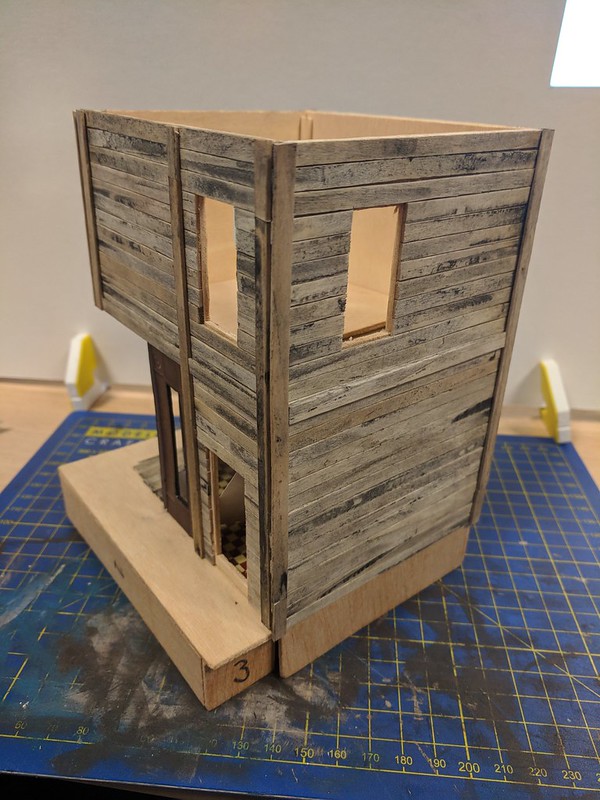
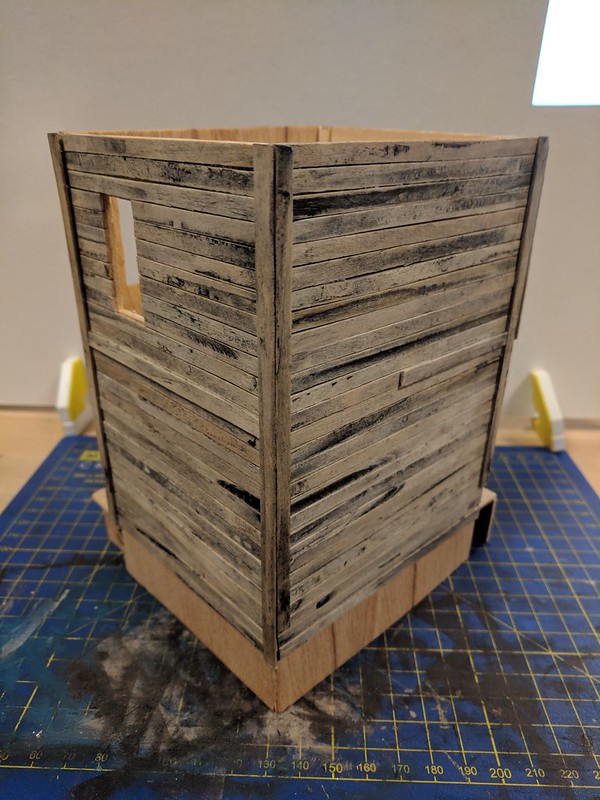
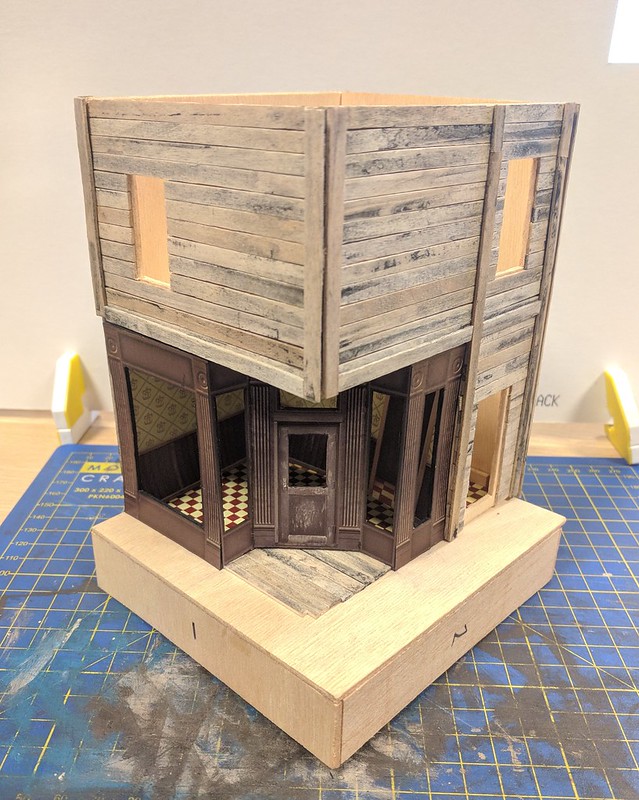
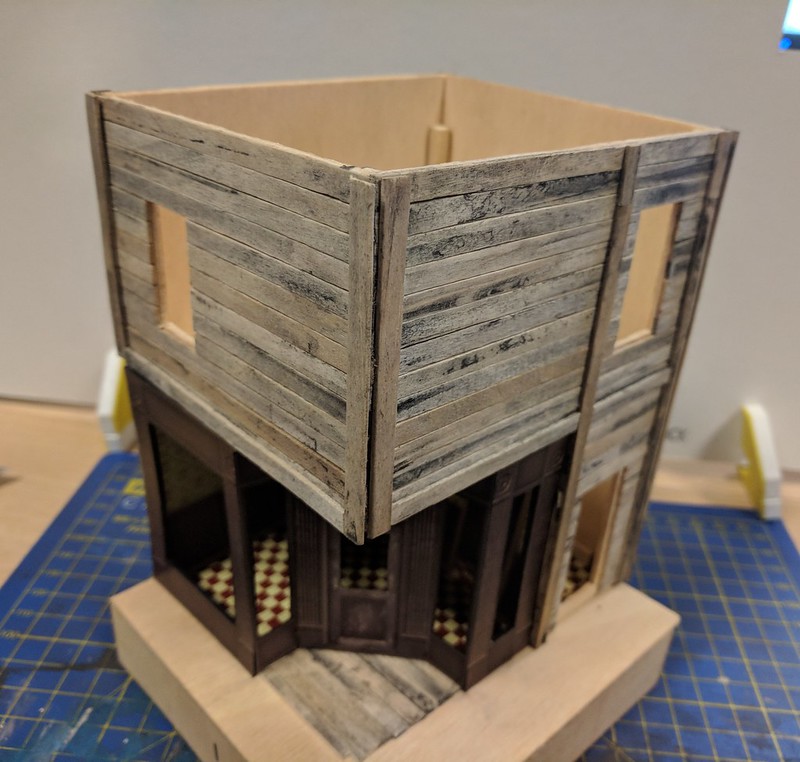
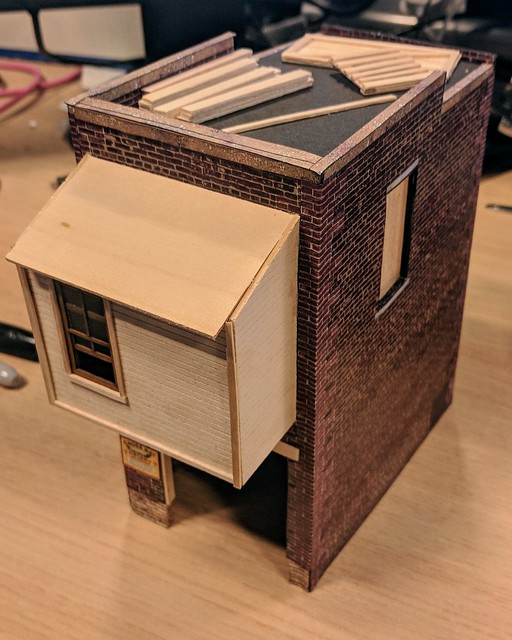
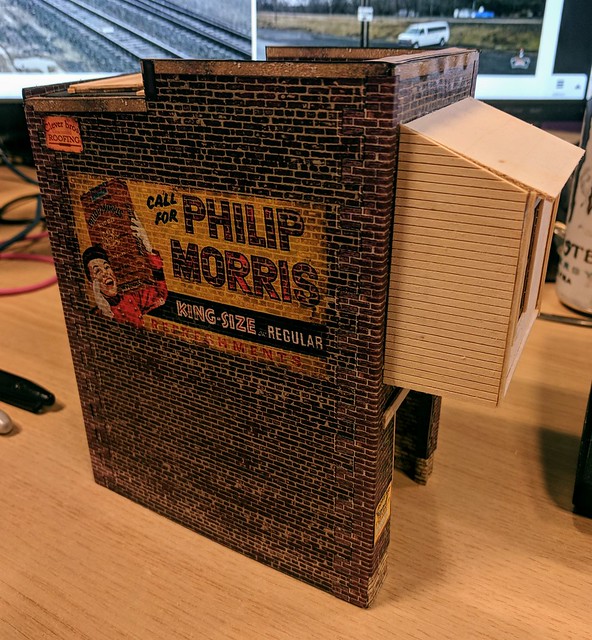
I have, however, been working on one of the buildings that will hide the sector plate from view - a mixed media version of the Clevermodels music store. I wanted to ensure that - in O scale - any part of the kits that should be wood are made from actual wood. I figured this would add to the overall look of the layout.
So here's the version of the kit I built in HO scale:
Whereas here is the progress so far on the O scale version:
 Last edit: by Danielb
Posted
Inactive Member
It's been a while, but with literally 2 weeks to go before the Mansfield show, I figured it best I actually get started on the scenery! :P
This is about 30 minutes work.

Two of the three boards have been wired, myself and Ford just need to find some time to get together and get them all linked together.
More scenery work when I get home later this morning. :D
Posted

Full Member
What took you so long? :lol:
Nigel
©Nigel C. Phillips
Posted
Inactive Member

One board, at least, will be completed scenically before Mansfield show. :)
Loads of time left! :D
Posted
Inactive Member
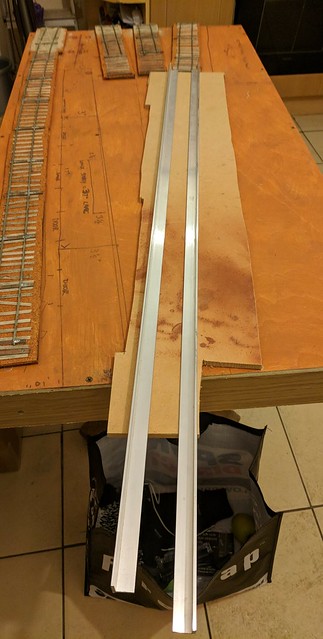
Ford stopped by with the current progress on the traversor. This very clever beast is controlled by a simple IR remote from an old CD player.
He also returned the sector plate board so I can work on wiring it up. As such, I took the opportunity to mock up the sector plate.
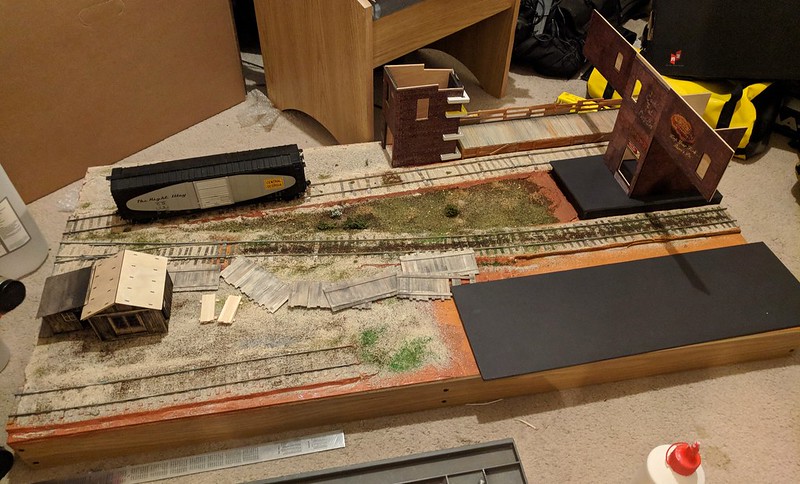
Finally, I spent some time working on structures for the end board, which is the one that will connect to the traversor.
It's really coming together now. :)

More to come tomorrow, with any luck.
Posted
Inactive Member

Posted
Inactive Member
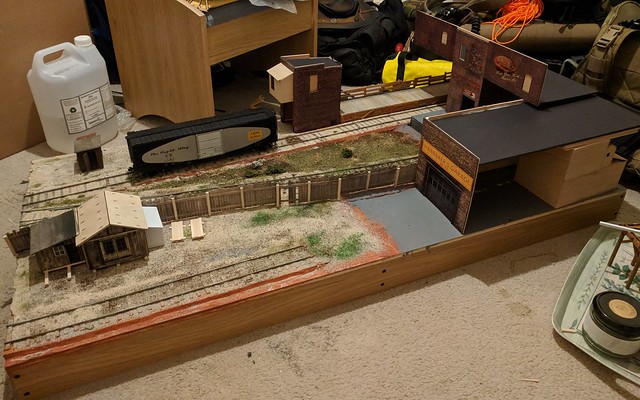
The to do list has expanded, as is to be expected after the true test of a two day show, but overall the layout performed fantastically.
During the show, further work was done on the layout, as was always the plan. I worked on the scenery whilst Ford ran trains, and then Ford worked on fine tuning the arduino controlled servos and lighting of buildings whilst I ran trains.
I can't claim to understand how it all works, but Ford used an arduino control board to work both the lights and the servos for the points.
Connected to it was an infra-red sensor, which allowed us to use a TV remote to switch the points - allowing for both switching of the points individually, and route setting - throwing multiple points with one button push to line up set routes for the locomotives to take.
For the Bingham show on 14th and 15th of April, we're hoping to have the point frogs wired up to polarity changing switches, so that when the button are pressed to change the routes, it also throws a SPDT switch to change the polarity of the frogs.
This would have been a massive benefit at Mansfield. As it stood, the frogs were dead at the show, which prevented us from using the Atlas Plymouth, and caused the slightly shorter wheelbase GP35 to stall when going one specific route, as it ended up with a truck each on two of the dead frogs at once, meaning it stalled out.
The RS3, having a slightly longer wheelbase, didn't have this issue.
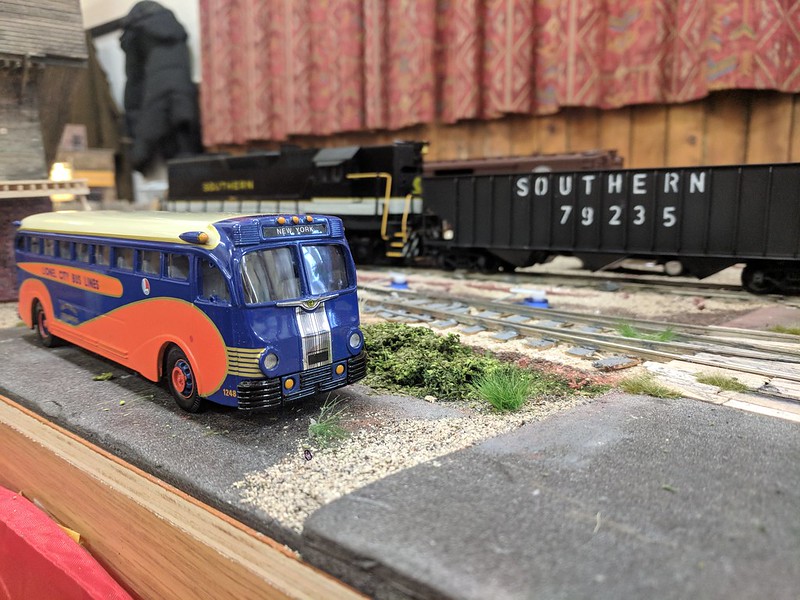
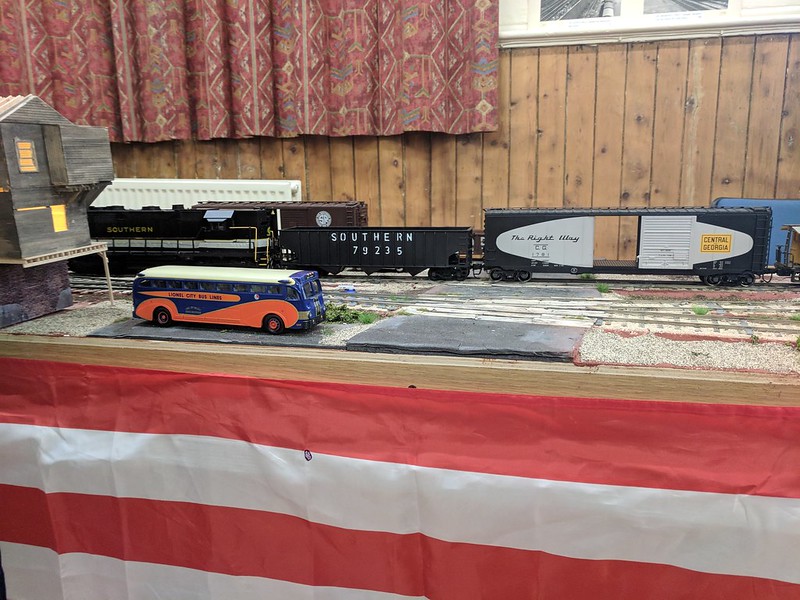
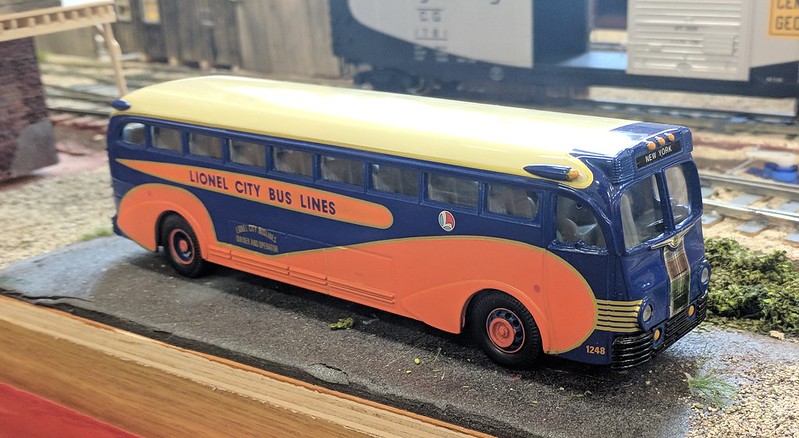
There wasn't much in terms of things to buy on the trade stands for the layout - US O scale isn't exactly all the rage here. That said, I did managed to get a 3-rail K-Line flat car, which will need converting over to 2 rail, as well as a Lionel/Corgi Greyhound bus, which you can see in some of the photographs below.
So here we are. Roll on Bingham show in April! :D


Posted
Inactive Member
First off, the prototype reference photo for one side of the car:
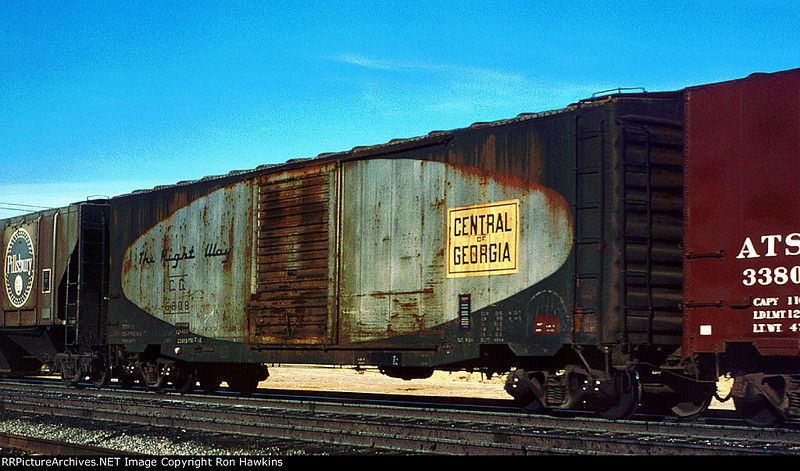
Next, the progress so far on replicating it. At this stage it's had a base rust colours applied with acrylic paint, then the rust built up with oil paint, and then weathering chalks added to the still wet oil paint.
The next steps for this car is to seal the work so far with dulcote once the oil paint has dried, then hit the whole car with a wash of isopropyl alcohol and india ink to dull down the shine on the car sides.
Posted
Inactive Member
Now I've been forced to use the templates for the O scale track already in SCARM, so the dimensions are going to be off, but with handbuilt track I should be able to get it all in a bit better, give or take.
So here's the daydream imagining of what PB could look like in that space.
Whether that happens or not (spoiler alert - probably NOT!), it was a fun little exercise that killed a boring lunch break for me. :D
Streetrunning. Streetrunning everywhere!
Posted
Inactive Member
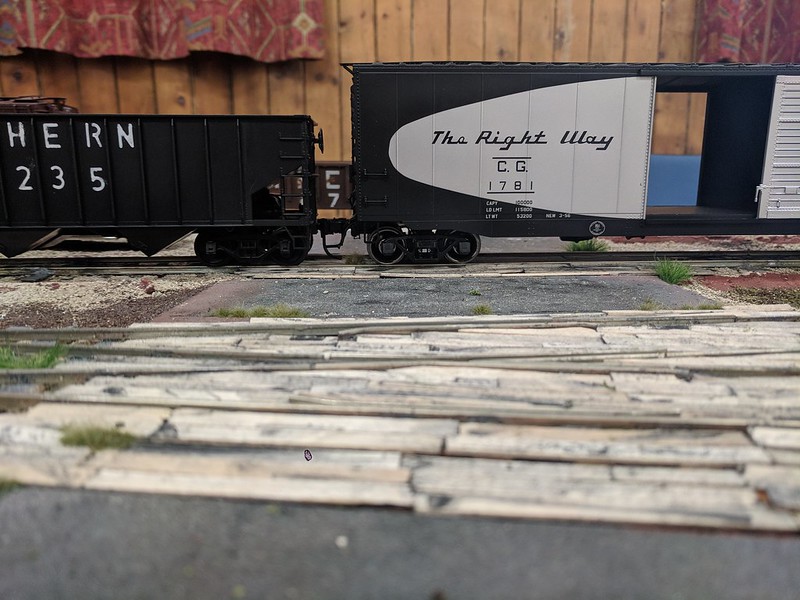
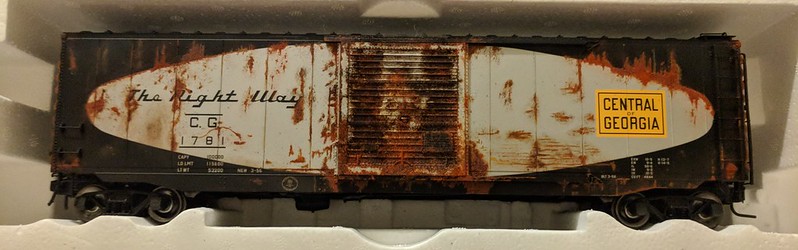
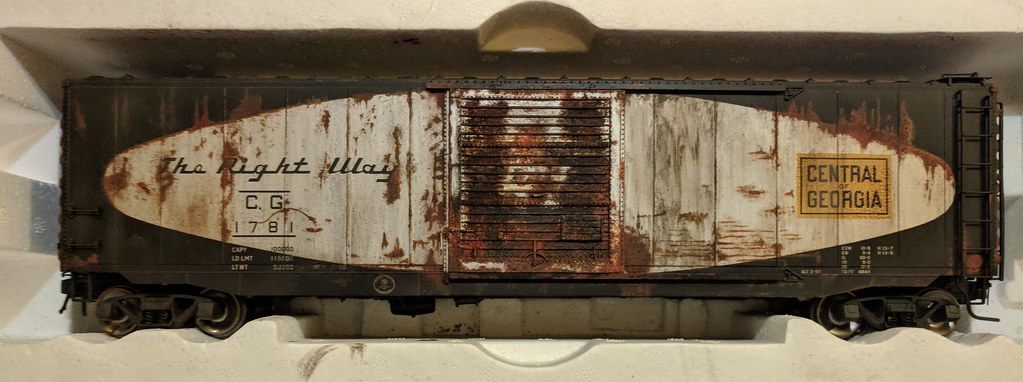
Further weathering on the CoG Boxcar:
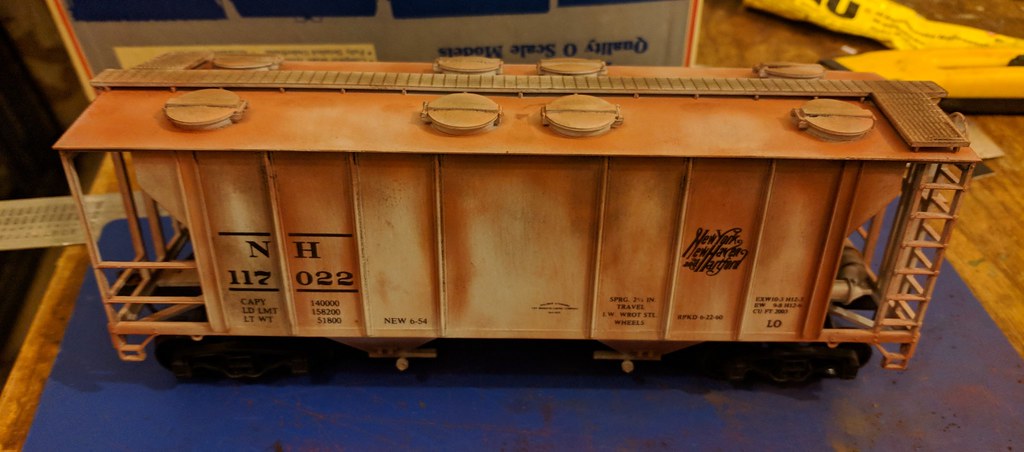
Coupler repair and weathering on a BevBel New Haven PS2 hopper:
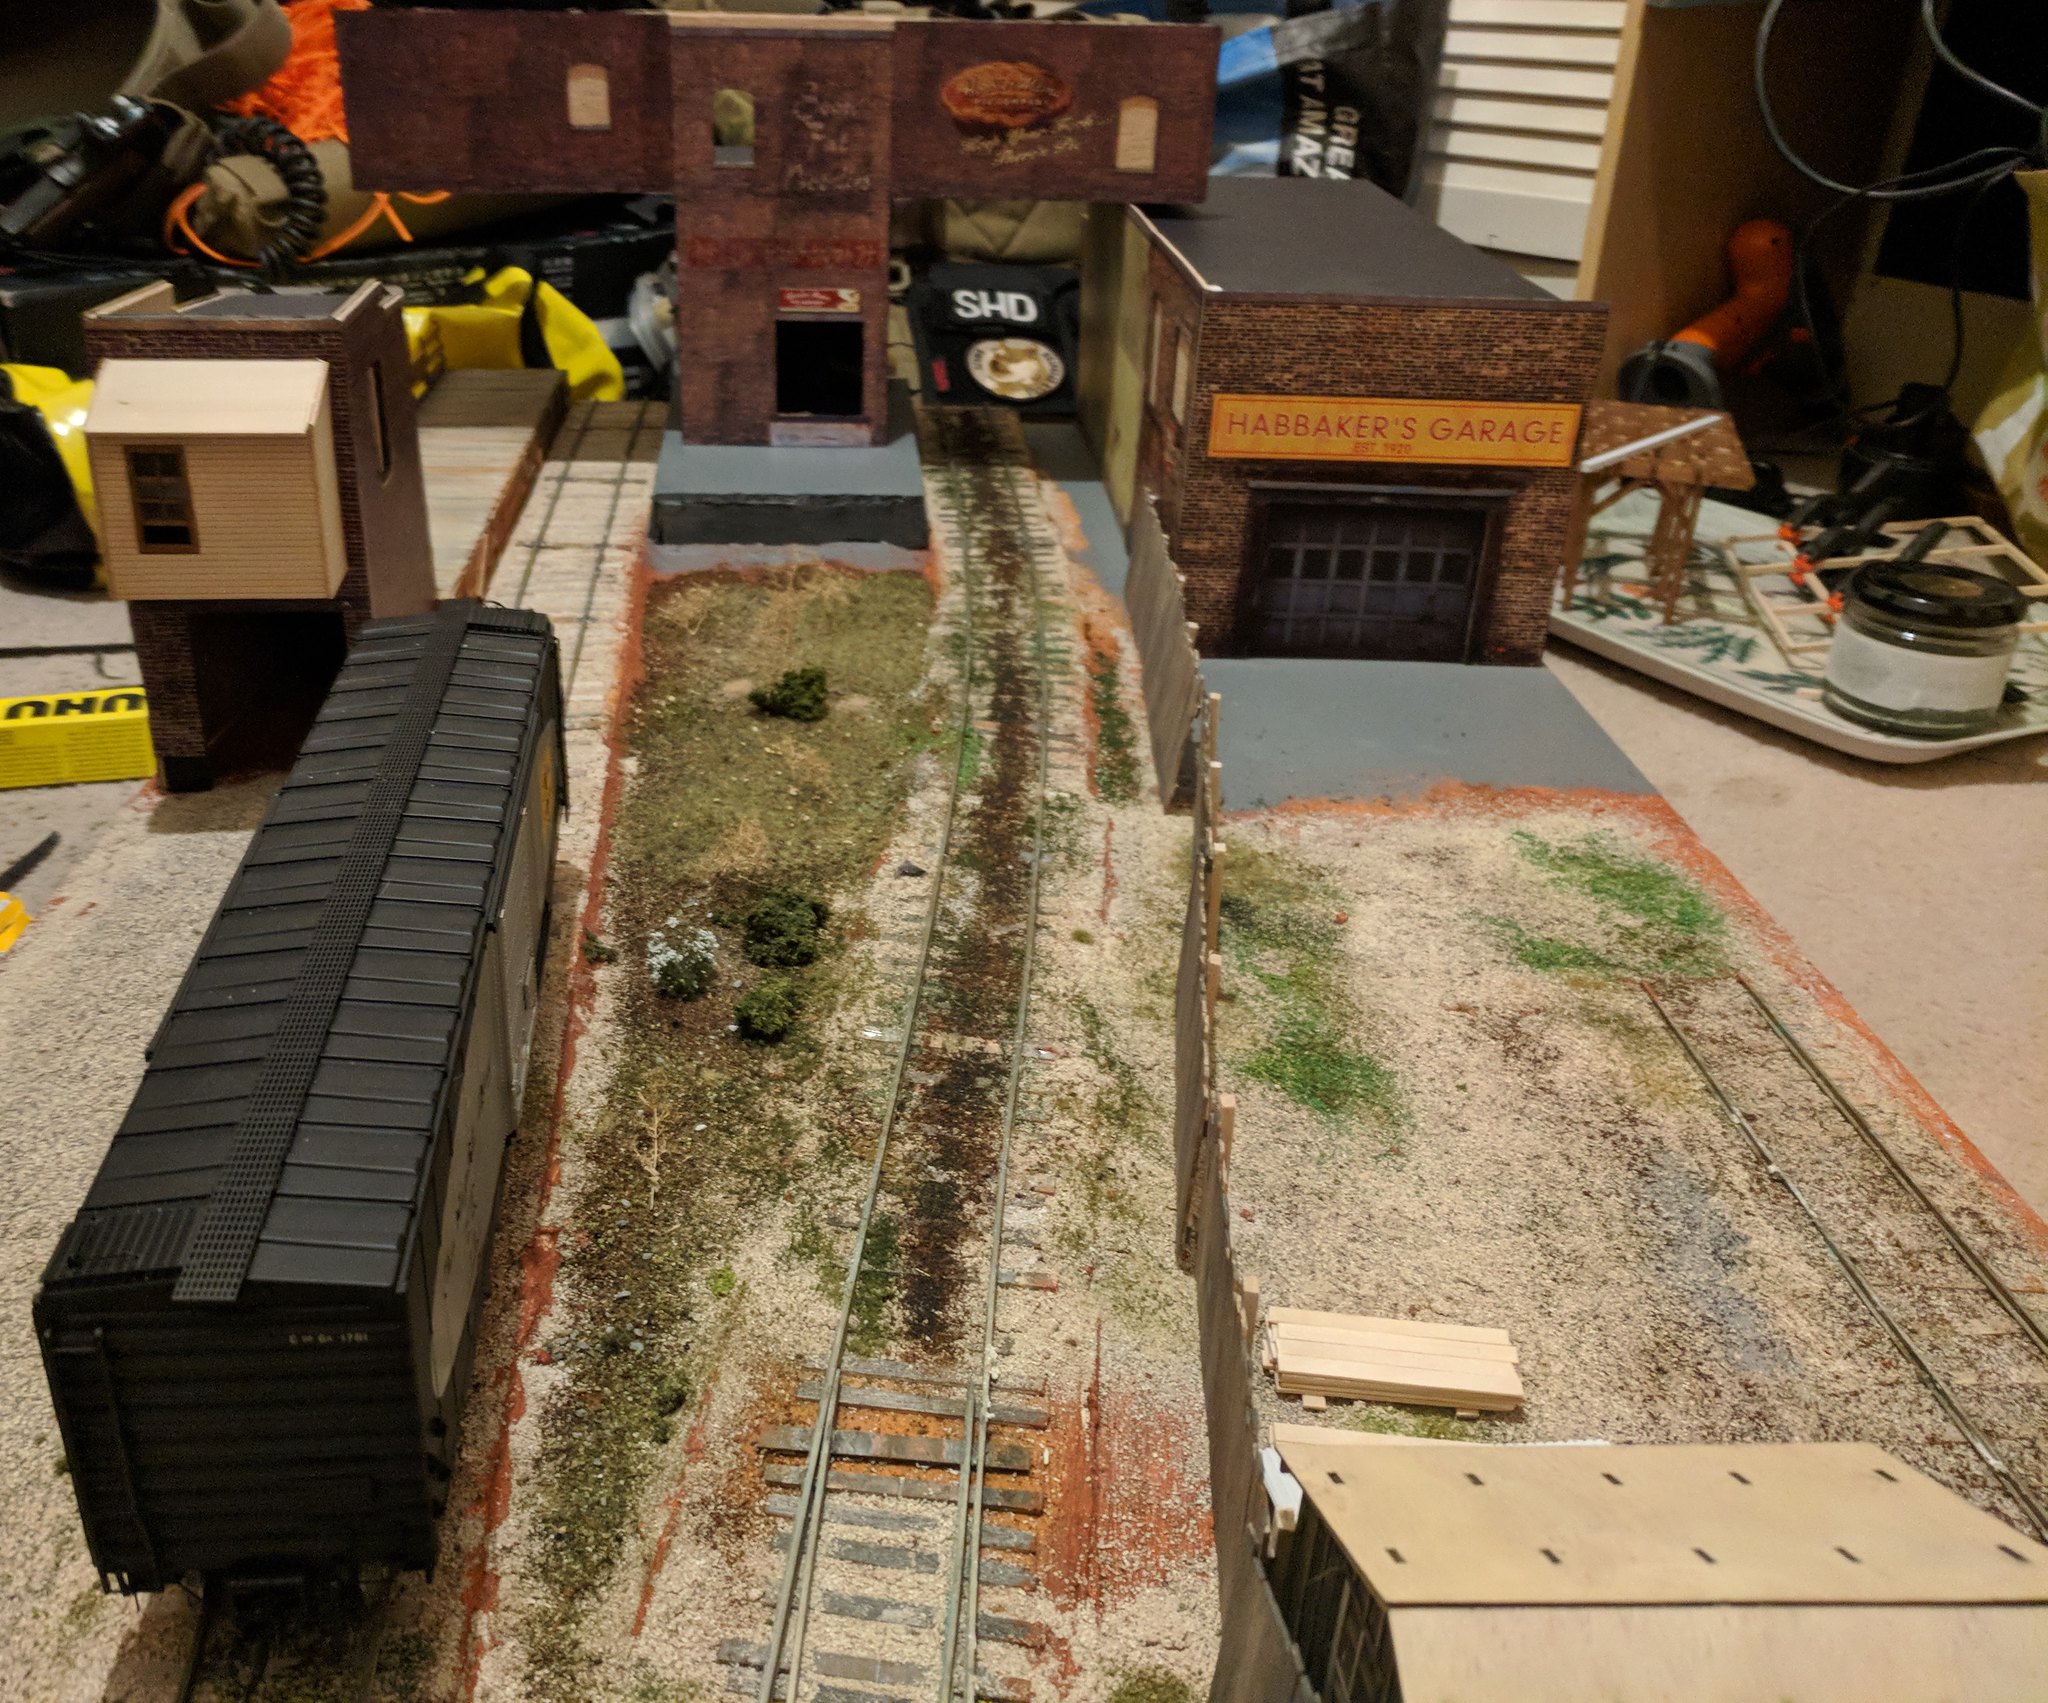
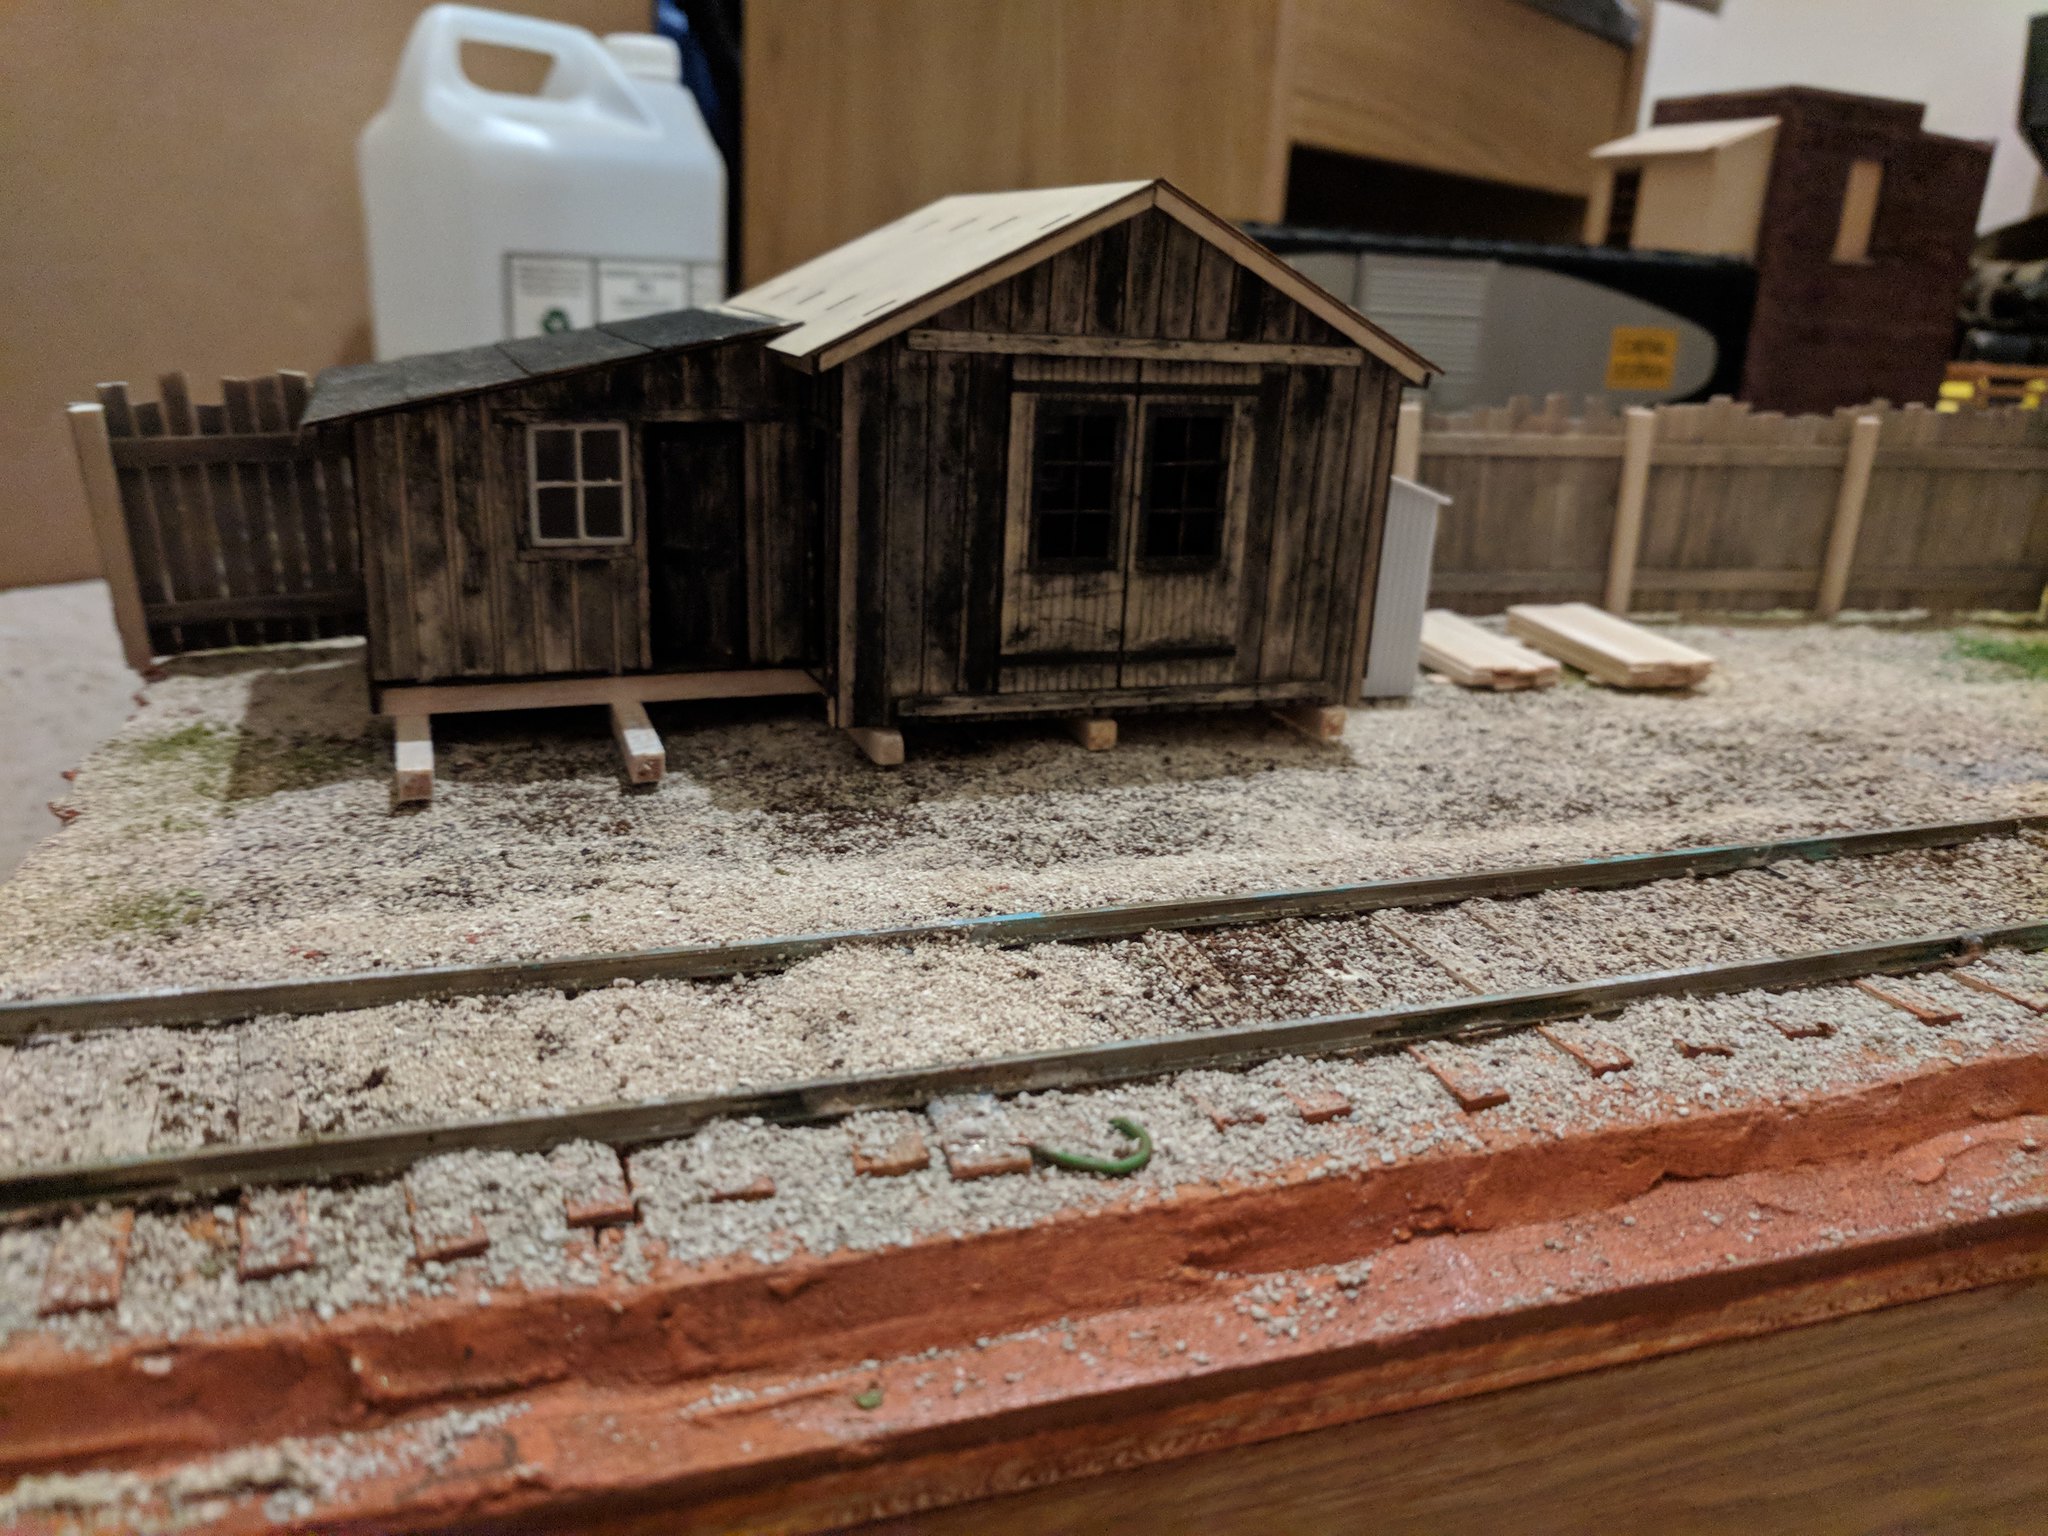
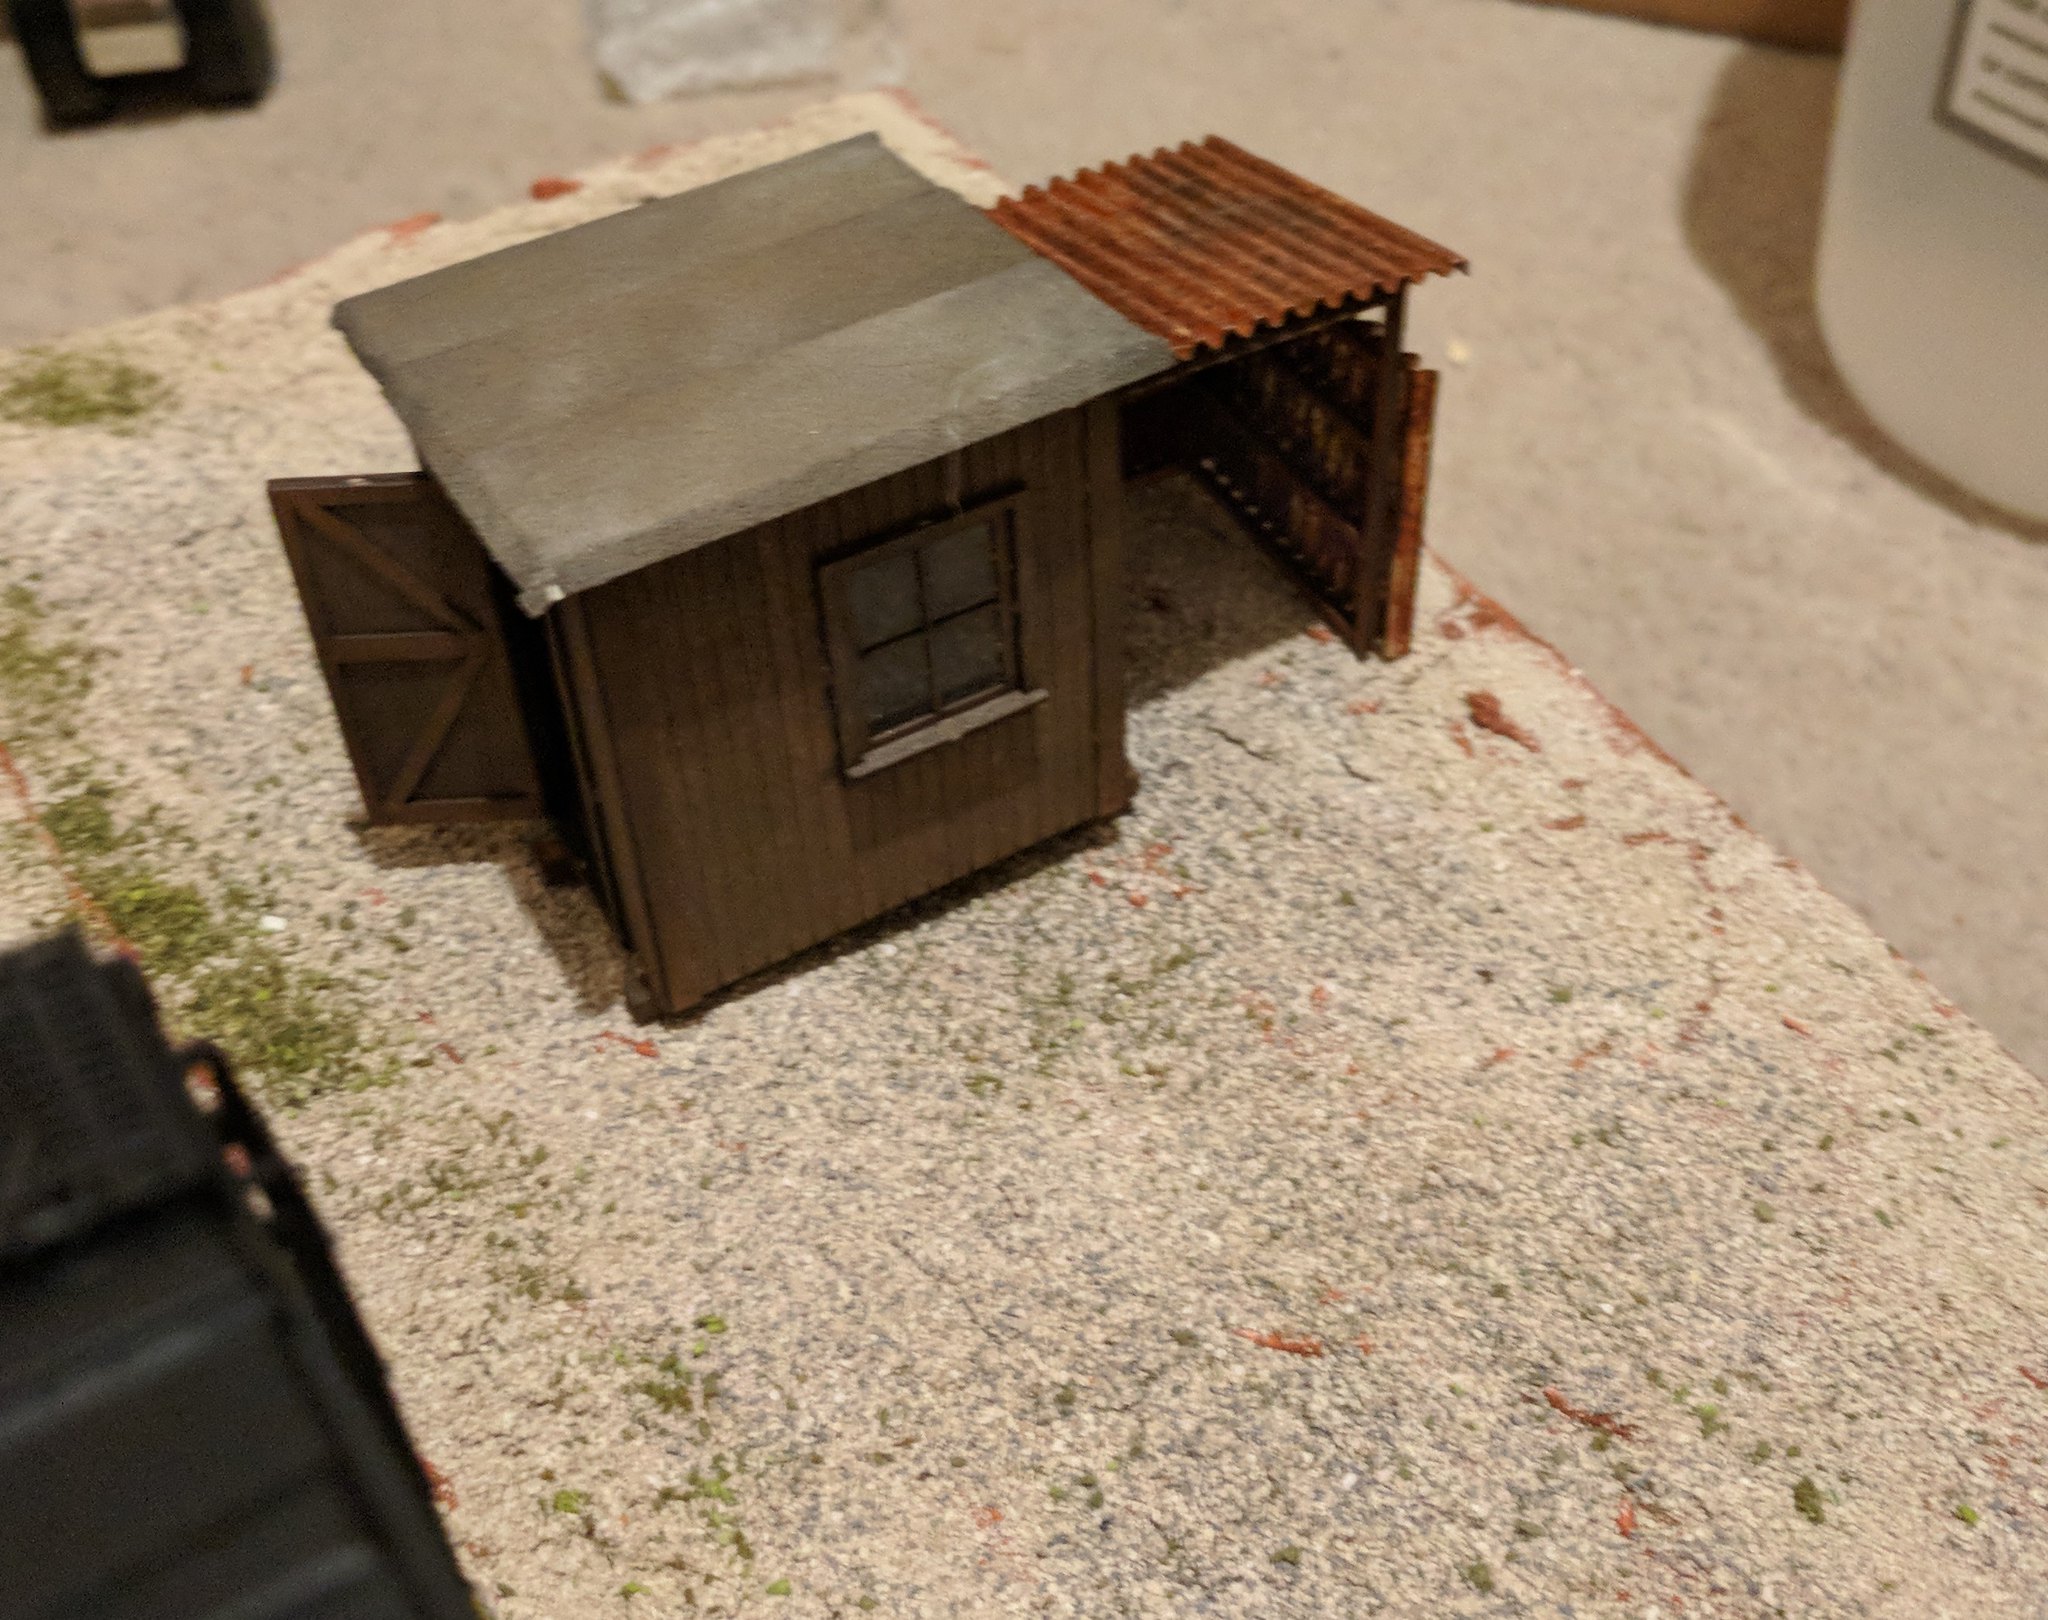
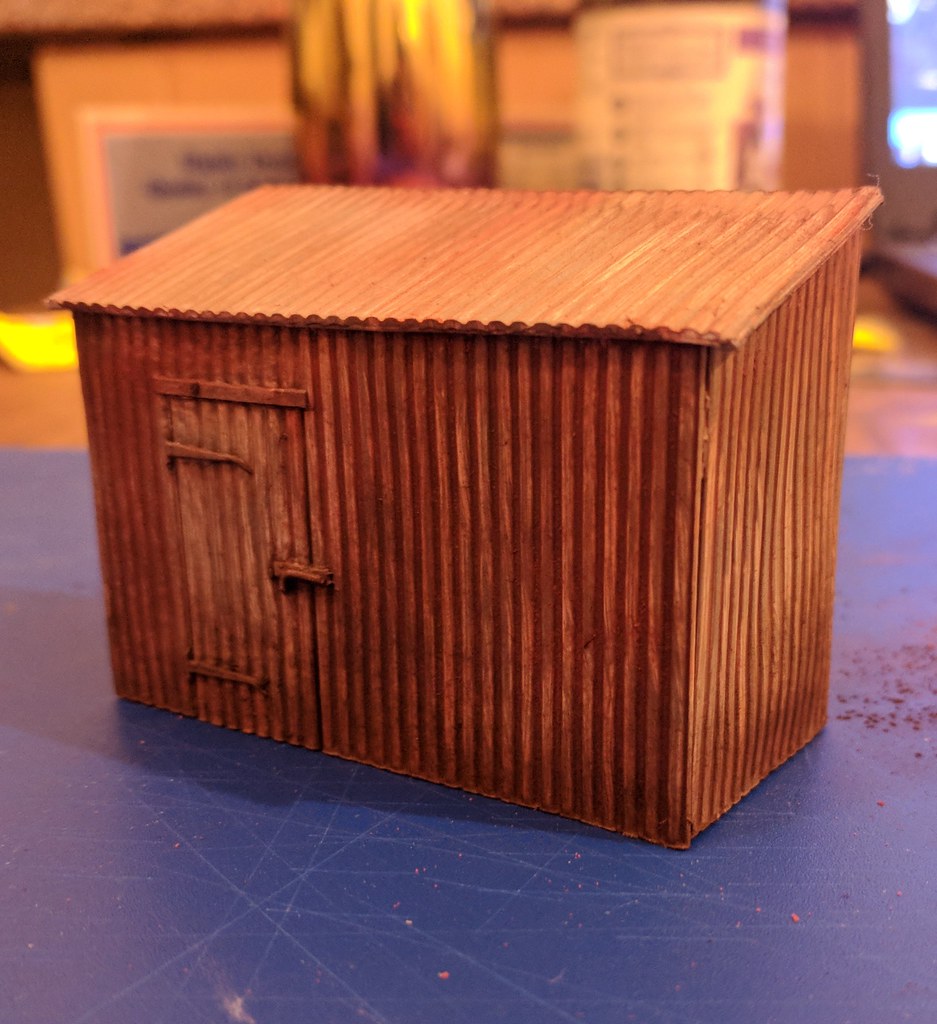
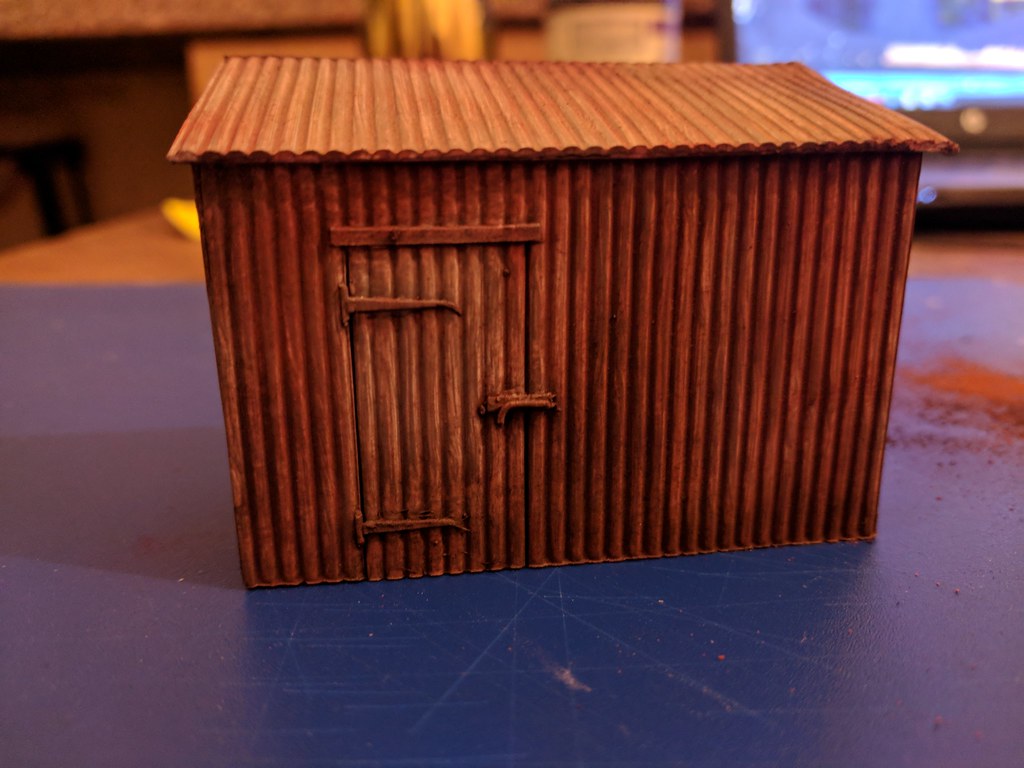
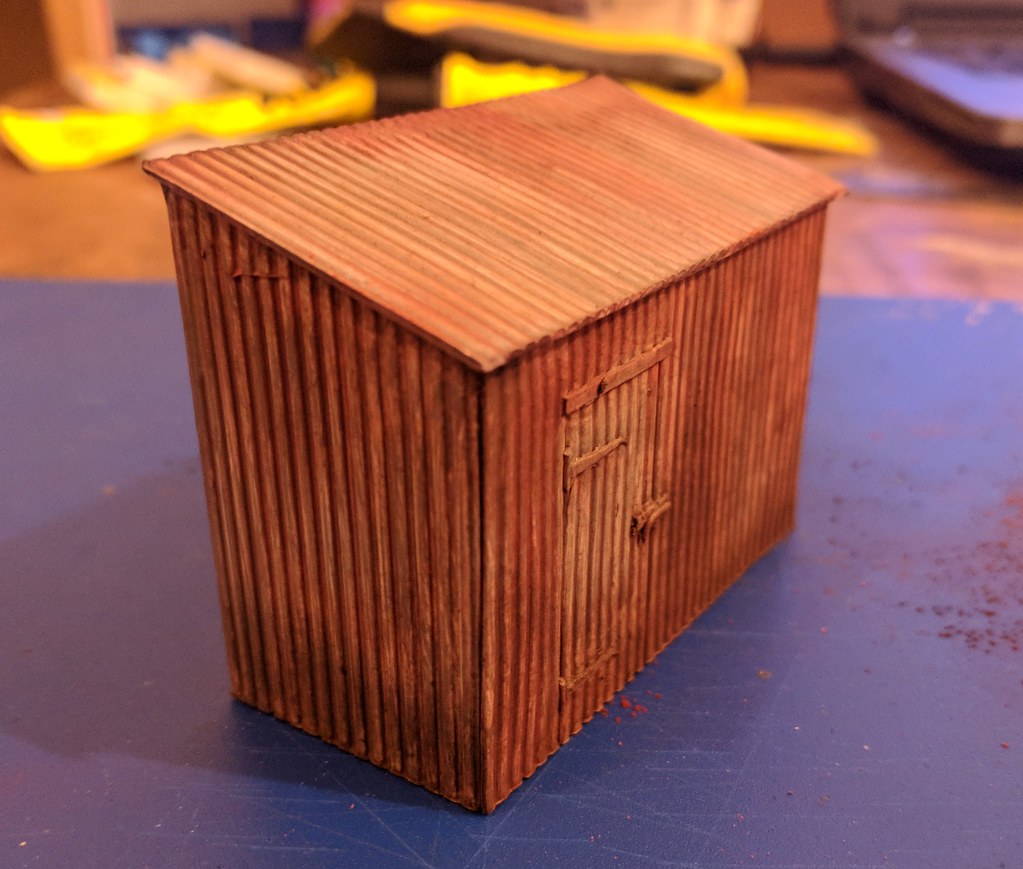
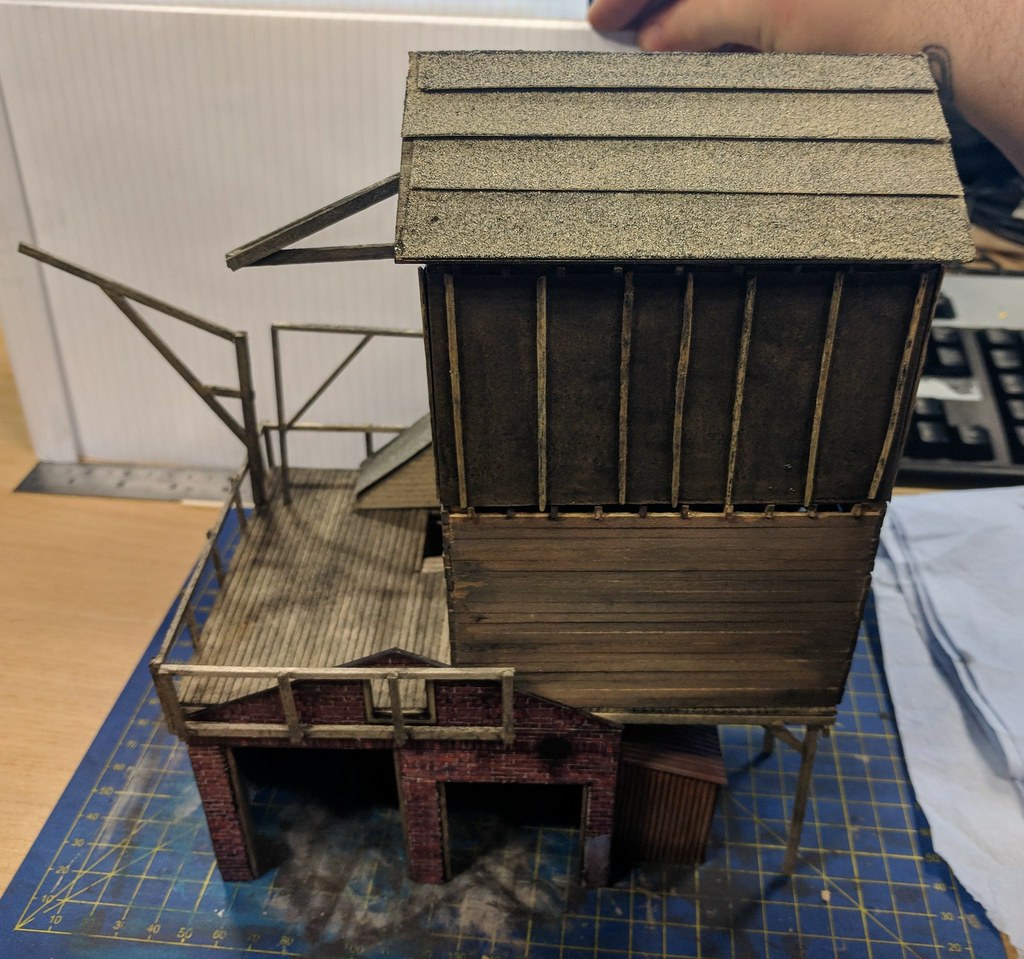
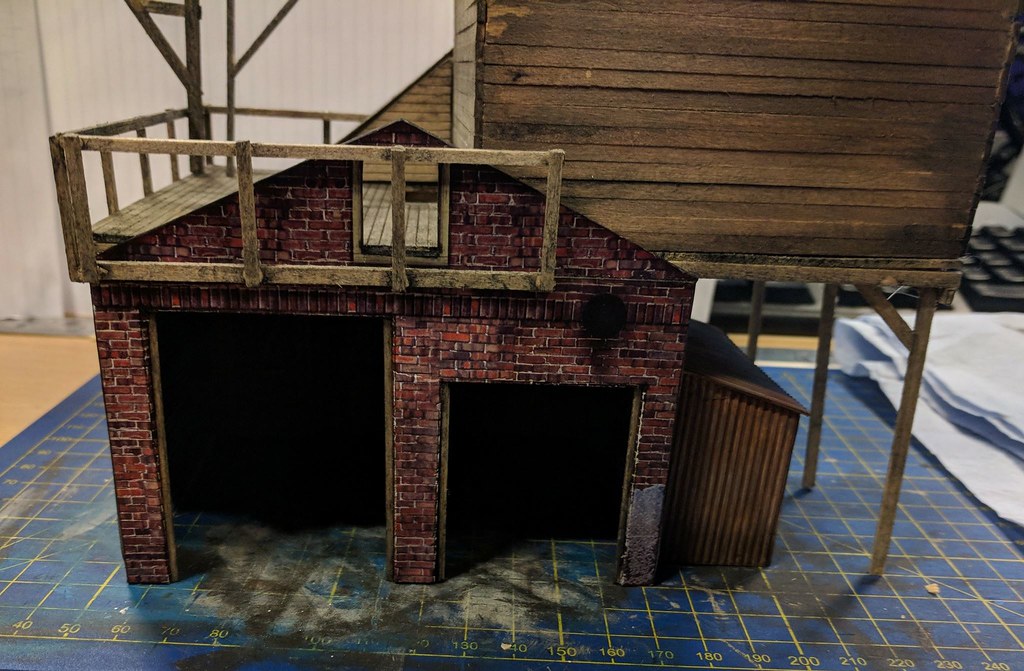
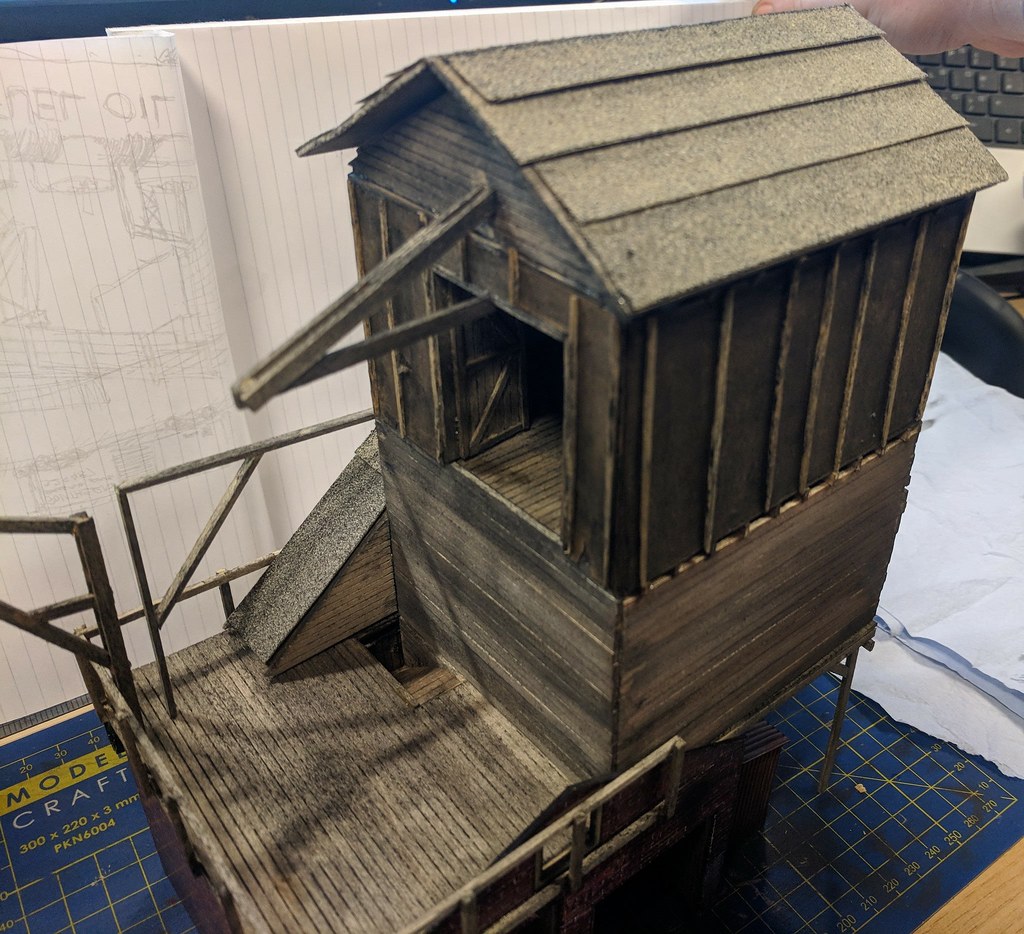
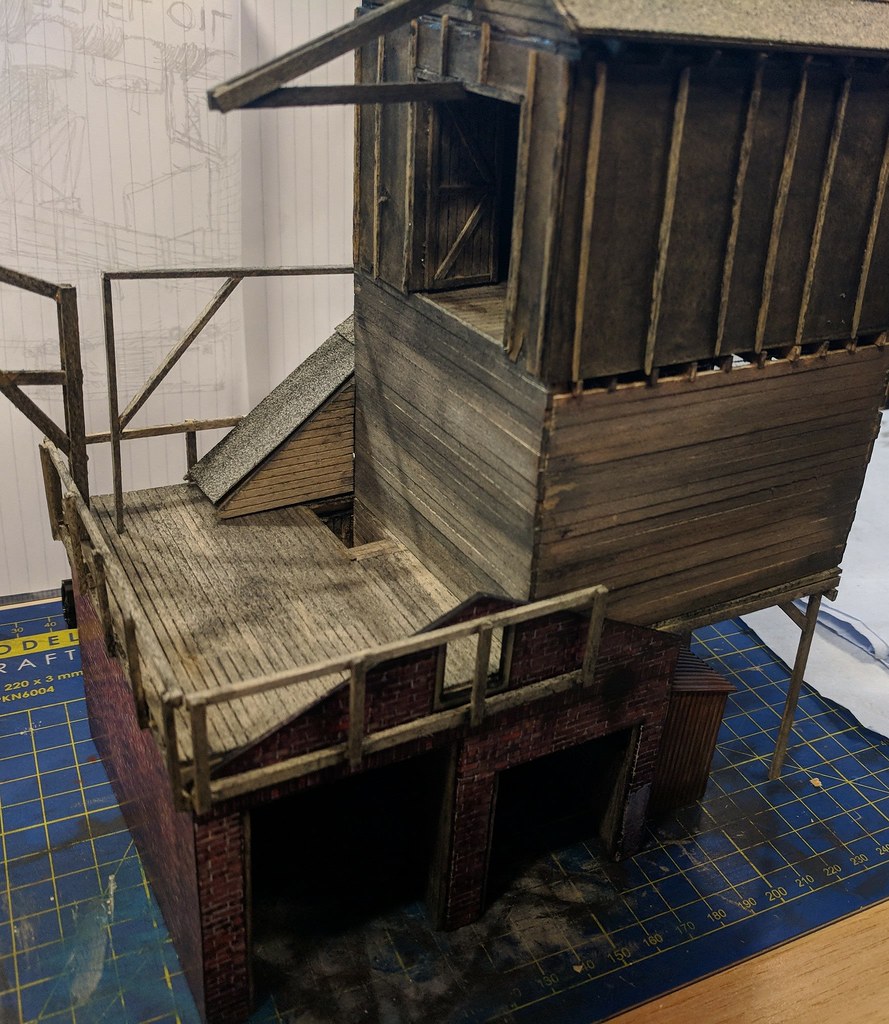
Painting and weathering on a scratchbuilt corrugated metal lean-to shack:

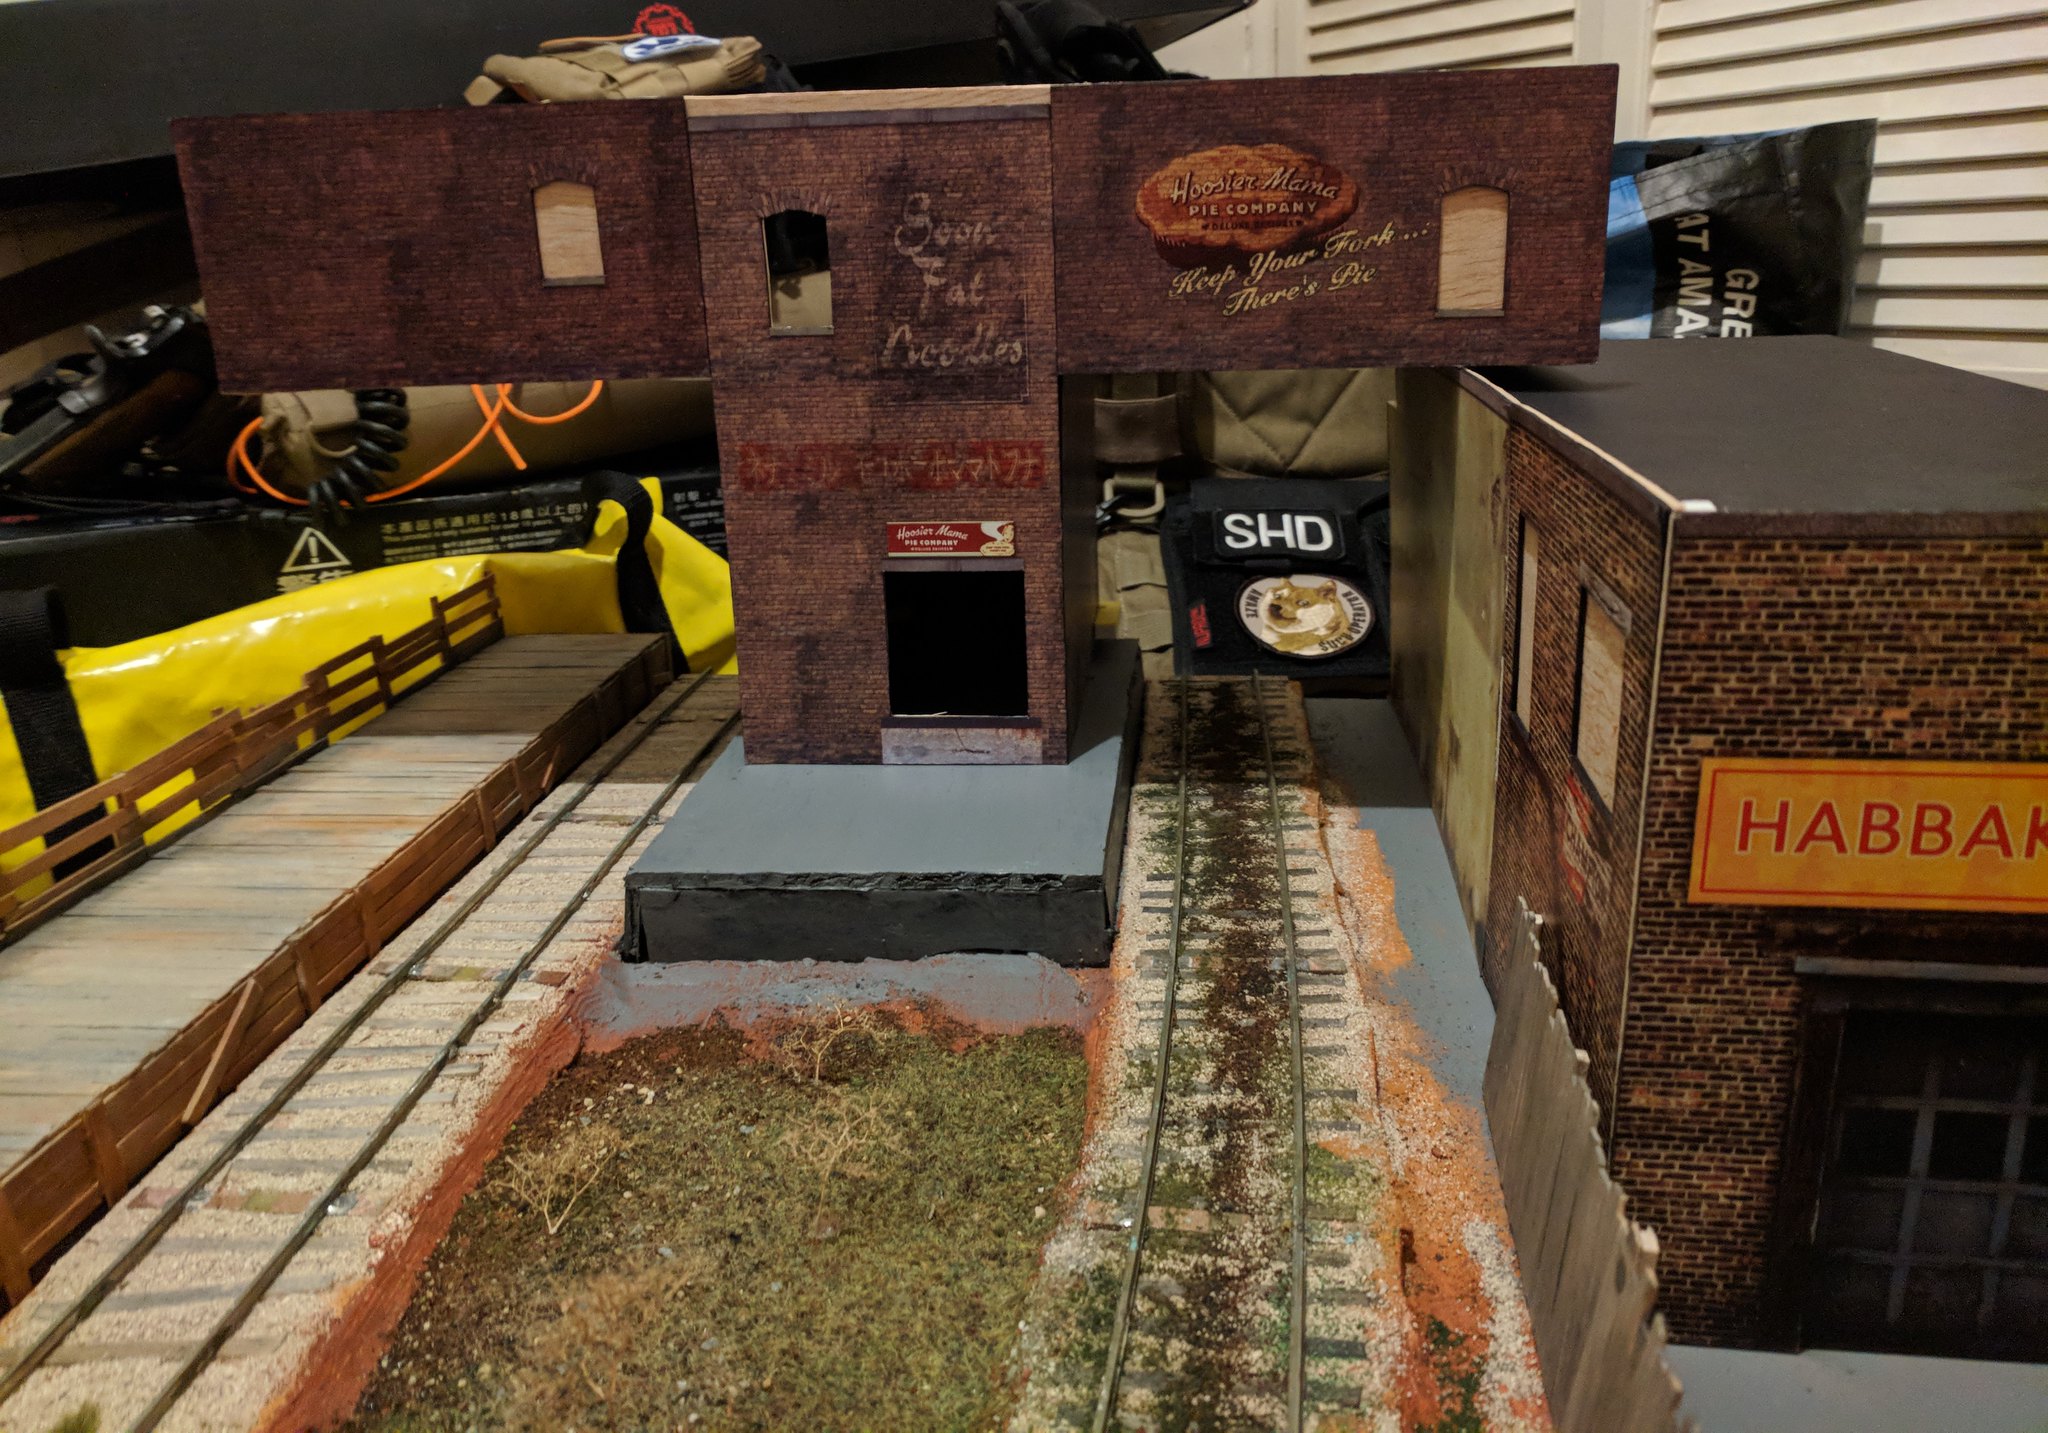
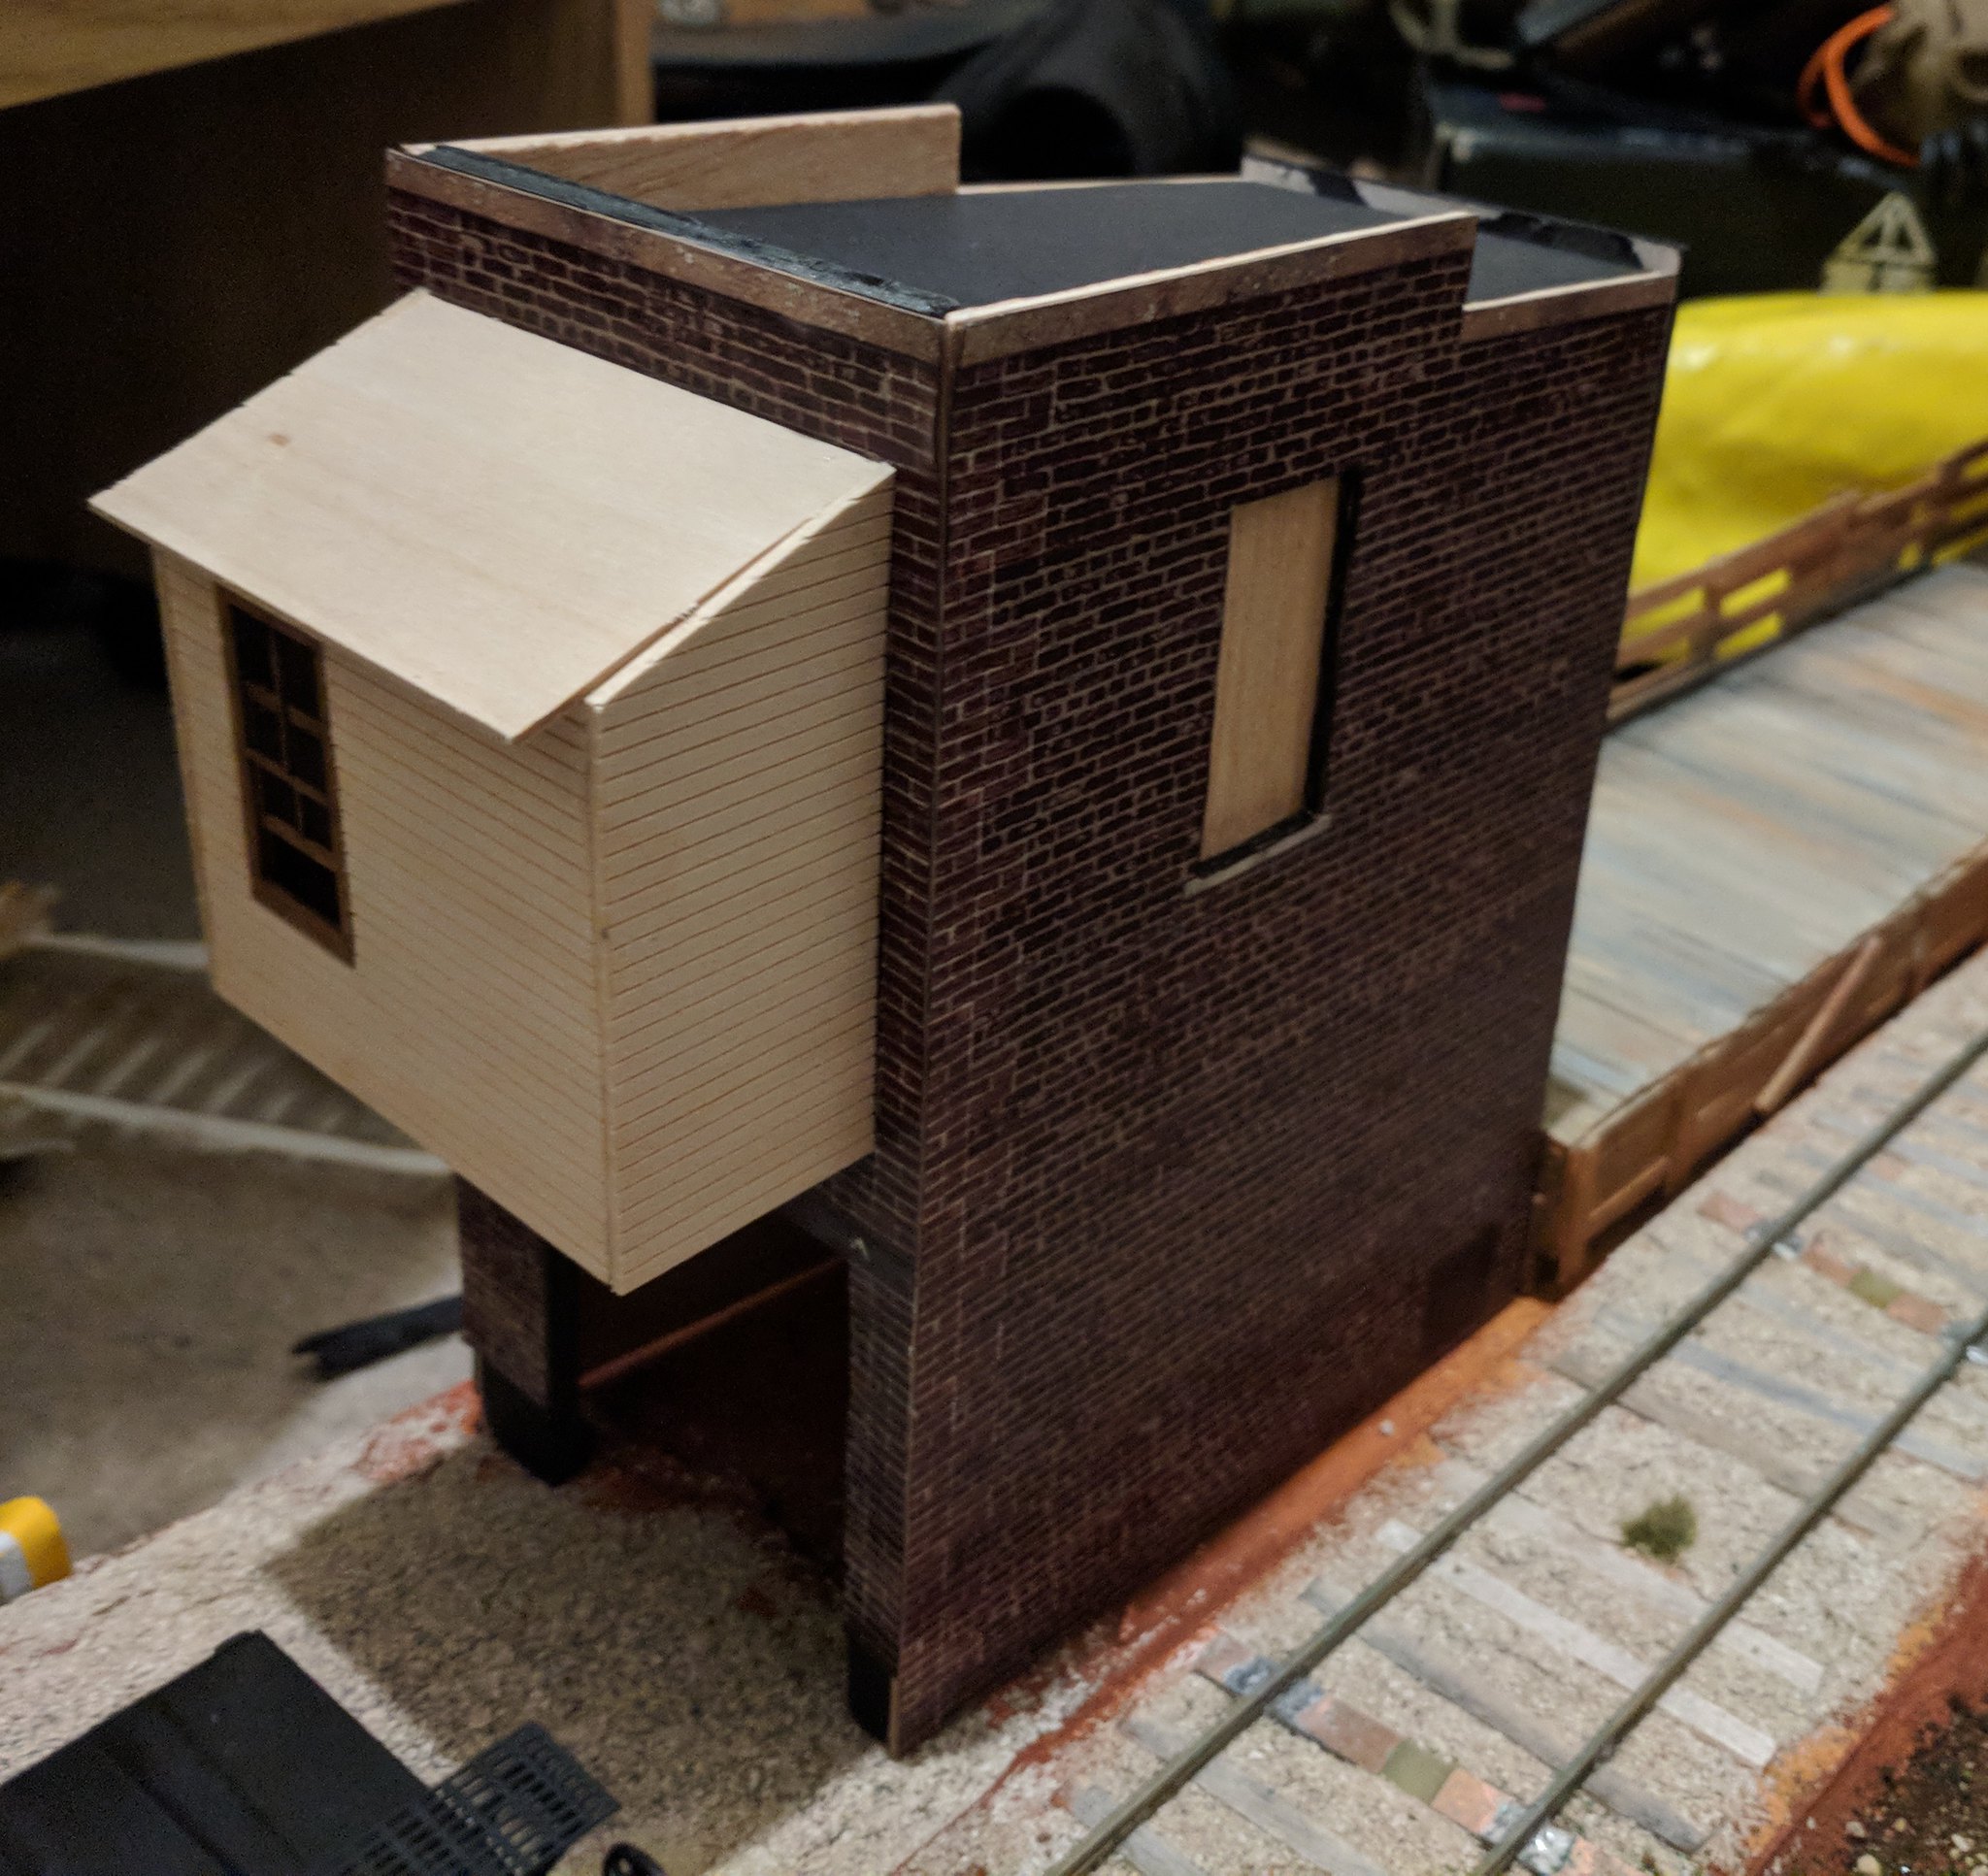
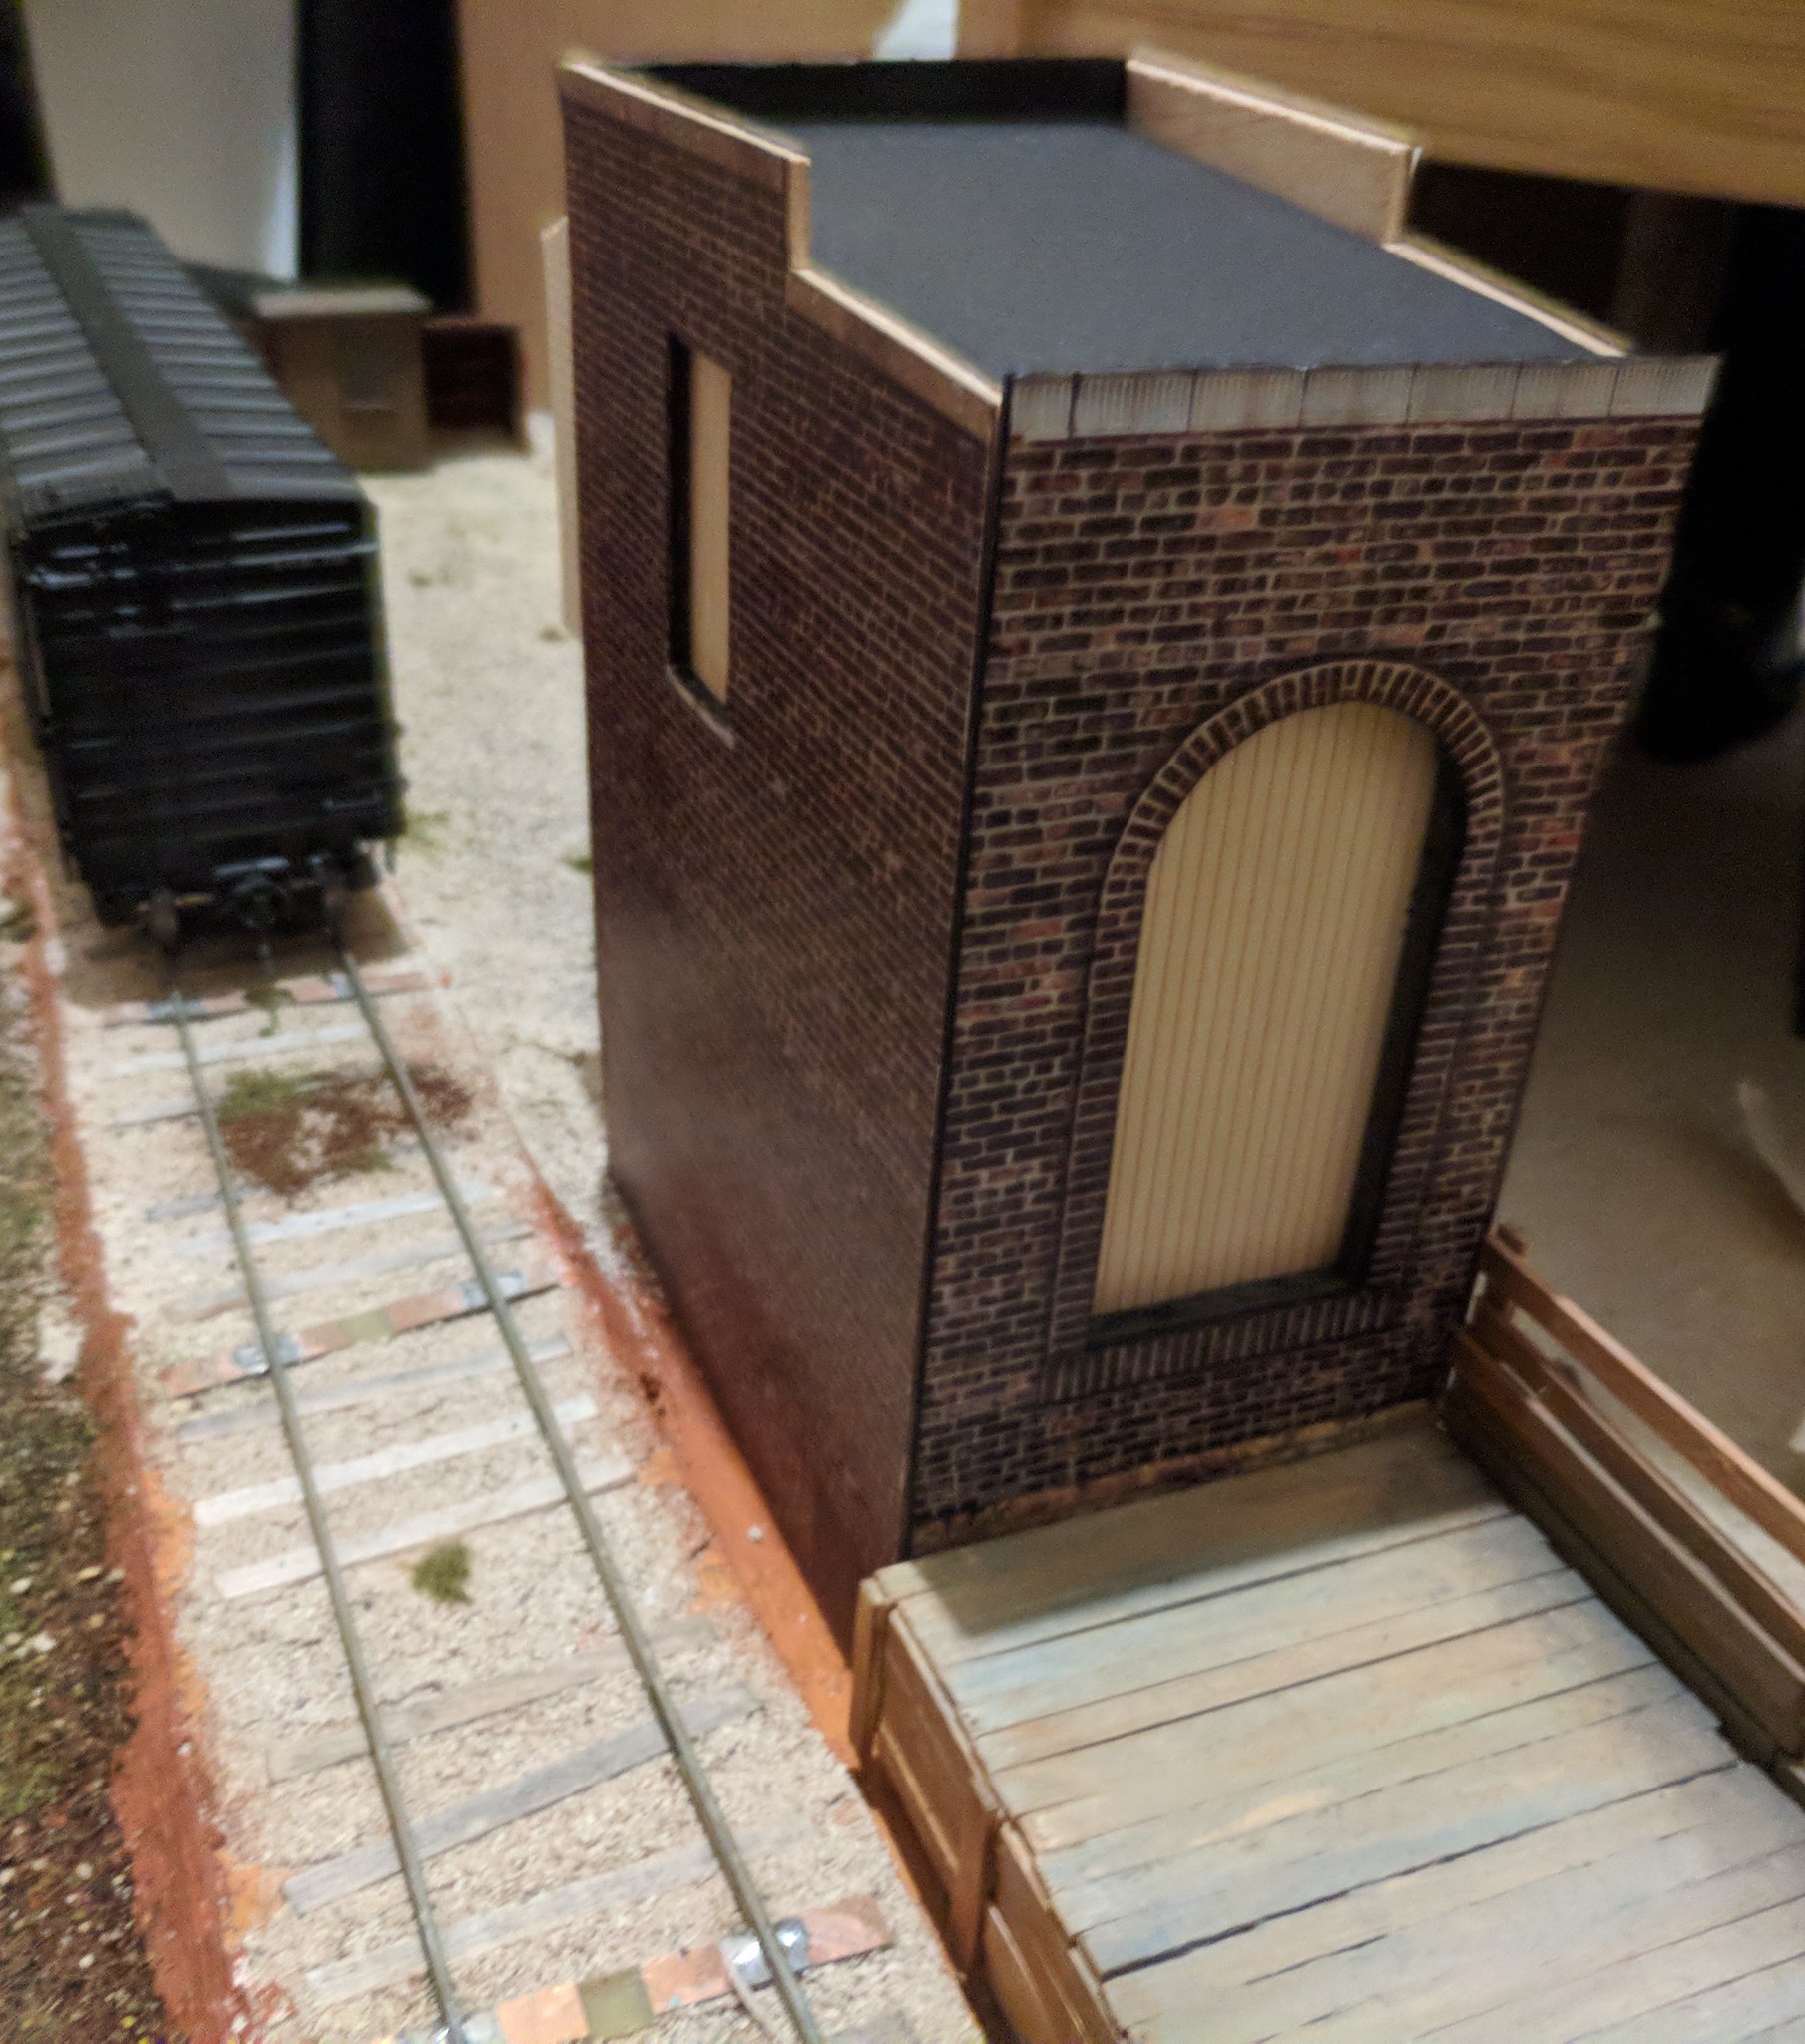
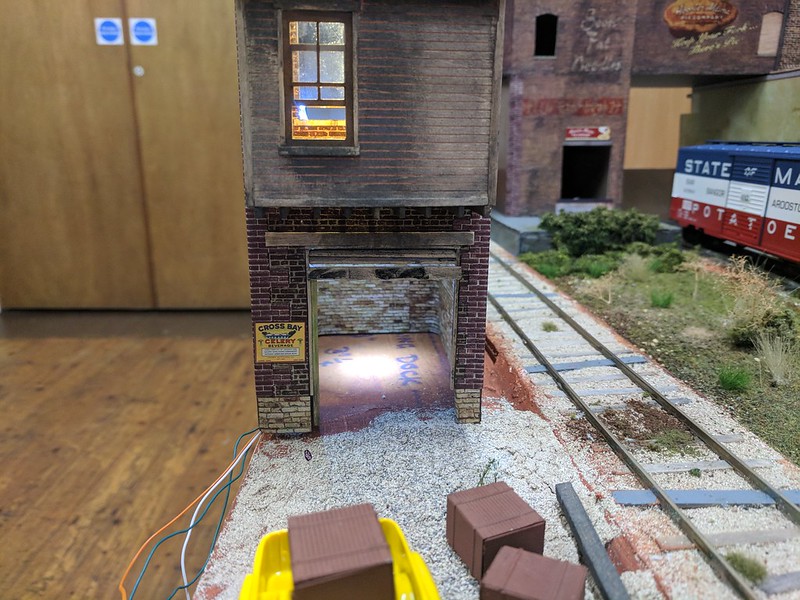
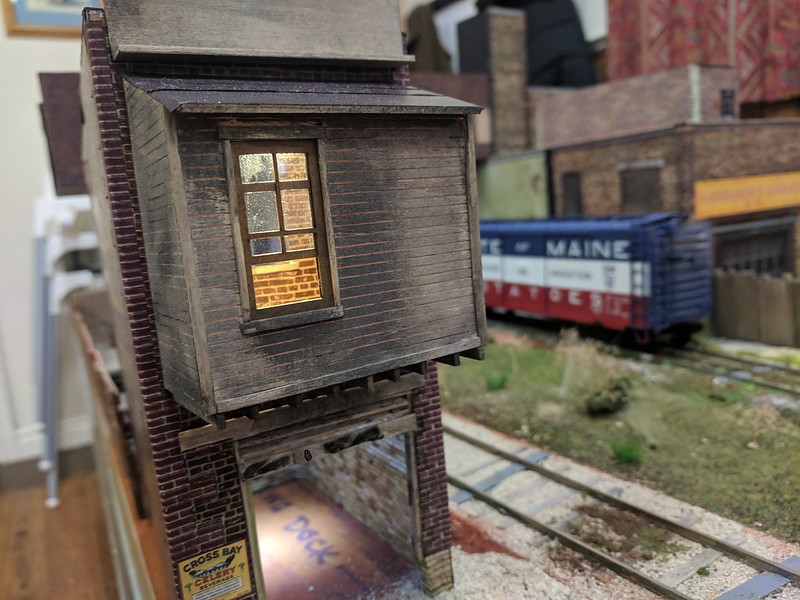
Interior added to the Hoosier Mama building's loading dock:

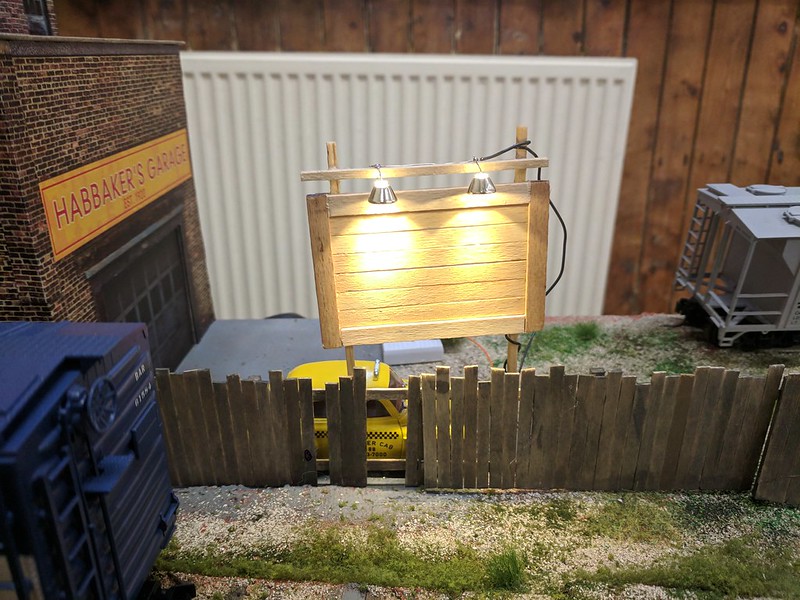
I've also added bricked up windows and capping stones to the same building, then I've cut out one of the boarded up windows on the Habbaker's building, and I've been working on finished the garage with the wooden tower added to the top. I'll get photos of that later, when it' done. :)
Posted
Inactive Member
Posted
Inactive Member
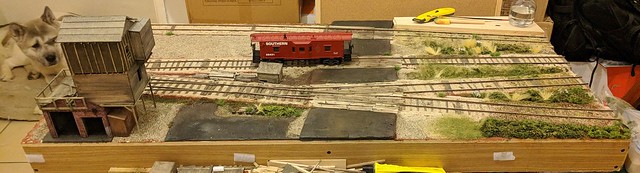
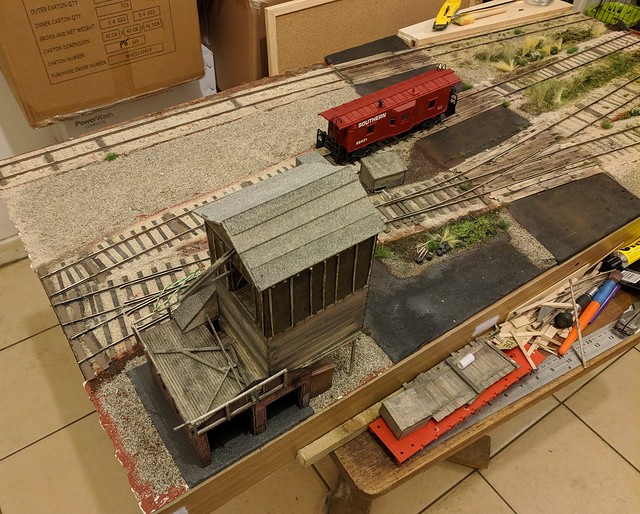
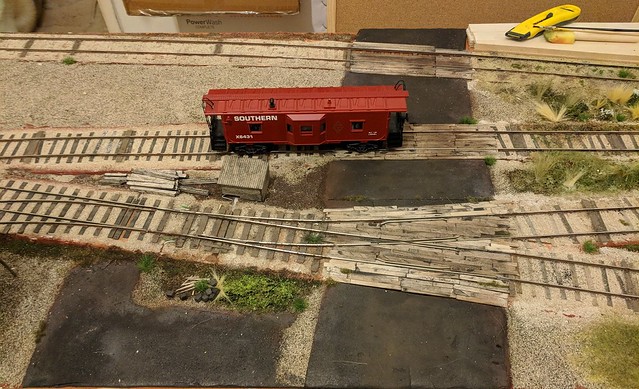
The caboose in the photos is a Lionel 3 Rail model which I am in the process of converting to 2 rail. So far I've done the trucks, next I need to do the couplers and the underframe detail. After that it'll need to add a rooftop solar panel and battery box, then the correct paint scheme to represent a "Local" assigned cab.
Posted
Inactive Member
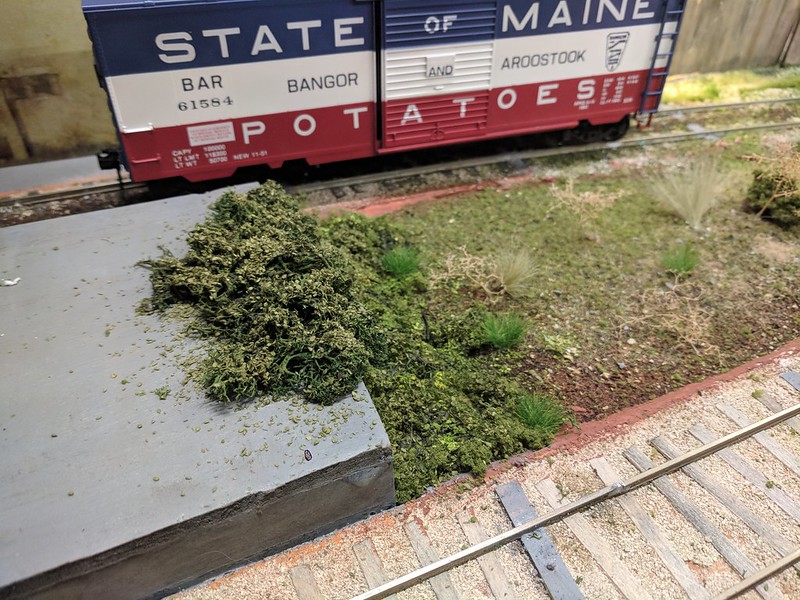
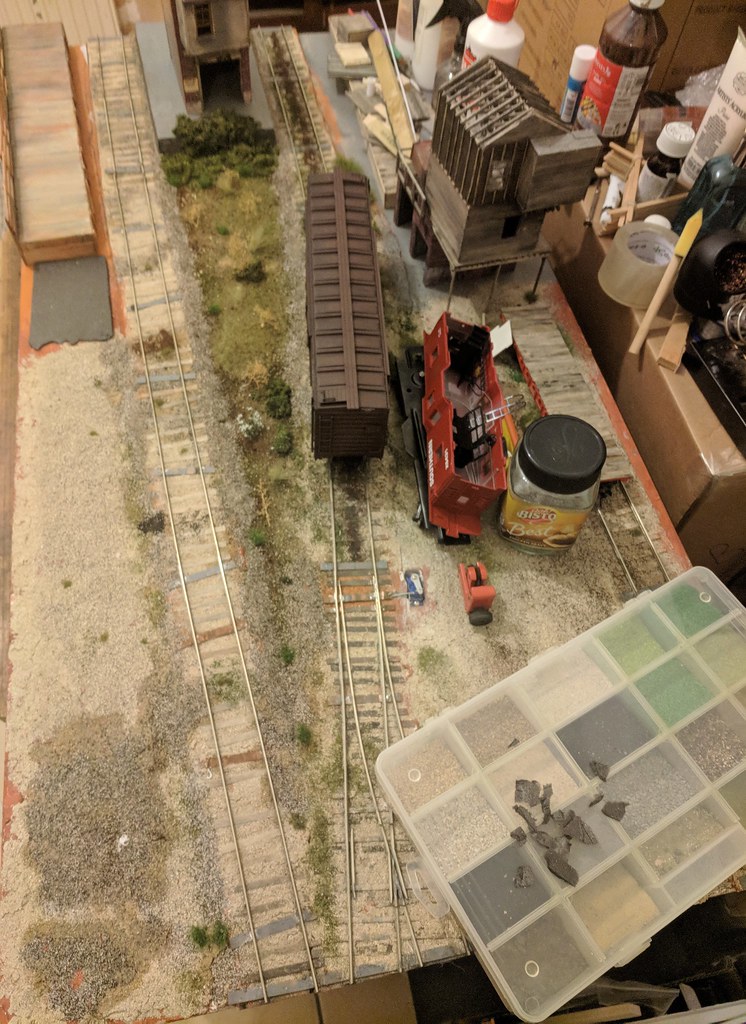
Mostly I've been working on scenery for the centre board, however I've also done a bit of structure and rolling stock work.
First up, I've turned this K-Line 3 Rail boom car…
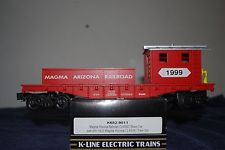
…Into this 2 rail flat car:
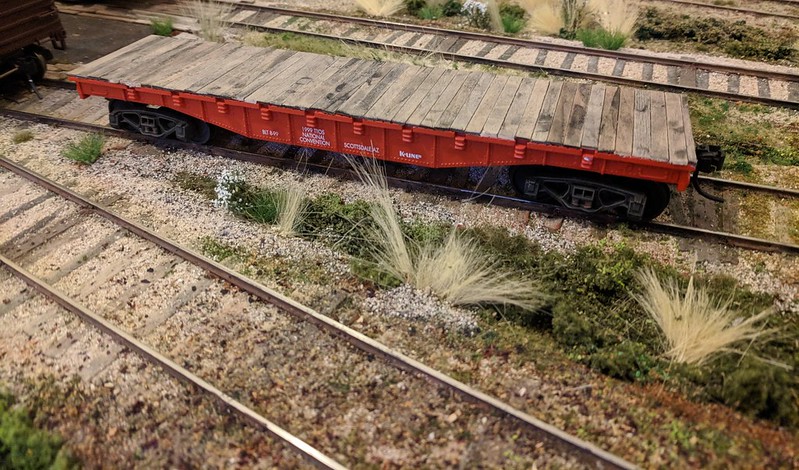
It still needs a brake wheel, then the lettering painting out and replacing with something more fitting - probably CB&Q :)
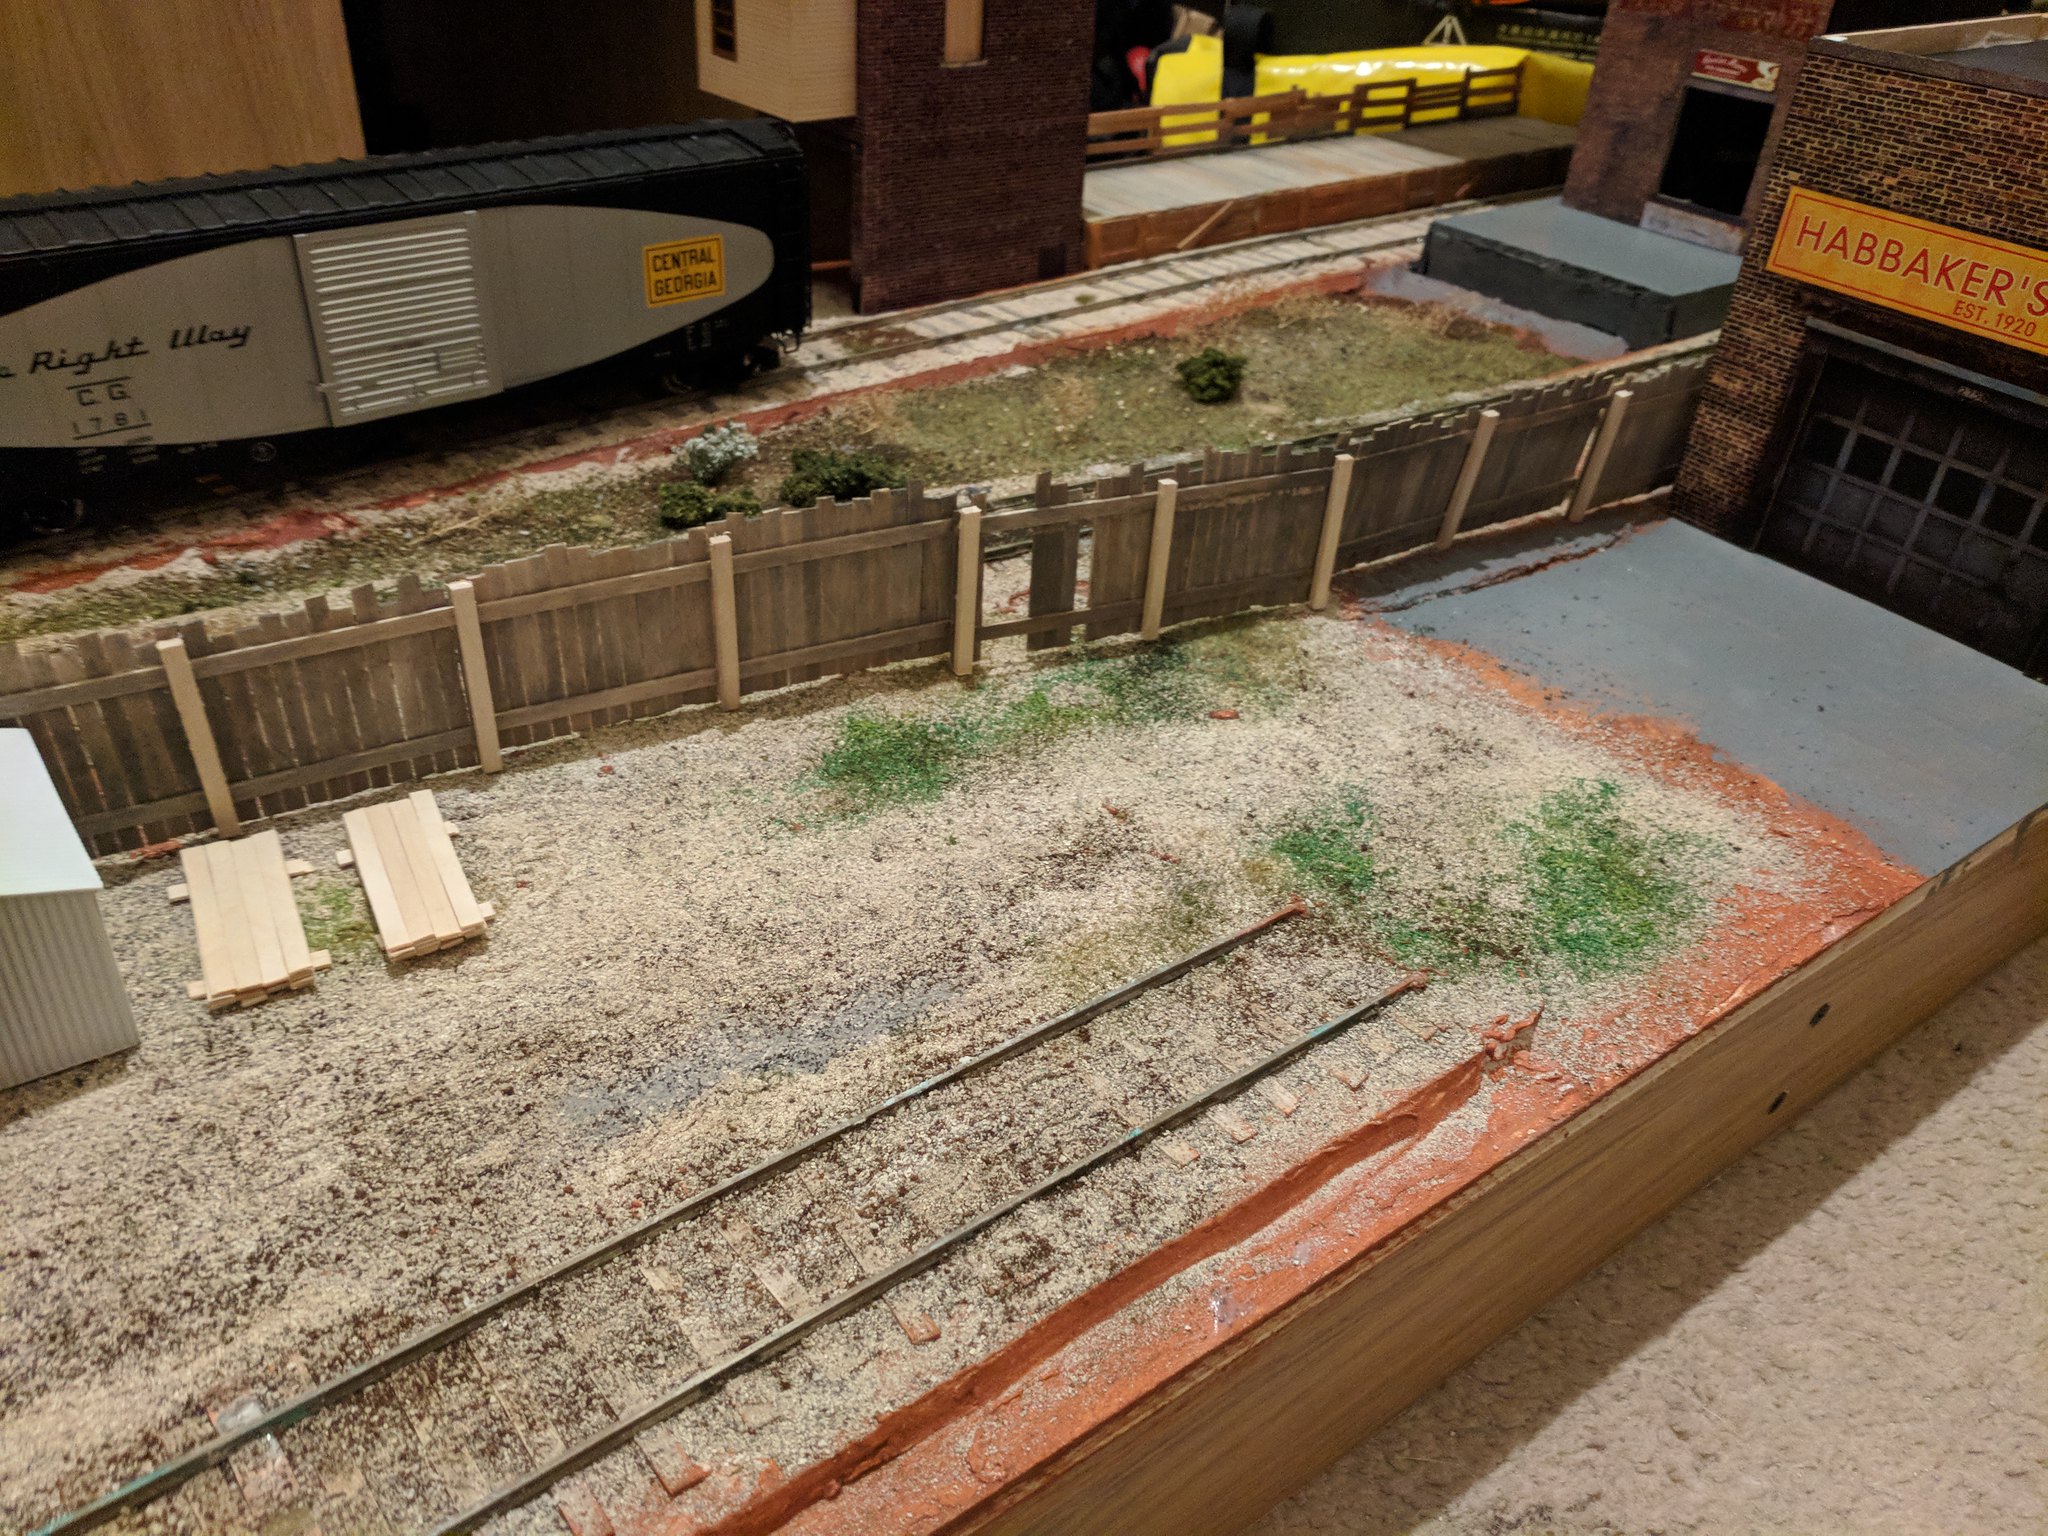
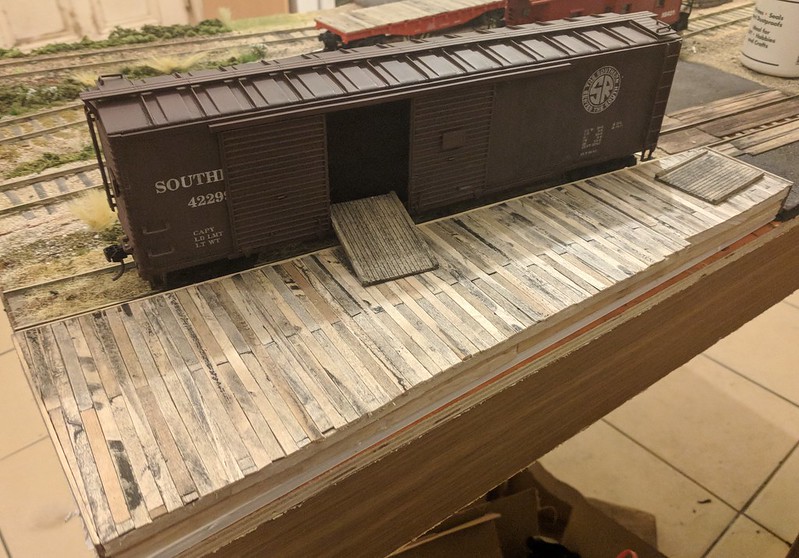
Next, the loading dock at the back of the layout. I've been working on a building to go here, but decided instead to put a loading dock here and then potentially add the building in as a flat building by fixing it to a sheet of plywood which would bolt into the side of the benchwork once the layout is set up at shows. Mainly because space is a premium in my car, and I'm not sure I could fit the originally planned building in the car!
Finally, we needed a way to hide the servos used to power the turnout throw bars. I made a ballast bin out of scrap wood and styrene, and a stack of ties from strips of suitable sized balsa wood.
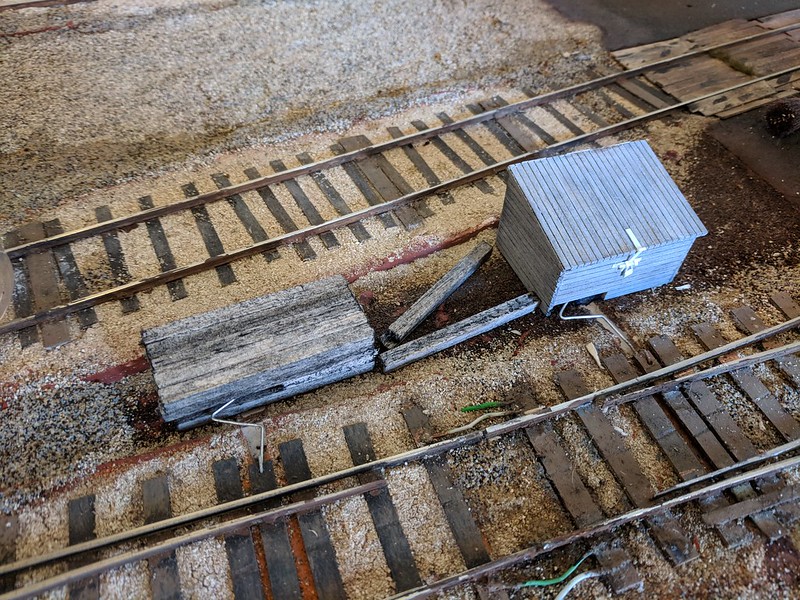
Close ups of the ballast bin. Stanley Knife (box cutter to Americans :) ) for scale.

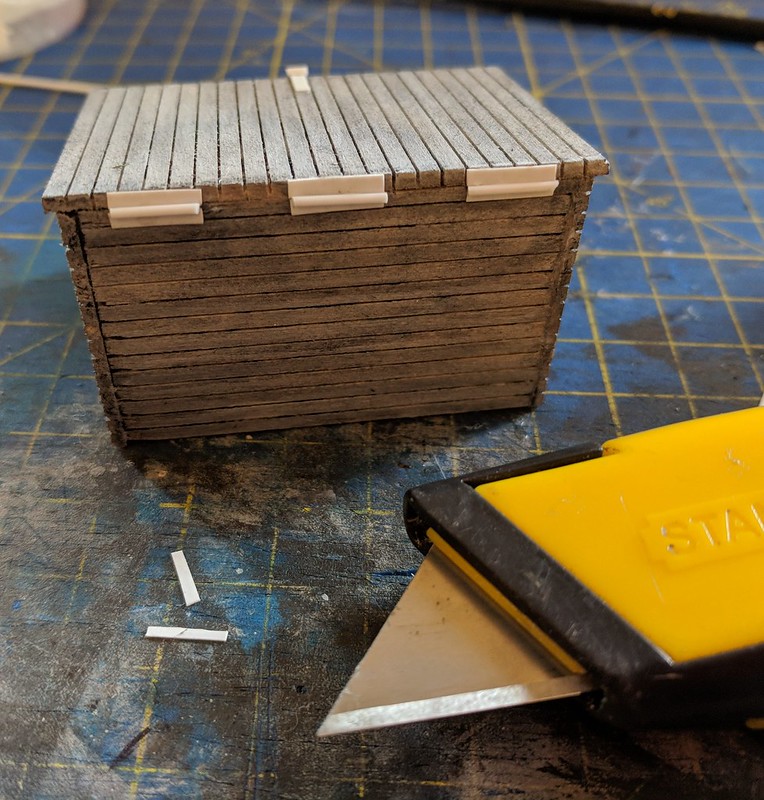
The hinges, latch and padlock all need painting still.
Hopefully I can get the fencing for the lumber yard finished today.
Posted
Inactive Member
Posted
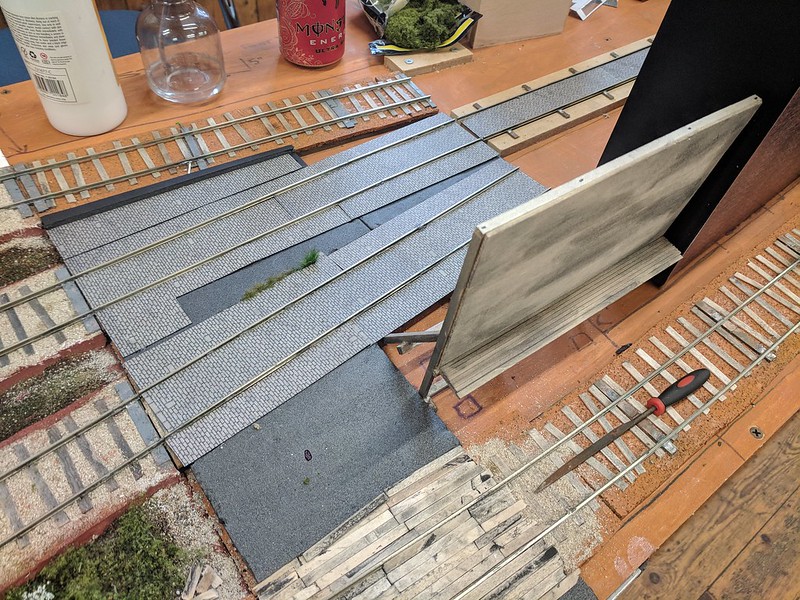
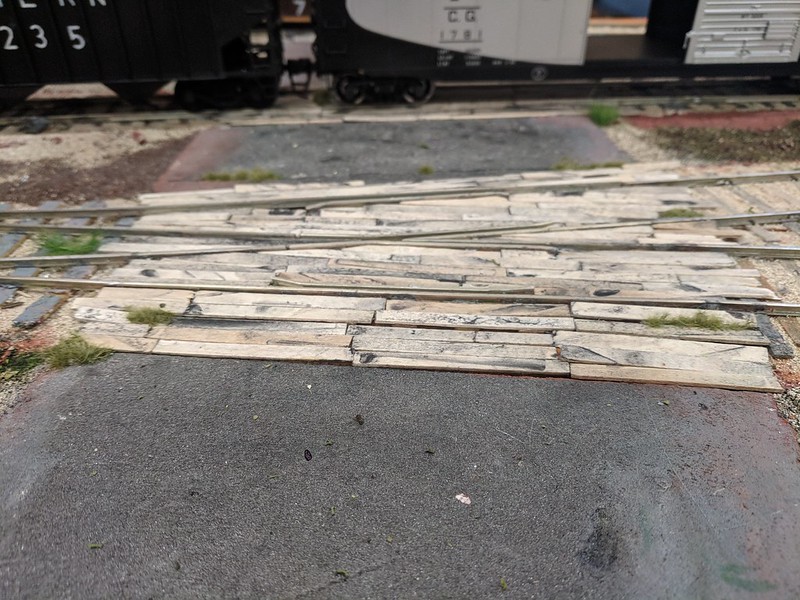
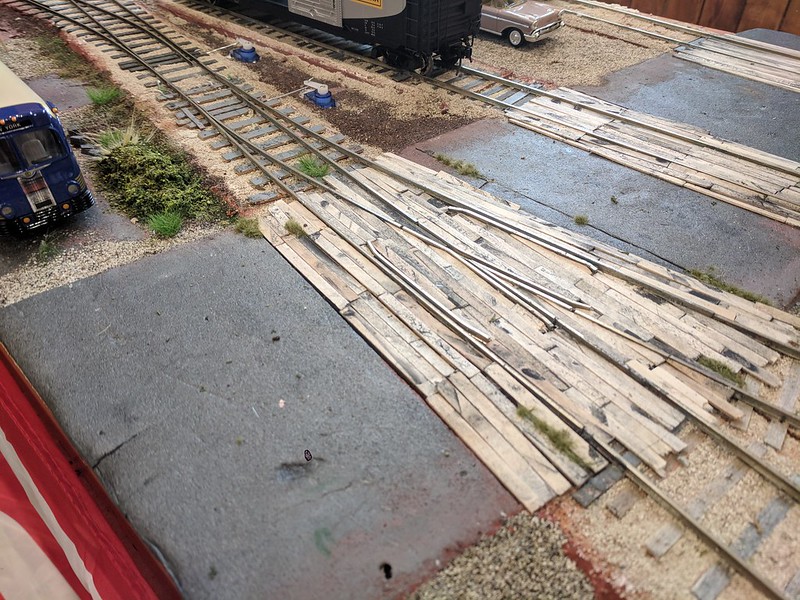
Inactive Member
Afterwards it'll get sand between the cobbles, then the whole thing will be getting painted and weathered. I am hoping to have it done by the end of the week. :)
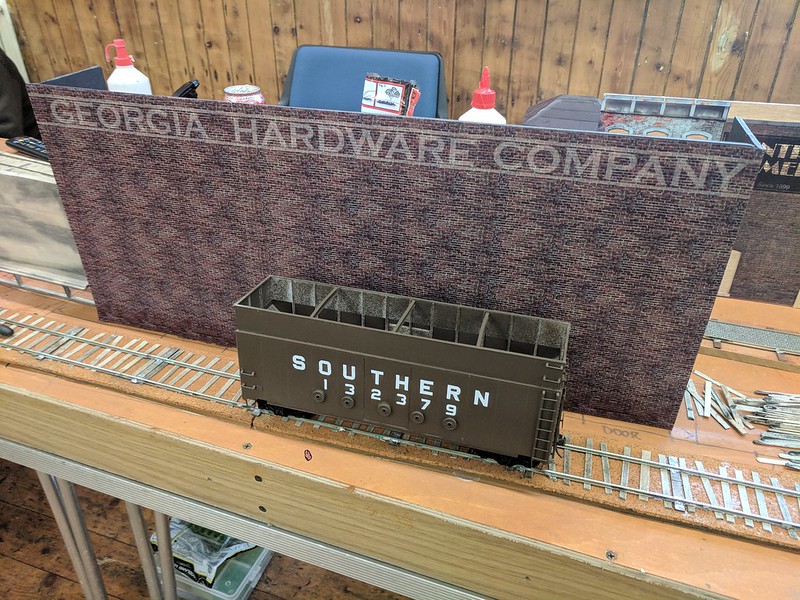
Once that's done, I can get get started on the Georgia Hardware Company building which will go over and around the cobbled street/tracks.
Between these, I'll be working on ground cover on this module, which will hopefully complete the basic scenery for the whole layout, and with loads of time to get it done ready for the Bingham show in 10 days time. ;)

1 guest and 0 members have just viewed this.