Newton Regis, it'll never be finished, hopefully!
Posted
Full Member
A GWR journey through the 1920s and 30s
"Embarrassingly long waiting list." You should see my waiting list to get on the waiting list of things of things to do.That partly built kit looks good and seems to have a Romford worm?
Cheers Pete.

Posted

Full Member
The K's 14xx is actually a good model body-wise, more accurate than the Hornby one. Their models of various GWR autocoaches leave a lot to be desired however, and their GWR diesel railcar is only good for weights in wagons.
Now Kay's white metal models of narrow gauge locomotives were a different beast, chalk and cheese.
I normally replace the wheels with Markits products, new gearbox and motor.
Bill is that a Buffalo? I was looking at the chassis, from memory Wills meant their body kits to go on an Airfix or similar frame and motor. I would imagine the start current of that motor to be more than most DCC decoders would tolerate. I have dark memories of a Wills Collett Goods on an Airfix/Triang chassis gently smoking as the decoder melt down.
Nigel
©Nigel C. Phillips
Posted

Full Member
Phil
Posted

Full Member
Hi Nigel,I've bought a few completed K's models, usually stuck together with a liberal application of 2 part epoxy. Which means a dunk in paint stripper for a few weeks to dissolve the now crystalline epoxy.
The K's 14xx is actually a good model body-wise, more accurate than the Hornby one. Their models of various GWR autocoaches leave a lot to be desired however, and their GWR diesel railcar is only good for weights in wagons.
Now Kay's white metal models of narrow gauge locomotives were a different beast, chalk and cheese.
I normally replace the wheels with Markits products, new gearbox and motor.
Bill is that a Buffalo? I was looking at the chassis, from memory Wills meant their body kits to go on an Airfix or similar frame and motor. I would imagine the start current of that motor to be more than most DCC decoders would tolerate. I have dark memories of a Wills Collett Goods on an Airfix/Triang chassis gently smoking as the decoder melt down.
Nigel
It’s an 1804 Class, not a Buffalo 1076 (outside frames), although I have a new Alan Gibson kit for a Pannier 1076, but want to build a few others before the more sophisticated Gibson kits, as I have an 850 Class as well, sans instructions, which shouldn’t be an issue.
I’ll measure the stall power for that open frame motor and see if I have a chip which can cope, otherwise I’ll pop in a newer motor from stock. Once I have the layout boards operational, I hope to have my kit building gear back from the UK and am looking forward to gaining useful experience with loco kits. My nemesis seems to be folding up tiny High Level etched hornblocks, but I’m determined to succeed!
My first loco kit was the Wills ex Taff Vale U1 which sits on the Triang 0-6-0 chassis and was a terrible runner. It will eventually need a new chassis and as you said, Markits gearbox and wheels.
Best,
Bill
At 6'4'', Bill is a tall chap, then again, when horizontal he is rather long and people often used to trip over him! . . . and so a nickname was born :)
Posted
Full Member
The only way to get round the kit stockpile was to stop buying stock Pete, as the time left to build all the kits may be more than I have available!"Embarrassingly long waiting list." You should see my waiting list to get on the waiting list of things of things to do.
That partly built kit looks good and seems to have a Romford worm?
Onwards!
Bill
At 6'4'', Bill is a tall chap, then again, when horizontal he is rather long and people often used to trip over him! . . . and so a nickname was born :)
Posted
Full Member
Actually invented in 1942, came on the market in 1958, I remember it as not like any other glue at the time, my brother sold the kit a few years ago which was still solidly stuck together :)
My ex Taff Vale U1 and the saddle tank above was epoxied together Phil and seem robust enough for further service, although I'd now use low melt solder.
I remember the waiting time for the 24 hour (or thereabouts) epoxy to go off made for extended construction times, but also made you careful with assembly!
Bill
At 6'4'', Bill is a tall chap, then again, when horizontal he is rather long and people often used to trip over him! . . . and so a nickname was born :)
Posted
Full Member

Low melt solder though is the way to go with white metal :)
Phil
Posted

Full Member
Recently, things may well have changed and kits could be entering a second life.
Having said that, my skill levels are still in the old life so I can't see me tackling a locomotive kit any time soon. I do however, follow those who do posess the necessary skill with great admiration.
'Petermac
Posted
Full Member
Phil
Posted
Full Member
Good looking model though. Checked the photo, it's on the box.
I started out in the black art of soldering putting some Langley white metal OO9 models together, then moved on to On30 narrow gauge ones. K's kits are sometimes more like welding than soldering. I think the original instructions For K's call for "a good adhesive" or solder.
Good quality low temp. solder is now expensive and increasingly hard to find.
Nigel
©Nigel C. Phillips
Posted
Full Member
Hi Nigel,
I've always sourced my low melt solder from DCC Concepts (100 deg), but just checked the current price against what I paid just a few years ago and it's 50% more expensive!
Little seems immune to high price increases nowadays.
Best,
Bill
At 6'4'', Bill is a tall chap, then again, when horizontal he is rather long and people often used to trip over him! . . . and so a nickname was born :)
Posted
Full Member
Phil
Posted
Full Member
The world is getting stranger and more crazy, as people worry more about the future, forget how to make love, not war and try to make as much money as possible.
Little good that will do them in the long run.
Be good everyone and don't worry, be happy,
Bill
:cheers
At 6'4'', Bill is a tall chap, then again, when horizontal he is rather long and people often used to trip over him! . . . and so a nickname was born :)
Posted
Full Member
I've used the Carrs range extensively, I tried the DCCConcepts range a few years ago. No advantage that I could see.
Nigel
©Nigel C. Phillips
Posted
Full Member
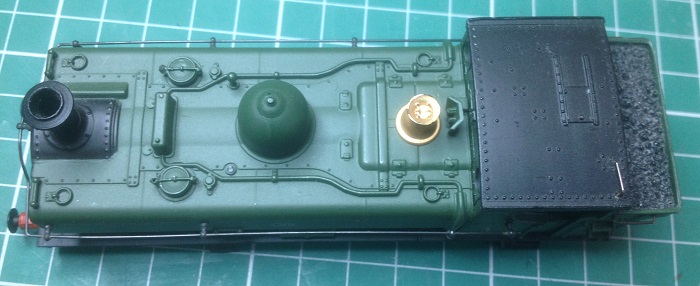
As wiring progresses on the branch, for a diversion, I made a start on the first of many Panniers needing nick and tuck surgery before some aspiring manufacturer brings us a much overdue all singing and dancing modern high fidelity standards Pannier to make the effort redundant. I picked an early used example to sort out my technique which will naturally evolve on subsequent victims.
For removal: top feed and pipework simply not present on pre-war Panniers, a fact missed by Mainline, Dapol and Bachmann.
Chosen trimming tool:

It is extremely sharp and satisfyingly heavy, which means it parts the raised plastic mouldings easily and is very controllable after a little practice, shaving layers off until pipework is near flush.
One hour's progress:

I've found that with just a little practice and a deal of patience with my new chisel, one can get even part of the cutting edge into quite small nooks and crannies. For anything trickier, there are two smaller sizes available.
There is no backhead detail on this example, which looks exactly the same as the Mainline model, although this is branded Bachmann. Fortunately, I have a 57xx backhead obtained from the really efficient Bachmann Europe spares service.
A few days later sees everything removed from the bodyshell of the now numberless 57xx and the front RH step glued back on and drying before a warm soapy wash to remove grease, etc before the primer rattle can is deployed.
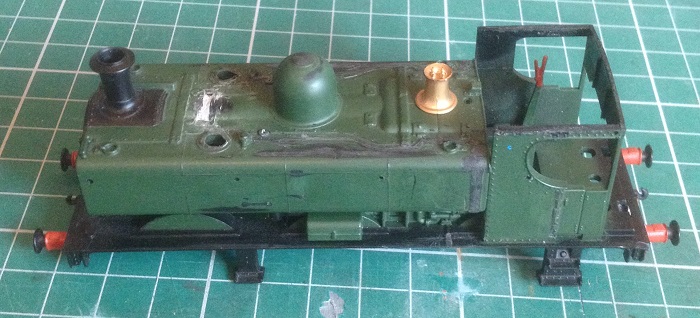
While rummaging in a box, not expecting to find any surprises, I came up with my first (and only) loco kit build, assembled and hand painted over 40 years ago.
Sat next to the Bachmann factory finished 57xx, the Precision Paints colour rendition seems to still be effective.
Some primer found its way over the ex-top feed to show the scars. Here's a photo, scary enough, but essential to indicate where more effort is needed. I never used to give this a thought, but the camera is now part of the modelling toolkit.
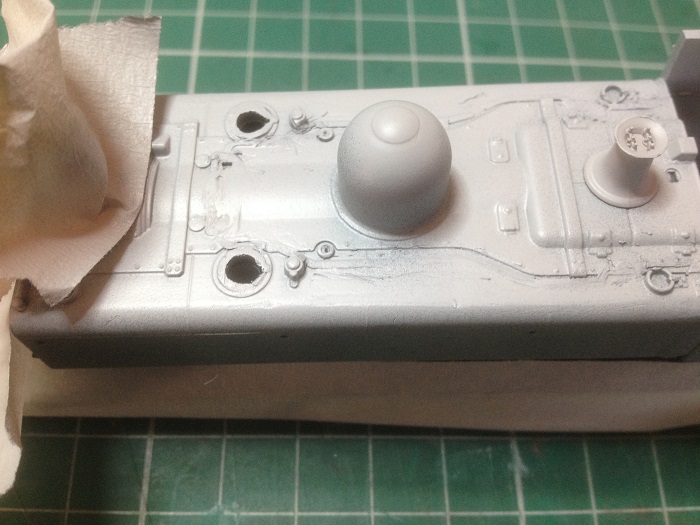
. . . . and I see that fried egg is still very much there atop the dome, so out with a sanding stick and some fine abrasive paper and I'm much happier.
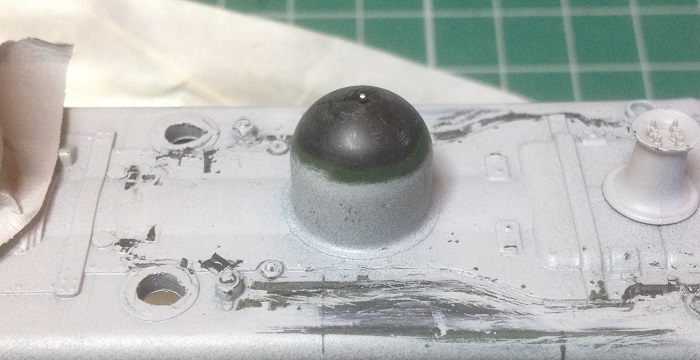
The fried egg has gone and a bolt of thin brass rod installed into the dome to represent the bolt.
After abortive attempts to attend a kit loco chassis building course at Pendon, I'm off to a weekend's residence at Missenden Abbey at the end of this week and have been busy preparing kit and materials to take with me.
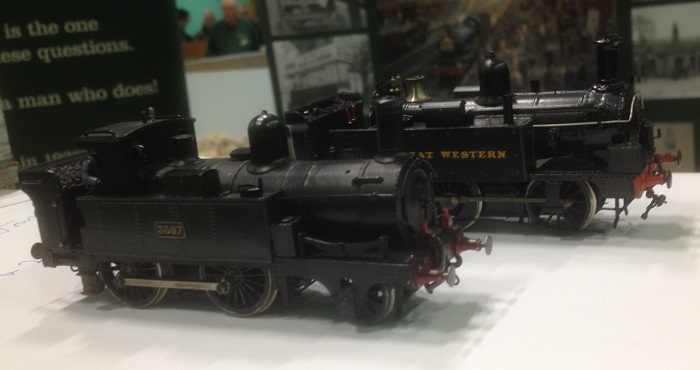
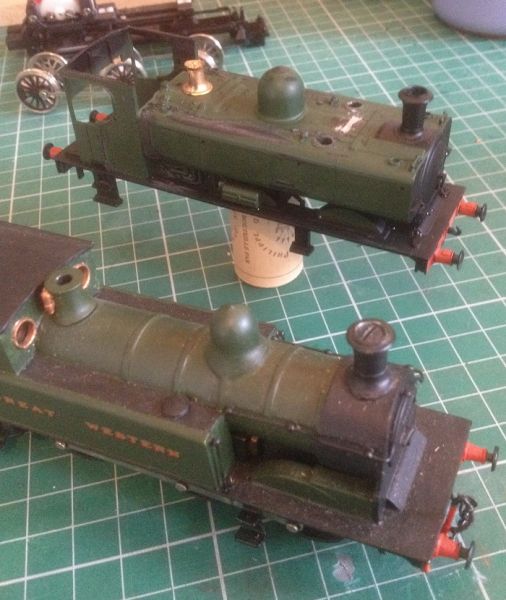
This pair were recently seen at the Southampton Model Railway Society exhibition at Eastleigh at the end of January and are the two which I am starting my loco building with, being a small Metro and 633 Class. I'm starting with the Metro and will hold back until I get to the course for the critically accurate build of the chassis, where frames, axles, wheels and coupling rods all have to be assembled in perfect harmony in order for it to run smoothly.
So I've started with the bodyshell and have over two days made useful progress with the bodyshell assembled sufficiently to enable trial chassis fitting at the Missenden course at the end of the week.
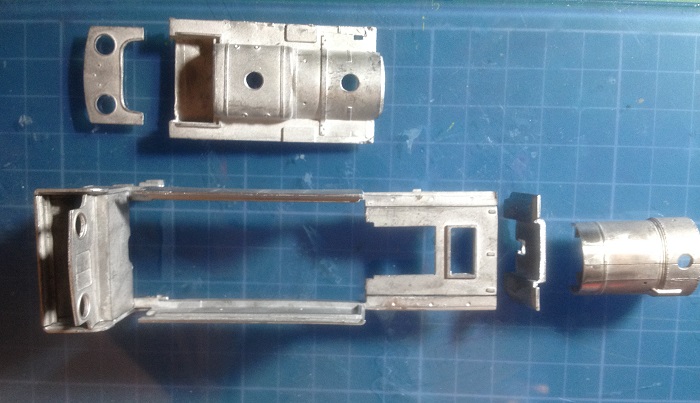
As I recalled from my other Finecast build, some 40 years ago, the instructions are only really a guide, as you need to be extremely careful how you exactly fit the parts together, as you don't want to have to adjust them later, so the first few castings were glued after much fettling and trial fitting and as usual for all my builds, I assemble the parts on a trusty flat glass shelf with the aid of small precision engineers' squares to get everything, well, square!
First joint: once correctly in position and with meeting surfaces cleaned, a drop of thin penetrating cyno glue is introduced to the joint, which speeds along it by capillary attraction, much like a well prepared solder joint.
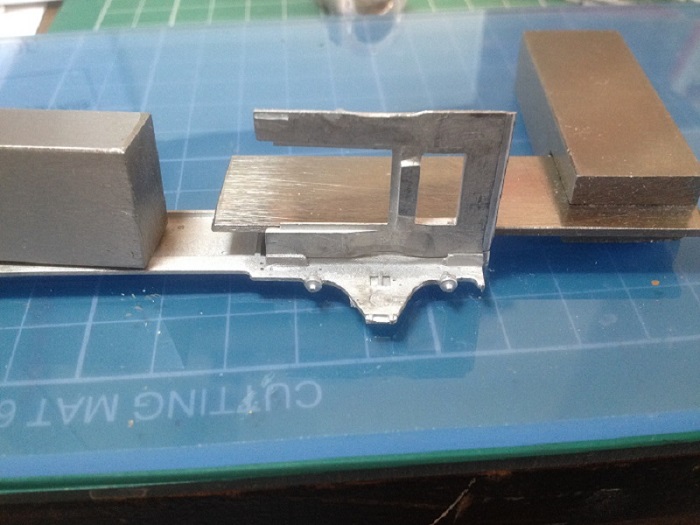
Remaining parts follow until a recognisable form emerges.
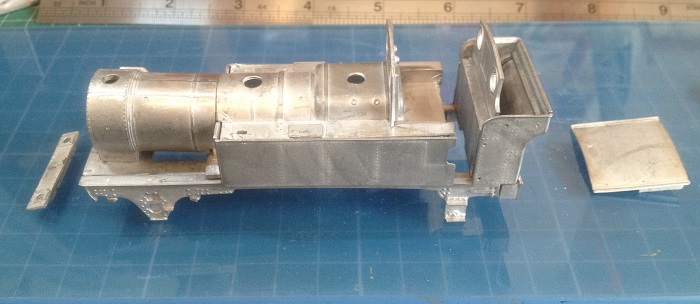

The smokebox isn't permanently fixed yet, as it needs some final fettling and filling, but everything appears to be on the straight and level.
As soon as my High Level Kits order arrives, I'll get a gearbox built, then will probably very carefully open up the holes in the conrods to match the crank pin bushes, but not too much, as the extent of compensation is yet to be decided.
It's good to be building something again.

More soon,
Bill
 Last edit: by Longchap
At 6'4'', Bill is a tall chap, then again, when horizontal he is rather long and people often used to trip over him! . . . and so a nickname was born :)
Full Member
Little things:


Alan Gibson smokebox door darts are particularly fiddly little blighters to fettle and fix in position, but after a couple of searches to retrieve a couple of parts from the floor, they were finally glued into position.
Moving to the brake gear, where there are four shoes to be rigged from the chassis on 0.45mm diameter wire, each shoe comprising two etches to be laminated together, thus:

They rigging is pretty much left for you to devise a practical method of getting the shoes to face the wheel treads (withing their side play zone), based not so much on the vague instructions, but rather on research and learning how to handle such tiny parts. A 3x Optivisor headband and an LED worklight were essential, plus some sage advice from other modellers, but the use of spacing the hangers from the chassis frames with 2.5mm long 1mm diameter brass tube proved sucessful:

Finally for now, some painting to the cab interior;

Still more to do, including a pair of tiny brass valve handes to mount onto wire spindles either side of the spectacle plate. All good fun, more later.
Best,
Bill
Last edit: by Longchap
At 6'4'', Bill is a tall chap, then again, when horizontal he is rather long and people often used to trip over him! . . . and so a nickname was born :)

Full Member
Curious as to why you took the top feed off the pannier. Top feeds were added in the latter half of the 1930s I think and by nationalization, not a lot were without this feature.
I actually added top feed to a friends second hand loco since his era is early 1950s.
Good stuff.
John
John
Posted
Full Member
After a slow start, whilst I improved my soldering to a level not to be ashamed of, not forgetting to learn how to hold very small parts while fettling and assembling them, not forgetting to get them square and the moving parts turning correctly, I'm really enjoying building locos. The process was greatly improved with a weekend loco building course at Missenden Abbey earlier this year.
The Newton Regis branch is set in the 1920s with appropriate stock and road vehicles, people, etc, while the continuous mainline run will be set in the 30s, until the outbreak of war, hence no top feeds, which I recall began to be fitted to Panniers from 1942.
I should hopefully be able to spend a little more time at the work bench from September.
Best,
Bill
Last edit: by Longchap
At 6'4'', Bill is a tall chap, then again, when horizontal he is rather long and people often used to trip over him! . . . and so a nickname was born :)
Posted
Full Member
4mm Loco Chassis Construction
By coincidence, he used a Bachmann Pannier as a demo project and I had the same model with a Perserverance chassis to build. By following the book I got the chassis to work right away - a great boost to ones confidence. I always used the compensation method, not trusting myself to get a chassis perfectly square.
While I have shied away from loco kits in 0 (despite buying a 3rd hand Slaters 1F kit) I have built a fair few etched wagon and van kits - very enjoyable.
Yes, as I suspected, your era is pre top feed. Takes courage to make that mod.
John
John
Posted
Full Member

I think I'll paint the gauges next.
It'a all go !
At 6'4'', Bill is a tall chap, then again, when horizontal he is rather long and people often used to trip over him! . . . and so a nickname was born :)
1 guest and 0 members have just viewed this.