N Gauge - Newcastle Emlyn****
Posted

Site staff
Ed
(Is that another jig-saw Alan ?)

Posted
Legacy Member
:thumbs;-):cool:
my webcam link http://86.19.184.67:8080
Posted

Inactive Member
Max
Port Elderley
Port Elderley
Posted

Full Member
Very glad to have your thoughts again Owen, love the round house that you are building!
All these planks that are being so beautifully put together have inspired me to forge ahead with what to me is my own "plank", that being the Mill, bridge and halt area of my layout.
In particular, Mike's great, and rapid progress on Pig Hill Yard made me want to get on with some more vegetating.
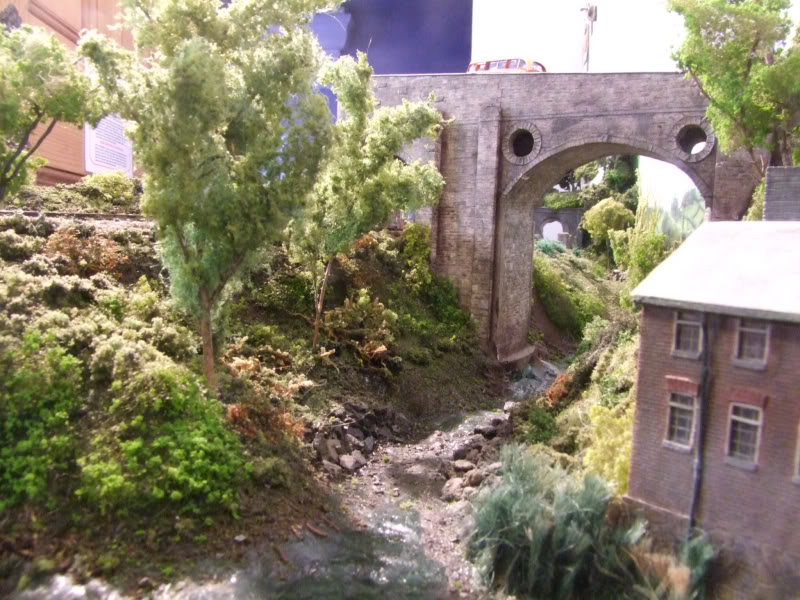
In the previous photo a couple of posts back you may recall that the left bank of the river was still earth colour with nothing but a couple of trial patches of scatter and static grass to gauge the effect of such treatment near the bridge.
It stuck out in photographs like a dog's biscuits and had to be dealt with.
I try and build my vegetation up in stages. Earth first. Then sometimes a layer of leaf litter and fallen branches if it is going to have trees or if not grass scatter/or static grass. Then shrubs, bushes, ferns and the like, then trees. Allowing each stage of the process to dry thoroughly before starting the next. (At least, that's what I tell myself to do anyway.)
The leaf litter is made by saving used tea leaves, drying them out in the Aussie sun and putting them into an old blender in the shed. A few dry leaves, some dark wood sawdust and a few small twigs make up the rest. Then the blender is powered on and left to beat the whole mess into tiny shredded pieces.
The resultant litter is sieved to take out the bigger lumps and then stored in an old jar.
A 50/50 PVA/water mix is my main scatter glue of choice but isopropyl alcohol is the wetting agent applied as and where it needs it, usually it's obvious that the PVA isn't soaking in.
So, lots of waffle about how I make a mess, where's the photos?
The first one shows the left bank after the leaf litter has been added and dried and a scatter of grass has gone over the top of that. Ballast is being laid at the same time and a vacuum cleaner will be needed to gather up the spillage.
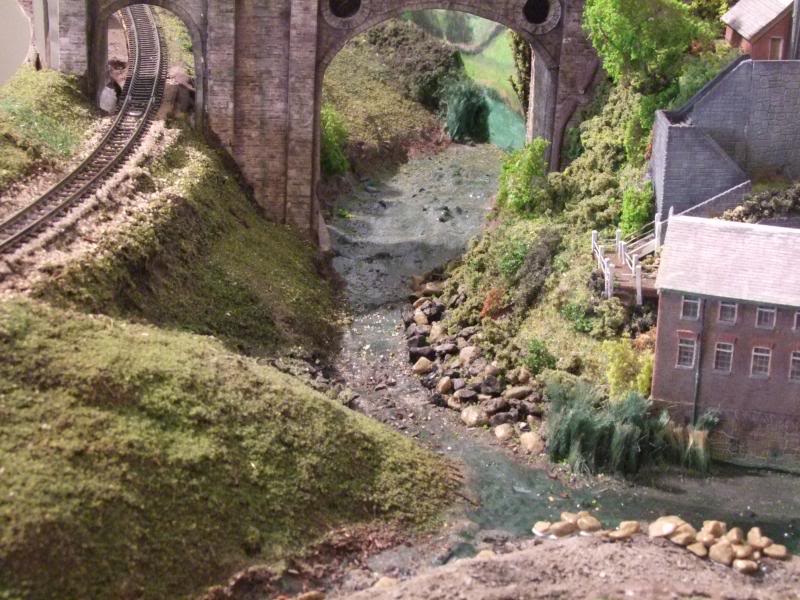
Applying the grass scatter over the leaf litter gives the area more texture, not the fairway but definitely the rough.
More to follow…
Posted
Full Member
The puffer bottle AND vacuum cleaner method sounded good, especially the comment about shaking the bottle to generate a charge on the grass fibres before "puffing". Worth a test anyway. Two glue patches were duly applied, on neat PVA and one 50/50, the bottle of static grass shaken and then "puffed" out with various levels of force. A firm puff seemed to spear the fibres into the glue.
The 50/50 mix worked better, in the photo below you can see the neat PVA is still white hours later, although it did eventually dry clear. The neat PVA also seemed not to take the grass so well. a couple of minutes drying and then a stocking masked vacuum to bring it to attention.
Not bad really… And you can see the leaf litter in the foreground near the bridge.
Moving back to the left bank the glue had dried and the first understory of bushes, shrubs and such have sprung up. Neat PVA in this case to hold the shrub in place. Once dry a drop or two of 50/50 from a turkey baster (I use lots of 50/50… But not on the turkey) and then a sprinkle of scatter.
Somewhere is discussed about how many scatter colours do you need? I have two base colours and 4 or 5 that are used as highlights where needed. Less is more.
And now the left bank, on both sides of the single branch line, has been "shrubbed" , still some patches of wet glue here and there…. And the evening is drawing in early again… The lights are on.

Ballasting continues and trees are under way….
Cheers
Marty
Posted

Full Member
Always try to look on the bright side of life!
Barney
Barney
Posted
Full Member
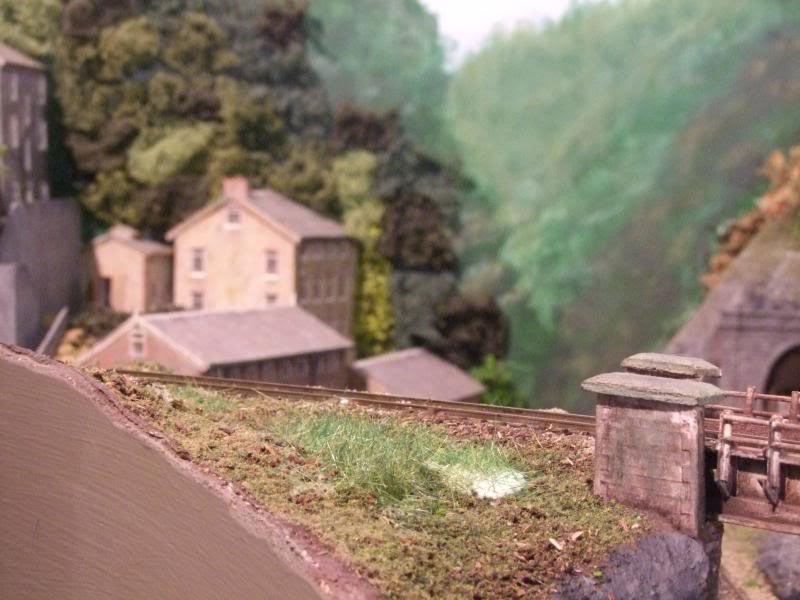
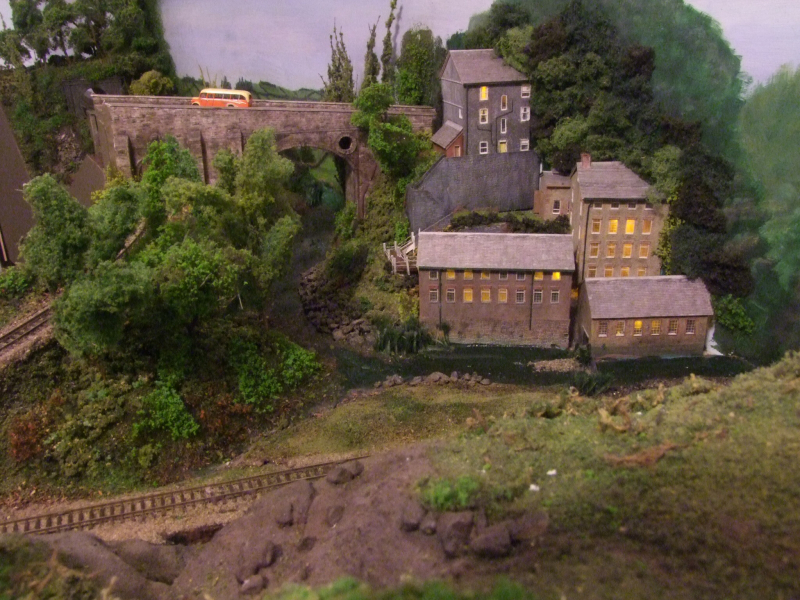
I suspect that a heavy rain might have flooded the mill wheel house from time to time. Certainly all that is left of it now are the foundations and the weir.
The Mill itself is built substantially higher, I believe that they learnt from their mistakes and built it that way. The current building is the third mill.
The railway is way up the bank and the bridge is very high, I think i read somewhere about the water getting close to the road but never over
Oh… And some trees have been a added…not the best of photos but it illustrates how steep sided the gorge is.
Marty
Posted
Legacy Member
:thumbs:thumbs;-):cool:
my webcam link http://86.19.184.67:8080
Posted

Inactive Member
As always your work looks the real thing, very well done mate.
Ken.
'It don't mean a thing if it ain't got that Swing'
Posted

Full Member
Your layout has been a massive inspiration to me for longer than Pig Hill has existed, so if in some way I've inspired you to carry on your fabulous work, then that's just fantastic!
I've been following the same 'ground up' approach as you, buy I do love the idea of the 'leaf layer', which I have not done. It is subtle isn't it, but I think it makes such a difference, especially on the bank near the river. Definitely one for the trick bag for the next layout! :)
Mike
Pig Hill Yard - a small Inglenook shunting layout for my boys, in 00.
Pig Hill Yard - a small Inglenook shunting layout for my boys, in 00.
Posted

Banned
Very, very, nice, love your work ! :thumbs
Can you tell me if you make your own trees or purchase them as is ??
Cheers, Gary.
 Last edit: by Gary
Posted

Site staff
Ron
NCE DCC ; 00 scale UK outline.
NCE DCC ; 00 scale UK outline.
Posted
Full Member
Posted

Legacy Member
Apparently the last real train on Newcastle Emlyn!
Bei Facebook anmelden
Regards, Peter.
Each can do but little, BUT if each did that little all would be done!
Posted
Inactive Member
It looks as if like me you have had a bit of a break from updates, however the last shots showing the work on the banks are superb especially in 2mm.
I'm glad to see I'm not the only advocate of using tea leaves, a lot of people seem to consider it old fashioned but I like to colour them - with powder paints - to get different shades from those that you buy, also I think they have nice leaf look about them, which of course they should. As for shredding them up a bit smaller I use a mortar & pestle to grind the larger bits down after I have sieved them, works well as long as they are absolutely dry, not always easy over here apart from a couple of weeks in summer.
Great to see NE looking so good and look forward to seeing more later.
Jim
My layout thread http://yourmodelrailway.net/view_topic.php?id=10930&forum_id=21
Buildings for Hemyock http://yourmodelrailway.net/view_topic.php?id=10931&forum_id=14
Buildings for Hemyock http://yourmodelrailway.net/view_topic.php?id=10931&forum_id=14
Posted
Full Member
Many thanks for the kind comments.
Gary, all my trees are hand made. Various methods but none unique and all learnt from this forum. The latest style twigs and dried roots from the garden.
Yes, 5 months without much progress at all, the mojo vanished and life got busy, and then I went on holiday.
But, there is movement at the station and I'm looking forward to getting back into the layout room in the not too distant future.
If photobucket comes back up I'll add a couple of photos of some of the last work to be done before the hiatus.
cheers
Marty
Posted
Full Member
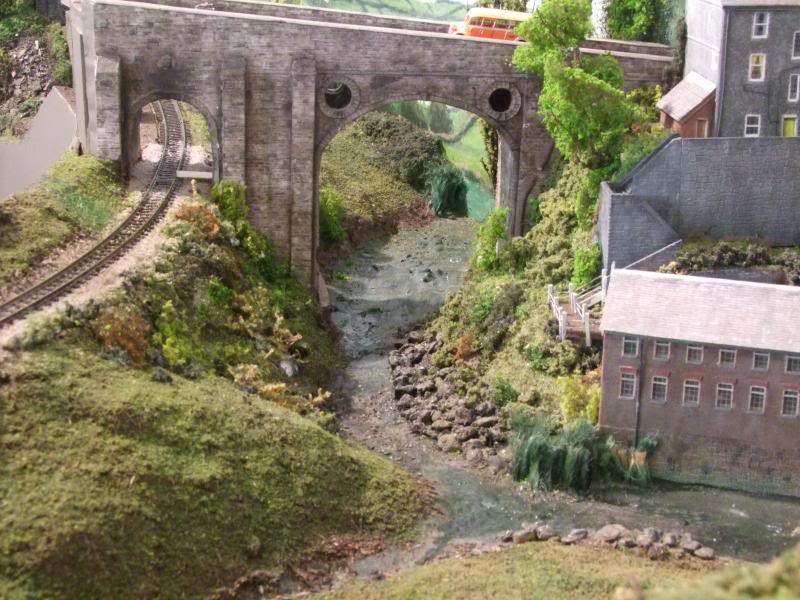
Those trees along the river bank in the previous posts photo were the vanguard of, if not quite an army, at least a copse that grew up over a week or so of work.
From on top of the hill overlooking the mill the gorge now looks like this.
Which gave me the opportunity for a couple more goes at some "arty" shots. On the camera side of the line there is the beginnings of the lengthmans path, just white water putty in this photo but more about it later on.
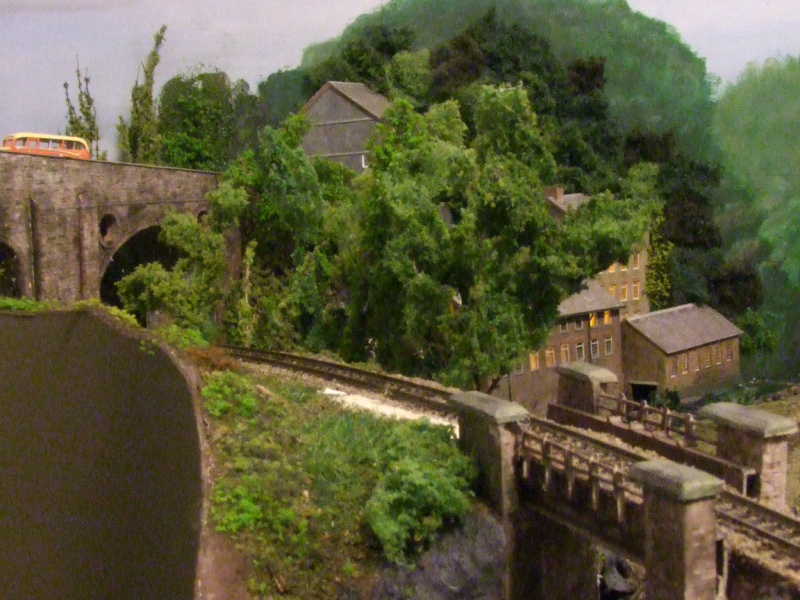
… And then a glimpse of the mill from the carriage window as the last train of the evening rolls gently down the valley towards Henllan.
Cheers
Marty
Posted

Full Member

Stunning Marty……absolutely stunning………difficult to believe it is in N gauge
Posted
Full Member
Glad you liked it, just a development on something that we've all seen before….
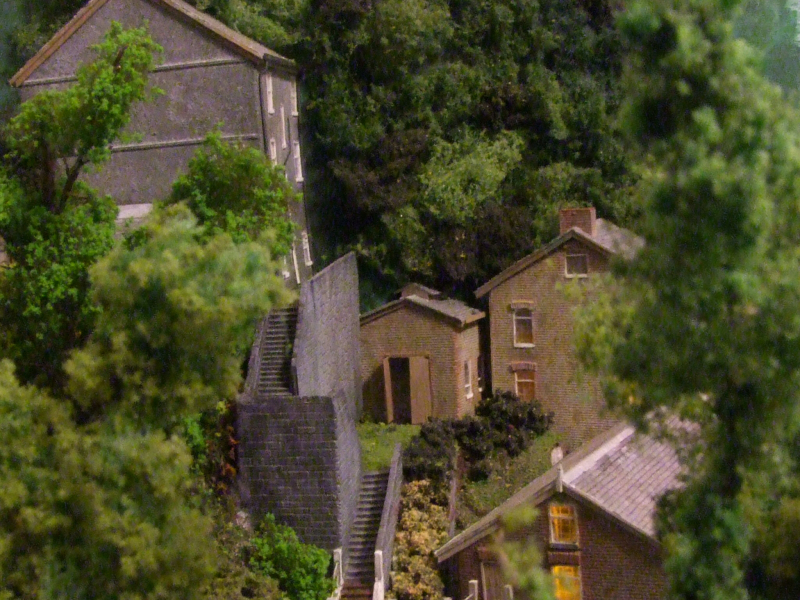
Thinking about moving on to scratch building the halt platform next.
Either that or drawing it up in 3D in CAD and getting Shapeways to print it out for me! Is that still classified as scratch building!!
cheers
Marty
Posted
Site staff

Is 3D printing scratch building quest: Now there's a can of worms exclam:
Ed
1 guest and 0 members have just viewed this.