N Gauge - Newcastle Emlyn****
Posted

Full Member
Cheers MIKE
I'm like my avatar - a local ruin!
I'm like my avatar - a local ruin!

Posted

Full Member
Shaun.
Posted

Full Member
Can you give me some details on the Archimedes drill please…………. :roll::roll: I bought a "cheapie" but it's a bit of a useless pig to use and the Dremel is ridiculously fast even set as slow as it will turn ………..:???:
'Petermac
Posted

Full Member
Posted
Full Member
Is this in the right place Phil ? :???::???::???:
'Petermac
Posted

Full Member
Peter, my father used to call it a pin vice, it too is a cheapie from the hobby shop, but one with 4 different chuck sizes. I'll take it apart and take some photos later on.
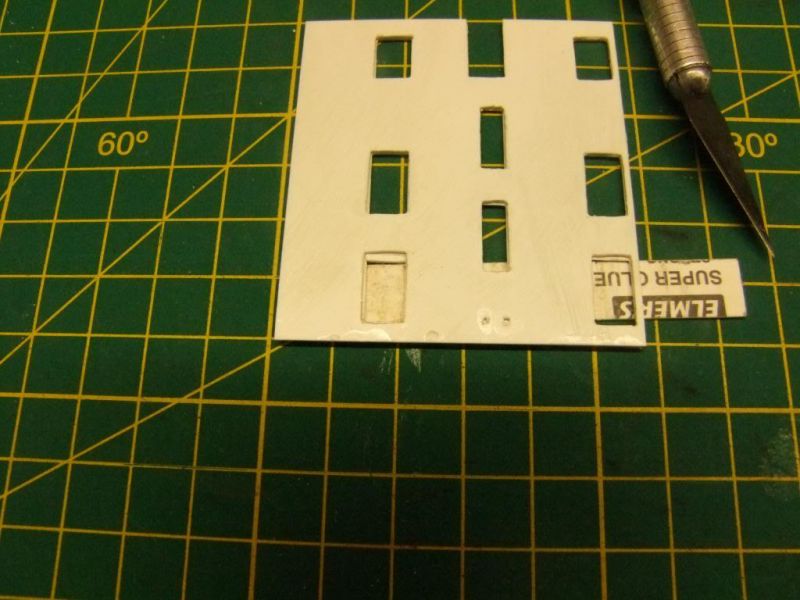
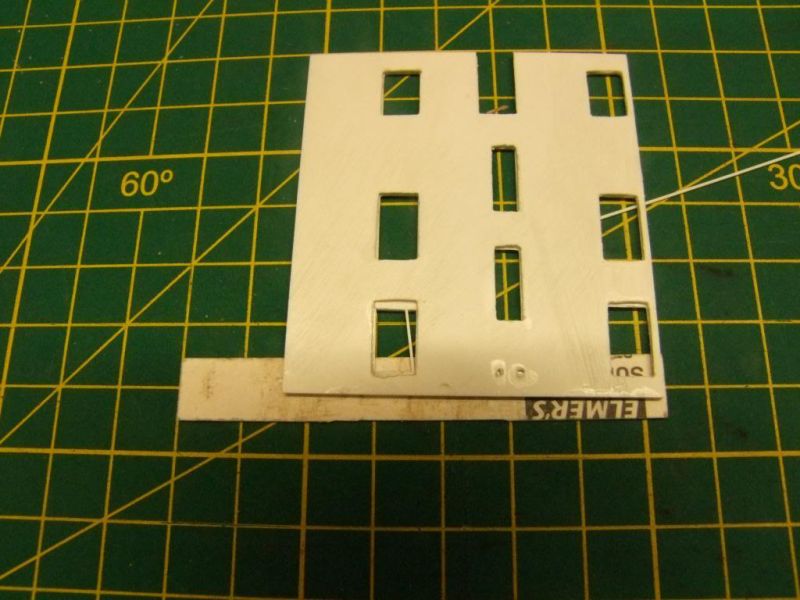
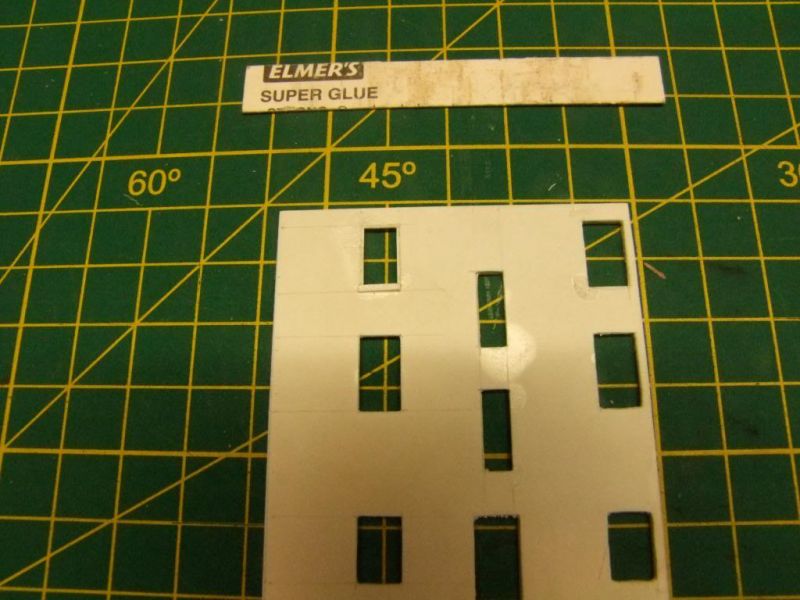
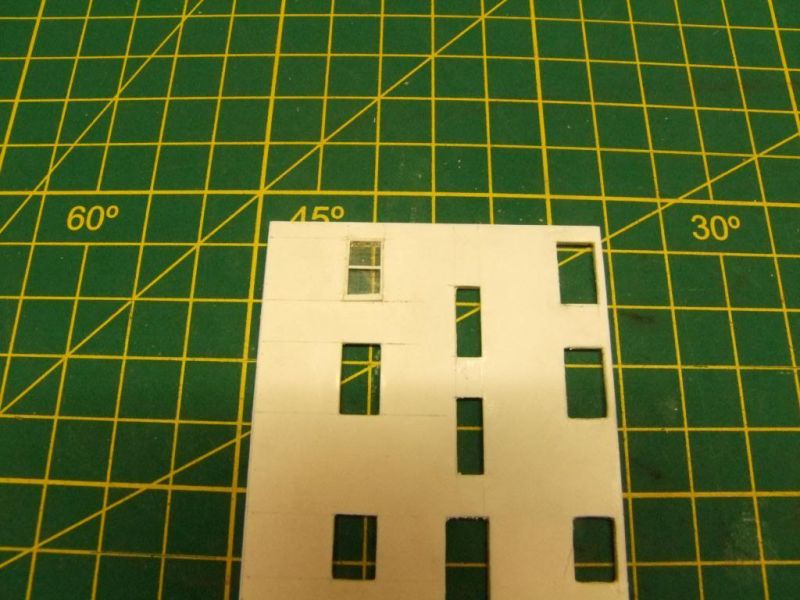
In the mean time… Here is the Mill House rear wall under construction. Same process, markup and cut out, lots more windows on this wall, despite the half relief, because of the angle to the back scene there is a lot more of it.
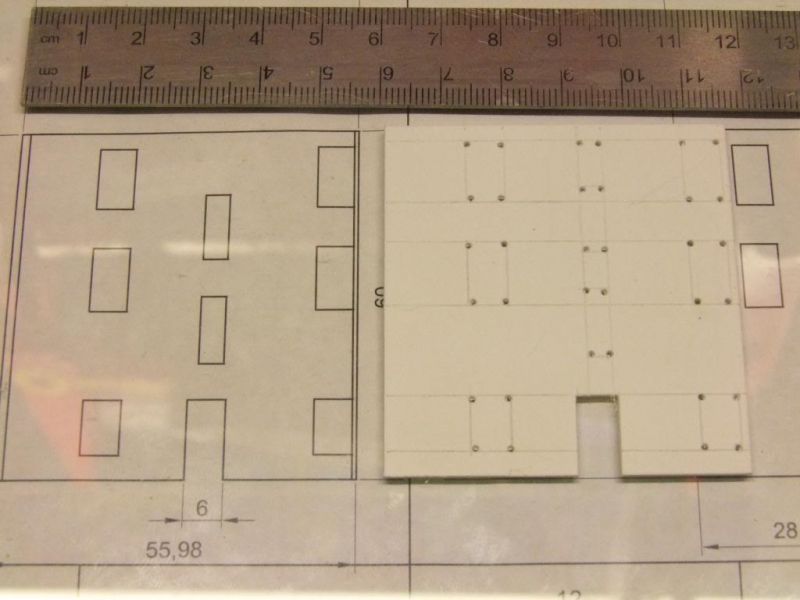
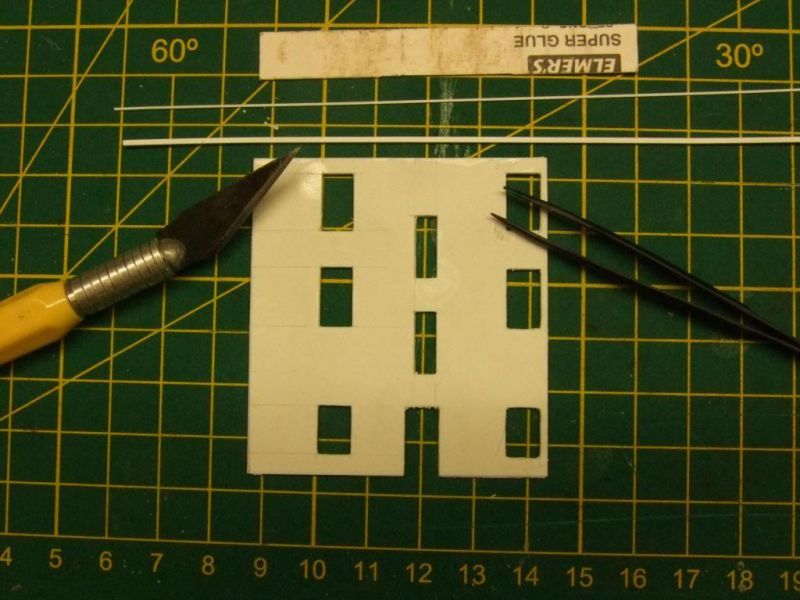
All the windows are now cut out, the two sheets glued together and left to dry under a bit of wood with a heavy book on it. The selection of tools are what I use to cut and fit the window frames.
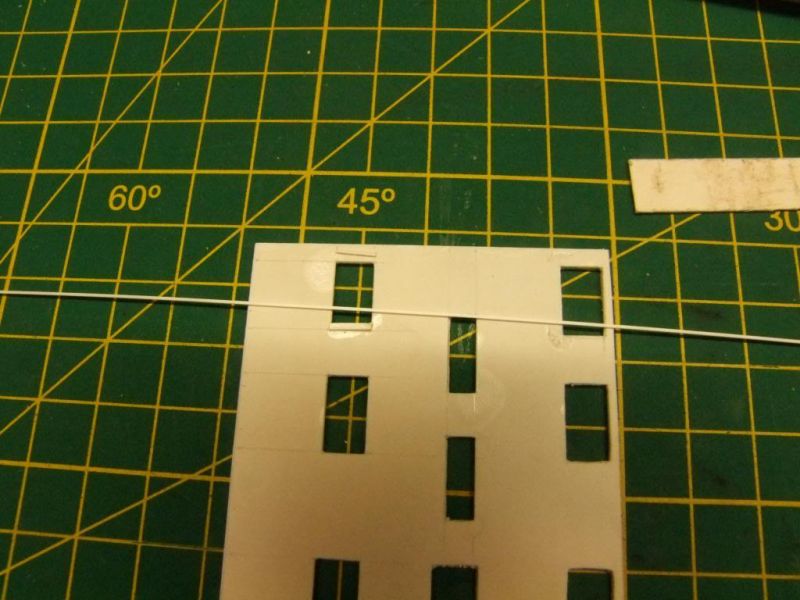
The window ledges are cut from 1mm square rod, just a whisker longer than the window opening to ensure a tight fit.
That length looks pretty good…

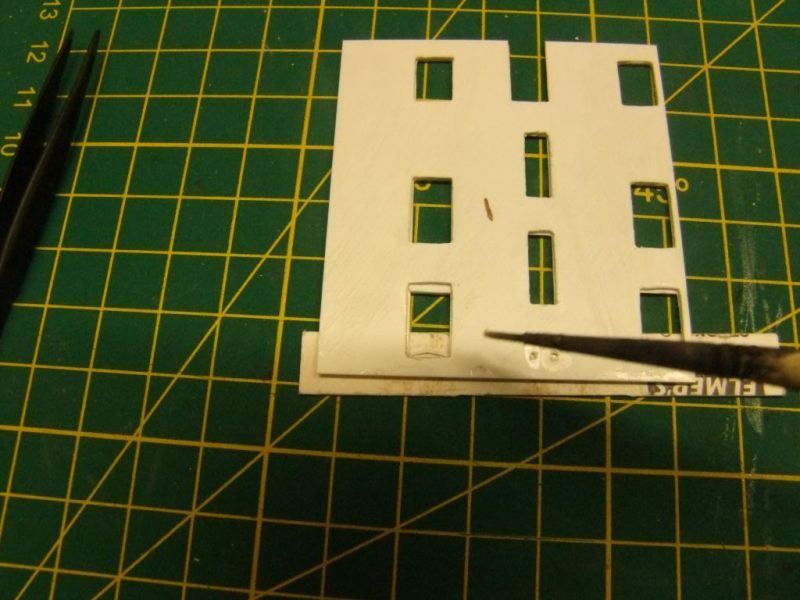
Now, I wanted the window ledge to sit proud of the front of the building by half a millimetre, so a bit of scrap card, half a millimetre thick is placed under the front wall and the ledge installed from the rear, or inside the house.
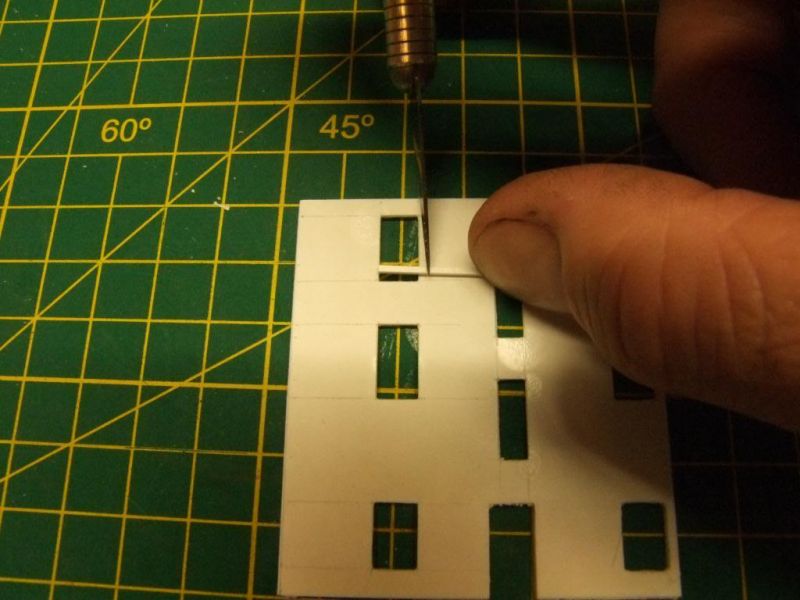
Set the ledge at an angle inside the window opening…
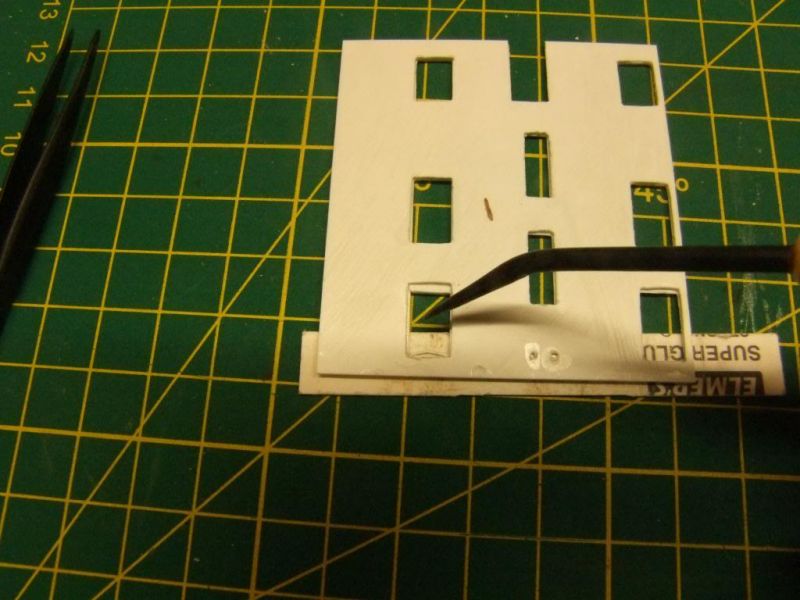
Then using some sort of tool, nudge it down firmly until it's wedged into the window space and resting on the cutting mat underneath, not on the cardboard which is the spacer. It doesn't matter if the rod bows a bit under tension, once the solvent glue is added the plastic melts a bit and the pressure, and a little nudge here or there, will straighten it out.

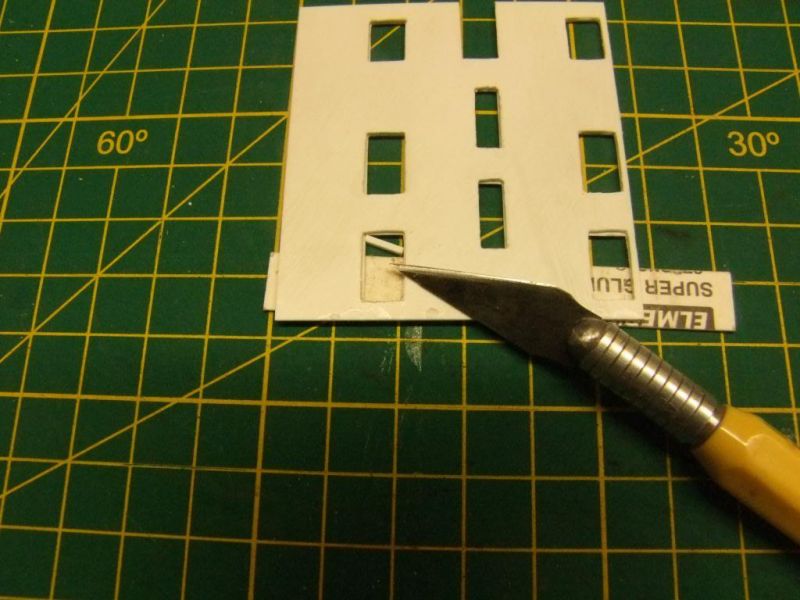
Before adding the solvent check that the ledge is in place… Here on the inside…
And on the outside showing the half millimetre overhang.

Then add the glue with the tip of a fine paint brush… But on the inside, not on the external wall as shown here!

More in the next day or so…
Cheers
Marty
Posted
Full Member
Sorry Phil - I missed the previous posts - "over the page" so I now see where it ties in ……………..:oops::oops::oops::oops:[user=753]Phil.c[/user] wrote:Is this in the right place Phil ? :???::???::???:
'Petermac
Posted
Full Member
Same process but in this case 0.5x0.4mm rectangular section.
Cut a little too long you can see the bend in the plastic in the window.

It's no bother, apply the solvent to the ends that are touching the window and…
Quickly change over to the nudging tool and nudge it into place…
Another run of solvent might be needed to bond the remainder of the frame.
Then onto the side frames, note that the 0.5 mm scrap card is under the frames as they were wanted flush with the front of the house wall. They probably should have been recessed into the window, that will be a development for the next build!
And turn it over and the outside frames are done.
Now the middle bar, tricky as it will only be glued in place by the two tiny end surfaces, getting the length right is important. Several short pieces got relegated to the scrap box…
From the inside you can now see that the frames provide a resting place for the glazing
The glazing, a piece of suitably scribed and sized transparent shirt box lid fits into place and is glued in once again with solvent.

And, finally, we have ONE window. I find the process strangely therapeutic.
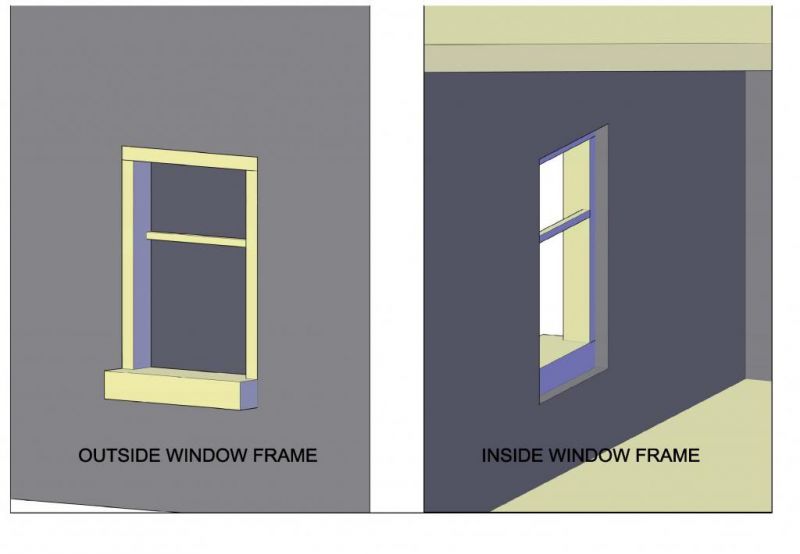
This image from the 3d model shows the window frame arrangement I'm trying to achieve.
Cheers
Marty
Posted
Full Member
Whatever lights your fire ………………:shock::shock::shock:………………………………………………I find the process strangely therapeutic. …………………………..
I struggle to see a whole millimetre Marty so heaven knows what I'd make of half a one. Were you a micro-surgeon in a previous life ? :roll::roll:
It's truly incredible stuff at this scale but I'm making notes of your methods for my "twice the size" stuff. :thumbs:thumbs
'Petermac
Posted
Full Member
We N gaugers prefer to call it 0rribly 0versize!It's truly incredible stuff at this scale but I'm making notes of your methods for my "twice the size" stuff.

Cheers MIKE
I'm like my avatar - a local ruin!
I'm like my avatar - a local ruin!
Posted
Full Member

That must make "N" equal "N-significant" Mike :lol::lol::lol:
'Petermac
Posted
Full Member
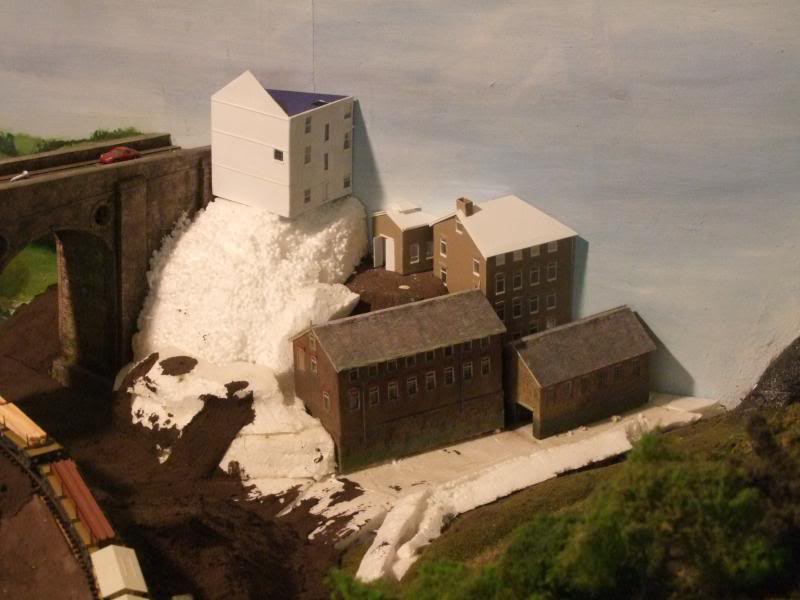
Moving right along…
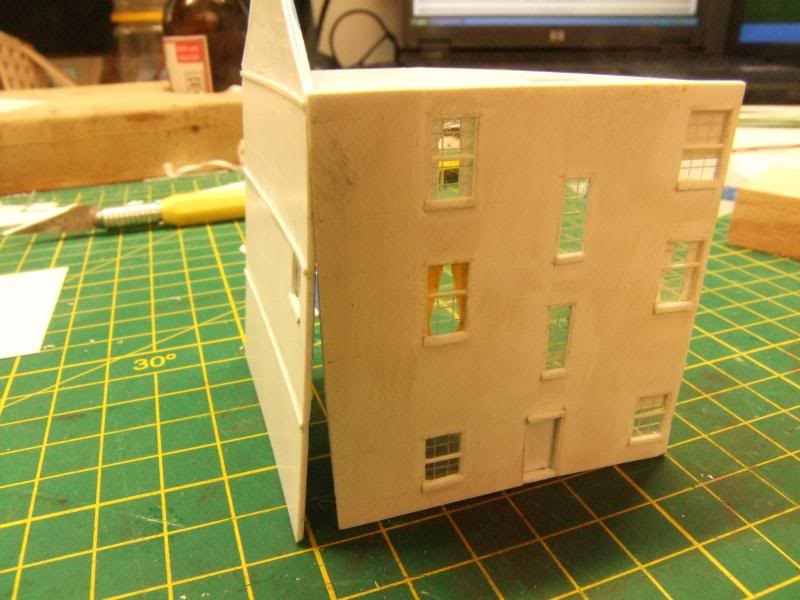
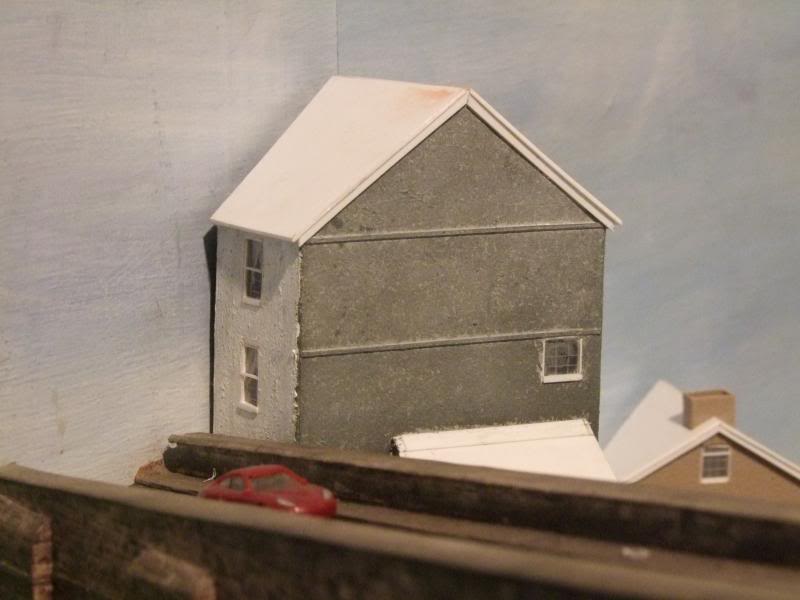
The rear wall is complete in the photo below, all of the windows are framed, glazed and have curtains or blinds. The rear door has been installed, recessed, which isn't true to the prototype but done to overcome the disappointment of not being able to recess the front door.
The riverside wall is also complete, there is one small window. It has, unfortunately warped a little but with luck gluing it to the other walls and interior floors should straighten it out.
As part of the straightening process the solvent was applied to the top corner only and allowed to set hard before the rest of the wall was stressed into place.
It seems to have worked, it's straight enough for me anyhow.

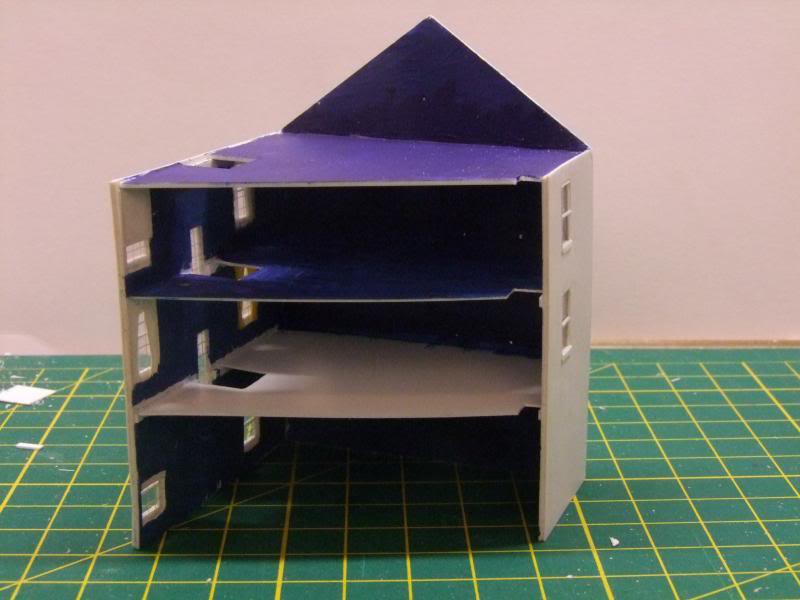
To assist with the positioning of the interior floors a scrap strip of rectangular section was glued first onto the inside of the walls before glueing the walls together. Accurate measurement is required to keep the floor level.
The interior walls and floors have been painted dark blue to try and prevent light bleed through the plastic, the small hole cut in each floor at the back corner is to allow for the LED wiring.
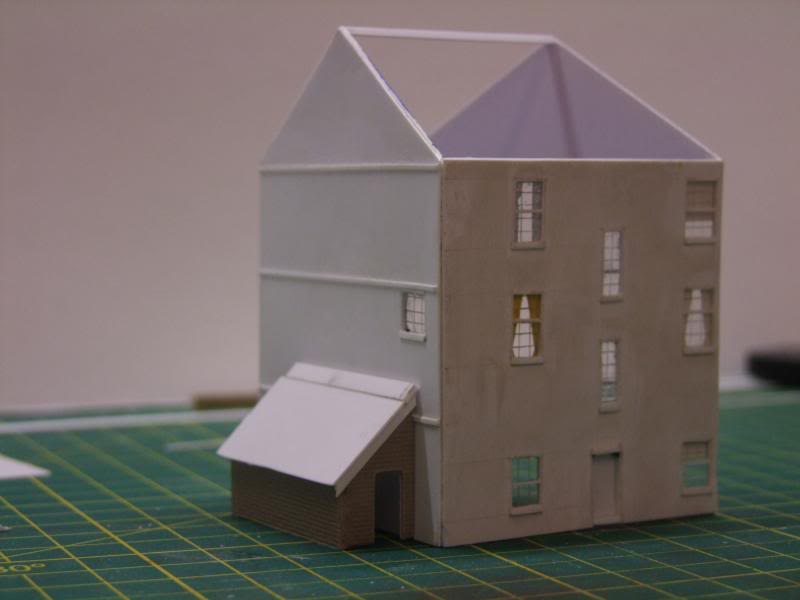
The hole in the floor near the long narrow windows was for the interior stairs….which in the end turned out to be a bridge to far…. N Scale, inside the building, what was I thinking?!
At which point it had to be tried for size in situ….
That will do nicely thank you…. Roof and lean to shed next…. Carry on…
Cheers
Marty
Posted

Full Member
Posted

Banned
Cheers, Gary.
Posted
Full Member
Posted
Full Member
Marty
Posted
Full Member
As you probably know, I don't have a great deal of patience so please get a move on - I can't wait to see the finished "ensemble", it will look brilliant.
'Petermac
Posted
Full Member
Terry
Posted
Full Member
Thanks Terry.
Posted
Full Member
The rear wall that supports the ridge beam had been created by trial and error in the previous buildings, a frustrating and time consuming task to an OCD sufferer like myself!!
In an attempt to work smarter, not harder, it was back to the 3D CAD model to get an exact plan for the shape needed. So much easier and cheaper in both time and materials (and sanity). One bit of plasticard cut to size and glued to the top of the upper ceiling and the ridge beam in place to support the roof.
The lean to shed in the photo below is substantially complete, lacking door, roof tiles and a lick of paint.
Some time ago help was asked for from the membership in regards to achieving the appearance of a rendered wall in N scale. Several replies with tremendous ideas eventuated and it was for this building that the help was needed.
In the end the front of the building, facing the bridge, which is white, was painted with a mix of white paint and gesso.
The remaining walls were painted with a mix of dark grey acrylic paint and water putty powder which, once dry, was dry brushed over with succeeding layers of lighter grey acrylic paint. Finally being dusted with a grey weathering powder.
I'm very pleased with the result!
1mm card roof also in place and awaiting tiling in the photo below.
Cheers
Marty
1 guest and 0 members have just viewed this.