N Gauge - Newcastle Emlyn****
Posted

Full Member
G'day Marty,
 I noticed that you chose to put windows right across the face of the building and exclude the end doors on each level. Would it have been easier to put doors in, rather than more windows ?
Cheers, Gary.
G'day Gary,
Glad that it is of interest.
Sometime in the past the end windows were bricked up, not sure why, the brick used was a different colour and I suspect that they are what you are seeing as doors?
If they had been doors, yes they would have been easier to construct and I would have cheerfully done so.
Cheers
Martin

Posted
Full Member
I'll keep working away at this N scale while the eyesight holds out. This layout is going to be substantially, maybe totally, finished before I fall of the perch.
I may not be able to bring about world peace…. But I'm determined to finish, and enjoy playing with, this layout.
Marty
Posted
Full Member
Great work Marty. That's going to be a lovely building. As an N Gauger myself I can imaging the work that went into all those windows. They all look very regular so did you use a jig ?
Thanks Trevor,
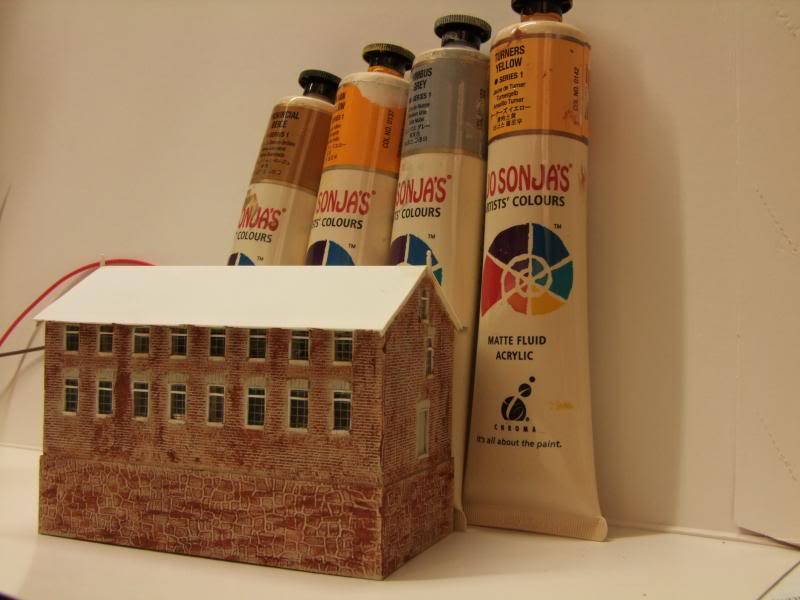
Sort of… The building was drawn up first in autoCAD and then I measured and scribed the window cut lines onto the inner surface of the plastic, the frames then fit into the hole fairly consistently. I tend to have to adjust the hole here and there with a file by eye if the craft knife has strayed from the line.
The cross brace frames are all positioned by eye.
Cheers
Marty
Posted
Full Member
That is superb in every respect Marty and the picture of it in situ really does show it to it's best advantage - and I've always thought that scoring a celluloid box lid is the best way of depicting glazing bars in N.   (As a matter of interest Tesco in the UK sell their CD plastic wallets in pre-scored 2mm diagonal lined celluloid boxes which are ideal for small N gauge glazing bars - the boxes are sized 160mm x 130mm)
Ken.
Ooh, machine scribed lines… You lucky devil, I dream of such a thing.
Getting a consistent 2mm spacing without the back of the blade "wandering" off the steel ruler is a right royal PTA.
Thanks for the feedback, it's always welcome.
Cheers
Marty
Posted

Site staff
Regards
Alan
Born beside the mighty GWR.
Alan
Born beside the mighty GWR.
Posted
Full Member
Martin
Posted

Banned
Thanks for the explanation. I did think them as doors and thought they may have been used for lifting/lowering items to/from the river at one stage. Being a mill in such terrain, the river would of been an ideal transport route.
Cheers, Gary.
Posted
Guest user
Posted
Full Member
… and yes, there are plans in the distant future for a port with dockside warehouses on the Cardigan section of the Newcastle Emlyn layout.
Marty
Posted
Guest user
See…. that's why you joined this wonderful forum Alan :thumbs
… and yes, there are plans in the distant future for a port with dockside warehouses on the Cardigan section of the Newcastle Emlyn layout.
Marty
Marty to be honest mate that's what makes this site.
Its not only the expertise and experience of the Senior Members but the friendly banter.
Love it.
Oh and BTW don't have future plans for a future Port and Dock Side Warehouses, already have it started… HA HA…

Posted
Inactive Member
You seem to make working in N scale look so easy it is almost tempting to try it as I could have a fantastic scenic layout, but I think I'll stay as I am now.
I know the feeling of the wandering knife blade only to well and it's frustrating when it happens, I look forward to seeing it finished.
ThanksJim
My layout thread http://yourmodelrailway.net/view_topic.php?id=10930&forum_id=21
Buildings for Hemyock http://yourmodelrailway.net/view_topic.php?id=10931&forum_id=14
Buildings for Hemyock http://yourmodelrailway.net/view_topic.php?id=10931&forum_id=14
Posted

Full Member
That "wandering blade"syndrome attacks me too,usually when I'm desperately trying to get a row of windows the same size or level.I wonder if we can get pills for it??:lol:
Cheers,John.B.:thumbs
Posted
Full Member
The wandering blade is usually a good sign of fatigue and a need for a cup of tea and a change… usually some "testing".
The 2nd Mill Building (Cont.)
With the general outline and size complete it was time to make it a home in the landscape so the craft knife was deployed
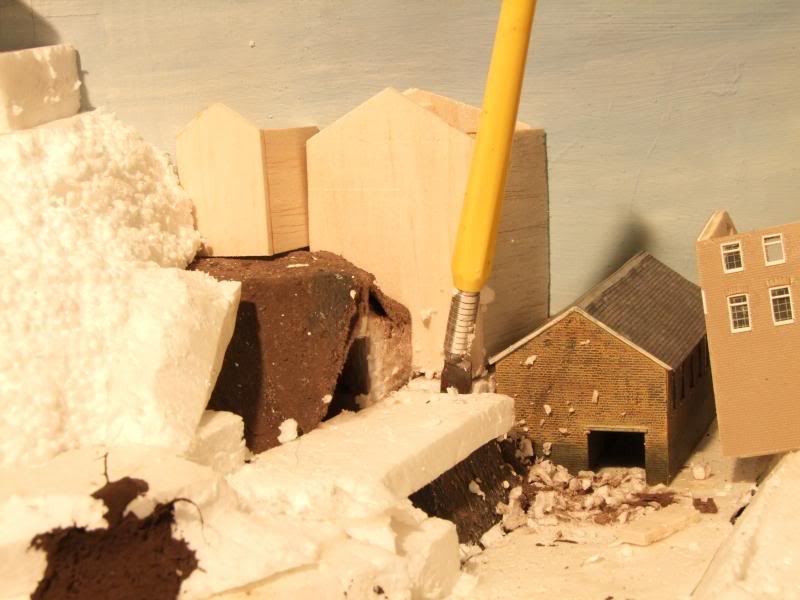
.
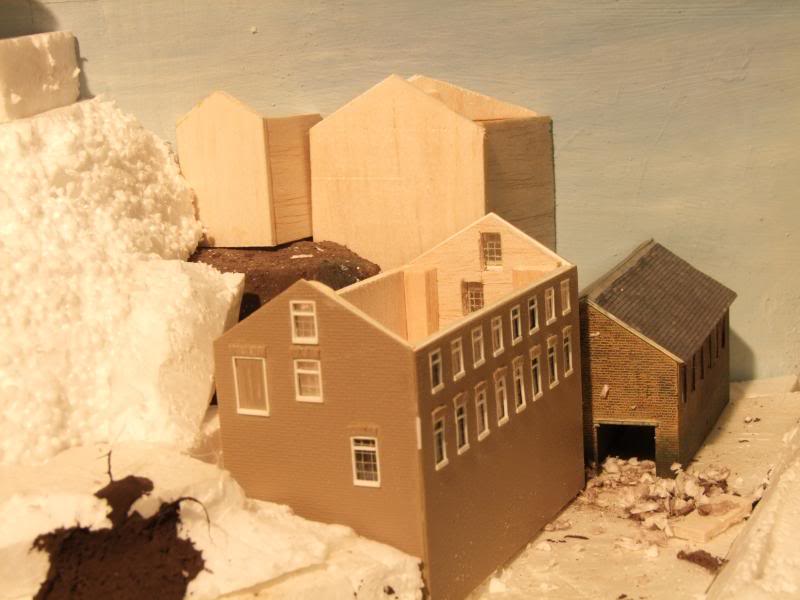
…. the building test fitted into place and the rear wall added. The offset from the Mill wheel building looks about right too.
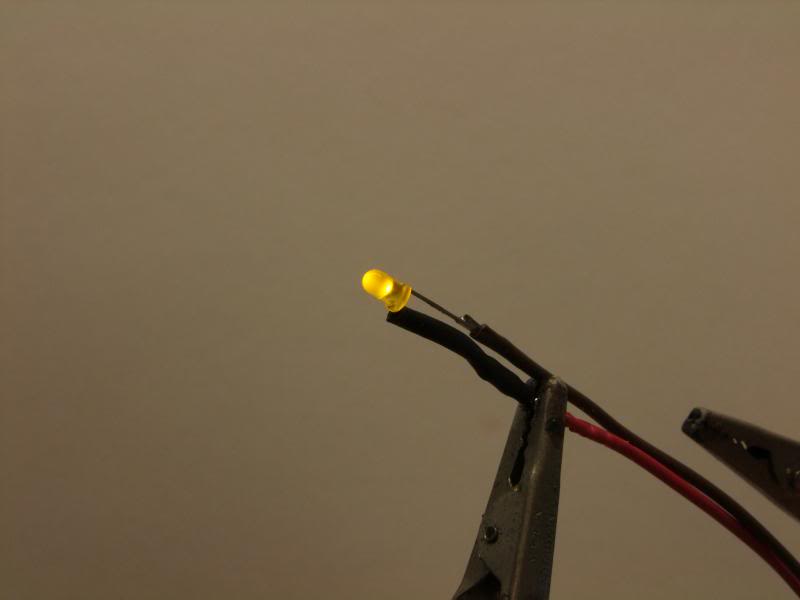
LED's (2) were wired up with out the board to see what happens… and I won't show you the installation inside the building…. let's just say "can do better". But they do work.
The roof base made from pasticard, the barge boards and the finials have now been added in the photo below and a base coat of paint applied.
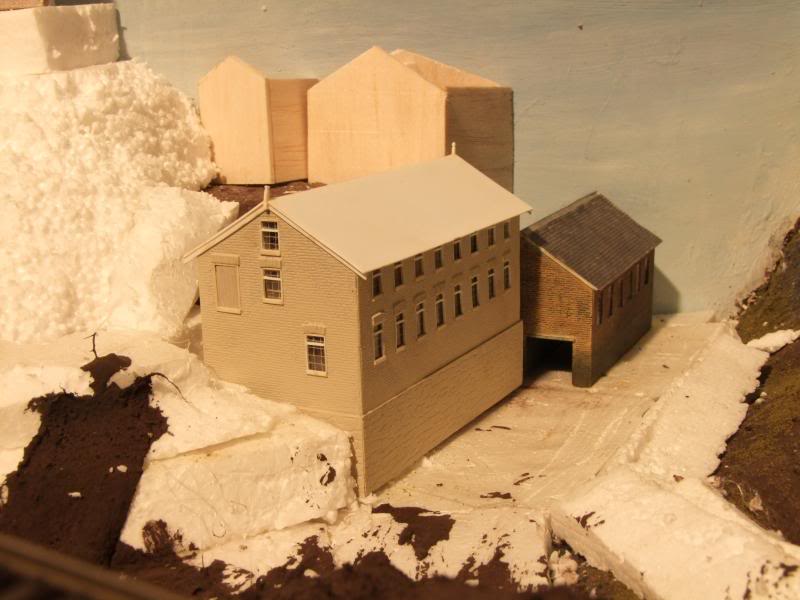
It's been a while since the Mill Wheel building was painted so the colours used have been returned to storage and no record was kept was there? These are likely candidates and a first pass has commenced on getting the stonework to match.
It took a couple of goes to get the colour to where I was happy with it… lets call this stage two…

and then finally, with a couple of dustings of weathering powder, the addition of roofing tiles, ridge cap, gutters and down pipes this will do…
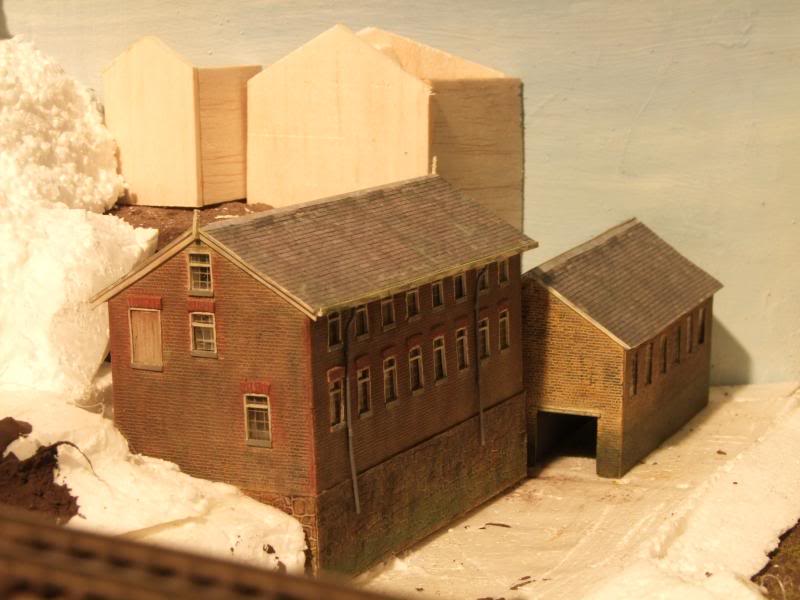
Up the hill to building 3 next….
cheers
Marty
Posted

Inactive Member
Ken
'It don't mean a thing if it ain't got that Swing'
Posted

Full Member
Phil
Posted

Full Member
Posted
Full Member
Hi Ken,Looking good Marty and what are you using for gutters and downpipes?
Ken
The gutters are simply Evergreen L-angle plasticard glued under the eaves. More than sufficient for N scale as we are trying for a mostly generic image rather than intense detail.
The down-pipes are round section plasticard, in this instance of too large a diameter but it's all I had, bent to shape with needle nose pliers and spot glued under the gutter at one end and also in one spot to the wall of the building. Not ideal, the rough stone foundation sheet causes the down-pipe to bend out at the base but it'll do.
The gutters were painted after installation, then a small spot drilled out underneath to take the head of the down-pipe. The down-pipe was pre-painted and once dry, scraped with the craft knife to remove the paint in the required locations. The paint on the wall of the building was scraped off too. Hold in place, apply a tiny drop of solvent with a paint brush, give it a 60 secs to grip and job done.
On these down-pipes I wrapped a small strip of paper to represent the pipe support brackets, blasted fiddly and I won't be doing it again.
cheers
Marty
Posted
Full Member
I'm worried about boring people with the building works, a bit same old, same old for 5 in total, but as long as people can put up with it I'll keep posting.
cheers
Marty
Posted
Full Member
Phil
Phil
Posted

Full Member
Regards,
Trevor
Trevor
1 guest and 0 members have just viewed this.