N Gauge - Newcastle Emlyn****
Posted

Full Member

Posted

Full Member
:cheers Geoff
Posted
Full Member
Note that there aren't that many at the moment but some progress has been made on the Newcastle Emlyn layout.
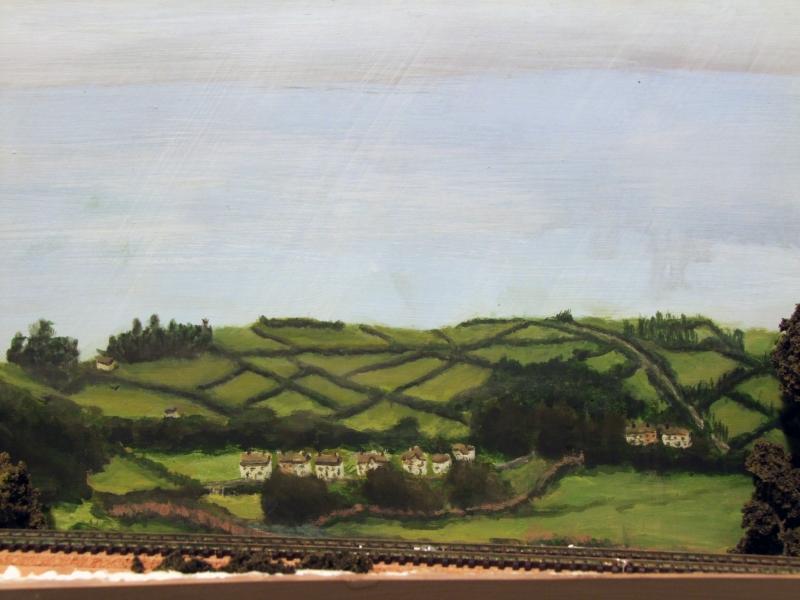
Last christmas I got the urge to paint again and a section of the backscene near the bridge went from this…
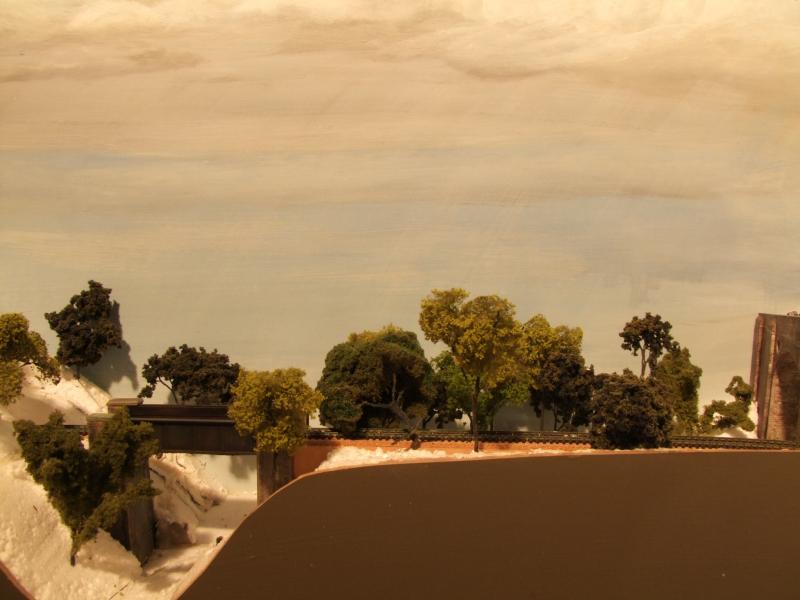
To this…
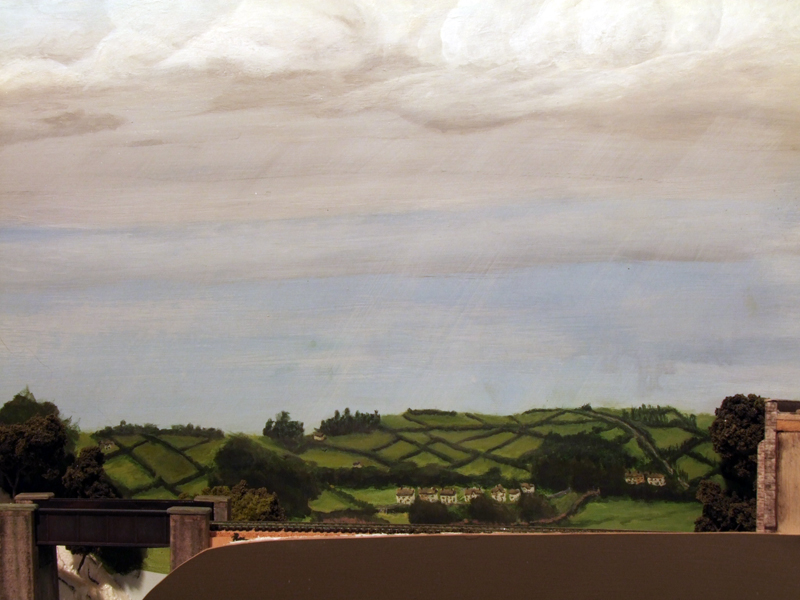
Hand painted over 4 days, it took 3 complete restarts and numerous tweaks before I was happy with it.
Actually, I still wasn't happy with it, the hillside was too steep and lacked a bit of depth perspective. Further work, including thinning the hedgerows as you went up the hill, realigning the field about the girder bridge on the left and add in a white wash over the hill top gave something that I did finally stop at.
There is more going on around this area but it's a slow old process…
More to follow.
Marty
 Last edit: by Marty
Posted

Inactive Member
Excellent.

Max
Port Elderley
Port Elderley
Posted
Full Member
Posted

Full Member
All stressed out, got addled brains?
Ride your bike or play with trains!
Ride your bike or play with trains!
Posted
Full Member
cheers
Marty
Posted

Full Member
[If not, can I have pepper and salt with my humble pie……….]
First class, Marty, in fact I'll give you a 'Bewdy' for that.
Doug
'You may share the labours of the great, but you will not share the spoil…' Aesop's Fables
"Beer is proof that God loves us and wants us to be happy" - Benjamin Franklin
In the land of the slap-dash and implausible, mediocrity is king
"Beer is proof that God loves us and wants us to be happy" - Benjamin Franklin
In the land of the slap-dash and implausible, mediocrity is king
Posted

Full Member
Life is just a bowl of cherries!
Posted

Full Member
Posted

Inactive Member
Posted

Full Member
Regards,
Trevor
Trevor
Posted
Full Member
I had a lot of fun doing it and YES I am a novice when it comes to painting. My normal medium is a computer and software and even then it's normally just line work!
I had a lot of help from others, particularly following the tutorial by MikeC, you should be able to find it in the index under painting your own backscene.
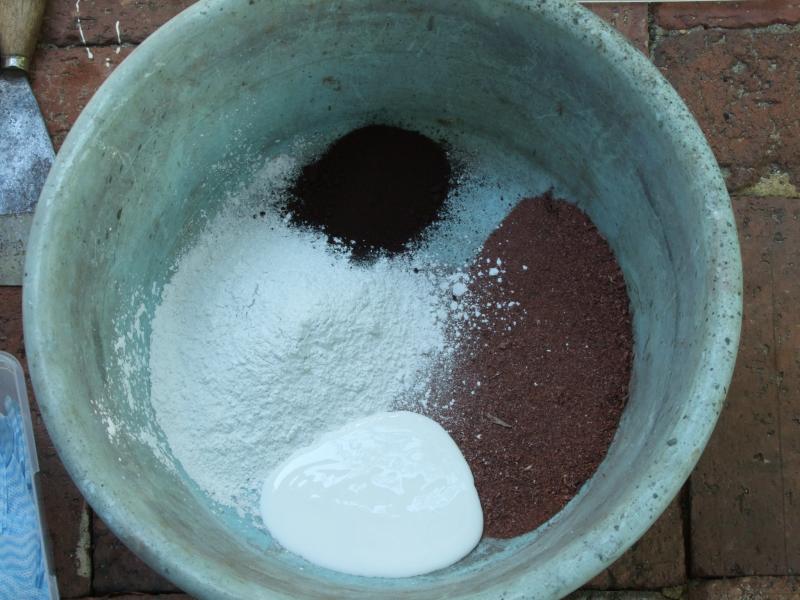
…. the snow IS going too… I use this stuff to make my earth layer/hard shell. The brown stuff from the Flip shelton bag is sawdust.
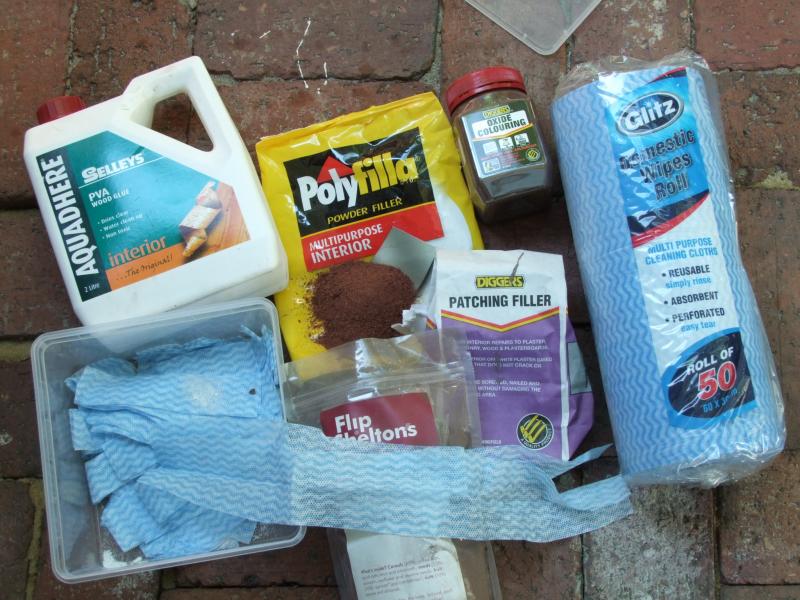
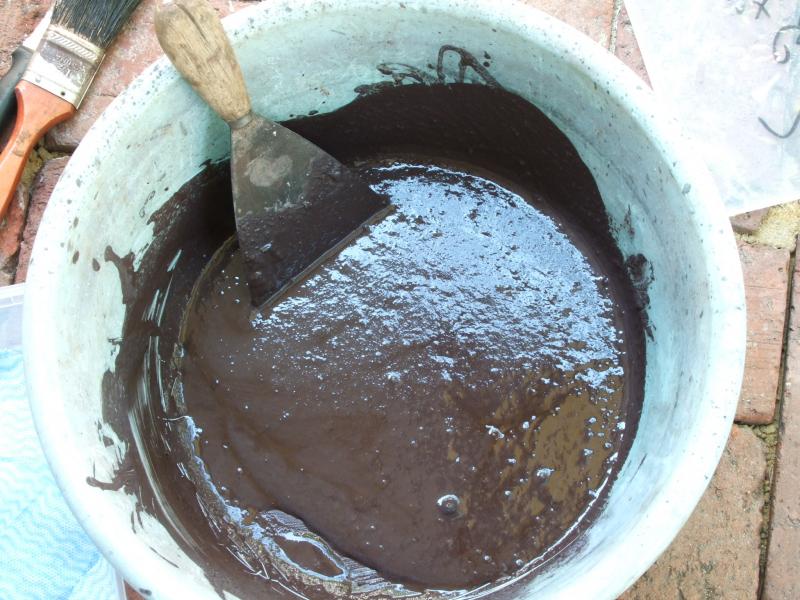
All ingredients mix together in a bowl with water to a milky texture.
Dip the J-cloths into the bucket to make a plaster bandage and apply over the "snow".

gradually building up the layers until the snow disappears…
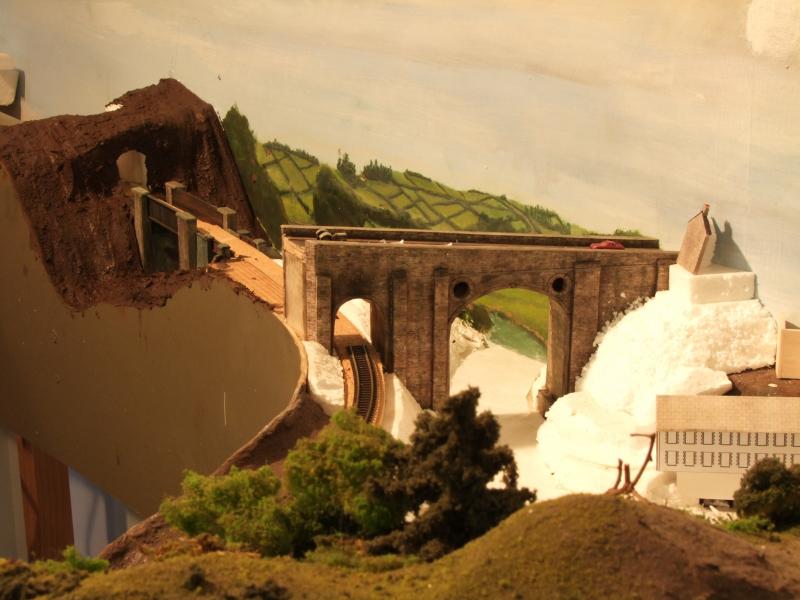
The snow around the tunnel entrance has melted leaving a thin but strong earth shell.
Snow removal is on hold at the moment until the mill buildings in front of the big bridge are constructed. A lot of landform sculpting is required to get the buildings to fit correctly.
cheers
Marty
(Click to enlarge)
Posted

Inactive Member
Ken.
'It don't mean a thing if it ain't got that Swing'
Posted

Full Member
That "gunk" looks pretty watery. I notice you say "milky" consistency. Desn't it end up either flooding the whole valley or taking almost as long to dry as the trees took to turn into the famous Welsh "steam coal" ? :roll::roll::roll:
'Petermac
Posted
Full Member
After soaking the 50mm wide strips in the gloop I wipe off the excess back into the bowl with my fingers and then apply the strip over the polystyrene terrain.
If you liked mud pies as a kid this is for you. Just make sure you let SWMBO know that you will NOT be available for putting the bins out, walking the dog, etc for the next 30 - 40mins.
Getting the mixture too wet and thin would limit the amount of plaster in the strip and limit the effectiveness of this method. Getting the mixture too thick would prevent the plaster being adsorbed into the cloth and also negate the effectiveness.
Drying times are, of course, dependent upon how many layers you put on, ambient air temperature and wether you tried, against the manufacturers instructions, to extend the working time of the gloop by adding more water.
How do I know this?…. It took days to dry.:roll:
Posted
Full Member
I use pva and kitchen towel but your method looks like fun!
Posted
Full Member
Marty
Posted
Full Member
DO NOT do it from a deep bucket whilst wearing a wooly jumper, especially with the ends of the sleeves folded over. The double thickness of wool will unwittingly absorb even more gloop than a single layer and subsequent mis-applications thereby, to the arms of settees and kitchen tablecloths are truly frightening…….
Together with the N'Emlyn expanded polystyrene explosions, Monsieur Marty has a lot to answer for, Chez Doofer!
Doug
'You may share the labours of the great, but you will not share the spoil…' Aesop's Fables
"Beer is proof that God loves us and wants us to be happy" - Benjamin Franklin
In the land of the slap-dash and implausible, mediocrity is king
"Beer is proof that God loves us and wants us to be happy" - Benjamin Franklin
In the land of the slap-dash and implausible, mediocrity is king
Posted
Full Member
Might I suggest an old business shirt, now surplus to requirements, and an old towel… and maybe a hose!
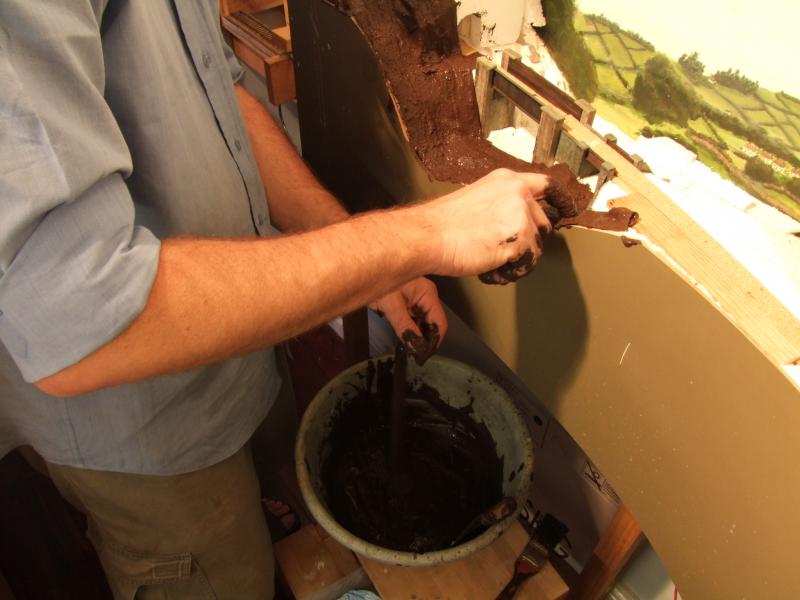
On a serious note, I do like to get my landforms to look "right" and by carving polystyrene and shaping and smoothing the covering "gloop" I find I get the most workable medium to do this. The hard shell it forms is tough but light and it takes scatter and paint well.
Planting trees is easy too, drill a hole through the hard shell and push the trunk into the underlying polystyrene. No glue required most of the time.
Oh… and newspaper on the floor to protect the polished floorboards/carpet/etc…. how do I know this??
Marty
1 guest and 0 members have just viewed this.