N Gauge - Newcastle Emlyn****
Posted

Inactive Member
Marty:
Marty, never do that, I've got loads of bridges to do in time ;-)I should have thrown the first set of railings out and started again

Posted

Full Member
Posted
Full Member
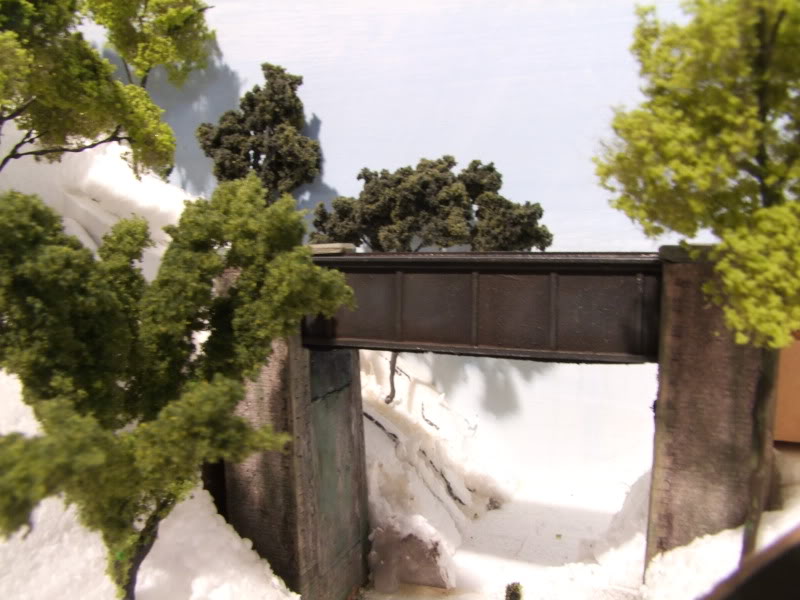
The second bridge complete
Now that both bridges are complete on the new Pentrecourt Halt - Pencader section the next stage is to create the plaster hard shell and terrain.

:HappyGoody… gotta love mud pies…
So we left it there… anticipating the gooey feel of ground goop and the change from white to brown.
So glad that life is busy and that The Nephew has a great head on his shoulders. Nothing happened for a week and then The Niece and Nephew came around to check out progress, drive a few trains and get stuck in to some building before heading home to Melbourne.
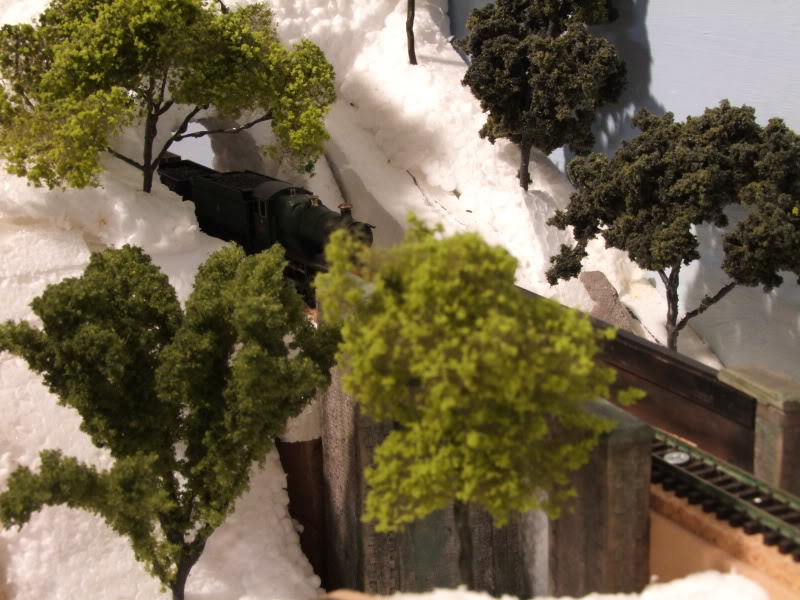
The Niece has added foliage to MORE tree frames, there are now only seven left to be completed from the original 35. Here are some of them around the first plate girder bridge and tunnel to the Pencader Cassettes.
A Collett 2251 Class Baby Castle is rumbling out of the tunnel with the early down goods to Newcastle Emlyn.
The Nephew was keen to get the cassette system up and running to add to the options he had for operations. Right now if you don't mind… so we gave it a bash and while unable to finish it for him on the day some progress has been made, options tested, and the drawing board is being consulted further. :???:
However, during conversations over a hot soldering iron The Nephew asked where the Altycefan Bridge was going on the main layout seeing as the Pentrecourt Halt section was being worked on. Out of the mouth of babes… no mud pies for a while until the bridge and the associated Altycefan mill are in place.
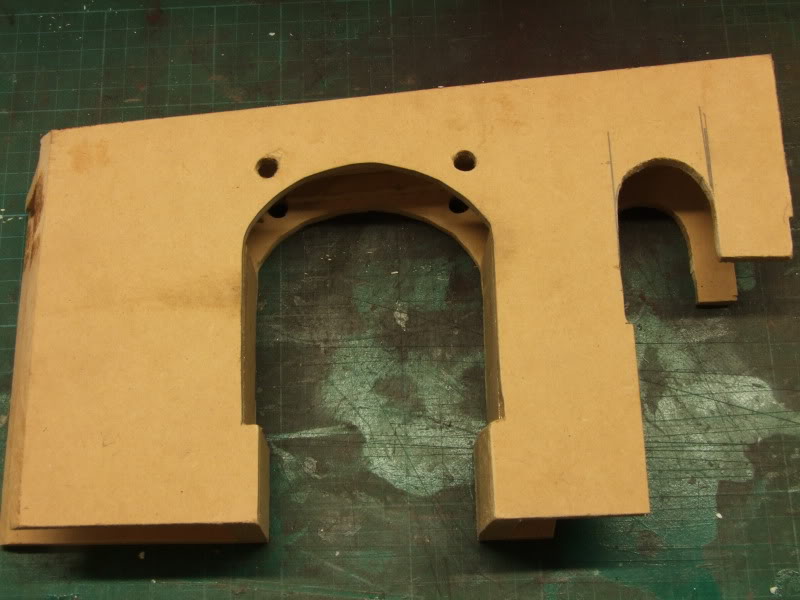
The main shell of the Altycefan bridge is now in place, constructed out of 6mm MDF and glued together with PVA. The plan is to cover it with Scalescenes Dark Ashlar Brick paper.
The same down goods has progressed a little further down the line.
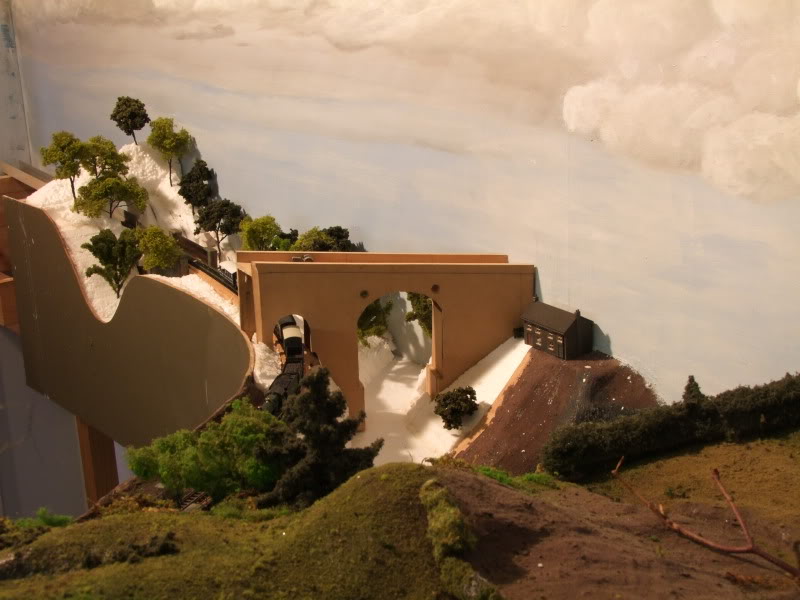
A little closer and the gorge that the Afon Teifi runs through is quite evident, the house on the hillside on the right is there for a sense of scale and to inspire me to get on with a mock-up of the mill.
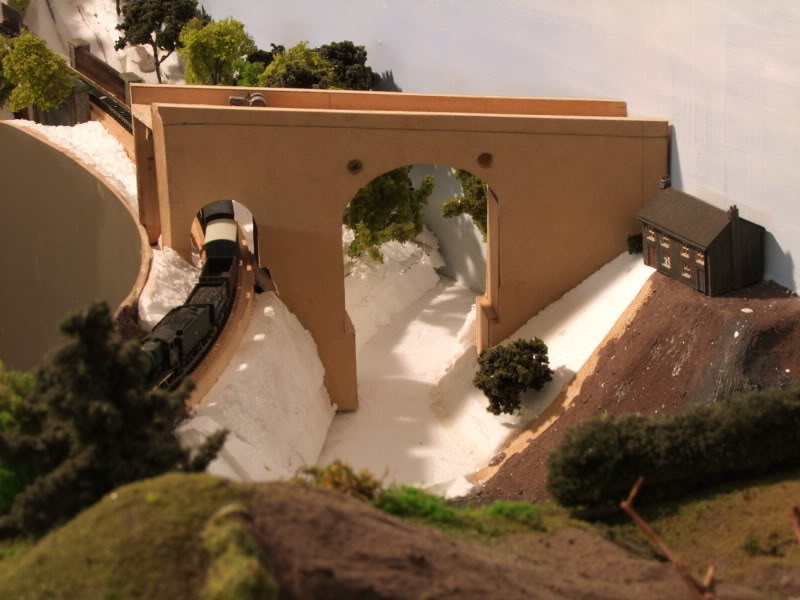
Because of the baseboard width at this point there has been a bit (hmmmm) of compression and further work with the "axe" is required to take another 10mm off the bottom of the bridge buttresses to lower the height to get it to look a little bit more like this…

The river level on the model is going to be modelled quite deep too… again hopefully mitigating the height of the model, it might look something like the photo above when finished. A perfect copy is not needed, a facsimilie that conveys the impression will do.
Anyway, from the other side of the bridge the space between the baseboard edge on the right and the track is where the halt will go…
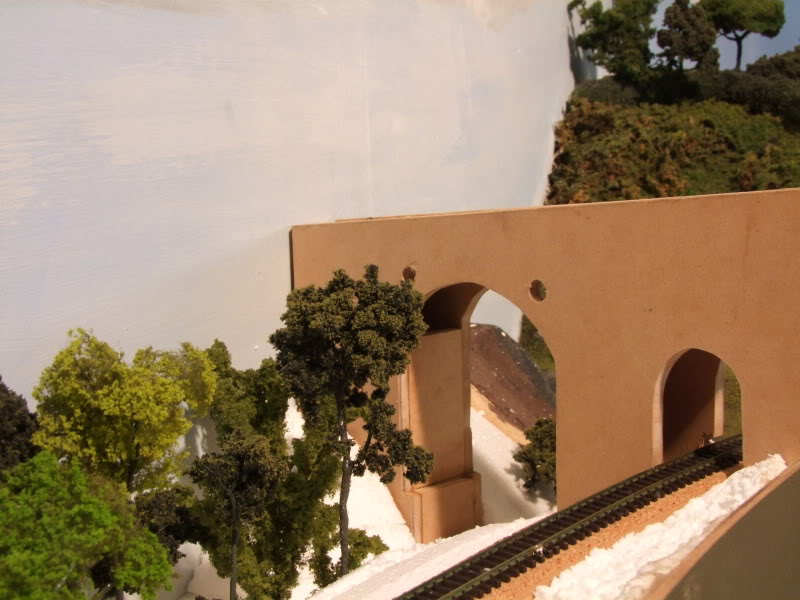
Now… where did I put that axe?
Posted
Guest user
What size screws do you use to temporarily hold the track in position until ballasting? I assume they are countersunk.
Chris
Posted
Full Member
What ever came to hand actually, some counter sink heads some not… but all small enough to allow rolling stock to pass over the top while still being wide enough to hold down the sleepers.
The concept is to allow a bit of flexability when aligning the track before ballasting, back off a screw or two here or there where the curve isn't just right, tweak it until it's better and then tighten the screws again. After many, many hours of testing, 'cause you have to right :thumbs, glue down the ballast and when dry, remove the screws and ballast the remaining holes.
There has only been a bit of ballast put down so far but it seems to work. Not my idea of course, just another of those borrowed from those that have gone before.
Posted
Guest user
That's the system which I am using.
The only screws which I have found that don't damage the sleepers are No2 Roundhead brass which grip fine. I was going to add a brass washer for a bit extra grip but it lifted the screw head a tad above the rail top and caused fouling particularly on the PECO Collett drive gears.
Chris
Posted

Full Member
I am enjoying this thread :thumbs
Doug
'You may share the labours of the great, but you will not share the spoil…' Aesop's Fables
"Beer is proof that God loves us and wants us to be happy" - Benjamin Franklin
In the land of the slap-dash and implausible, mediocrity is king
"Beer is proof that God loves us and wants us to be happy" - Benjamin Franklin
In the land of the slap-dash and implausible, mediocrity is king
Posted

Full Member
:pathead:pathead:pathead
Cheers,John.B.:thumbs
Posted
Guest user
:doublethumb:lol::cool:
Posted

Full Member
If i ever build another layout i shall make it easier on myself and find a prototype. Now i must go to the beginning and be fully conversant its hard to believe its N gauge then the screw head confirmed it

Regards
Pete
Regards
Pete.
ECOS2 with RR&Co Traincontroller and a load of other electronics so i can sit back and watch the trains go by.
Pete.
ECOS2 with RR&Co Traincontroller and a load of other electronics so i can sit back and watch the trains go by.
Posted
Full Member
Posted
Full Member
Comparing the model trees with the photo I can see I'm going to have to try and find a darker Heki foliage.
Posted
Full Member
Caught up late with this Marty and have been watching from a distance, i love the dedication to the prototype and faithfully following the pictures.
If i ever build another layout i shall make it easier on myself and find a prototype. Now i must go to the beginning and be fully conversant its hard to believe its N gauge then the screw head confirmed it
Regards
Pete
Your comment about the use of a prototype as a guide making it easier is, in my opinion, spot on. I could never "make up" the wealth of detail that is in the real world.
You have set yourself a long read if you start from the begining Pete, there are all sorts of wanderings. Occasionally I go and read it from the start just to remind myself just how far I have managed to get in the 4 years or so that I have been building the layout.
cheers
Posted

Full Member
Phill
Posted
Full Member
Posted
Guest user
Just roam, wander, divert, meander, adapt, re-shape, adjust etcetcetc as much as you want, mate, :roll: you are NOT going to be able to dilute the excellence of this Lay-out. :pathead Just keep-on keeping-on. If at first you don't succeed
 and start again :lol: This is "top-notch" modelling, up-there with our other great modellers on our Forum,
Kind Regards,
Michael Thornberry.
Posted
Full Member
What have you made your baseboard out of Doug? Mine is a combination of mdf and ply and might be a bit hard to get drawing pins into with out a pilot hole.
Those poor ole' pilots, the things they get stuck in their holes……….:shock::shock::shock:
My baseboard is plywood, Marty, scrounged from the tip.
Point taken! [Groan - Tee hee]
Doug
'You may share the labours of the great, but you will not share the spoil…' Aesop's Fables
"Beer is proof that God loves us and wants us to be happy" - Benjamin Franklin
In the land of the slap-dash and implausible, mediocrity is king
"Beer is proof that God loves us and wants us to be happy" - Benjamin Franklin
In the land of the slap-dash and implausible, mediocrity is king
Posted

Full Member
The trees look really good, the building work on the bridge is very substantial … and the chimneys on that house are blocked up.
The only thing to do with those Kestrel kits is cut the chimneys off and use styrene tube (sometimes one pot instead of two will do the job).
Lots of potential to get nearer to the appearance of the prototype as you progress - good stuff.
Posted
Guest user
Mrs Doofer must dread you going to the Tip :roll:My baseboard is plywood, Marty, scrounged from the tip.
Doug
Posted
Full Member
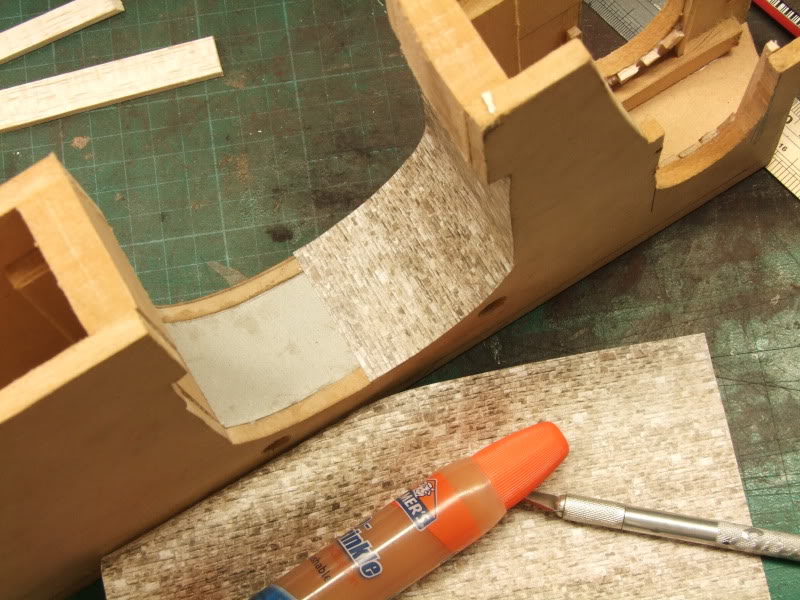
The first thing was to get some thick card curved into the underside of the arches, small bits of scrap balsa were cut up and glued into place to provide backing blocks for the card.
The PVA glue is still drying.
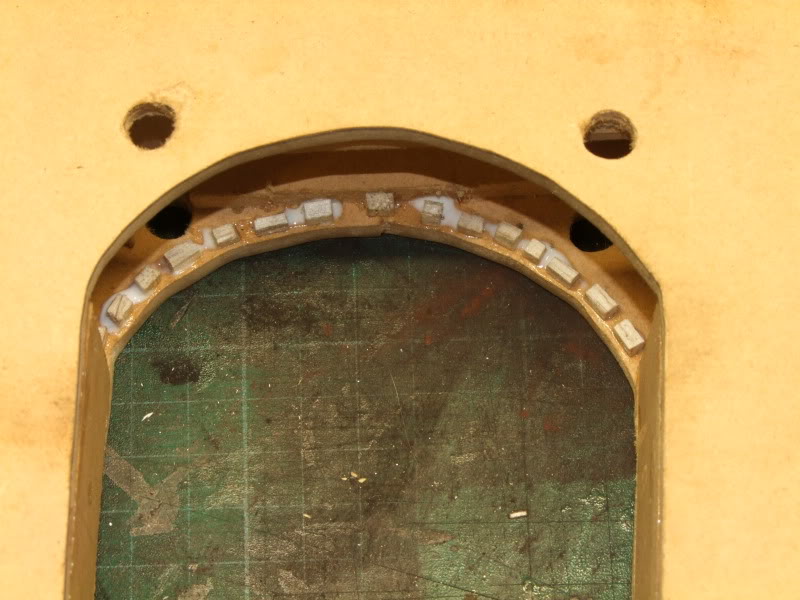
Backing blocks in place on both sides of the arch ready for the card.

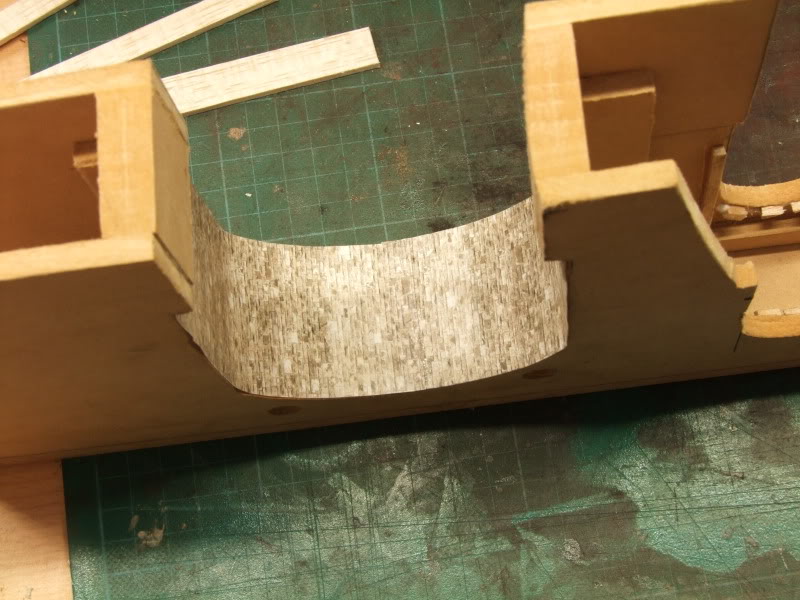
Card in place under the main arch, backing blocks going into place on either side of the railway arch.
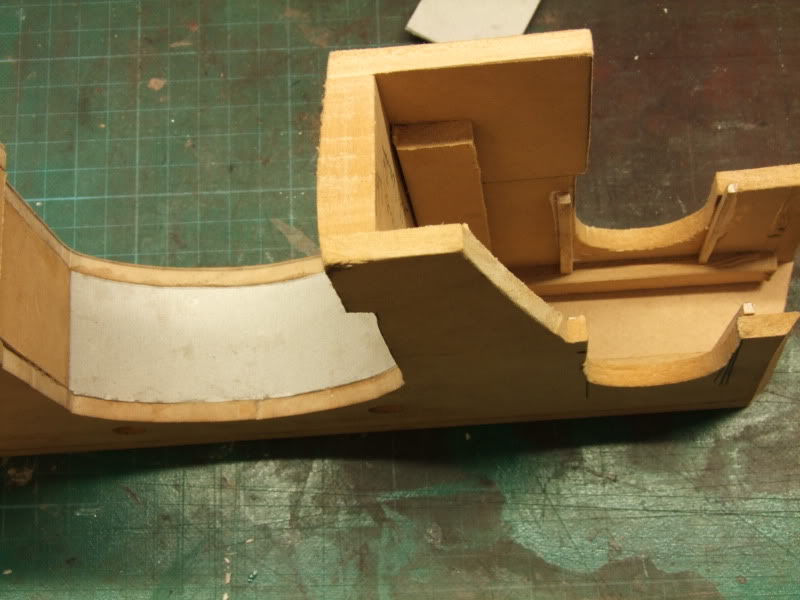
Scalescenes Ashlar glued on one side…
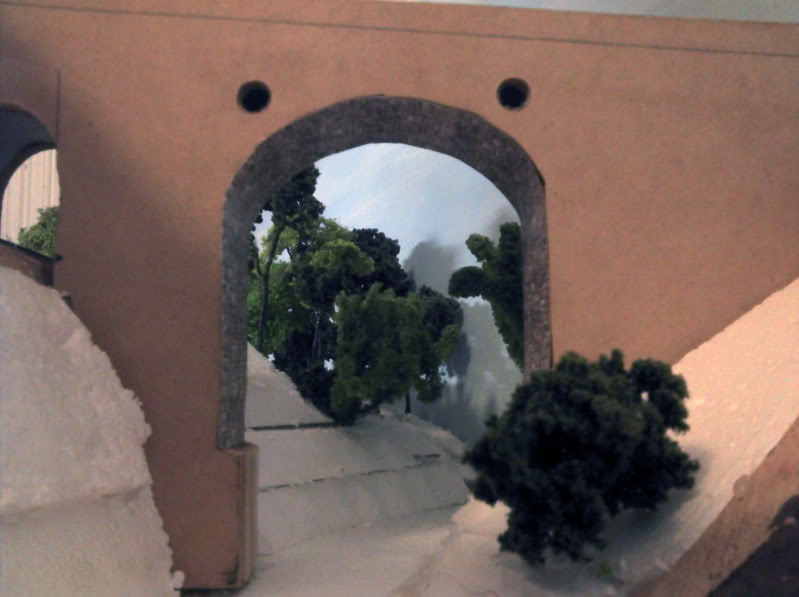
and now both sides of the main arch. Making sure that the shadows on the printed stone are the right way up on both sides of the arch.
Temporarily back in place on the layout at the end of the modelling session these last photos were taken on my mobile phone because being small it could be placed low to the landscape for a more prototypical type of photo.
Looking down the gorge… it's still a big bridge…
… and along the line with the card in the railway arch in place.
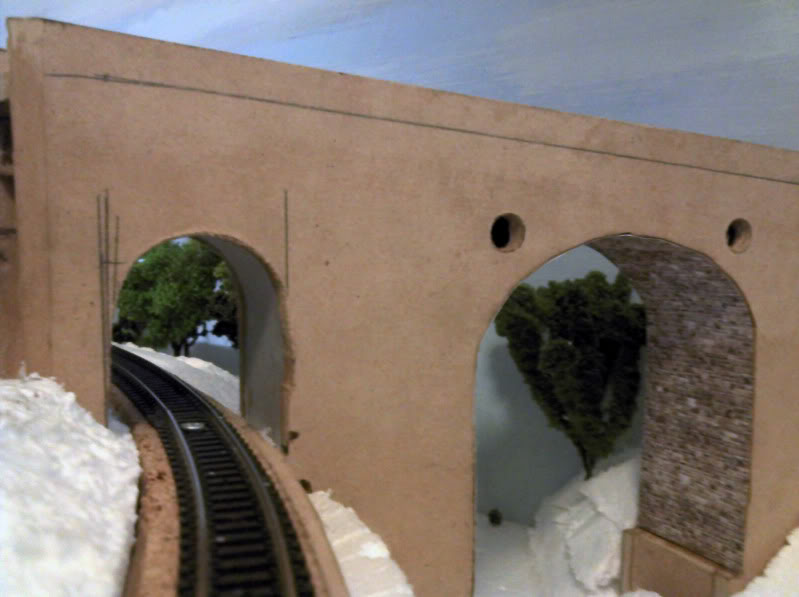
cheers
1 guest and 0 members have just viewed this.