N Gauge - Newcastle Emlyn****
Posted
Guest user
That is excellent modelling, mate, especially so as it's in N Gauge. The severity of the railway-cutting is beautifully high-lighted by the bridge. Will you be "inserting" a distant, low-level scenic back-drop to finish-off the view through the cutting? Something like a "low valley and 3 mile-away hills". I am nearly ready to commence my Lay-out build, in OO and N Gauge, so I will be following, with great interest, your future modelling. I was, of course, surprised to see those "steam-coaches" being hi-jacked/stolen by that coughcoughchokechoke diesel,:It's a no no:Red Card:lol:
Kind Regards,
Michael Thornberry.
Posted

Full Member

Posted

Full Member
[user=469]Michael Thornberry[/user] wrote:
Will you be "inserting" a distant, low-level scenic back-drop to finish-off the view through the cutting? Something like a "low valley and 3 mile-away hills".
Something like that… bridges first, then plaster ground modelling then backscene, more painting, although, as you will see in due course, the trees on the river bank will mask most of the backscene where the river valley meets it. This will be deliberate as trying paint a river's continuation on the backscene so that it looks "right" is notoriously difficult.
I was, of course, surprised to see those "steam-coaches" being hi-jacked/stolen by that coughcoughchokechoke diesel,:It's a no no:Red Card:lol:
cheersmust have been a enthusiasts special.
Posted
Full Member
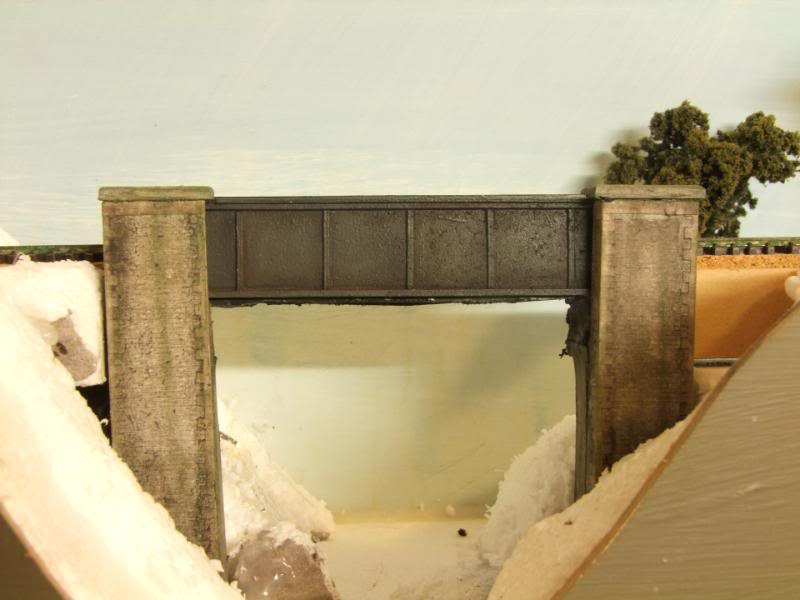
The rail over river bridge is almost complete.
This photo shows the front buttresses, capping and plate girder completed and weathered.

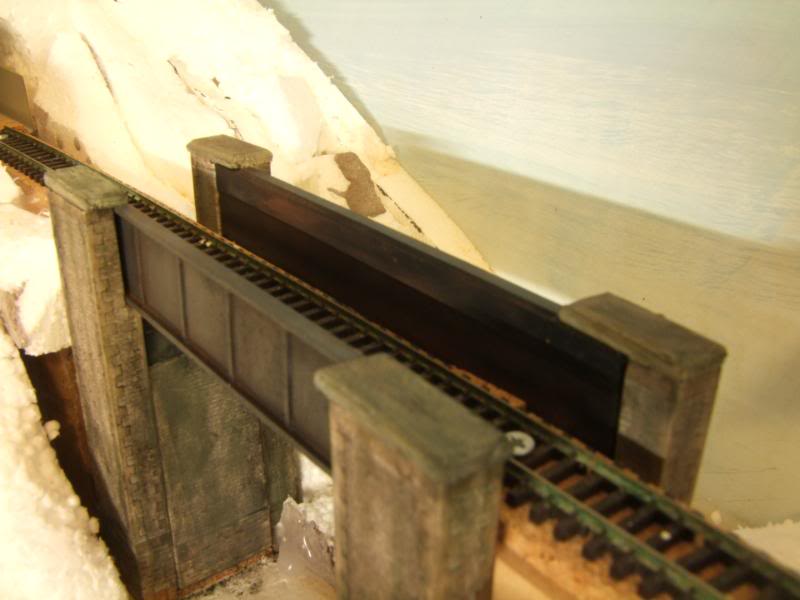
Now the rear buttress, capping and girder are in place and the Abutment's between the buttress pillars are being worked on. Some thought is being put into determining a better way of blending the Abutments into the bridge. The camera on full macro clearly shows the joins, but, being N - scale, once weathered and suitably vegetated, it is unlikely to be noticed from the normal view distance.

Looking at the left side at the same stage of completion. The gap between the top of the abutment and the bottom of the bridge needs to be eliminated.
For the time being this will do, further detailing will occur after the landscaping is complete.
and from above
The plan is to have a river depth, made from resin, maybe half an inch up the bridge. We shall see.
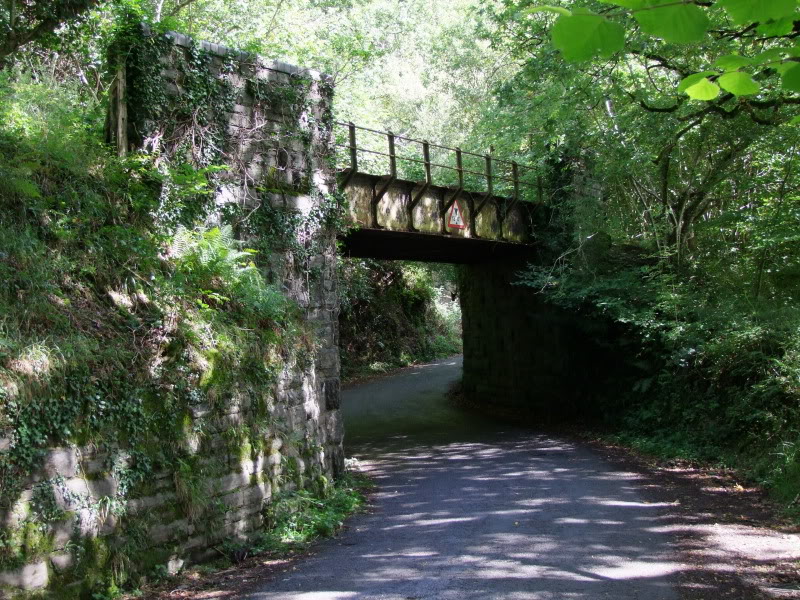
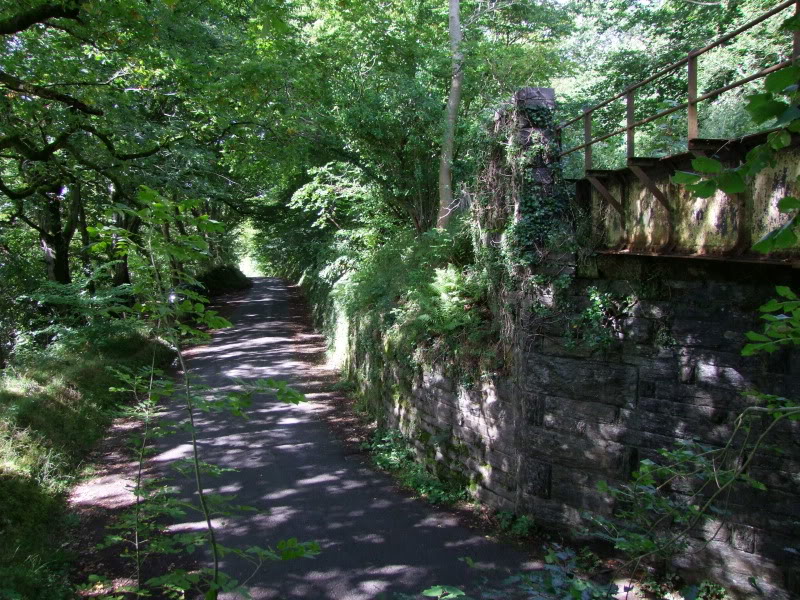
The rail over rail bridge, of which, on the prototype branch, there are none, is now being constructed.
The plan being to try and make a bridge similar to this one, which is just up from Henllan.
The photo was taken during the September 2010 visit to the branch.
The scalescenes Ashlar brick paper has been left unglued on the track side edges of the buttresses on purpose. Hopefully the abutments will slide in between the buttresses and by then gluing the flaps down the edges will be less prominent.

The existing embankment has been carefully sliced to allow the buttress to fit, that and the existing hillside helps with the visualisation of the completed scene.
The balsa wood girder is just a place holder. Abutments next, then the girder and railings should slot in where the place holder is.
Lots of fun.
Posted

Full Member
'Petermac
Posted
Full Member
Then paint… black undercoat in this case, not sure if it was necessary, and then a mix of greens, beige, grey and white.
Once dry… a dusting of weathering powders, black (very little) and grey and green from a Tamiya weathering pack.
Seems to work ok :hmm :thumbs
Posted
Guest user
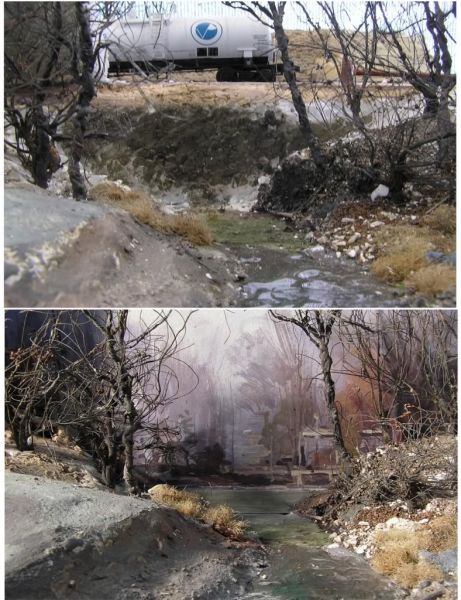
This is my little trial painting of river onto backscene
No doubt you can do it - and quite likely do a better job.
It poses its own set of problems such as getting the eye-level right, and avoiding cast shadows when taking pics. But when you're operating the railway, they're of no concern, are they? :lol:
The distant shoreline in my trial scene works ok when the camera is low, but it looks totally wrong when the camera is higher. It's something to think about, and your final choice has to be determined by which eye level you prefer.
Mike
Posted

Inactive Member
Max
Port Elderley
Port Elderley
Posted
Full Member
This is one beautiful layout, Marty. I think your initial tan colouring helps a lot!
The distant shoreline in my trial scene works ok when the camera is low, but it looks totally wrong when the camera is higher. It's something to think about, and your final choice has to be determined by which eye level you prefer.
Mike
thanks Mike,
Yes, the perspective view based on eye level is the tricky bit. As you say, looks right in the photo but when the photo is taken from another angle it just doesn't work.
My plan is to use foliage and a mirror. Then of course, you can't take a photo straight on to the mirror or the photographer and camera are seen in the reflection. Hopefully though, any other angle will look OK. Some experimenting to be done.
cheers
Posted
Full Member
With the bridge buttresses more or less in the right place, although not yet glued in it was time to scratch build the girder and handrails out of styrene.
The girder is pretty straight forward and while not an exact copy of the original will do for my purposes. The handrails were another step up again.
The styrene rod is 1.0mm x 1.00mm angle and the shortest length required was 6mm long. Handrails from 0.75mm round rod and holes drilled in the uprights with a pin vise.
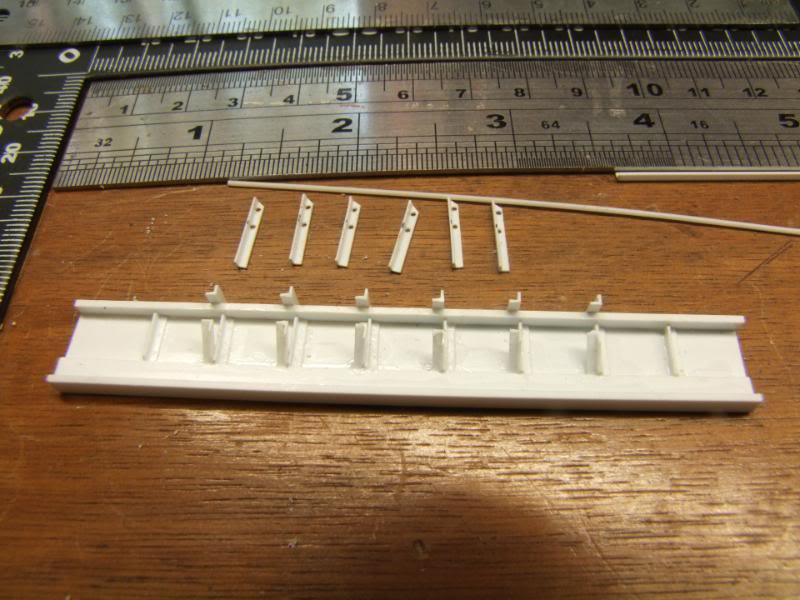
As you can see, without setting up a template or guide for the handrail holes the chances of getting nice even handrails is pretty slim. Eventually they will be replaced but the little blighters are so time consuming that for N scale, close enough is good enough. The camera unfortunately is going to be quite cruel. The railings on the 2nd girder were done with a template and are straight.

In place and from a distance they don't look quite so bad. The space under the bridge for the abutments can be seen.

Girder and rails sprayed in grey primer and abutments going in.
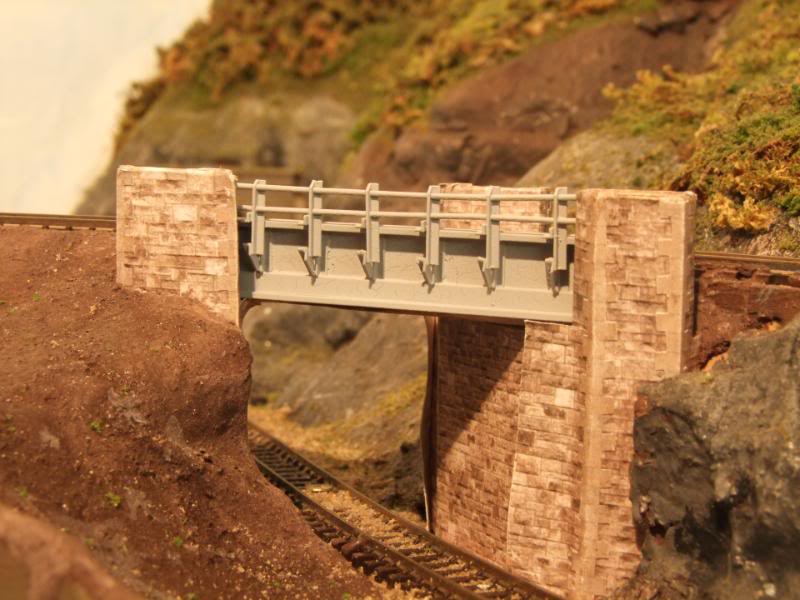
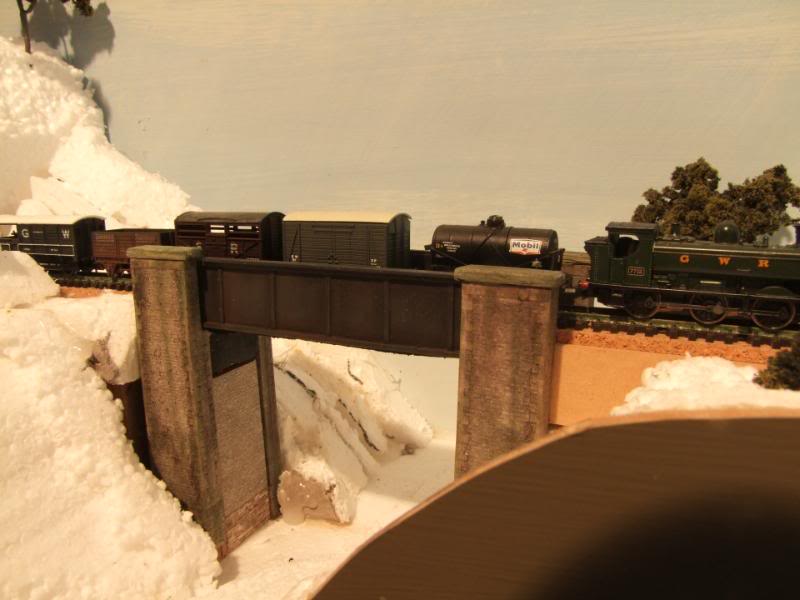
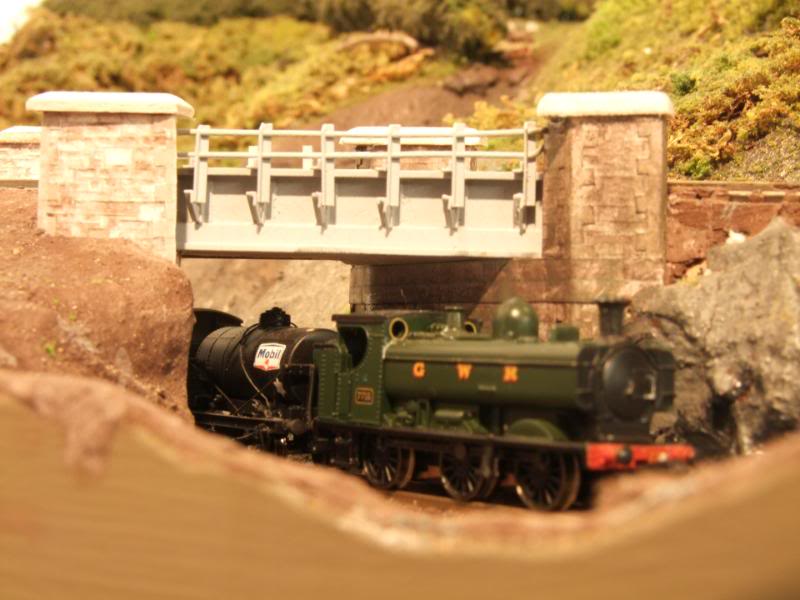
Unpainted buttress cap stones and some local goods traffic underneath with a 57xx tank engine in charge.
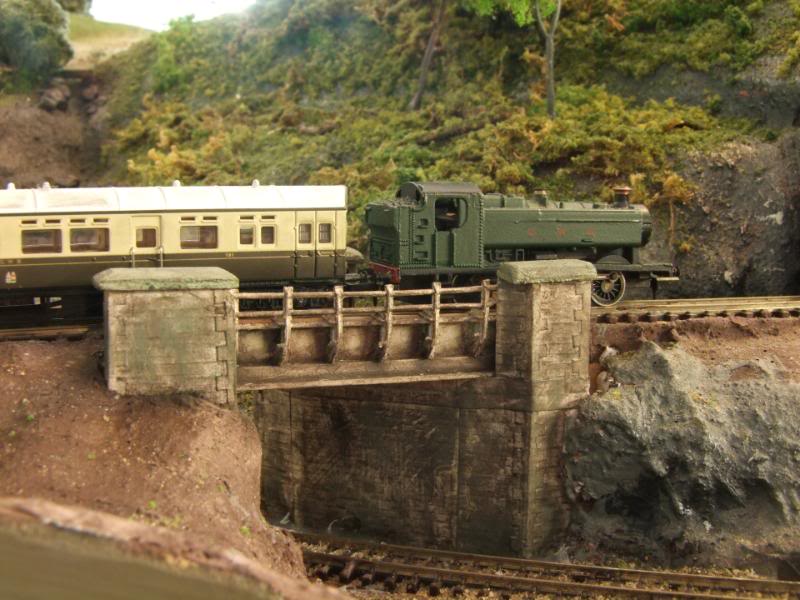
… and all done, painted and weathered.
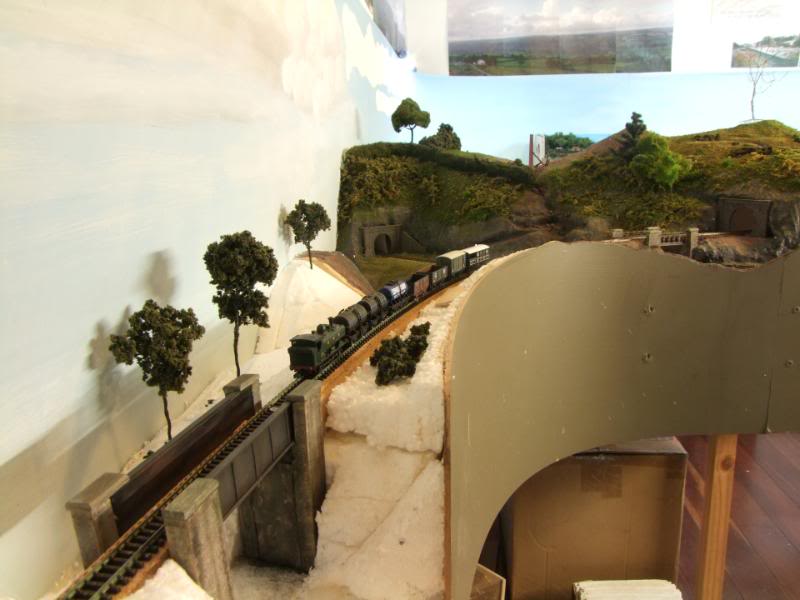
Now that both bridges are complete on the new Pentrecourt Halt - Pencader section the next stage is to create the plaster hard shell and terrain.
:HappyGoody… gotta love mud pies…
Posted
Guest user

VG, :thumbs & as Max, would say " an elephant stamp"
Posted
Full Member
Posted
Guest user
Blimey Marty, that's fiddly. Nice result though.
Posted
Inactive Member
Max
Port Elderley
Port Elderley
Posted
Full Member
Wonderful work and a dream to watch …….:cheers
'Petermac
Posted
Guest user
Posted

Inactive Member
Posted
Guest user
WOW
This is in the very top drawer of scenery representation I've seen in 40 years of N Scale modelling
You've certainly overcome the cruelty of the camera closeup with your finishing
:doublethumb :doublethumb :doublethumb
Posted

Full Member
Doug
'You may share the labours of the great, but you will not share the spoil…' Aesop's Fables
"Beer is proof that God loves us and wants us to be happy" - Benjamin Franklin
In the land of the slap-dash and implausible, mediocrity is king
"Beer is proof that God loves us and wants us to be happy" - Benjamin Franklin
In the land of the slap-dash and implausible, mediocrity is king
Posted

Full Member
Are you sure it's N gauge? You aren't trying to pull a fast one over on us are you?
One question Marty, you stated: "The styrene rod is 1.0mm x 1.00mm angle and the shortest length required was 6mm long." Am I reading this right, you have a styrene angle 1.0mm x 1.00mm? If so where in the world did you find it?
Wayne
1 guest and 0 members have just viewed this.