N Gauge - Newcastle Emlyn****
Posted

Full Member

Posted
Full Member
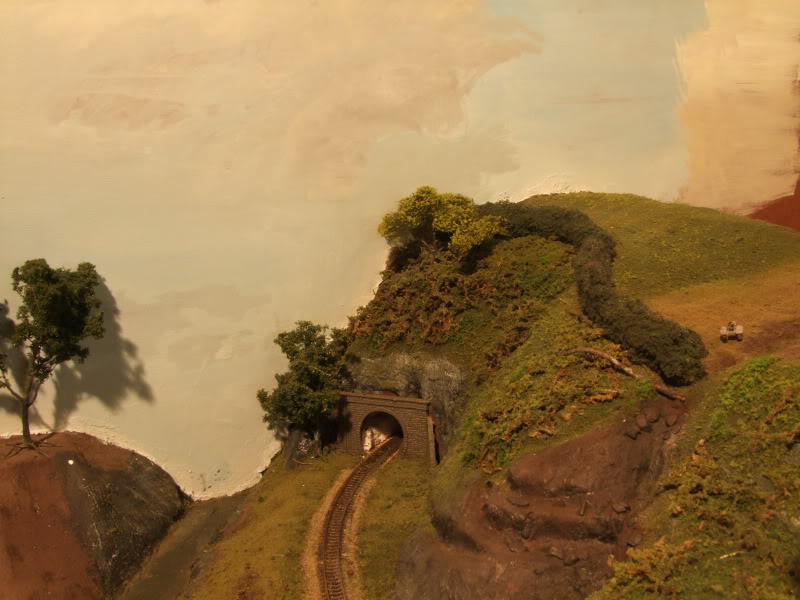
Building up from the base layer of vegetation the plan is create a representation of the bracken and understory shrubs and trees on the hillside. There is also a smattering of twigs, bark and bits and pieces that one might find on the forest floor.
Over the top of all is another scattering of woodland scenics fine turf in two colours to give the impression of moss and lichen growing over everything.
The base material is lichen from a bag of the stuff that has been lying around the workbench for 20 years, lots of diluted PVA glue and then once dryish, spray glue for the scatter to stick to.
In the first photo there are a few addition rocks still waiting for the glue to dry.
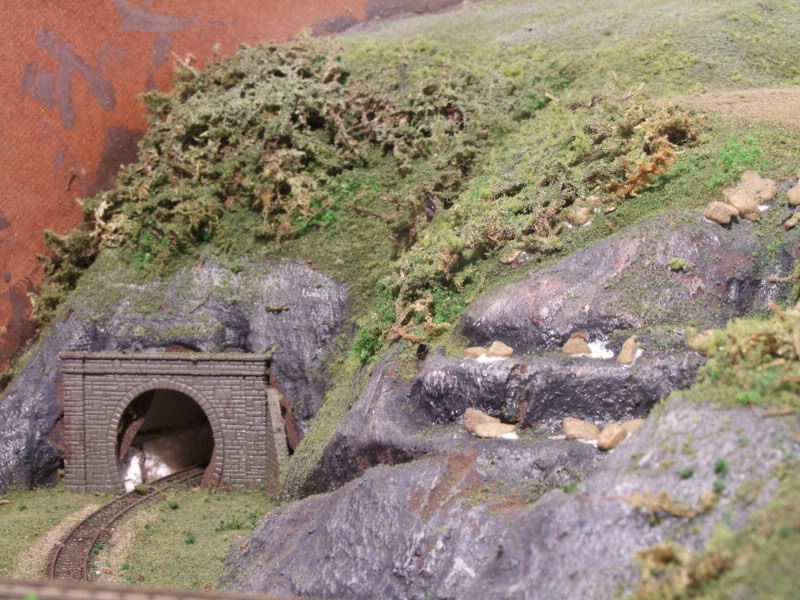
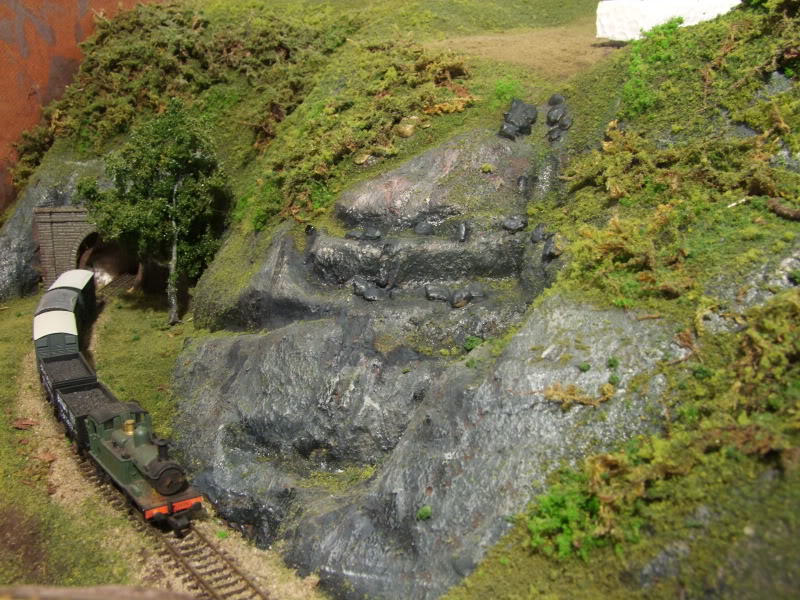
In the second photo, more scatterings and pattings and the rocks have been painted in an effort to make them blend in.
The top of the hill has also started getting the makings of pasture and fallow fields.
The 14XX, possibly 5819, works upgrade with the morning goods for Newcastle Emlyn.
Waterfall, hedges, trees, so much to do.
Bother spring cleaning :???:
Posted
Guest user
Mike
Posted
Guest user
Posted
Inactive Member
Les
Devon Junction
Kernow Junction
Kernow Junction
Posted

Full Member
Excellent Marty. :thumbs
'Petermac
Posted
Guest user
Your trip to Cornwall and Wales certainly gave you the minds eye view of the actual landscape of these areas.
Depending on the time of year the gorse bushes have tiny yellow flowers which can be recreated using that woodland scenics stuff that teases apart and you spread it across the bush.
Brian
Posted
Inactive Member
Peco have just released some neat gorse bushes they look the part with flowers. Of course Its not the same as doing your own thing.
regards,Derek
Posted

Full Member
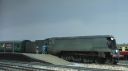
Love that last photo!! Have you weathered the 14xx,or is it just my eyes playing tricks?
:pathead:pathead:pathead
Cheers,John.B.:thumbs
Posted

Inactive Member
What is it about these Australian modellers ? They must have better light than we do …………………………..:roll:
Excellent Marty. :thumbs
Perhaps it's that light at the end of the tunnel………………….?:roll:
Ken
'It don't mean a thing if it ain't got that Swing'
Posted
Guest user
I'd make or buy some of those, if I were you.
Mike
Posted
Full Member
There's a patch on the right hand side of the smoke box, under the boiler, that needs "reducing". When the camera zoomed in it looked like rust had taken a serious hold.
Posted
Full Member
There WERE a lot of photos taken while in Wales, hopefully I can do them justice.
I've got some yellow scatter somewhere and will give the gorse a go.
And the light IS better here :thumbs.
Posted

Full Member
Phill
Posted
Full Member
Having fun doing it and just want to get on with it.
But stuck at work now… and timber flooring to lay on saturday and an SES recce to plan out a camp site on Sunday morning means I've got to wait… sigh.
Posted

Full Member
Dip clumping into a solution of pva and yellow acrylic and hang 'upside down' to drain off.
If the mixture is right, the yellow goes to the very tips of the material.
Posted
Full Member
I'll give it a go. :thumbs
Posted

Full Member
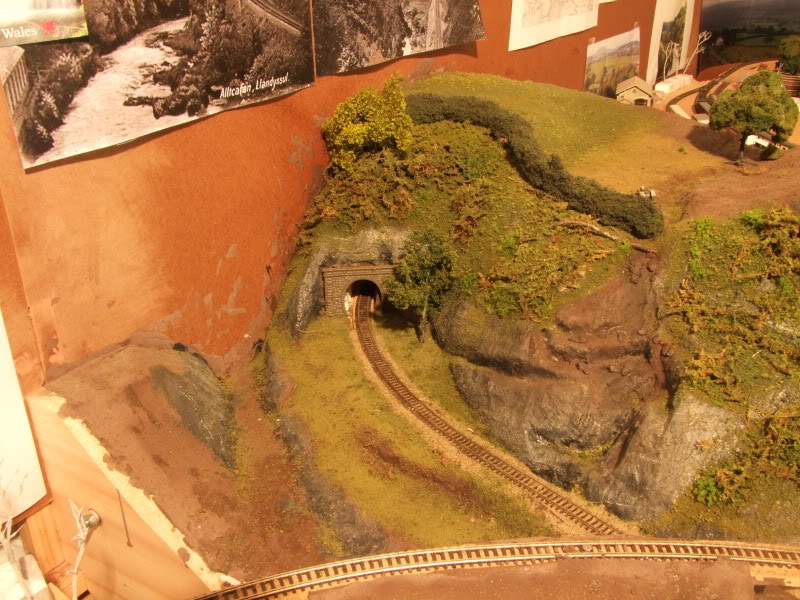
Just been catching up on your thread. Some excellent progress and that tunnel looks very effective and as though it really needs to be there. One of the joys of N gauge I suppose in that you can reflect some substantial natural features in a small space. The rock work is excellent.
Bob(K)
 Last edit: by Bob K
Posted
Full Member
Progress update from the holidays
Finally managed to get a serious go at the layout over the Christmas and New Year holidays.
The forum tree construction project has a lot to answer for. For those of you that remember 35+ trees are being made up for the Newcastle Emlyn layout, particularly for the hillside above the Altycefan tunnel in the picture above.
Several were completed and along with some home made hedges, put into place against the backboard at the top of the hill to see if they were looking "right".
It was then that it became apparent that before the trees could be permanently "planted" on the layout the backscene was going to have to be completed. Either painted or the photo montages from the trip to Wales made up and stuck on.
It looked like this and lets face it, had looked like this for far too long:
So, was painting an option, always inspired by MikeC's work it was worth having another go. Some more brushes and paints fell into the shopping trolley at the nearest hardware megastore while on a trip for something needed around the house. The "how to paint a backscene" topic was re-read and a small section of the backscene was attacked to see if it was worth the effort.
After consultation with Tracy and consideration of the fact that the practice was actually quite enjoyable. The bullet was bitten and painting a backscene begun.
Posted
Guest user
1 guest and 0 members have just viewed this.