N Gauge - Newcastle Emlyn****
Posted

Full Member
Yes Alan,How are you going to seal it all, if you use plaster/ modrock in patches that will also bond all the polystyrene together.
Same method I used for the Pentrecourt Halt diorama, chux dishcloths in a polyfiller, PVA and earth Oxide mix, layered to make a hardshell and then more of the same but without the chux to complete the surface and allow some more sculpting.
Now, if I do 3 or 4 layers of the chux plaster cloth base it will certainly hold the polystyrene in place but I am a little worried that it might collapse in on itself if the polystyrene is eaten away underneath it.
I'll have to turn the Pentrecourt halt diorama upside down and see how the polystyrene is doing there, I'm pretty sure I used the same glue.
[user=285]Alan[/user] wrote:
Thanks mate, glad to hear people are learning from my mistakes. :shock:I am so looking forward to you starting work on the ground area, just so much to learn from :thumbs

Seriously though… I'm really happy with the progress so far… and if it helps anyone else, so much the better… onwards and upwards. :thumbs
 Last edit: by Marty

Posted

Inactive Member
Ken
'It don't mean a thing if it ain't got that Swing'
Posted

Full Member
That large hill / small mountain has the potential to look very impressive when it is done, i'm glad i didn't have to clean up the mess though :thumbs
'Kev
Posted

Full Member

That is a 2" thick piece of expanded polyurethane.
A small drip of Liquid Poly went straight through and out the other side and shows no sign of stopping 5 minutes later.
The PVA glue has not penetrated the surface. Yet.
The UHU is gently boring a hole.
Last edit: by ddolfelin
Posted
Guest user
That's a very useful experiment :thumbs
I have always used PVA, takes a little longer to dry, but always works, but then I don't have any of the other glues in the shed :roll:
Posted
Full Member
The UHU has excavated a 0.75" hole.
The PVA has hardly had an impact.
Perhaps best to remember also that the fumes from liquid poly can cause as much melting as contact (I've had this!).
Posted

Full Member
Glad to hear you have made accommodations for the occasional derailment. I have the same issues on my layout.
I really do not like that polystyrene stuff, just too messy for my taste. I guess every type foam has it's drawbacks though. The blue foam I'm using doesn't carve very well, but it does clean up easily.
Really like what you are doing with the hill, should look super when it's done.
Wayne
Posted

Full Member
The hill looks great Marty. If I were you,I'd add some colour to your plaster/cloth so that if it ever chips,you're not left with glaring white underneath.(Maybe even paint the polystyrene first with brown/sand coloured acrylic?)
We all just KNOW that you're going to do an amazing job on this,if Pentrecourt Halt is anything to go by!!!
:pathead
Looking forward to the next bit!
Cheers,John.B.:thumbs
We all just KNOW that you're going to do an amazing job on this,if Pentrecourt Halt is anything to go by!!!
:pathead
Looking forward to the next bit!
Cheers,John.B.:thumbs
Last edit: by georgejacksongenius
Posted
Full Member
Glad it helped Ken.- and I've got loads of it from my local TV shop!!!:roll:
Ken
I've got a loft space full of it too :thud
I'd like to use it up but I think the look on Tracy's face last night suggests an alternative method should be used ;-) :thumbs
Posted
Full Member
Thanks Kev, … and what a clean up too, easy I though… and it was… but time consuming tracking all the bits down… oh brother.
That large hill / small mountain has the potential to look very impressive when it is done, i'm glad i didn't have to clean up the mess though :thumbs
Posted
Full Member
Now, three hours later, the liquid poly has eaten a 2" x 2" cube out of the polyurethane and hasn't stopped yet!
The UHU has excavated a 0.75" hole.
The PVA has hardly had an impact.
Perhaps best to remember also that the fumes from liquid poly can cause as much melting as contact (I've had this!).
A very useful experiment and a clear warning. I hope you conducted it outside. :mrgreen:
I've upended my Pentrecourt Halt diorama and there is no damage what-so-ever from the liquid Nails "Fast" nor is the recently completed hillside showing any impact from that adhesive either.
I'm fairly confident that the combination I have used is sound.
Not so the leak of varish on the Three Rivers test bed… but that is another story for another time… when I complete that thread there will be photos.
Last edit: by Marty
Posted
Full Member
Useful to know, what did you use to shape it.The blue foam I'm using doesn't carve very well,
Posted
Full Member
Thanks John,If I were you,I'd add some colour to your plaster/cloth so that if it ever chips,you're not left with glaring white underneath.(Maybe even paint the polystyrene first with brown/sand coloured acrylic?)
My standard earth coloured ground "goop" uses a brown Oxide used to colour concrete/render and it works a treat.
Onwards and upwards.
Posted
Guest user
Just looking at the photos again, show what a huge layout you are building, I keep forgetting that this is N scale/gauge, how long is the track plan,or what size room is it in, cause that would take up a very large space in 00.
Posted
Full Member
how long is the track plan,or what size room is it in, cause that would take up a very large space in 00.
Alan,
The hill has made a big difference to the overall view of the layout. It has suddenly become more 3 dimensional and has more "depth". I'm very pleased.
Not as long as I want it to be!! But you have to start somewhere.
I had hoped (and still do) to model the entire branch from the junction with the Aberystwyth - Carmarthen line at Pencader all the way to the terminus at Newcastle Emlyn.
In it's current configuration (L-shaped) in a room 13' 6" by 9' the single track run from cassette to terminus is about 69'.
Then there are all the sidings.
I mustn't be greedy, it's enough to get on with… and there is always the other side of the room where my workbench is.
Last edit: by Marty
Posted
Guest user
That would take up a very large double garage in 00, I think :hmm
Posted
Full Member
That's why I chose N gauge. :thumbs
My double garage isn't that big and the cars, pushbikes and workshop live in it.
Last edit: by Marty
Posted
Guest user
Reckon it would, basically double it, 27' x 18'.
That's why I chose N gauge. :thumbs
My double garage isn't that big and the cars, pushbikes and workshop live in it.
 hmm
hmmI live in mine sometimes :roll::roll::roll:
Posted
Full Member
[user=22]Wayne Williams[/user] wrote:Useful to know, what did you use to shape it. The blue foam I'm using doesn't carve very well,
I have not done a lot of shaping as yet, but the spots that I have tried, the foam comes out in small chunks about the size of a marble or even bigger. So it is hard to remove small amount of foam from the surface.
When I get to an area like that I will do a thread on the problem and issues of the blue foam.
Wayne
Posted
Full Member
Progress on the hill is steady and a solution has been found to reducing the mess it makes.
One of the problems with cleaning up the polystyrene mess was that it filled up the vacuum cleaner quite quickly.
Tracy found a reusable vacuum bag for our vacuum cleaner, rather than a paper disposable one.
The bag has an open end that is sealed by a plastic clip and is now dedicated to vacuuming up modelling stuff.
The other trick is to vacuum as you go, that is, one hand for the bread knife, scalpel, etc the other hand holds the nozzle of the
running vacuum cleaner close to the area being worked on.
This method prevents the polystyrene from spreading on the 4 winds and was quite successful.
Depending on the vintage and power of your Hoover you might want ear plugs.
Anyway…
To the pictures… it's still a big mound of polystyrene but hopefully you can see that compared to some earlier photos that it has grown a bit and taken on more shape.
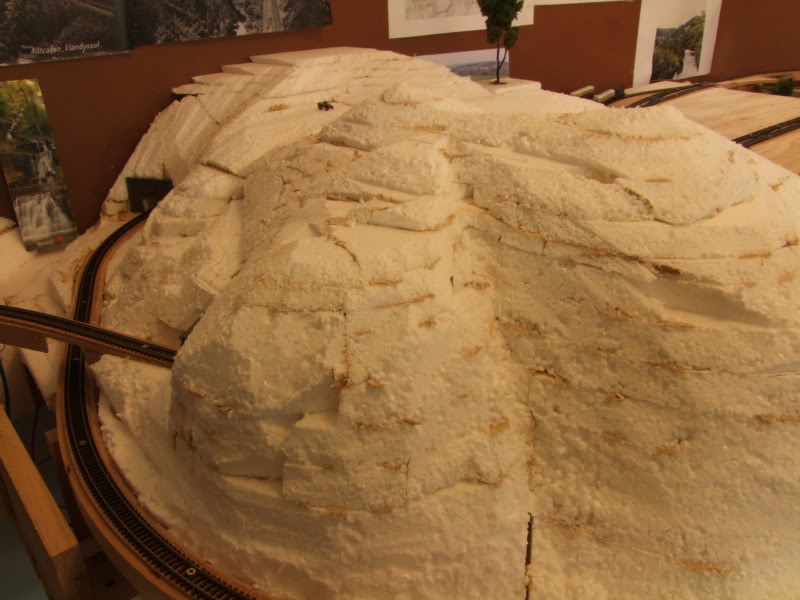
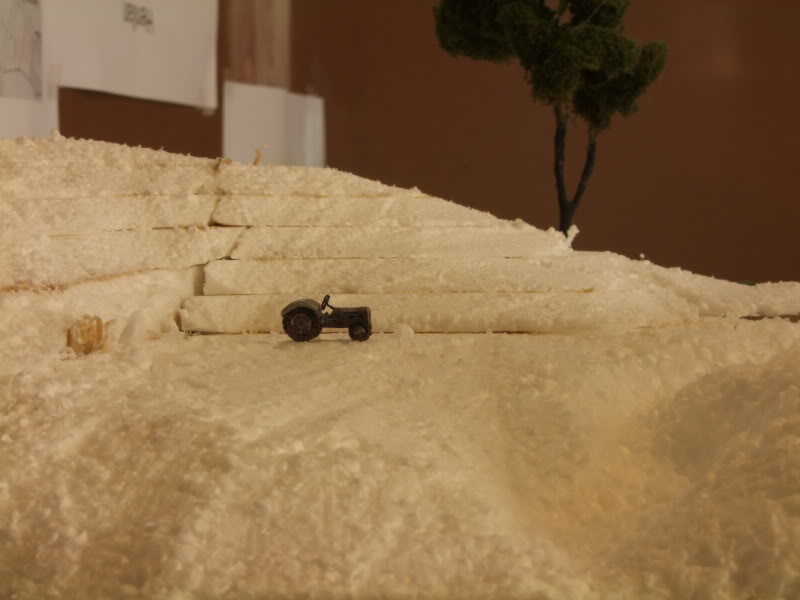
A tractor and tree have been added to give some scale representation.

… and a little closer, for those capable of picking out white water in a white river bed on a white hillside, the stream that runs into the waterfall in the centre of the picture above, starts to the right of the tractor.
This has been mentioned elsewhere but a Farish 0-6-0 tank was taken apart for cleaning the other day and one of the small screws/bolts disappeared onto the wooden floor never to be seen again. :thud
Hoping that Richard of DDC Concepts would have a suitable replacement a trip to his Naval Base shop about 40 mins drive south of Perth was made on Saturday.
Nice and helpful bloke.
He pointed out that the screw only held the copper pickups to one of the brush wires and that a touch of solder would do the trick… this after ransacking his supply of small screws/bolts to no avail.
So, since it was time to replace the "beginners" soldering iron, a new toy was duly purchased, with solder and flux and the Farish tank is now as good as new.
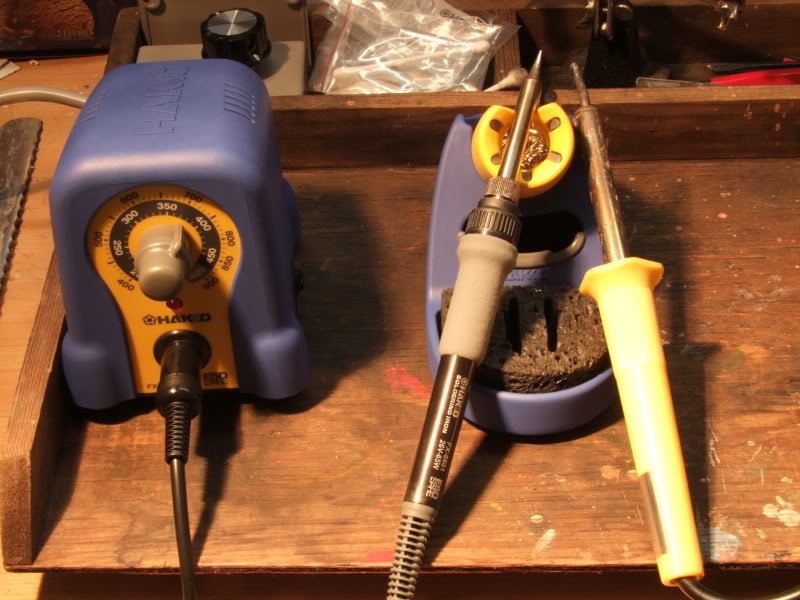
The poor beaten up old yellow one on the right just doesn't compare.
There is also a small hand held controller on my workbench that is being made up from scratch. Just playing around with the concept at the moment and might start another thread for some assistance, but at least soldering fine connections will no longer be a problem.
1 guest and 0 members have just viewed this.