N Gauge - Newcastle Emlyn****
Posted

Full Member
Unfortunately there are a bunch of SEEPs in stock.
The Servo's are on the list once the SEEPs are used up. Looking forward to the challenge and to the smoother operation.
This is as good a point as any to discuss what is being trialed on this test bed to try and make the SEEP accessory switch more reliable.
From what I've read so far and for those that don't know (and to clarify my understanding), the problem with trying to use SEEP accessory switches with N scale points is that the contacts on the SEEPs mounting board are better suited for HO/OO points.
The accessory switch contacts rely on the armature of the motor to slide far enough across to bridge between the common contact and one or other of the outside contacts.
If the SEEP is mounted up close and tight to the baseboard under an N scale point the movement of the throw bar doesn't go across far enough to allow the contacts to be bridged.
The SEEP does, however, come in a long length pin version which allows the motor to be mounted further away from the point throw bar thus allowing some flex in the pin to come into play which in turn allows the armature further travel.
Thus Paul's comment about using a 3 - 5mm foam pad as a spacer.
Another option is to use slightly smaller diameter screws to hold the mounting board to the underside of the baseboard and to NOT do the screws up tight. This will allow the point motor to move slightly under the baseboard further increasing the movement of the armature across the accessory switch contacts.
There are several discussion on this on the web if you need something clearer than my musings. Videos too.
The baseboard on this test bed is 18mm thick and the screws are smaller than they need to be. The sucker had better work reliably!!
Anyways….. enough waffle…
Must have been kicked in the head by the missus or one of the cats Saturday night, woke up on Sunday with a headache and a limited range of movement. Not ideal for slaving away at the workbench fiddling with tiny wires and such.
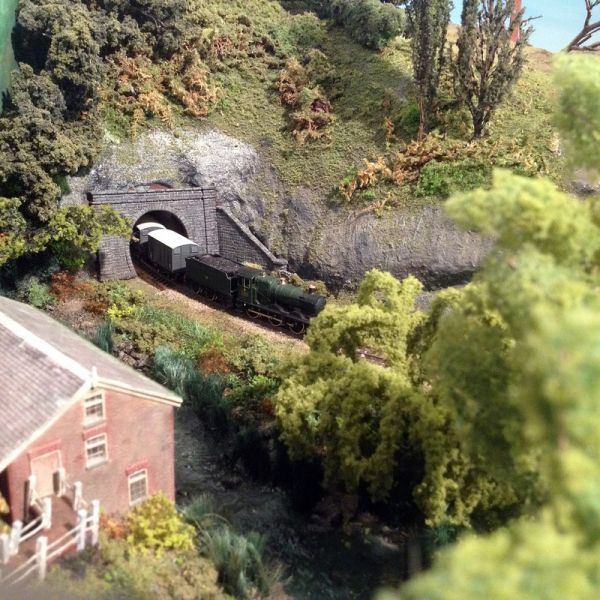
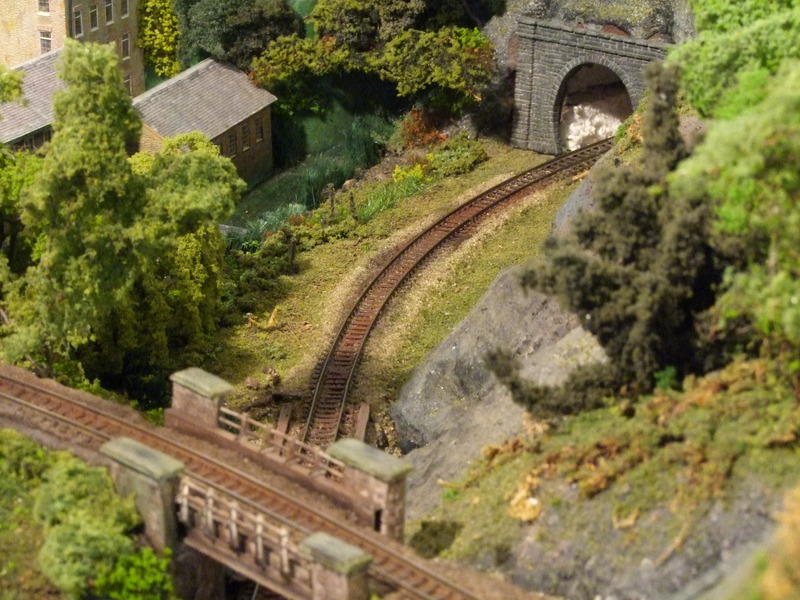
Standing up straight, waving an aerosol can of hairspray around and sprinkling scatter was much easier so a tree making session happened instead.
This is part of the result, there is a new willow on the other side of the riverbank, some pines on the hillside and a woodland against the backscene above the tunnel. The tunnel mouth still needs fixing in place and there is more to do with the whole scene yet but the Collett Goods number 2252 with it's early turn goods for Newcastle Emlyn is enjoying the run up the bank through the valley.
cheers
Marty

Posted

Banned
Cheers, Gary.
Posted
Full Member
Posted
Guest user
Another picture of the century coming up without a doubt. Blew me away.
No more to be said
Toto
Posted

Full Member
Cheers
Ron
Proper Preparation makes for Perfect Performance!!
http://yourmodelrailway.net/view_topic.php?id=13331&forum_id=21
http://yourmodelrailway.net/view_topic.php?id=13331&forum_id=21
Posted

Full Member
As you are using a relay, you only need enough movement to work as an off/on switch, so mounting slightly off centre may work better.
Paul
Posted
Full Member
They're trick little suckers though, getting the whole thing centered under the center of the switch blades is finicky enough, then trying to offset it…. adjust the clothes peg jig accordingly maybe… definitely worth sleeping on. cheers mate.
Marty
Posted
Banned
Thanks mate…. working hard to keep up with the Linden Ford's of this world.
The difference is that working in OO is relatively simple, but working in N is just incredible. I'd easily say the scenes you create are above that of Linden Ford due to such scale. I would love to see your layout in the flesh Marty. Top job. :thumbs
Cheers, Gary.
Posted
Full Member
Marty
Posted
Banned

Cheers, Gary.
Posted
Full Member
Worth the trip though.
Onwards…..
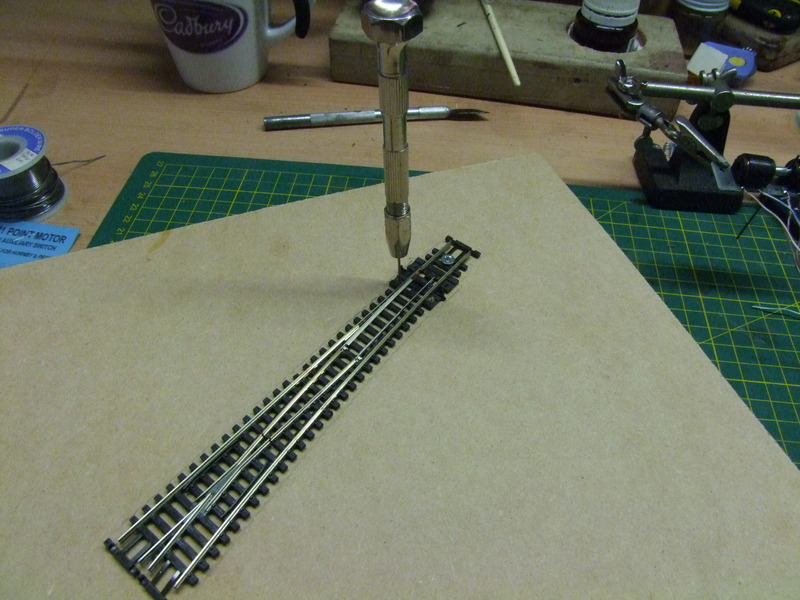
With the Switched Frog test plank the next step was to mount the point.
Once the point is in the correct position on the layout, in this case sort of centered and angled to allow for a little bit of plain track at each end, it's time to mark up the orientation so that the point motor can be positioned correctly below the board.
To do this a small drill bit in the pin vice was used to drill through the hole in the throw bar that is further from the track, then the point was changed and a second hole drilled through using the hole in the other end of the throw bar. Normally done before soldering on the dropper wires.
Then underneath the base board (how nice to be able to just flip it over on this test bed) a pencil line was drawn between the two holes. This gives the point motor alignment. In this photo the dropper wires are already through the holes drilled for them and the larger hole near the alignment line is for the extender rod from the armature of the point motor to one or the other of the holes in the point tie bar. There are also a couple of the bus wires in place. They will be discussed later.

Then the SEEP point motor was positioned and aligned, carefully threading the extender bar through the hole in point throw bar and using the pencil line for alignment.
The wooden clothes peg has a gap cut and filed in it to allow the armature to be centered and held in position, on the other side of the board a couple of shims from plasticard offcuts were used to center the switch blades of the point. Once all aligned and centered the screw holes were drilled with the pin vice as shown and the SEEP was lightly fixed in place with a couple of screws with a slightly smaller diameter than needed.

Also, mostly in the evenings after work when the brain can't cope with complex things, some ongoing work is being done to the scenery.
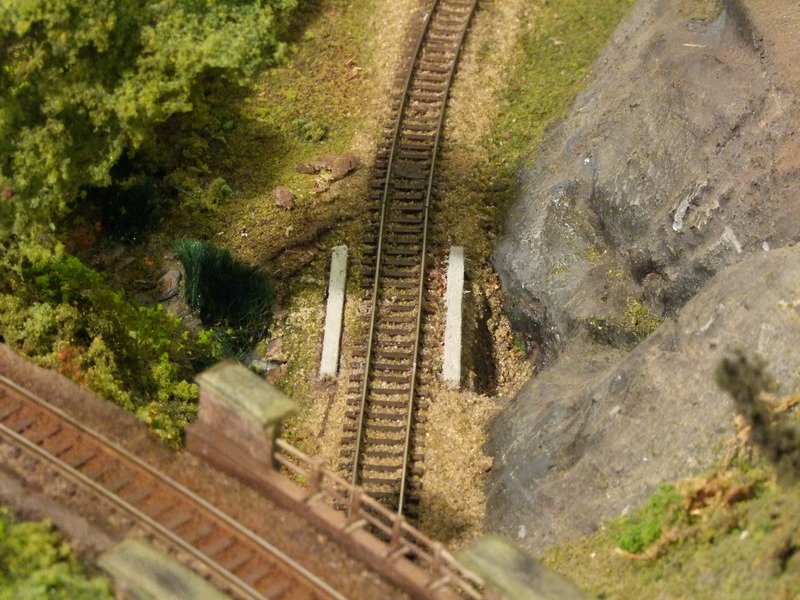
Just beyond the rail bridge in the Alltycefan Mill valley is a waterfall that runs out under the tracks into the Afon Teifi. The rocks on the right is the area to be made into the waterfall and there is a brook on the left that runs into the river.
There was an opportunity to delineate the crossing point a bit better with a drain pipe and rough culvert. The drain pipe is on place on the river side, although it's a bit hard to see in these photos, and a couple of bits of balsa have been cut into the bank on either side of the ballast to represent some sort of concrete retaining wall. Here they are in their natural state.

Then painted with a light grey acrylic paint and left to dry overnight….
Then a wash of thinned black to bring out some texture…. and left to dry….
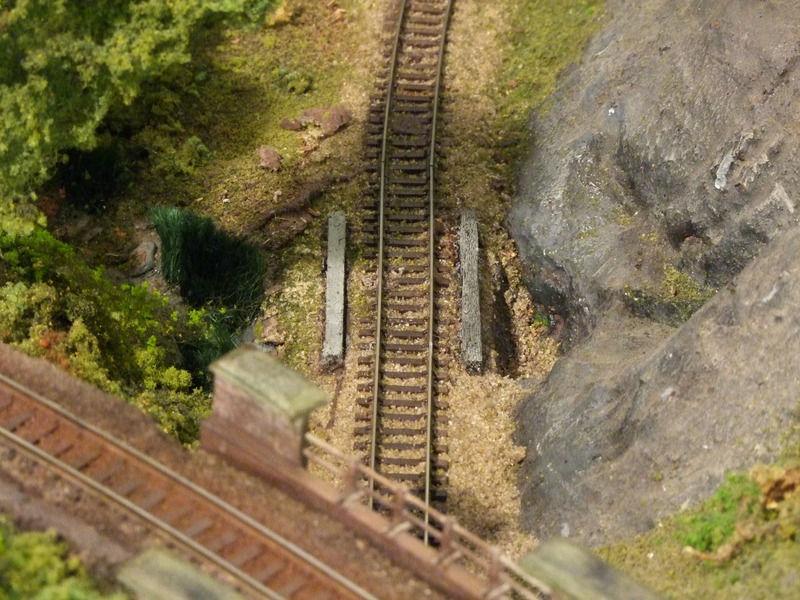
… and finally a dusting of rail rust and black weathering powders…. as always I've overdone it…. must get less on the brush…
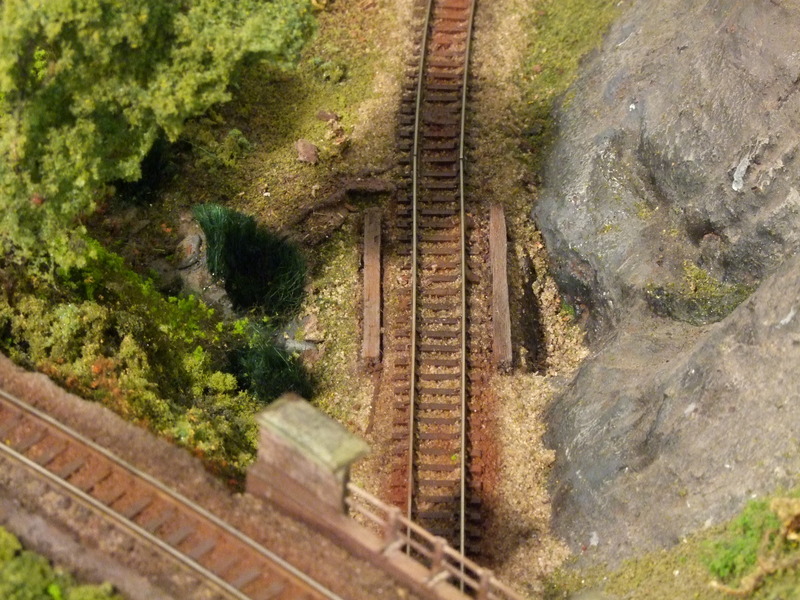
With the weathering powders out I couldn't resist having a go at the track bed too…

I think I should have left the concrete without the weathering powders and the track bed is going get as much of it vacuumed up as I can!
Hopefully that will tone it down a bit.
cheers
Marty
Posted

Site staff
Ron
NCE DCC ; 00 scale UK outline.
NCE DCC ; 00 scale UK outline.
Posted
Full Member
It's cold in them there tunnels…. some of that snow hasn't melted yet….
As many of you will recall the hillside was once covered in snow…..


It's on the list Sol…. when I fix the tunnel mouth I'll do the internal walls at the same time….
Posted
Guest user
What a transformation. The waterfall area and the culvert look terrific.
Another great scene:thumbs:thumbs
Cheers
Toto
Posted
Full Member
Marty - simply boootiful, I know its n gauge cos you let that slip in the description, looking at the photos I'd say it was a larger scale. Excellent modeling there.:pathead
Paul
Posted

Inactive Member
That`s just beautiful mate…..a little work of art.:thumbs:thumbs:thumbs:thumbs:thumbs
Just a thought re your switching issues and this may not work at all or even be practical for that matter….but….would it be possible to place a micro switch close to the point motor center pin and then that micro switch could activate either a DPDT or 4PDT relay to take care of your switching requirements.
You could fit your point motor to move the tie bar correctly and then fit the micro switch to match the position of the point motor center pin?????
Like I say…it may not be practical…but I just thought of it and decided to chuck it into the mix….you never know.????
:cheers Gormo
"Anyone who claims to have never made a mistake, never made anything!!"
https://sites.google.com/site/greatchesterfordmodelrailway/home
https://sites.google.com/site/greatchesterfordmodelrailway/home
Posted

Site staff
Not sure you have overdone it Marty, looks great as it is and probably a bit different to the naked eye anyway :thumbs… and finally a dusting of rail rust and black weathering powders…. as always I've overdone it…. must get less on the brush…
With the weathering powders out I couldn't resist having a go at the track bed too…
I think I should have left the concrete without the weathering powders and the track bed is going get as much of it vacuumed up as I can!
Hopefully that will tone it down a bit.
cheers
Marty
Ed

Posted
Full Member
Here's the comparison for what it's worth. The excess powder was vacuumed up and then further toned down with some Tamiya Yellow and grey weathering powders. To my eye it blends in better.
This is what it was….

This is what it now is…
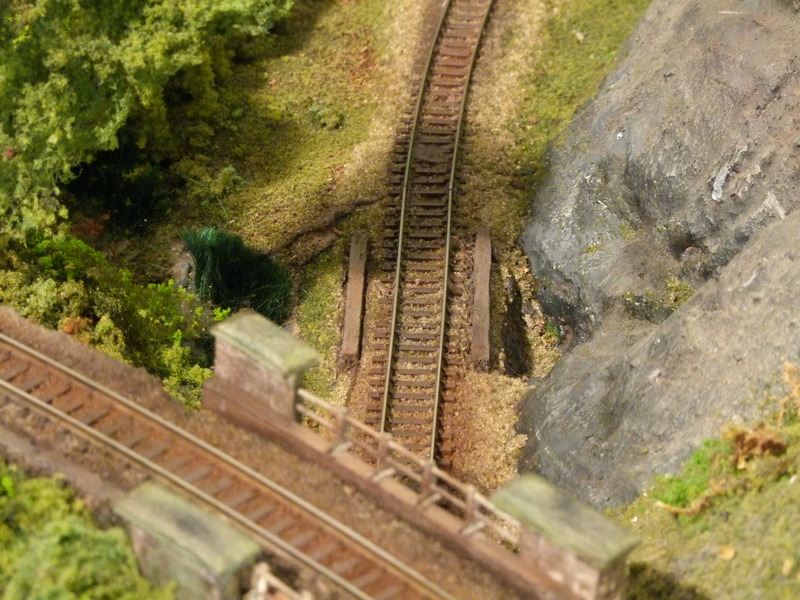
and the overview shot… from this….

to this…

cheers
Marty
Posted
Full Member
Micro switches had certainly crossed my mind Gormo after your examples and if I find that the SEEPs are unreliable despite the modifications they will be next to be tried.Hey Marty,
That`s just beautiful mate…..a little work of art.:thumbs:thumbs:thumbs:thumbs:thumbs
Just a thought re your switching issues and this may not work at all or even be practical for that matter….but….would it be possible to place a micro switch close to the point motor center pin and then that micro switch could activate either a DPDT or 4PDT relay to take care of your switching requirements.
You could fit your point motor to move the tie bar correctly and then fit the micro switch to match the position of the point motor center pin?????
Like I say…it may not be practical…but I just thought of it and decided to chuck it into the mix….you never know.????
:cheers Gormo
cheers
Marty
Posted
Full Member
I've tried the slitting disc on the Dremel but it's slow, noisy and messy. The razor saw is slower, less noisy but just as messy.
I thought I might try the band saw next. Should make short work of it!

cheers
Marty
1 guest and 0 members have just viewed this.