N Gauge - Newcastle Emlyn****
Posted

Full Member
A good show, plenty of quality, and not so quality, layouts to provide inspiration. No photos taken, sorry, realised after that they probably would have been of interest to everyone and so wont waffle on too much about it.
Best of show for me was a Sn31/2 scale layout of Bridgetown, one of the country towns in the south west of Western Australia. I used to holiday there as a youngster and could recognise the exact spot in the station forecourt where we would wait to catch the bus back up to Perth. Passenger trains having stopped long ago.
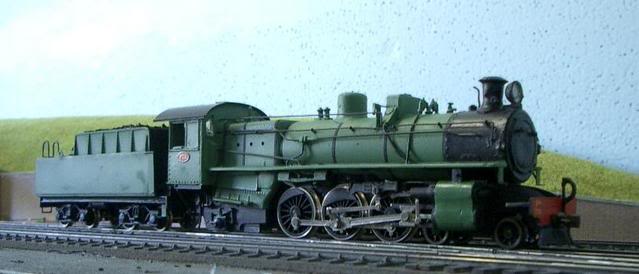
The scale has been specifically chosen to allow modellers to create the Western Australian Government Railways (WAGR) 3 6 narrow gauge lines on OO track but at 1:64 scale. The special interest group scratch build a lot of it but have also developed their own kits, about 40 odd just for the WAGR. Thats dedication for you!!
Heres a WAGR Pm class in Sn31/2. Photo and model by Phil Knife.
No GWR Brake vans to be had unfortunately, but I did manage to take advantage of show discounts and second hand bargains and have added another 9 wagons to the fleet and a Kestrel plastic building kit.
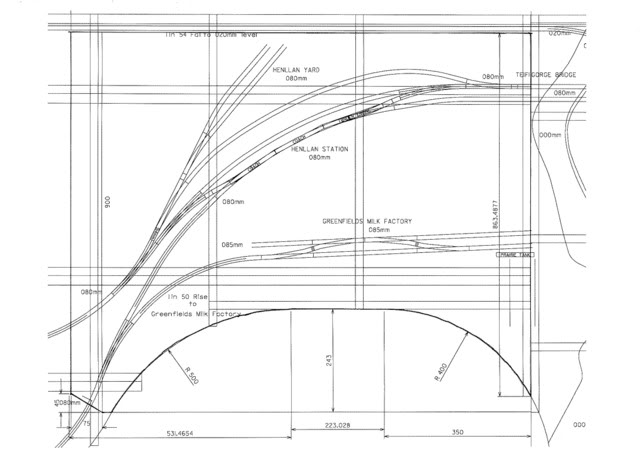
The ply base board for Henllan Station has been purchased and only needs a couple more modifications to its shape before the support frame is added underneath.
The working plan of the layout of the Station looks like this…

Posted
Full Member
Over the next couple of days I'll see if I can recreate the missing posts that bring the thread up to date with progress on the Newcastle Emlyn layout.
cheers
Posted
Full Member
Some good news…
The package of old Graham Farish loco's that was dispatched to BRLines has finally arrived in the UK. While not critical if they went astray, their loss for sentimental value would have been a blow.
Thankfully, Bob Sutton has reported that after a trip to customs to retreive them from the customs layout out the back (what else would customs want them for?), my loco's have been added to his repair list.
A list, I might add, just out of interests sake, for I am not worried, that will take him at least 5 weeks to clear. Business is obviously good.
I am between jobs, finished the old job today and have a whole 10 days off before I start my next job… should be able to make a bit of progress on the layout in that time.
Posted
Guest user
Mike
Posted

Full Member
A great story and a superb project, which is coming on well. If it is any consolation, I had a couple of Dapol locos on Grimethorpe and they were not good. They had no pulling power, just used to skid when pulling more than a few wagons and I too had derailing problems with them. At the time I put it down to the Kato track I was using.
A quick question: One of the reasons (apart from my feeble eyesight :) ) why I changed to 00 gauge was that I found uncoupling in N gauge very difficult, to the extent that shunting was a tedious affair. Have you worked out how you will uncouple your stock? On Grimethorpe I resorted to running the the stock as made up trains and rarely uncoupled wagons.
Novice
Posted
Full Member
Members of the N gauge society have reported good success after some effort with various systems.
I'll start with the PECO system because the initial modifications to rolling stock will be fairly minor. Remove the springs from any couplings that have them, add a shim to prop up drooping couplings, add the elsi metallic strip, add the electro-magnets under the base boards and track.
If I have to go to a different system I'll probably have to replace the standard N gauge couplings.
It's on the list and I'll document the saga when I get to it.
I'm confident I can make it work. :roll:

…btw once I've finished this layout I think the next one will be O gauge in the garden :!: :!: :wink:
Posted
Guest user
Mike
Posted
Guest user
Nice to see Newcastle Emlyn back :!:

Posted
Full Member
The clock means a lot to me and was in my layout thread in the previous forum so I'm going to put it back on here.
T thought about getting me an original GWR station clock for my birthday, bless her. Ebay proved that they were physically available but also proved that financially they were not.
This little gem comes from a guy in the UK who can print anything you want onto the face of a standard, modern, mass produced clock.
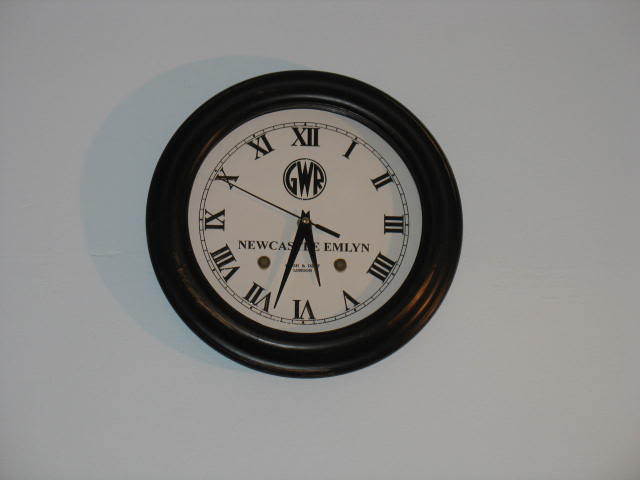
I think it's great and it takes up pride of place in my layout room.
Only thing now is that I have no excuse for being late :!: :shock:
Posted
Full Member
Brian(G)
Posted
Guest user
Yes. Pride of place and deservedly so.
Mike
Posted

Full Member

Posted
Guest user
Posted
Full Member
Posted
Guest user
What an idea :!:
Posted
Full Member
Still catching up with what has happened and was posted.
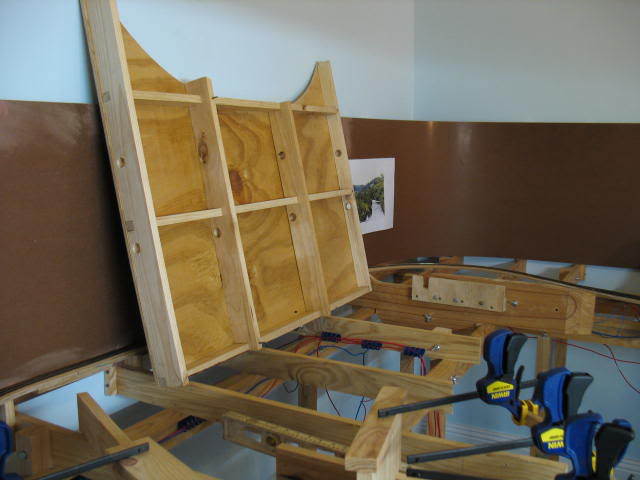
The Henllan Station Board has been constructed and is in place.
Designed to be removeable to allow access to the underside and relocation to the workbench if required.
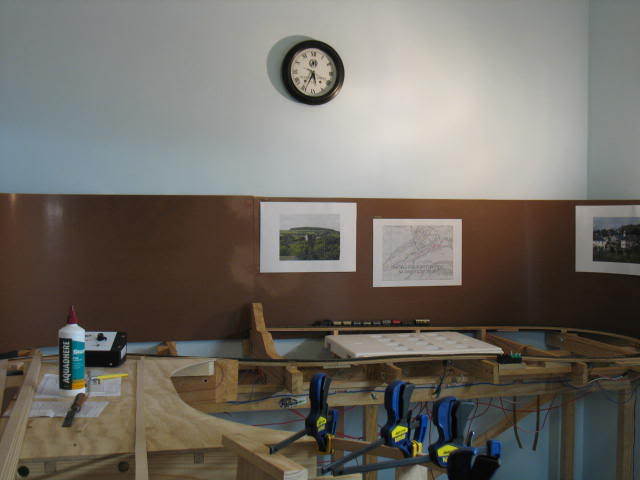
Here it is leaning against the back scene board prior to fitting onto the baseboard
…and here, in the background, in position. In the foreground a spline sub-roadbed is being constructed to carry the line up the "Henllan Bank" from Riverbank sidings.
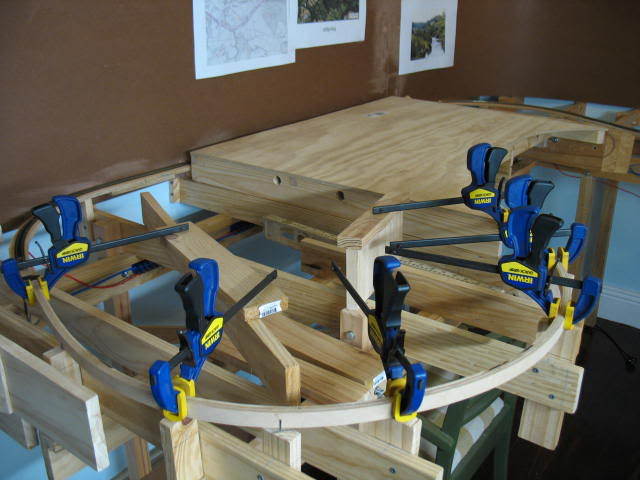
A couple of nails have been hammered into pre-drilled holes in the baseboard joists and then corresponding holes, have been drilled into the frame of the Henllan board to assist with alignment at one end.
At the far end a tight fitting wooden channel has been constructed on the baseboard to match the frame of the Henllan baseboard. A firm tap is required to get the Henllan board in and out but once in it doesn't move.
Posted
Full Member
Great pictures which clearly show the techniques you are applying. I assume you will use flexi track for the curve, or are you able to mould the splines accurately enough to use sectional track?
Novice
Posted
Full Member
Having said that I don't see why you couldn't make the spline sub-roadbed to match set track if needed.
Posted
Full Member
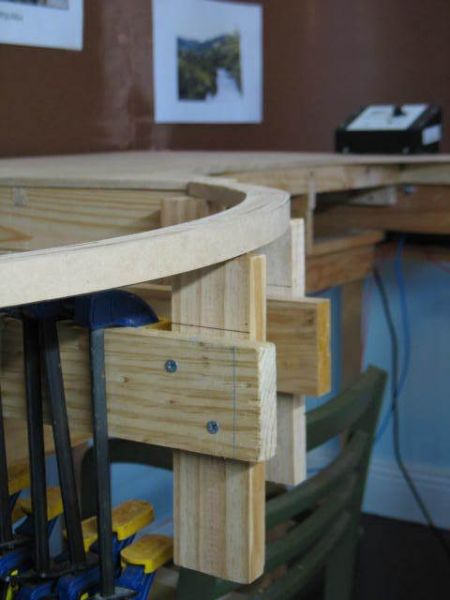
A close up of construction of a spline sub-roadbed leading from the hidden return line from Riverbank Siding to Henllan Station.
4 splines on the inside of the centreline have been cut, glued and clamped.
One more on the outside to go and then 24hrs to dry before removing the centreline nails from the risers and adding the 5 splines on the outside of the centreline.

A close up of the completed sub-roadbed
An overall view showing the L-girder, joist, riser and sub-roadbed construction.
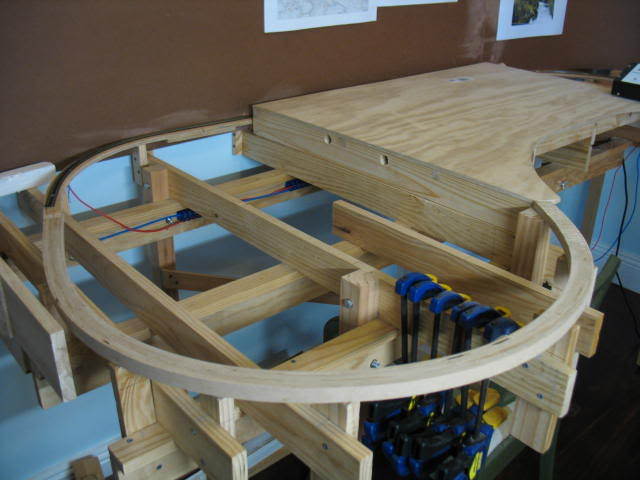
3 different methods of construction have been used for the sub-roadbeds.
At the back of the photo where the track has been laid 9mm ply has been cut to shape and then glued to the top of the risers.
The flat expanse of the Henllan Station board is a traditional baseboard of 9mm ply glued to a softwood underframe.
In the foreground waiting for track is the spline roadbed.
Why, well the station, yard and milk factory siding need to be flat to stop my rolling stock… well… rolling away when parked in sidings.
The straight return loop at the back of the board was easy to do with ply and although I detect the tiniest undulation between the risers as the unsupported section submits to gravity, it will be in a tunnel.
The spline construction, while a little more time consuming, won't droop, makes really nice transition curves both horizontally and vertically and is therapeutic to put together.
Posted
Guest user
Marty said
Electrics
Progress… and holding
I'm itching to get on but we have visitors this week and one of them is using the loft bed in the layout room for sleeping.
Tell them to p*ss off Marty as you have important things to do :P
Darryl…thinking :?: How dare guests invite themselves over when you have a railroad to build :P
1 guest and 0 members have just viewed this.