H0 Scale - South Shore Line
Posted

Full Member
I have learned so much from all of you, and of course the master in my opinion, is "Perry". He's the one who really got me started.
I hope this technique will help you Owen, it really was pretty simple. Maybe that's why it worked so nice. The simple things are always the easiest.
Now what about this cassette dilemma?

Wayne

Posted
Full Member
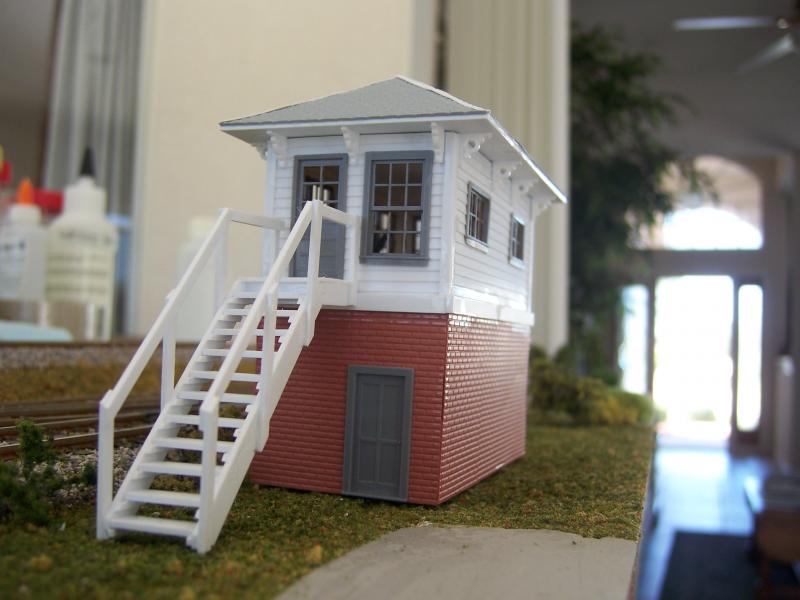
Here it is sitting in place on the layout. It is screaming out for paint, but hey, it looks great to me.

All in all I am happy with my first attempt at making corbels. These in particular were easier to make than I thought they would be. It only took my about an hour to make 18 of them. I figured I needed a few spares!
Once I get it painted, I'll have to make sure that I get my Loco in the next picture!
Wayne
Posted
Guest user
:doublethumb
:cool:.
Posted
Guest user
Posted
Guest user
Sorry I have missed the build of the signal box, is it in another thread ? great job as normal, which area of the layout does it sit ?
Posted
Full Member
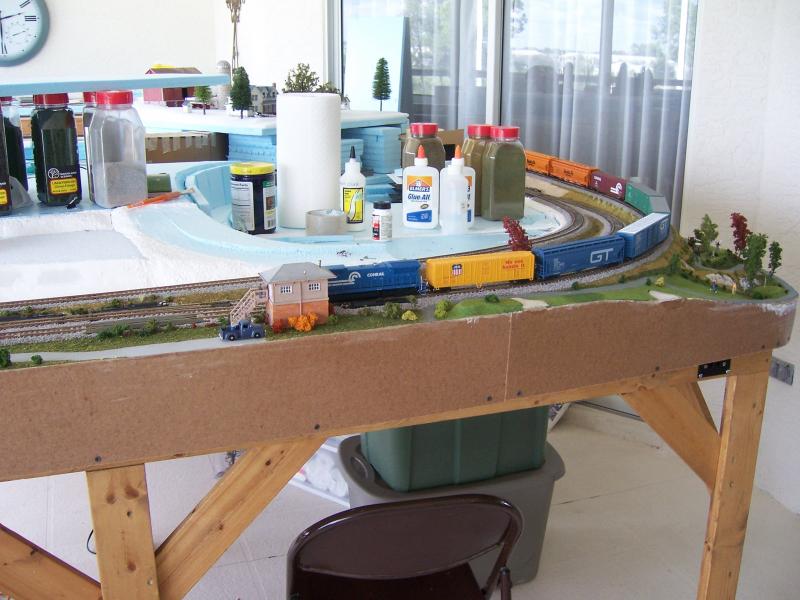
This first picture will show you where the Signal Box sits on the layout, and no I did not do a detailed thread on this project. I thought everyone had seen plenty of Signal Boxes being built.
The position of the Signal Box gives meaning to the dead end road on the layout.
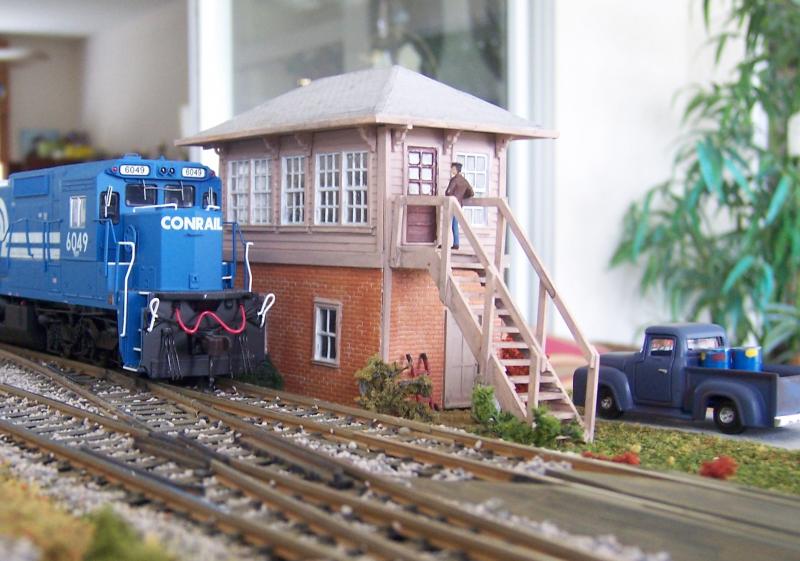
Here it is in a close up view.
Now on to the next project, building of the "Old Republic". That one I will do a separate thread on.
Wayne
Posted
Guest user
 lol::cool:
Posted
Guest user
Alan,
This first picture will show you where the Signal Box sits on the layout, and no I did not do a detailed thread on this project. I thought everyone had seen plenty of Signal Boxes being built.
Wayne
OK, so we'll accept no thread on a detailed signal box thread (grudgingly). But the corbels, Wayne, tell us how you made the corbels exclam:exclam:
thumbs:thumbs(Especially how to make 18 of them in an hour)
Posted
Guest user
[user=22]Wayne Williams[/user] wrote:Alan,
This first picture will show you where the Signal Box sits on the layout, and no I did not do a detailed thread on this project. I thought everyone had seen plenty of Signal Boxes being built.
Wayne
OK, so we'll accept no thread on a detailed signal box thread (grudgingly). But the corbels, Wayne, tell us how you made the corbels exclam:exclam:
(Especially how to make 18 of them in an hour)
Ah silly me, just above the golf course :roll::roll:
Looks good painted Wayne, and yes how did you make 18 corbels in an hour ?
Posted
Full Member
Silly me, but I got so engrossed in trying to make these that I took no pictures. Anyway this is how it went.
After giving this some thought I came up with this process. It really is simple and only limited to the available shapes in extruded styrene.
The outer piece is a 1/4" styrene angle, the center circle is a 3/32" styrene tube, and the two pieces adjacent to the tube are both .020 styrene rod.
I cut them all up at about 3" long, laid the tube and the 2 rods in the angle, and glued them together. Using "The Chopper" I carefully cut the assembly in 1/16" widths.
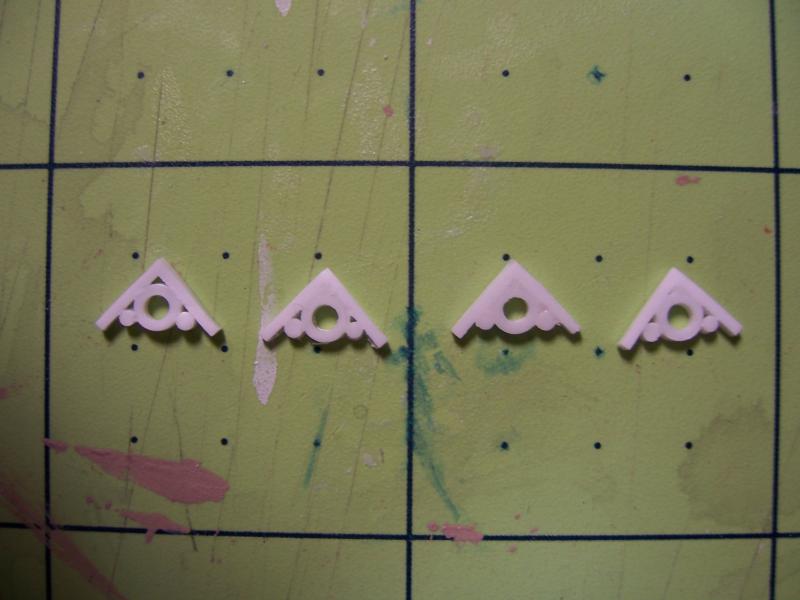
If you look at the four samples that I had left, you will notice that 3 of them do not have the triangular gap in the upper corner. I did not want that gap, so I drilled a .020" hole into the gap and filled it with the .020" rod.
The only reason I had the piece on the left is it fell on the floor and I could not find it until after they were all done. So it was a good thing I made up 18 with only needing 14. Them little buggers go everywhere!
So there you have it, 18 corbels in an hour. Actually it only took me about 20 minutes to make them. The other 40 minutes was sitting there trying to figure out what size of tubes and rods were needed to look the way I wanted the corbels shape to be.
Hope this explains it well enough.
Wayne
Posted
Full Member
Thanks for the information on making your corbels. I now know how I am going to make the supports for my station canopies.
I am enjoying watching your layout develop.
Derek
Posted
Guest user
If only I had the Patience…………Oh and the skill
Posted

Full Member
Does this "chopper" cut a clean slice off easily ? I'll have to look back through your thread to find it but I do recall you have one. :roll:
'Petermac
Posted
Guest user
thumbs
Posted
Guest user
 lol::cool:
Posted

Full Member
Phill
Owen i think Henry Parrot has it at the mo :thumbs
Posted
Guest user
 :cool:
Posted
Full Member
Thanks Owen - I really should have guessed it would be in there if it's any good - most useful things are !!! :oops::oops:Peter the chopper is in the forum index..
'Petermac
Posted

Full Member
A Very much box bound modeller…
Posted
Full Member
The Chopper can be a bit tricky to get a clean parallel cut. If you press to hard on the handle the blade will bend and you end up with a tapered cut. :twisted:
Sometimes you have to change the way the material lays in the Chopper to get it to cut straight. For instance using my Corbel as an example, you could lay the styrene assembly with one leg sticking straight up, or turn it so that the corner of the angle is pointing up.
The area where the most mass is, is where the blade wants to bend slightly. Taking your time trying to cut through will help too, and when I say take your time, I mean it could take up to ten seconds of gently applied pressure to get through the entire assembly. Of course using a nice sharp blade helps too.
When the cut fails, you must use the sanding block to "square up" the end before starting the next cut.
Wayne
1 guest and 0 members have just viewed this.