H0 Scale - South Shore Line
Posted

Full Member
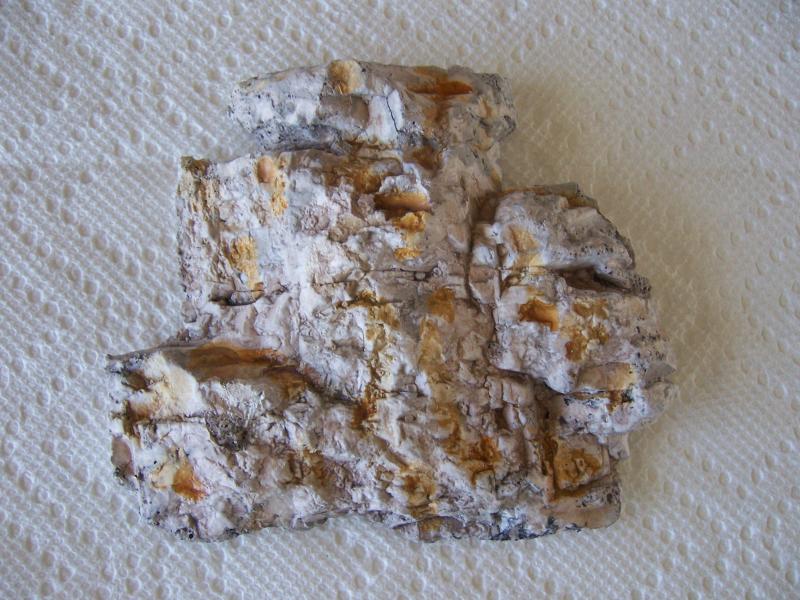
I started this morning making 7 rocks, cut them to the shape I needed and covered the seams with plaster cloth. The whole thing is still very wet but….
I pushed the envelope a bit, and managed to get it out of the wood frame. It's still quite damp and I must be very careful handling it, but as you can see, it came out without much ado. It needs to be fitted at the bottom some, but not until it's totally dried. All in all, I am very happy with it. Can't wait to see it finished and in place.
Wayne

Posted

Inactive Member
Max
Port Elderley
Port Elderley
Posted

Site staff
If a worked out one, have a hole of water with a lot of junk, old cars, etc dumped into it.
Ron
NCE DCC ; 00 scale UK outline.
NCE DCC ; 00 scale UK outline.
Posted
Full Member
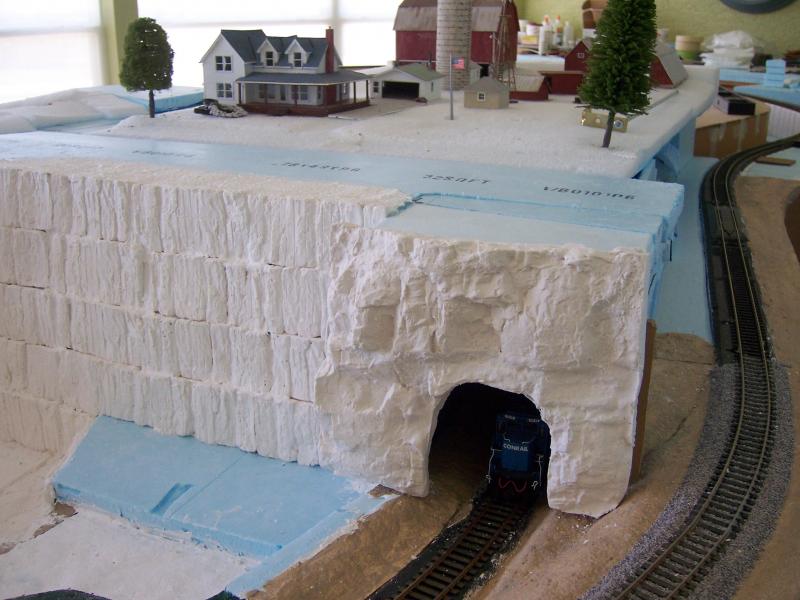
I will have all sorts of things down in the bottom and lots of over grown trees, shrubs, etc. on the walls of the quarry also.
Wayne
Posted
Full Member
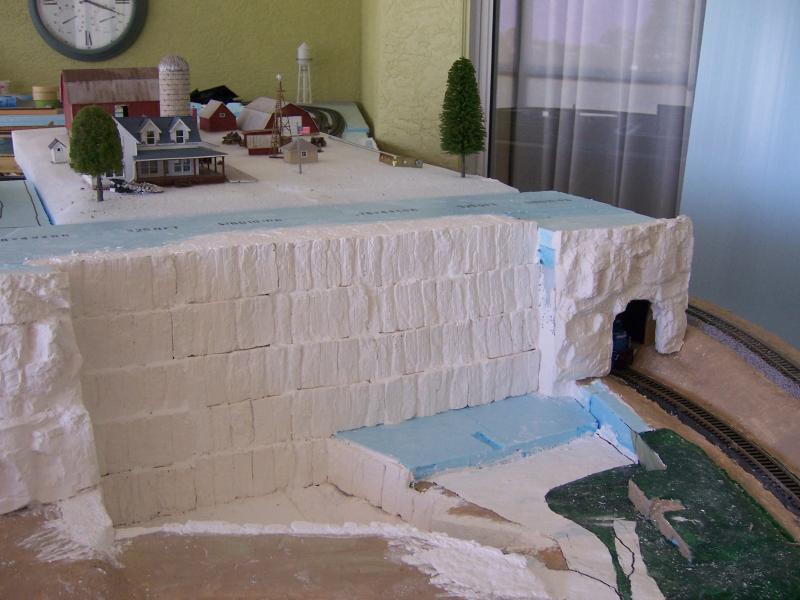
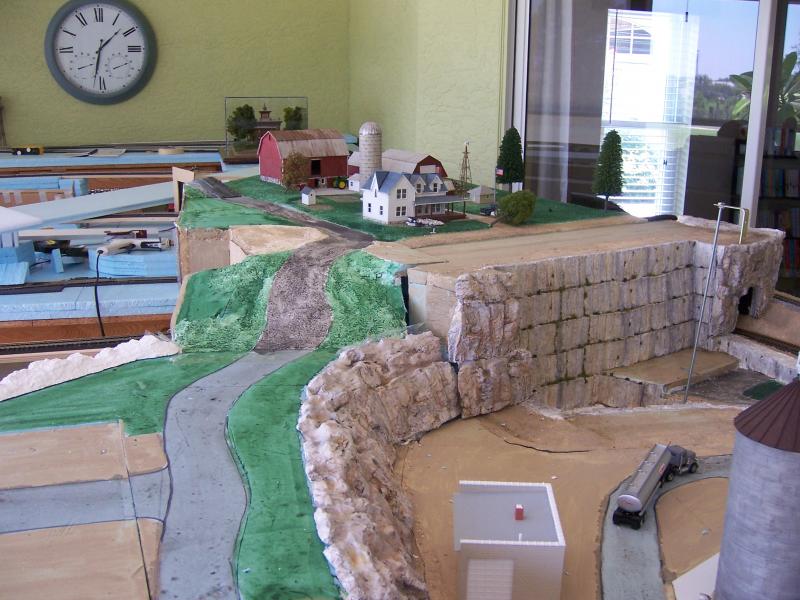
I wanted the actual quarry to be lighter than the surrounding rock, mainly because that stone is much newer than rock around it.
There is still much to do in the actual quarry itself that will make it look much better than it does here. Who knows, maybe some of that will get done tomorrow.
Wayne


Posted
Site staff
This 'quarry' is going to look the part.
Ron
NCE DCC ; 00 scale UK outline.
NCE DCC ; 00 scale UK outline.
Posted

Full Member
It will really spring to life when you 'vegetate' the ledges and finish the other scenery you describe.
Posted

Full Member
Bob
Posted
Full Member
It is amazing how fast I got to where I quit with the ballast. Of course it's always easier to stop at a point!

Bob,
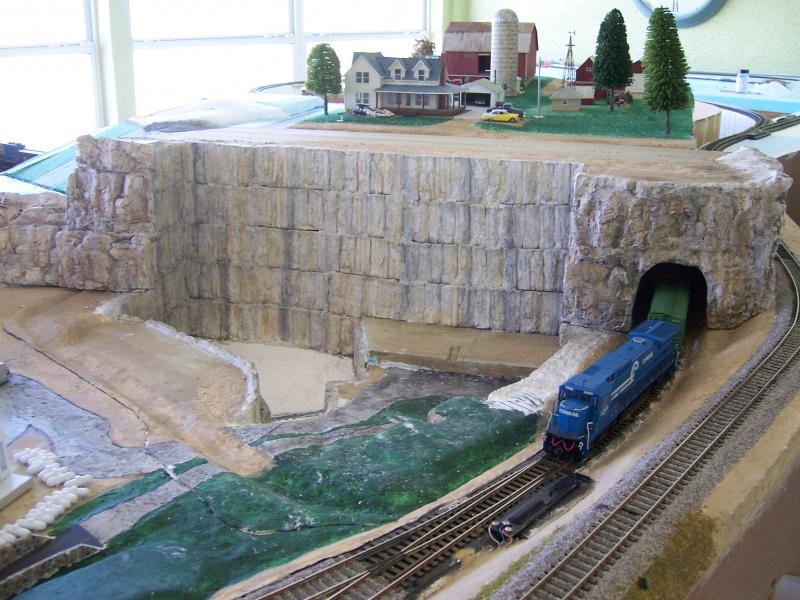
I'm glad you like the color, as do I. That was probably the hardest part of the whole exercise. I am very happy with how it came out. the quarry came out just a tad bit lighter than the surrounding rock, which is what I wanted.
I gave it a rest today and worked on weathering the Water Tower. That way I don't get tired of working on something.
Maybe I will tackle those weeds on the ledges of the limestone quarry tomorrow! :???:
Wayne
Posted
Full Member
Today I did a lot of contouring on the road that runs along side of the Proctor Farm. Even threw on a coat of paint to help see the slopes a bit better.
The module that contains the two tunnel portals is now married in on three of it's four sides. The only side that is not is where it is adjacent to the farm, and the front corner where it meets the limestone quarry. That corner is ready for the rocks that will end up matching the rest. That should be a challenge to paint it the same as those. I can't remember exactly but there are something like 8-10 coats of paint on those rocks. I hope I can remember the sequence!
Wayne
Posted

Full Member
Have you been "up north" for the "season" ? If so, I hope you had a good trip - back in time for the orange harvest eh ? :cheers
'Petermac
Posted
Full Member
Posted
Full Member
Gorge ous.
 How do you come up with these things? :roll:
I have not gone up north as yet, but will do so this weekend. It's been rather hectic around here, the summer is going by way too fast.
I'll be gone for just over a month so I'll see you all sometime in August.
Wayne
Posted
Full Member
Here are a few pictures of the interior walls I have been adding to all the tunnels. I only go in as far as you can see from each tunnel portal, which is probably too far because the actual portals are not even there yet. The portals will restrict the interior view even more.
I did not plan to install these in the beginning so I had several spots where I had to cut out the cardboard walls of the tunnels and widen them, so there was room to put in the Hydrocal walls. They are about 3/8" thick with the bonding layer. Taking 3/4" out of the width proved a bit too much. Oh well, I do like the way they have turned out so it was worth the effort.
Wayne


Posted
Site staff
Ron
NCE DCC ; 00 scale UK outline.
NCE DCC ; 00 scale UK outline.
Posted

Full Member
Is it moulded or scribed?
Marty
Posted
Full Member
I do scrape off the face with a scraper but only enough to get some flat areas. I leave the deeper holes to make it look more natural. So basically I plane off the tips and leave the valleys, once it is at that point, I sand it smooth to remove the scraper marks.
I really am tickled pink with the way they look. Can't wait to see what color I paint them. :roll:
Wayne
Posted

Full Member
Just a point of interest about rock faces that have been blasted. Generally they will have been blasted away by drilling down on the line of the cut so you can often see the semi-circular remains of the drill holes. It might be something that could be modelled by just making some vertical scrape lines in plaster or perhaps by pushing a hot piece of thin copper rod against polystyrene.
Just a thought in case you find yourself at a loose end some time.
Regards,
Trevor
Trevor
Posted
Full Member
Wayne
Posted
Full Member
Tunnelling is something I do know a bit about having worked on several of them, the largest being 10 metres diameter and 7 miles long.
Rock tunneling is done a similar way to open face blasting except the holes are drilled horizontally on the outline shape of the tunnel and also into the central part of the actual face. Time delayed detonation is done so that the central face charges explode a fraction of a second before those on the perimeter. This way the central part of the face is weakened and the explosions on the perimeter break the rock in the direction of least resistance. i.e. towards the centre, leaving a nice clean tunnel arch.
That's the theory anyway, though I have seen a few blasts that didn't quite work out that way.

 Last edit: by Chinahand
Regards,
Trevor
Trevor
1 guest and 0 members have just viewed this.