Granby Junction 1948 N. Wales
Posted
Inactive Member
GWR/LMS OO Gauge DCC RR&Co
:)Thought that info might cheer you up John.Oh if you think the white looks odd on just two window frames.
Nothing to stop you painting the store window frames white this was also a common practice.
The MPD may yet be ready over the Christmas break.
regards,
Derek.

Posted

Banned
Cheers, Gary.
Posted
Full Member
Posted

Full Member
Posted

Full Member
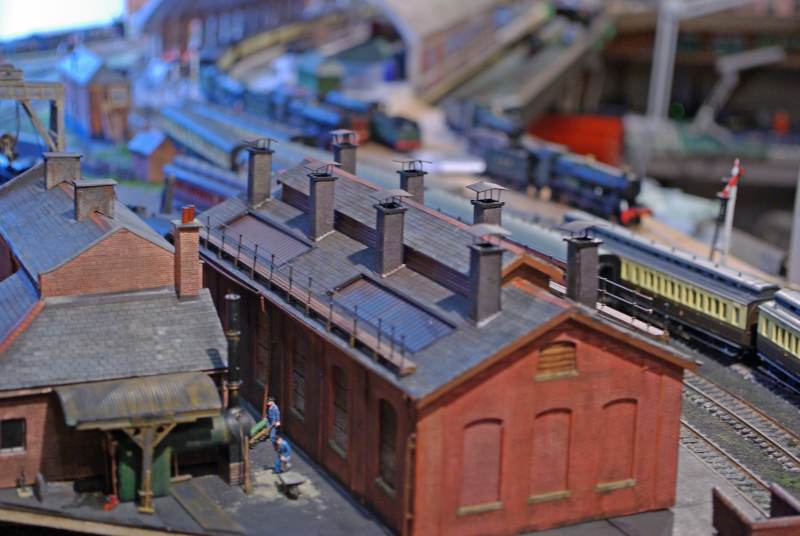
Heres the completed roof and the framing of the skylights using L profile plastic strip.
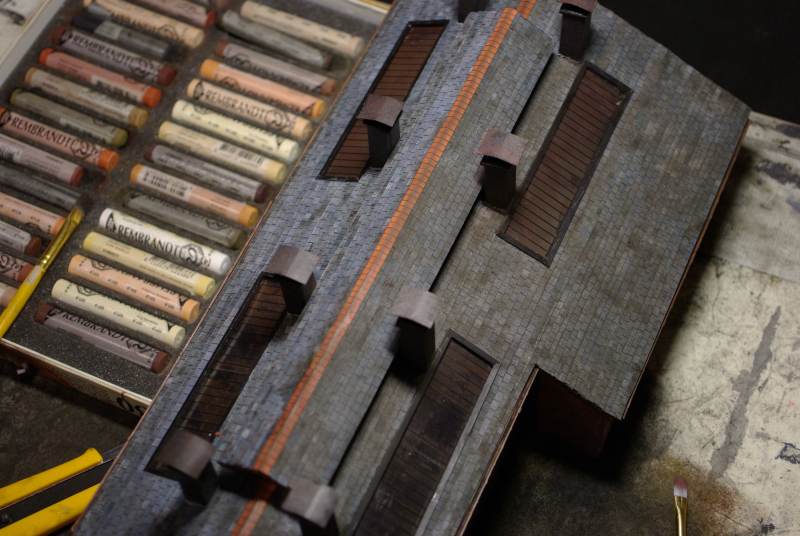
Scalescene provide both a red and grey coping stone……I opted for red as being more in keeping with the red brick walls but clearly the roof and particularly the coping stones require a lot of weathering powder
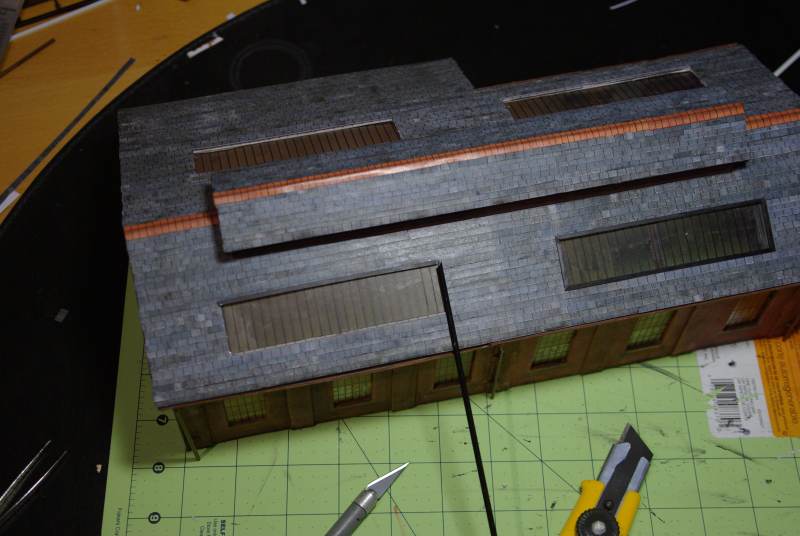

The cut off roof edge has been sorted but the transition between the office and shed is a little obvious……in addition I had to use 2 different tile prints and I rather suspect I muddled the strips hence the variegated weathering………I am planning a cat walk which hopefully will conceal this
Next the vents
Here is the the original Metcalfe Roof complete with vents
I covered the vents with Scalescene paper then following a load of helpful advice…….particularly from my LNWR guru Derek…..I started a production line to add a 6" (2mm) support rim and 4 x 1' (4mm) legs for the cowl
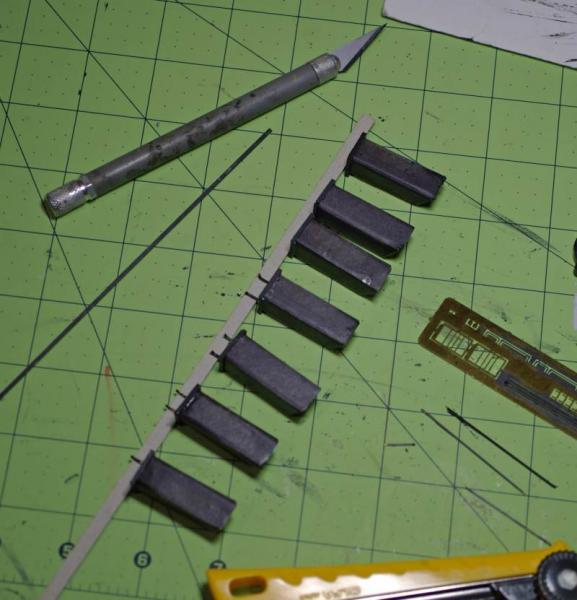
The legs were made from 1mm brass strip from a never to be completed Perseverance LMS Suburban Coach Kit……I cut them to about 10mm bent about 2mm back to support the cowl, used a strip of 4mm card as a guide and super glued the remaining 5mm to the inside 4 corners of the vent…….picky and they are not exactly straight but hopefully they are reasonably close to the sketch Derek so kindly drew for me


I may put some flashing round the base of the vents to conceal the gap
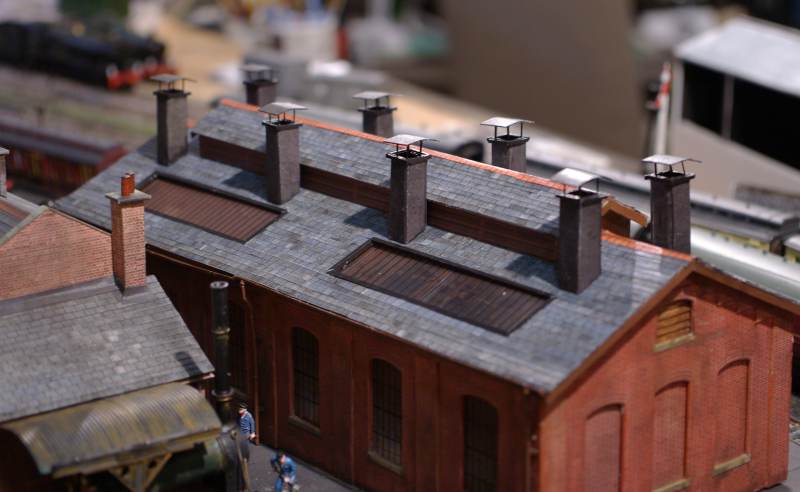
Cruel close up

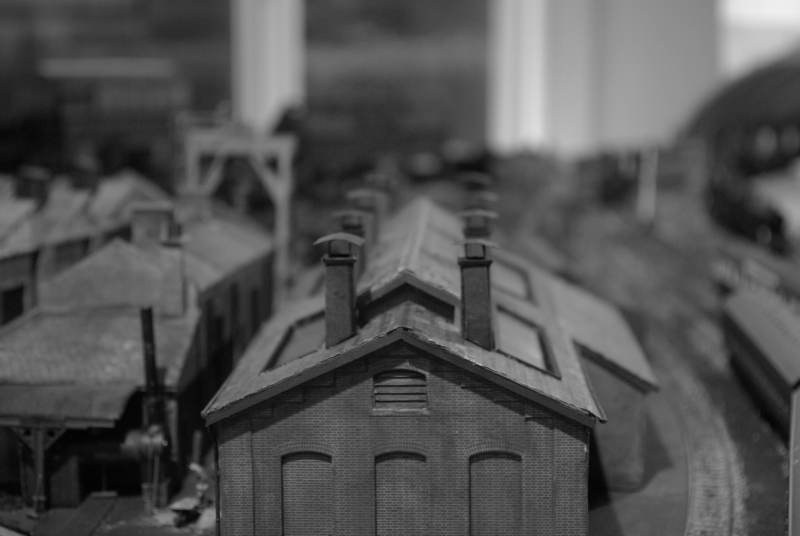
You can always tell when I am reasonably happy with a project……the last shot is B&W:lol:
 Last edit: by John Dew
Posted
Inactive Member
Its great to see an authentic model produced.
Also glad you maintained your sanity :).
The choice of red coping tiles also a good one. A little weathering, Bird droppings and such :lol:.
A seagull perched on a vent :).
Thanks for the work you put in.
regards,
Derek.
Posted
Guest user
The building is looking really excellent. The flashings around the vents would be the icing on the cake I think. Very good indeed.
Cheers for now
Toto
Posted
Full Member
Posted

Full Member
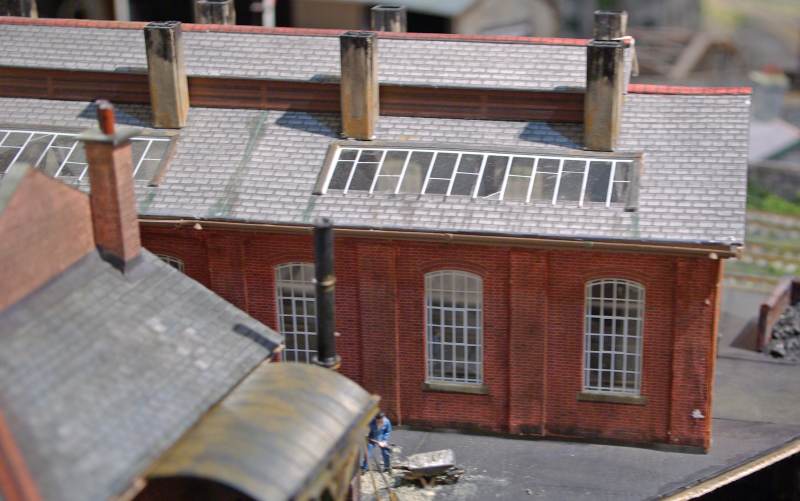
They look exactly "in scale" and the roof, irrespective of the "slipped" weathering (that only you can see), is a huge improvement on the Metcalfe one. Flashing would finish them off perfectly. I see you've put flashing on the brick chimney left centre of this shot and it does make a big difference:
'Petermac
Posted
Full Member
Just downloaded the Scalescene sheet……..and I am away flashing…..so to speak:roll:
Posted

Site staff
Lovely work as usual John.I like the water stain at the bottom of the brickwork.Please remember we are a family forum.
and I am away flashing…..so to speak:roll:

Regards
Alan
Born beside the mighty GWR.
Alan
Born beside the mighty GWR.
Posted
Full Member
Pot calling the kettle black, I feel :It's a no no
Or is it not that kind of stain! :hmm
Jeff
Jeff
Posted
Site staff
Regards
Alan
Born beside the mighty GWR.
Alan
Born beside the mighty GWR.
Posted
Inactive Member
Now that the winter festivities are more or less out of the way!
What are your next moves with the MPD and siding,s?:).
Best of luck in 2014.
Derek.
Posted
Guest user
Looking forward to seeing your flashes John.
……….oh the childishness of it all. Small minds easily amused and all that.Seriously, I look forward to seeing the progress.
Cheers
Toto
Posted
Full Member
I finished the vent flashing which was very fiddly and not totally satisfactory and then…………disaster
I was putting some weathering powders on the roof and tilted the building to get a better angle…..the support slipped and the building toppled over breaking off one vent,six cowls and about 10 of the tiny metal supports.
:shock::twisted::shock::twisted: I was not a happy camper……the air was blue and I have never seen the dog move so fast!
This is a before, after and before shot!
Before and after weathering………………and just before I tilted the building to get a "better" angle
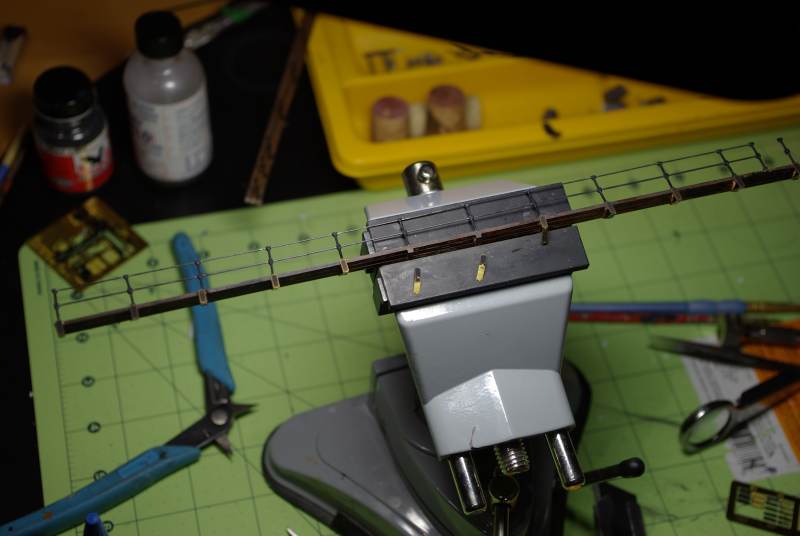
So I had to begin the long slow job of refixing the supports …..much more difficult to position accurately when the vents are secured to the roof (well all bar one!)
I was obliged to take it very slowly …..just a couple of supports a day to give the adhesive plenty of time to cure………..so in the meantime I ran a lot of trains and started on the catwalk
This is a rather poor reproduction of a couple of shots I took many years ago at Didcot
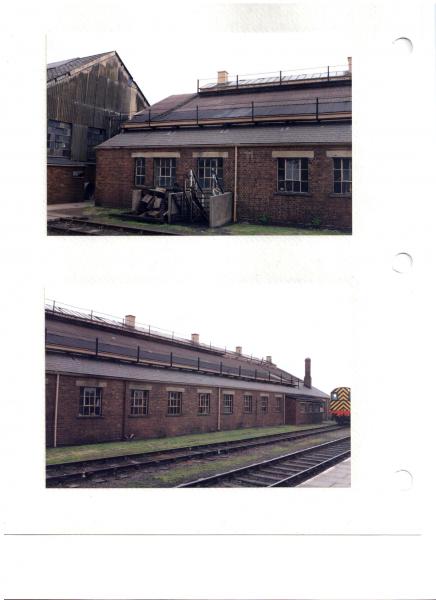
I know Didcot is GWR and this is LMS (ex LNWR) but I have seen this feature on many photos so I thought it would be worth trying to replicate………….it will also serve to conceal the roof transitions
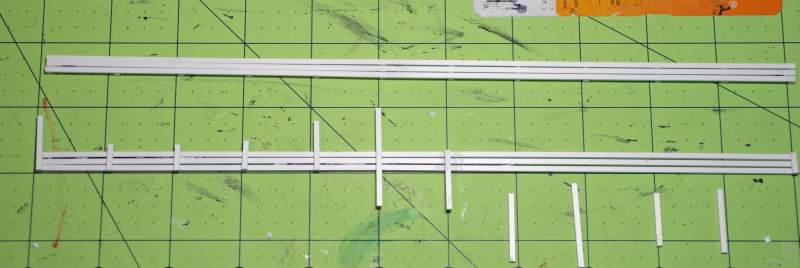
3 Strips of 2mm x 1.5mm Evergreen plastic with beams glued at 1" centres . I cut the beams over size to facilitate glueing and once secure cut to size. I cut one side of each beam at an approximation of 60o to mate (sort of) with the roof
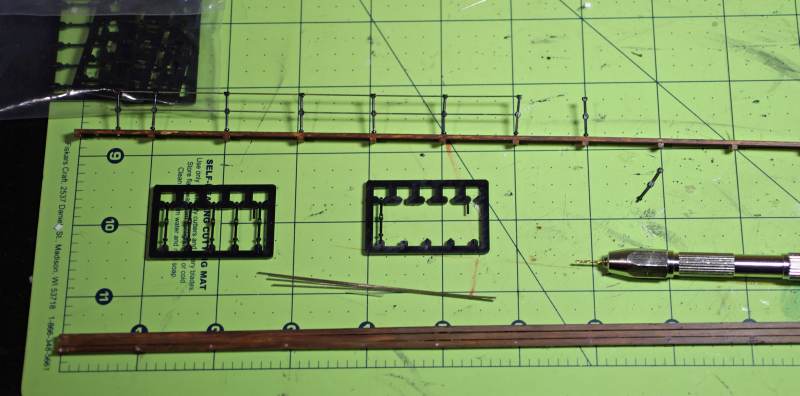
Painted and drilled over the beams to accept Ratio stanchions…………these are a really useful bit of kit…..you can use them for all manner of railings and are so much easier to handle than using bits of wire as vertical supports…….its a bit fiddly threading the wire railing through the apertures and keeping the uprights at 90o…………but then I had another look at the Didcot photo and realised I didnt have to be too picky
I found some little brass etchings on the cannibalised coach kit which fitted the beam ends perfectly and could be bent back to line up with the roof.
So here they in position along with all the replaced cowls (albeit at "interesting" angles)

Now I just have to build a couple of Chimneys for the office and boiler house and add some drain pipes and other detailing and its done……………..not before time I might add:twisted:
Posted

Full Member
:doublethumb
:doublethumb
to put the icing on the cake all you need is some rail-yard junk or some grass to finish off the scene
Posted
Banned
Can you tell me, is the Ratio stanchions a plastic mould or metal ?
Cheers, Gary.
Posted
Full Member
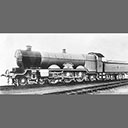
Detailing and Junk to come Dave…………maybe with a Jinty posing in the foreground (cant do a Pannier its the LMS Shed:lol:)
Gary: they are Plastic (Sorry should have mentioned it) I think you get 5 sprues each with 5 Stanchions per set for about 4GBP
There are double rail in black or a shorter (too short?) single rail in white….but you can paint them of course
Posted
Full Member
Thanks Guys:thumbs
Detailing and Junk to come Dave…………maybe with a Jinty posing in the foreground (cant do a Pannier its the LMS Shed:lol:)
You never know John - those pesky panniers have been known to make the most of the camera angle to get into a shot :twisted:
1 guest and 0 members have just viewed this.