Granby Junction 1948 N. Wales
Posted

Full Member
GWR/LMS OO Gauge DCC RR&Co
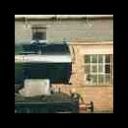
The lamps on the front of the Pub are interesting, John.I've not noticed them from normal sources.
Are they off a model ship?
Congratulations on producing very absorbing scenes.

Posted

Full Member
The lamps on the front of the Pub are interesting, John.
I've not noticed them from normal sources.
Are they off a model ship?
Congratulations on producing very absorbing scenes.
Woteesed.
SWMBO likes the b/w one especially.
Doug
'You may share the labours of the great, but you will not share the spoil…' Aesop's Fables
"Beer is proof that God loves us and wants us to be happy" - Benjamin Franklin
In the land of the slap-dash and implausible, mediocrity is king
"Beer is proof that God loves us and wants us to be happy" - Benjamin Franklin
In the land of the slap-dash and implausible, mediocrity is king
Posted
Legacy Member
Just enter Wall Lamp in the search box - that firm is usually my first port of call for anything a bit out the ordinary for lineside accessories.
www.scalelink.co.uk
Richard. A sorely missed member who lost a brave battle in 2012.
Posted

Full Member
Posted
Full Member
They are nice but in white metal which I generally try to stay clear of.
Posted

Full Member
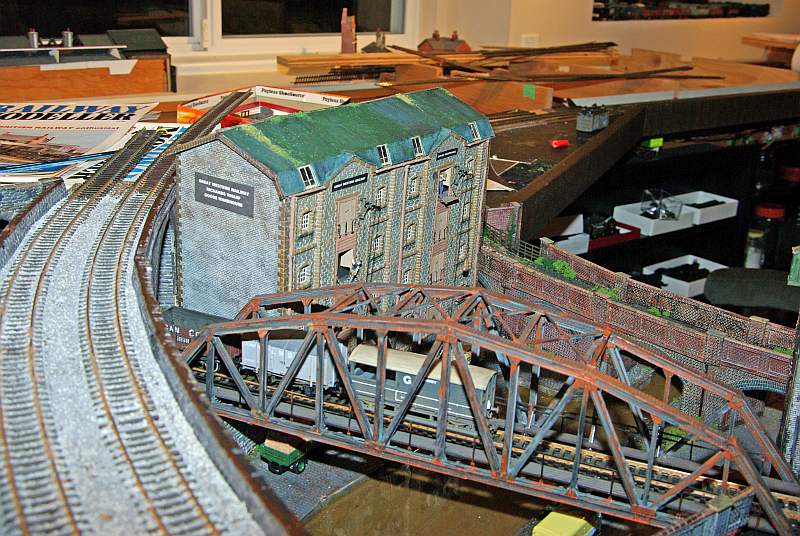
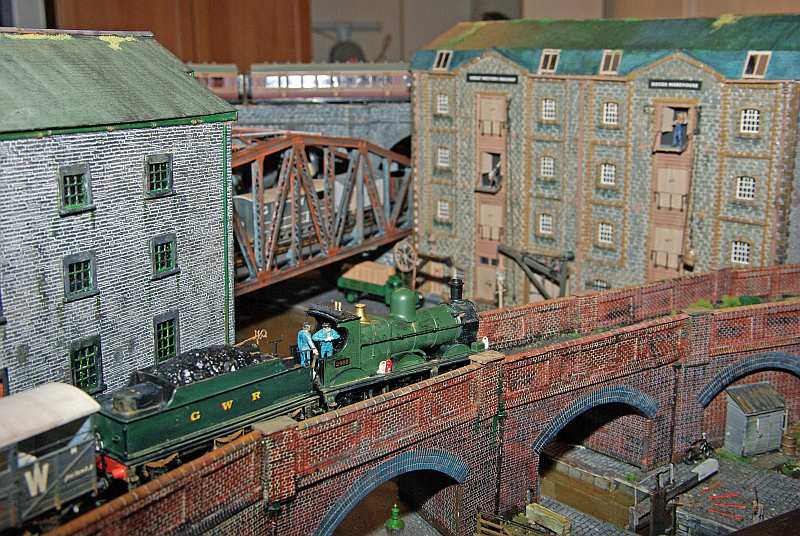
The detail in and around the arches/tunnel areas is fantastic John, A lot of hard work has obviously gone into it.
Is the layout DCC ??????? If it is you have the wiring all wrong mate, there is only supposed to be TWO

This is going to be one hell of a layout, well done :doublethumb
'Kev
Posted

Full Member
[user=394]ddolfelin[/user] wrote:
The lamps on the front of the Pub are interesting, John.
I've not noticed them from normal sources.
Are they off a model ship?
The Pub is made from a Langley vacuum moulded low relief plastic shell………with it comes a brass etching sheet and the lamps were on that. The etching can be bought separately
[user=19]Marty[/user] wrote:
What John? No outside tables?
You would get a bit mucky with those coal trains rumbling by![user=98]Kevr[/user] wrote:
Yes……my first foray into DCC……..two wires is an urban myth I think, although in my case the wiring is increased because of DCC point control and occupancy detectionIs the layout DCC ??????? If it is you have the wiring all wrong mate, there is only supposed to be TWO
Kind Regards to all
Posted
Full Member
You may recall that this was the original start point.
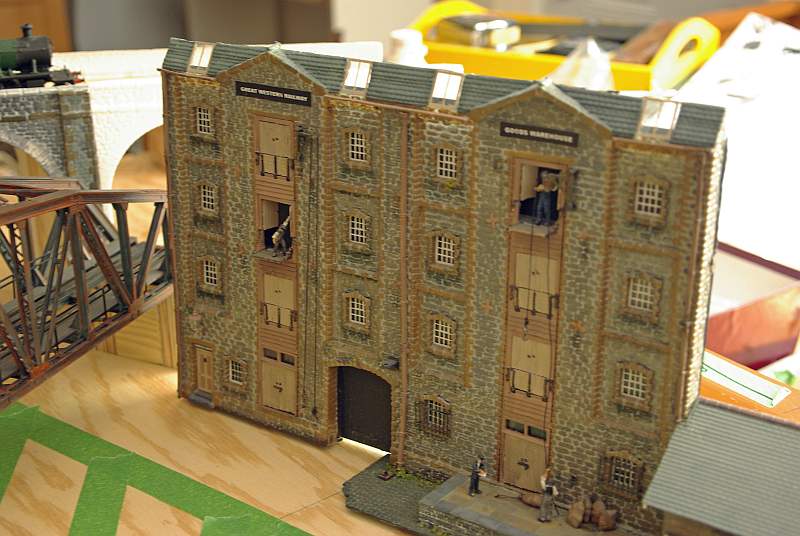
Another Vacuum Moulded kit from Langley…..in addition to the former you get a load of white metal fittings for window frames etc. I checked the price yesterday and it mist have increased in price by about 60% since I bought it 10+ years ago. I have always like the model……..on Granby II it was tucked away on the back scene and I always intended it to be centre stage on the canal in Granby III
The problem, as I exposed some months ago, it is ultral low relief
Hence the delay in completion……..
I built new card side walls, clad them with Slaters plasticard and overlaid them on the existing short side walls……….I concealed the joins with Wills Corner Stones……..this worked reasonably well although, as you will see, there is a noticeable colour difference
The roof was a bigger problem. If I extended the existing roof line the building would be far too tall so I created a second roof at a lower pitch using Slaters Tiles. I then clad all the faces of the original roof with the tiles from the same sheet. Unfortunately the slaters sheets were not long enough to cover the entire roof so there are a couple of joins which I have attempted to conceal with convenient growths of Moss
From a distance I think it has worked reasonably well

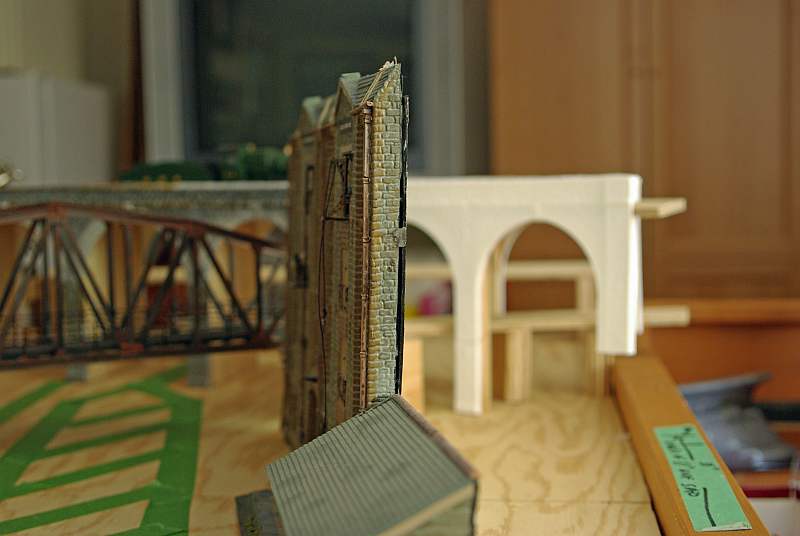
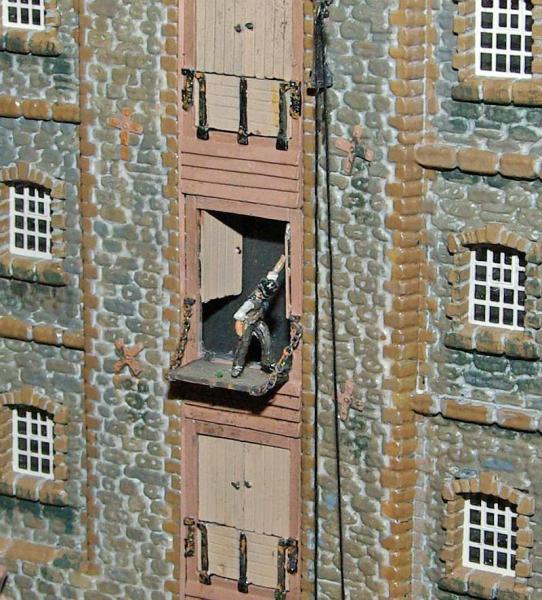
The detailing is now completed

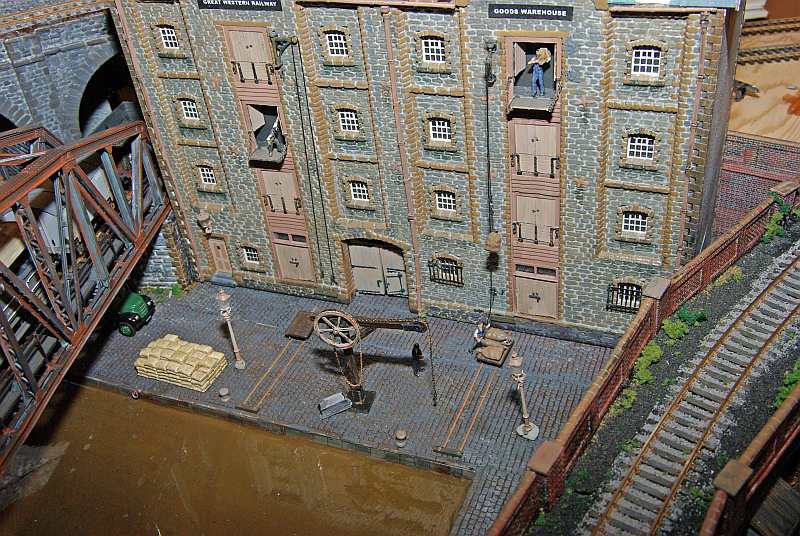
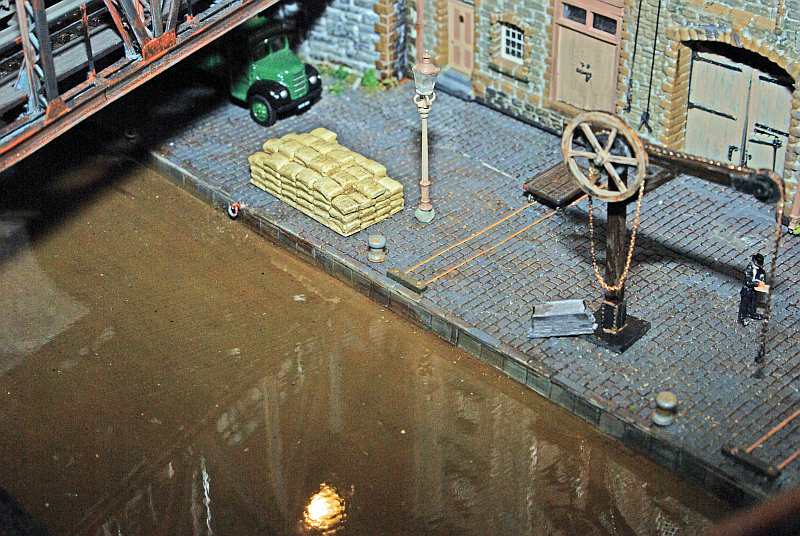
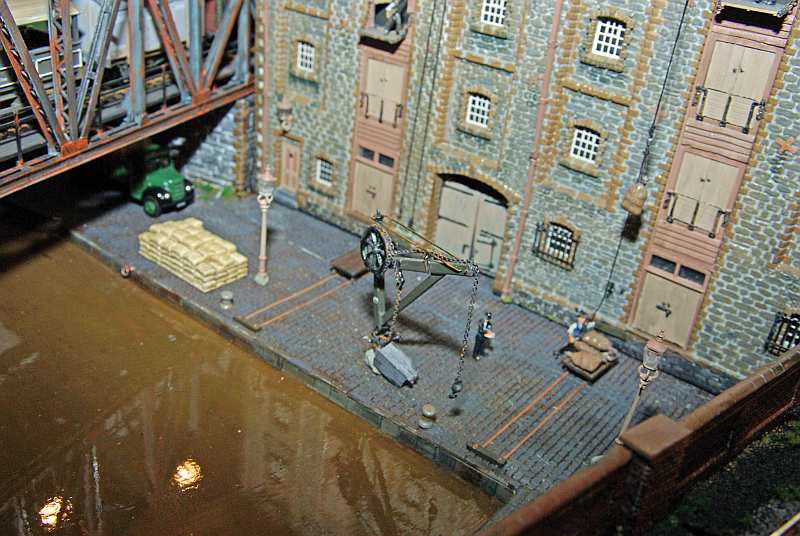
This shot also shows the mooring rings and bollards quite well. The sacks are from Harburn Hobbies. The Yard Lamp is from Mikes Models
The Gibbet Crane attached to the Warehouse is from Langley (as are all the figures)……. the second crane is from Ratio…….I am a little ambivalent about this one…….if nothing else it exposes the major design flaw in this project. The warehouse should really have been closer to the quayside so the first crane could unload the narrow boats but it would have been far too dominant or, alternatively, I should have run a rail line in front of the warehouse with a wagon turntable……but at the time I didnt think it was practicable……so the second crane is the compromise.
Last time I showed the warehouse some guys commented about Health and Safety…….so I thought I should at least show the warehouse man has a hand rail
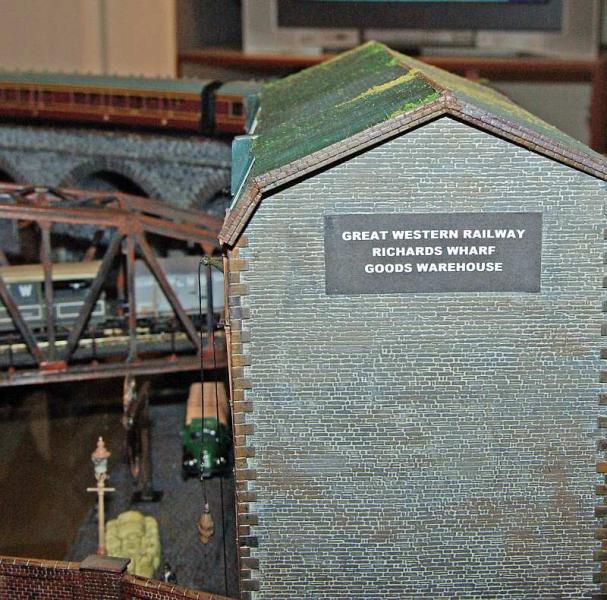
You may well be wondering about the back of this structure………….you will not be disappointed…….the Dew signature item has been retained

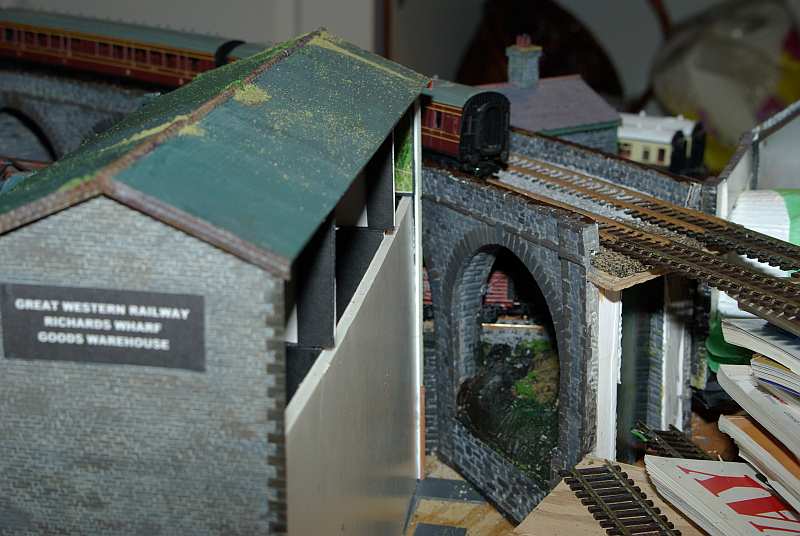
This is, for once, not idleness but genuine forward planning…….the plan is to extend the back into a rail goods shed for the sidings you saw a few weeks ago
Thus I will have rail access albeit at the upper level and can justify retaining the GWR paint treatment………however this will have to wait until the main line is finished
When I first started this project Richard (Wheeltapper) suggested that this canal would have probably been owned by the Shropshire Union Canal Co who were taken over by the GWR so I do have a reasonably credible story!
This is an appropriate time to acknowledge the astonishing amount of help and advice I have had from Richard on this project……..couldnt have done it without you Richard………….thank you so much:thumbs:thumbs:thumbs
I am honoured that, despite my previous hobby as a Rally Driver (and the life belts), Richard allowed me to call the project "Richard's Wharf".
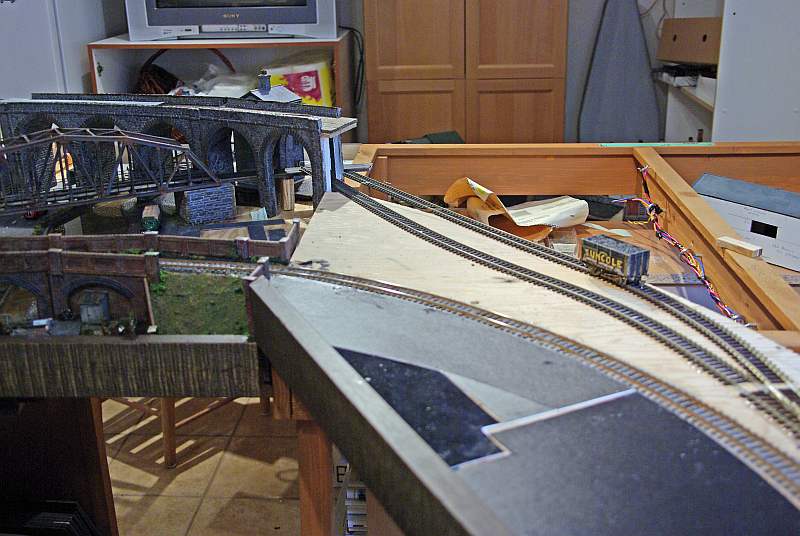
Its a curious feeling drawing a line under a project that has taken up virtually all of my modelling time for the last six months
There is certainly a big difference between this
and this
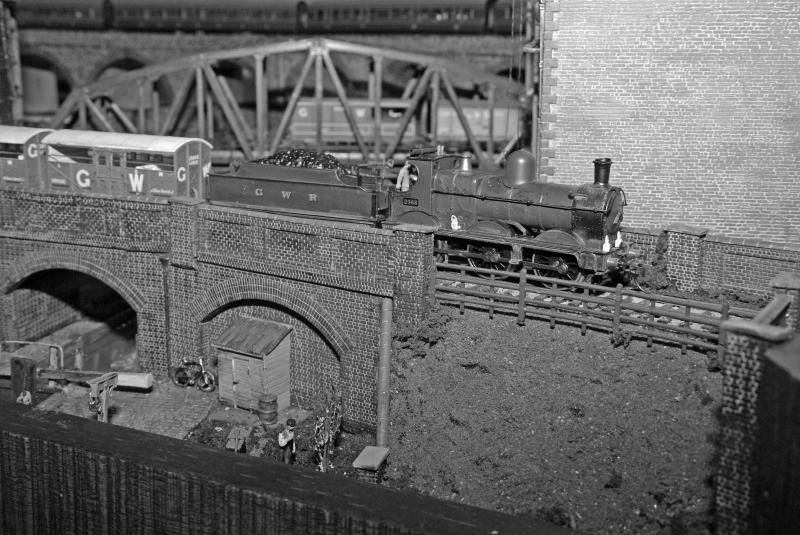
This is a Dean Goods (Tender Drive and probably the most expensive loco in my collection……but thats another story) drifting down the branch with the weekly Cattle train
Yet another train of empties trundles over the Coal Line and in the back ground one can see an LMS express on the joint main line…….the promise of things to come
To finish another Black and White shot…………….hope Mrs Dooferdog approves :lol:
Regards from Vancouver
Posted

Inactive Member
Max
Port Elderley
Port Elderley
Posted
Guest user
Posted
Full Member
Thanks for the info. about the lamps.
By coincidence, I saw the kit for them yesterday!
Posted
Legacy Member
Thank you so very much for the glowing thanks for the advice which it has been an absolute pleasure to give as you have done such a marvellous job on the locks and wharf . I only wish my own modelling skills were good enough in some small way to emulate the patient perseverence and sheer determination to make such a fantastic job of this project that you have shown over the last six months.
The crowning accolade is of course the naming of the wharf and I have to say thats probably one of the greatest compliments I have ever been paid in railway modelling.
I look forward to seeing further developments on what in my opinion is turning into one of the finest layouts on the forum,
Thanks again and very very very well done!
Richard. A sorely missed member who lost a brave battle in 2012.
Posted
Full Member
From a distance I think it has worked reasonably well
Masterful understatement of the month…………
[Thank you, v. much appreciated, Mme Doofer]
Doug
PS Re the distance from the canal/unloading etc, you are right, two cranes looka smidgen wrong….
Perhaps a longer term solution could be a little length of sunken/low track from the natural drop of the wharf-side crane to below the warehouse hoist and a flat bed 'trolley' ready to do the transferring?
The wooden one looks best in that situation too…….[IMHO]
Doug
 Last edit: by Chubber
'You may share the labours of the great, but you will not share the spoil…' Aesop's Fables
"Beer is proof that God loves us and wants us to be happy" - Benjamin Franklin
In the land of the slap-dash and implausible, mediocrity is king
"Beer is proof that God loves us and wants us to be happy" - Benjamin Franklin
In the land of the slap-dash and implausible, mediocrity is king
Posted

Full Member
Lots of little cameos appearing on this layout and lots of very interesting corners that will provide innumerable header photos in the future,if I'm any judge!
Lovely,lovely work!
Cheers,John.B.:thumbs
Lovely,lovely work!
Cheers,John.B.:thumbs
Posted
Full Member
See the 5th picture down……
Wigan Pier - Leeds and Liverpool Canal
This is the sort of thing I mean, any good?
Doug
'You may share the labours of the great, but you will not share the spoil…' Aesop's Fables
"Beer is proof that God loves us and wants us to be happy" - Benjamin Franklin
In the land of the slap-dash and implausible, mediocrity is king
"Beer is proof that God loves us and wants us to be happy" - Benjamin Franklin
In the land of the slap-dash and implausible, mediocrity is king
Posted
Full Member
And there was I thinking it was finished and Doug confirms my lingering doubts
[user=312]dooferdog[/user] wrote:
You are right of course but the thought of hacking up all those Wills sheets horrifies mePS Re the distance from the canal/unloading etc, you are right, two cranes looka smidgen wrong….
Perhaps a longer term solution could be a little length of sunken/low track from the natural drop of the wharf-side crane to below the warehouse hoist and a flat bed 'trolley' ready to do the transferring?
Doug

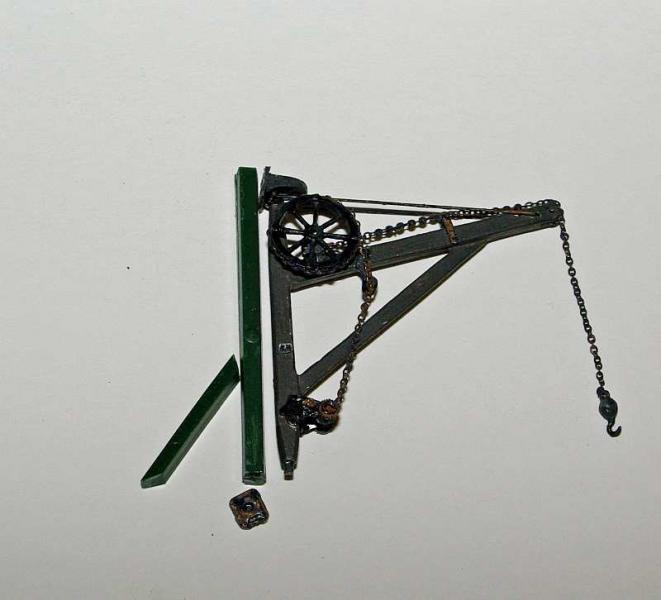
They are both intended to be wood although the wharfside one is Plastic and the Warehouse one white metal. They were painted at different times and the warehouse one is slightly misaligned……I rather prefer the warehouse one but maybe I can make a vertical support post and relocate it in place of the Ratio one?The wooden one looks best in that situation too…….[IMHO]
I thought I had seen something like it in prototype, Wigan Pier!
This is the sort of thing I mean, any good?
Brilliant!!
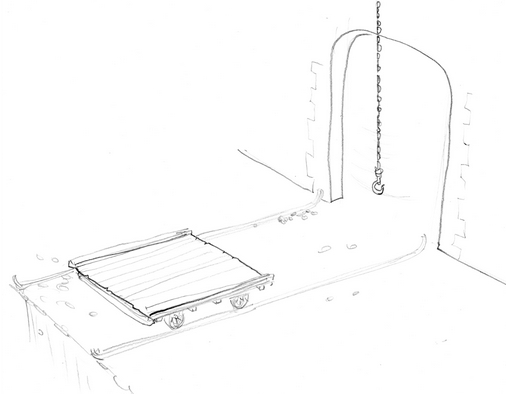
Thank you for digging this….. out much appreciated……………you have got me thinking…..I could use a Coopercraft platform trolley without the handle which just by chance I have on hand!
I wonder if I could create the illusion of inset rail by laying some ultra thin ultra narrow plastic strips…….I will have a go…..after all it is being viewed from a distance………..there are actually two hoists so I will need two sets of rails and then I could resite one crane between them
Conceptually the problem is solved now I just have to put it into practice :roll:
Kind Regards
Posted
Full Member
I wonder if I could create the illusion of inset rail by laying some ultra thin ultra narrow plastic strips…….I will have a go…..after all it is being viewed from a distance………..there are actually two hoists so I will need two sets of rails and then I could resite one crane between them
John, I have every sympathy with you dreading taking up the sheets, but having just had a similar thought re Peters trams……
perhaps sourcing some bullhead rail, of the sort the P4 chaps to hand build track, and laying it on its side from the wharf to the hoists in a groove you could scratch out, or just on the surface, and make some putty type stuff to show where vehicles have been helped over with little ramps…..the wheels of the Dew-Doofer Transporterer would roll in the side grooves of the rail…
Doug
'You may share the labours of the great, but you will not share the spoil…' Aesop's Fables
"Beer is proof that God loves us and wants us to be happy" - Benjamin Franklin
In the land of the slap-dash and implausible, mediocrity is king
"Beer is proof that God loves us and wants us to be happy" - Benjamin Franklin
In the land of the slap-dash and implausible, mediocrity is king
Posted
Full Member
I repositioned the right hand hoist to the inside of the loading doors…….you can see the patch marks on the shot below
Then from the base of the two hoists I ran two thin parallell strips of plasticard to simulated rails for the Trolleys
The strips ran over indentations in the setts but it would be better if eventually I carved proper grooves
I removed the yard lamp…..I thought it too tall and inserted two platform lights…..currently on plasticene
One set of sacks was removed and a single crane mounted temporarily between the "tracks"
The problem is that this crane (Ratio) is pretty flimsy and the jib is obviously not quite long enough to span the two tracks
The other crane is more substantial and has a longer jib once the jib is parallell with the ground:roll:
But as you can see both above and below it is designed to be mounted on a wall

So my plan…..which is now almost complete is to fabricate a wooden upright suitably reinforced with ironwork from which to mount the crane
Doug I think your suggestion was great…..thank you…….the rails are just about ok from a distance and I think the quayside still looks busy but in a less cluttered way
Comments/feedback much appreciated before I remove the plasticene
Posted
Inactive Member
Max
Port Elderley
Port Elderley
Posted
Guest user
:doublethumb:lol::lol::cool:
1 guest and 0 members have just viewed this.