Granby Junction 1948 N. Wales
Posted

Full Member
GWR/LMS OO Gauge DCC RR&Co
After two weeks of marshalling the Down Parcels I promised something new for this week.Well this is new in every sense. My recently delivered AEC Diesel Railcar from Heljab:
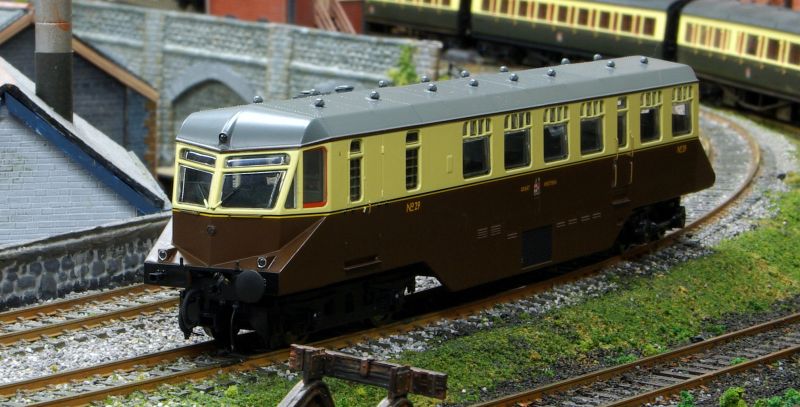
Like most new arrivals on Granby this is hardly breaking news as the model was released in August. In this case though I had also hummed and haad before actually ordering as I already had a similar model.
I bought the Lima version in Beatties Sheffield in the late 90. It was an appalling runner with enormous pizza cutter wheels. With help from Nigel (BCDR) I re wheeled it and with added contacts and a Lenz Gold Chip and Stay Alive I was able to turn it into a reasonably reliable runner and became quite attached to it. Sadly it has recently become rather iffy and reluctant to run everywhere I want, so I eventually succumbed to temptation.
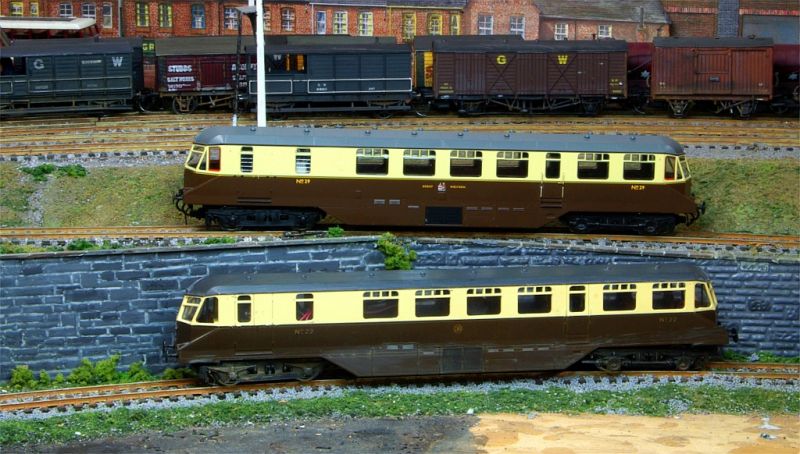
This comparison shot rather flatters my old Lima friend but it still appears somewhat clunky:
The Heljan version has some superb detailing with separate hand rails, pre-fitted pipework, sprung buffers and amazing lighting


Unfortunately one of the buffers arrived loose and the spring is nowhere to be found. Not the end of the world and certainly not worth sending back to Liverpool from Vancouver. Ben Jones, the Heljan Rep, has been very helpful and hopes to be able to get a replacement spring sent to me.
On the the plus side the 5 pole motor is centrally (and unobtrusively) mounted beneath the floor and drives both sets of bogies. With a Lokpilot5 chip the running performance is exceptionally smooth and reliable
The chip is installed by removing the roof….very simple just 4 easily accessible screws:

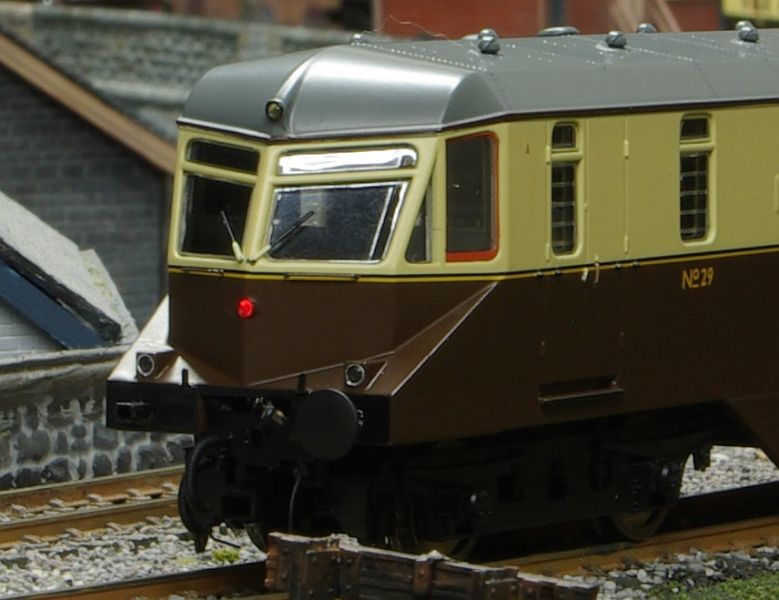
I guess the next job is to get some seated passengers. Nice cab detail at both ends:
I mentioned that the lighting was amazing:

There are nine separately switched lighting functions
Lower End Light Front and Back Cab Light Front and Back
Top Light Front and Back Passenger Interior
Red Light Front and Back
For DC users there is a bank of 9 switches mounted on the underside. The basic (non sound) ESU Lokpilot 5 decoder is preprogrammed to manage the 9 functions…….hence my switch from Zimo for this model.
Its unlikely I will be using all the lights. Unlike the Dapol Parcels Railcar, the Heljan will be scheduled as a Class B Ordinary Passenger so I doubt if I will use the twin Lower End Lights. The top light will indicate the train class.
With either the function buttons or automatically with Train Controller I can switch the front and rear lights on and off as the Railcar shuttles back and forth between the tunnels that form the entry/exit of the low level branch.
I suppose that I may have a slight problem with the rear train light :
Technically I should also mount a standard oil burning rear light on one of the provided lamp irons. This can only be done manually……..after each run. I also have a problem with either an empty cab at one end or a driver at both ends!
I am already indulging heavily in Rule 1………I am not aware that these rail cars ever operated in the Chester area……..so another application of Rule 1 will not do any harm.
In any event the model's red light is much brighter than that of the prototype. It was the alleged dimness of the latter which caused the standard lamp instruction to be issued.
Regards from Vancouver

Posted
Full Member
Cheers Pete.
Posted

Full Member
What a fine model it is and thank you for pointing out the extensive lighting options. It makes good sense if passengers are to be carried, as they will otherwise be difficult to see. That's my thinking behind ordering a Genesis rake with lighting and in due course will need to consider coach lighting for existing stock.
The jobs list expands, as ever!
Best,
Bill
At 6'4'', Bill is a tall chap, then again, when horizontal he is rather long and people often used to trip over him! . . . and so a nickname was born :)
Posted
Full Member
What decoder did you use?
Cheers
John
Posted

Full Member
#29 was based at Stourbridge Junction in 1947 looking after Birmingham suburban commuter traffic. Dudley was as far north as it. went. Most trips were less than a mile so I doubt it ever got out of second gear.
#19 (and I have read possibly #s 6 and 11) got as far as the Newcastle area in 1944 when on loan to the LNER.
Did Heljan do both cardan shafts or just the one on #29?
Nigel
 Last edit: by BCDR
©Nigel C. Phillips
Posted

Full Member
Hi John,
……………………………….
#19 (and I have read possibly #s 6 and 11) got as far as the Newcastle area in 1944 when on loan to the LNER.
…………………………………………………………………
Nigel
:hmmOoooh - does that mean I could possibly have one …………?
'Petermac
Posted
Full Member
Nigel
Last edit: by BCDR
©Nigel C. Phillips
Posted
Full Member
[user=1632]BCDR[/user] wrote:Hi John,
……………………………….
#19 (and I have read possibly #s 6 and 11) got as far as the Newcastle area in 1944 when on loan to the LNER.…………………………………………………………………
Nigel
:hmmOoooh - does that mean I could possibly have one …………?
 Absolument ! Carpe Diem.
Posted
Full Member
Well at least #29 got north of Watford. :lol:Hi John,
#29 was based at Stourbridge Junction in 1947 looking after Birmingham suburban commuter traffic. Dudley was as far north as it. went. Most trips were less than a mile so I doubt it ever got out of second gear.
#19 (and I have read possibly #s 6 and 11) got as far as the Newcastle area in 1944 when on loan to the LNER.
Did Heljan do both cardan shafts or just the one on #29?
Nigel
There are Cardan shafts on both bogies (alternating sides). They also supplied, in the accessory bag, two cosmetic bogie main drive axles.I cant find the mating recess on the bogies so they havent yet been fitted.
Posted
Full Member
One was removed, due to SKF bearings being unavailable during WWII and after it, all the post WWII photographs show them with only one driven axle. Which meant only one engine (the one with the gearbox, the other was a direct drive/fluid clutch that engaged when up to speed). Which us why I think they were only used for branch line and suburban traffic.
Nigel
Last edit: by BCDR
©Nigel C. Phillips
Posted
Full Member
This has been unfinished for years. I couldnt really do much until the hotel was completed - and you know how long that took!
The warehouse started life as a Langley Models low relief kit on Granby II. When the canal was finished on the current layout it was converted to full relief by adding a roof and sides made from Slaters plastic sheets.
For this project, in many ways, I would have preferred to modify a Scalescene kit. I have mixed plastic and paper kits elsewhere on the layout but, in this instance, I wasnt convinced it would be a happy marriage. I decided to eke out my remaining stock of Slaters sheets mounted on card
Two main walls at right angles. Both fitted with loading doors for rail and road

Ex Ratio/Wills Canopies, salvaged from island platforms on Granby II, added over the doors
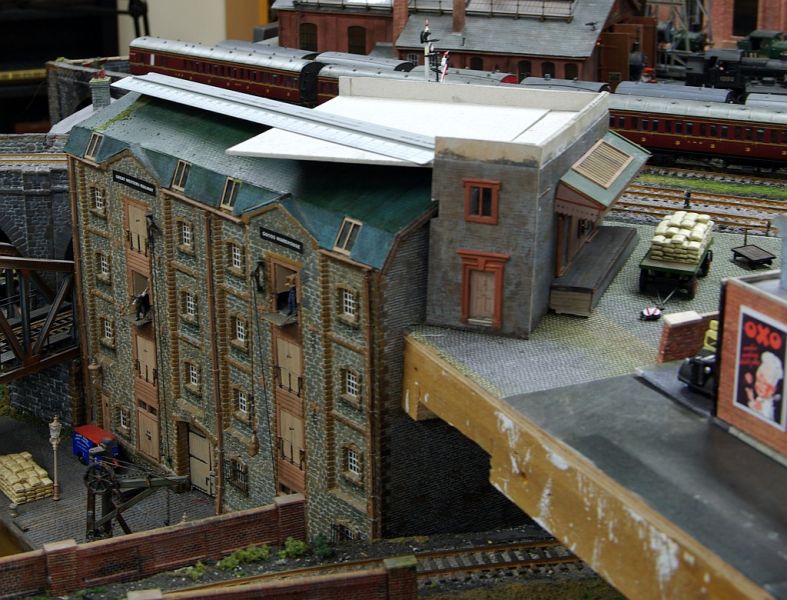
If I am honest one of the other reasons for delaying this project was the challenging nature the of site. The existing warehouse is aligned with the canal but the space to be built on is on the inside of the medium radius curves that approach the station. As you can see, its not possible to put a simple rectangular extension on top of the roof.
Short wall added at right angles to the Yard side wall:
Note sophisticated geometry used to calculate extension roof dimensions.
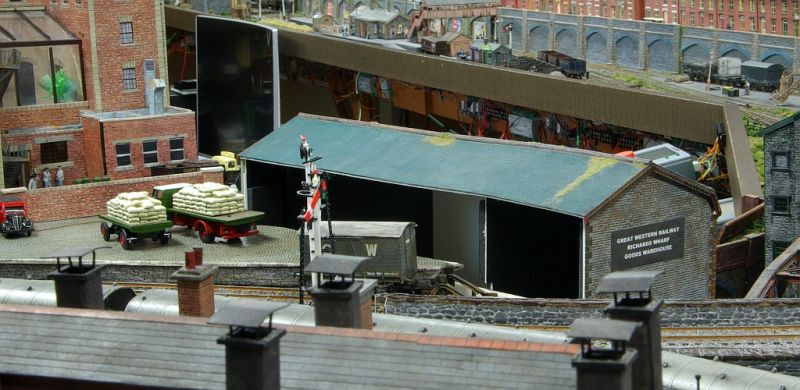
The track leads to the hidden branch storage sidings. Once the warehouse extension is finished I will start building a tunnel mouth and retaining wall from Wills Random Stone sheets.
Asymmetrical roof cut to size and clad with Slaters brick sheets:
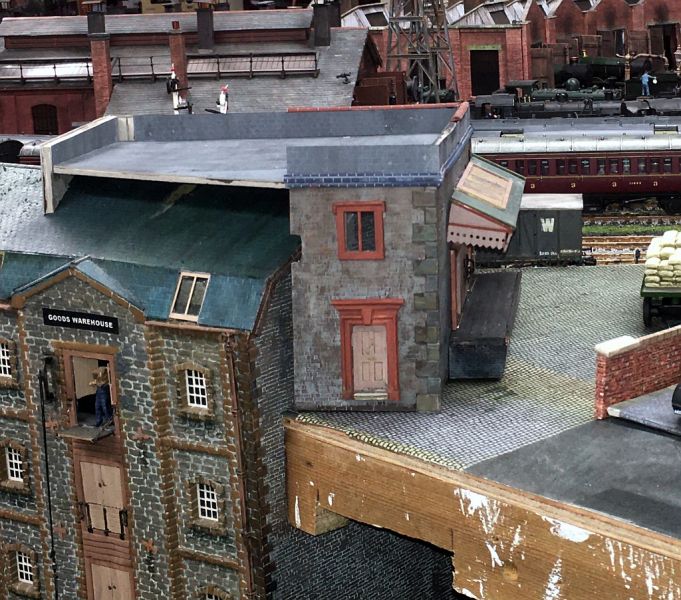
The parapet walls are clad with Slaters Tiles painted to look like cut stone. This is not so much a design feature but to disguise my limited stocks of Slaters random stone. Blue brick strips from Wills building packs hide the join.
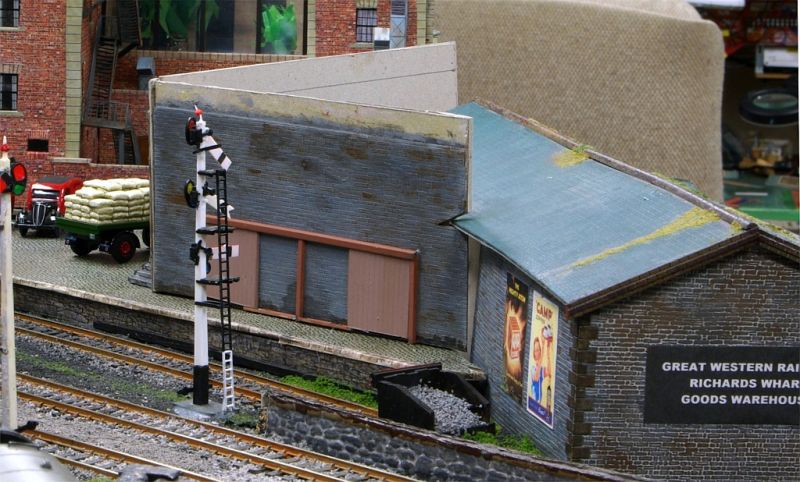
The raw wall corners are being covered with quoins cut from Slaters Paving stones
Fourth wall bridging the old warehouse roof
Cutting this out was "interesting". Flashing from plastic strip will conceal the gap and more quoins for the vertical gap.
All that remains is to cut the final fifth wall, add the remaining trim and a touch of weathering powder.
Talking of weather…….here is something rather different to finish…..North Vancouver last week:
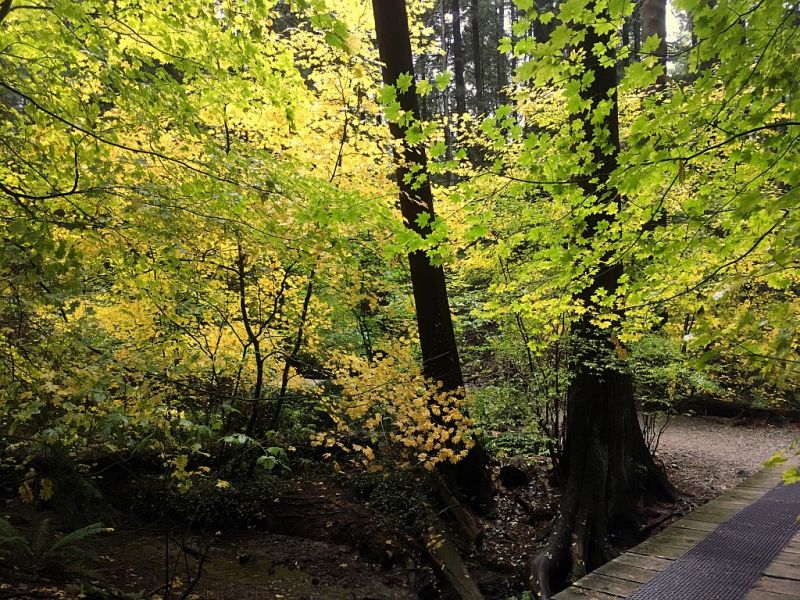
Not too many leaves left now. Over the week a cyclone passed through our area. Winds of 100kmph, strongest ever, were recorded. Its eased off a bit now and happily no damage and no power cuts.
Regards from a still windy Vancouver
Posted
Full Member
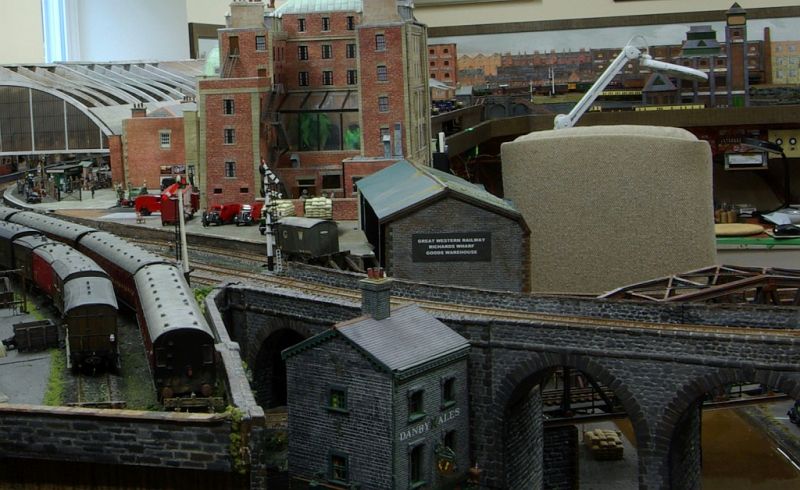
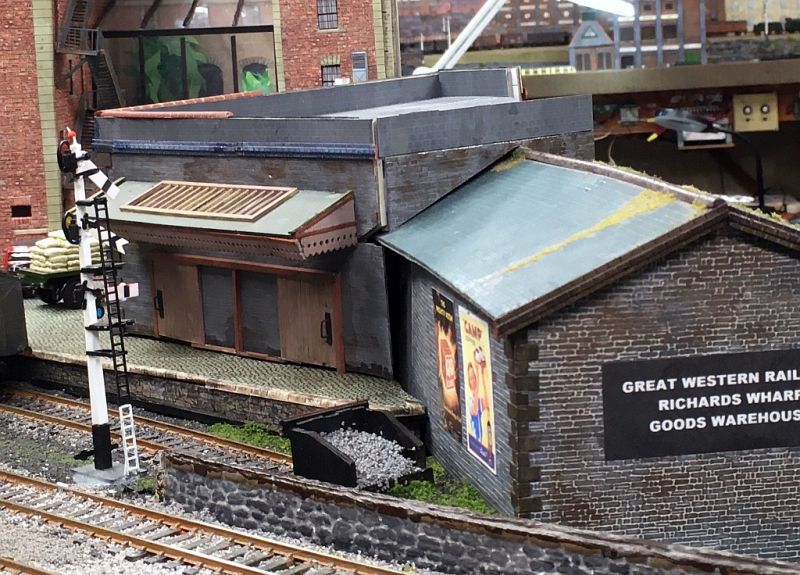
I think this overall shot demonstrates both the significance of the building and the design challenge it created
It occupies a key position at the front of the layout , one of the first buildings visitors will see. However I didnt want it to detract from the dominance of the Hotelt nor to obstruct the views into the Hotel and GPO yards.
I wanted it to complement the overall look but not be obtrusive. Ideally it would look as though it predated the Hotel
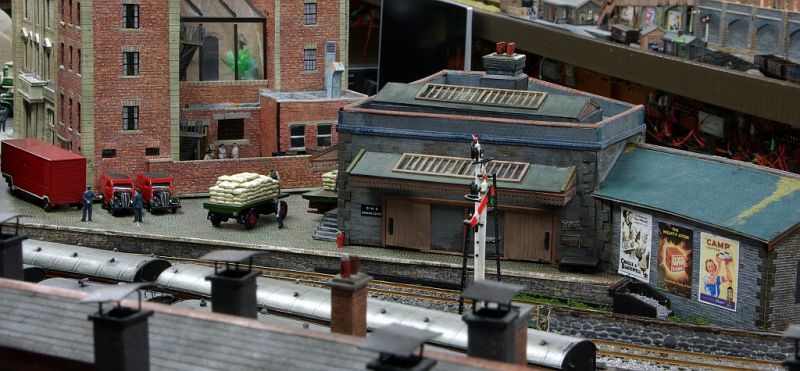
I want to suggest that the railway siding is now little used and that it is primarily used as a road link to the canal.
I like the contrasting roof silhouettes shown in this shot:

This shot from the Box Brownie looks as though it has indeed been there forever!

Having lugged the camera and tripod through the duck-under here is a shot from the other side:

The next major job is to build a tunnel mouth and retaining wall to cover the exposed framing. To complete the scene, running at right angles, will be a pair of Langley entrance gates.The gates will be mounted on a new wall separating the Hotel yard from the Railway platform.

The home made quoins look particularly clunky in this shot ……..but they hide a multitude of sins!
The gates and dividing wall will run along the line between the "setts" and "asphalt"
Hopefully the retaining wall will help hide the bowing of the hotel base on the extreme right.
Here is another skyline shot showing, from this angle, how relatively inconspicuous the extension appears:

The retaining wall will run from the warehouse to the buses (and red throttle) in the middle distance. I have more than a few sheets of Wills Random Stone to spray!
First off, I think I will finish painting some little people to populate the empty pavement in front of the buses.
Regards from a very wet Vancouver
Posted

Site staff
The Franklin and South Manchester Gallery 2 |
Ron
NCE DCC ; 00 scale UK outline.
NCE DCC ; 00 scale UK outline.
Posted
Full Member
Cheers Pete.
Posted

Full Member
Last edit: by Phil.c
Phil
Posted
Full Member
John, very nice & those collection of buildings reminds me of these
https://www.vikaschander.com/the-franklin-and-south-manchester-gallery-2/
https://www.youtube.com/watch?v=NW0QdEpGKVg
Wow thanks Ron……..I think you are flattering me……..that is a seriously impressive layout
Posted
Full Member
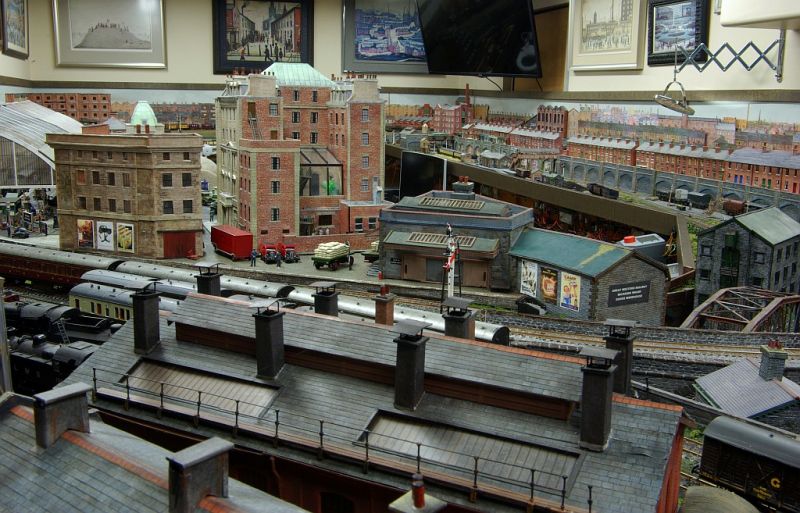
Thanks Pete………..I try to point the camera in all the little hidey holes but I am guilty of focussing on the current project.It's one of those layouts that you could look at for ages and still not see it all.
Posted
Full Member
There's not many layouts around as involved as this one and it only took John a few months to put together
Hi Phil…….
Only 14 years and counting!
Posted
Full Member
Last edit: by Phil.c
Phil
Posted
Full Member
1 guest and 0 members have just viewed this.