Granby Junction 1948 N. Wales
Posted

Full Member
GWR/LMS OO Gauge DCC RR&Co
In addition to the figures I got a batch of GWR (WR) head and tail lamps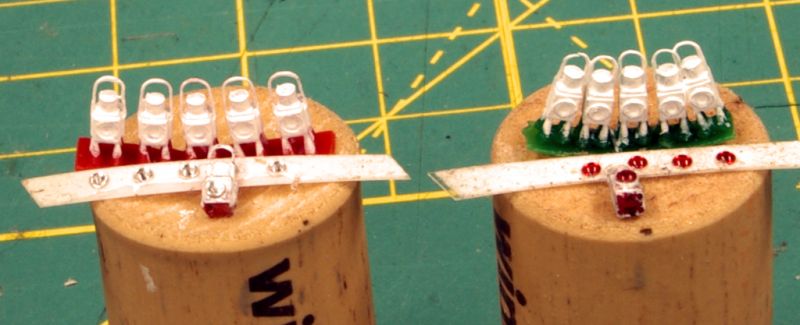
Unlike the Springside models these dont come ready to plonk. They have to be painted and the tiny shiny lens inserted
A neat idea, which I had forgotten to use until this batch, is the minute slot in the base of each lamp.
With a pair of tweezers you can insert the lamp on to the relevant iron on the loco or coach. (Still has to be glued to older stock of course)
No more fiddling around with super glue.
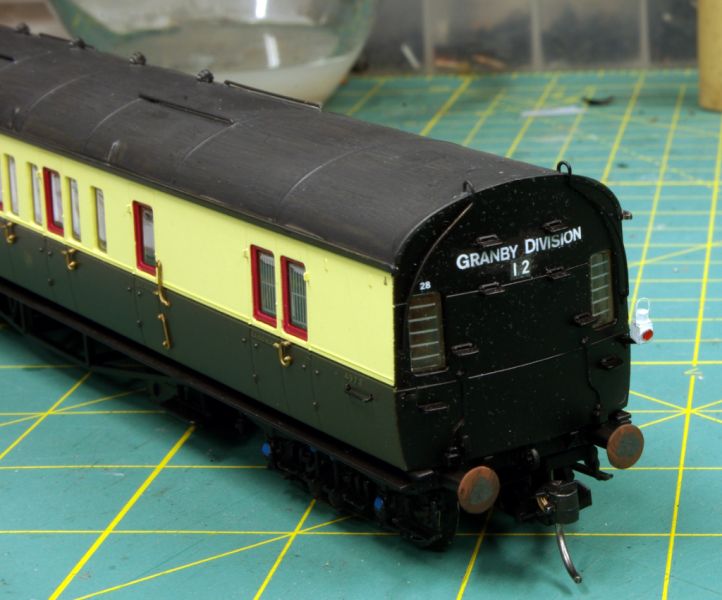
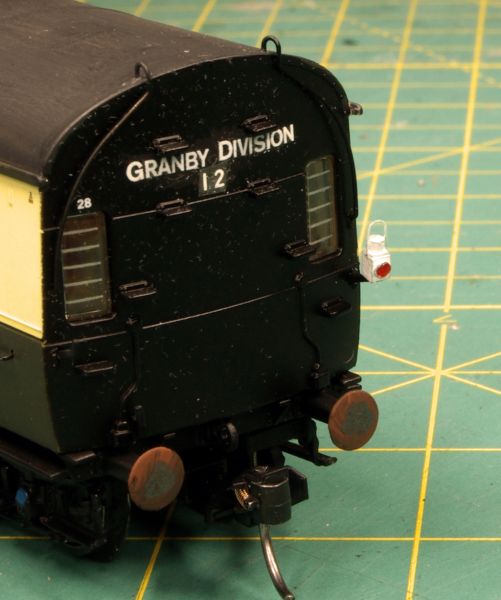
I suspect I will still top and tail my coach rakes and those tank engines that work bunker first but it will definitely make changing loco head codes much easier!
Regards from a sunny Vancouver

Posted

Full Member
I like those figures too - I have recently purchased a few and am very happy with the detail. A few more ordered and some others for the warehouses - not that they are all built yet - busy casting. I will follow your progress, I'm bound to learn a new trick or two….
Michael
Posted
Full Member
I'm amazed at your commitment John - that's a lot of wine you had to drink, the day you decided to paint the figures and lamps! And you didn't even go over the lines - impressive!
Michael
 And that doesnt include all the screw caps…….its usually Chateau Plonk here!
Good luck with your figures I look forward to seeing them at Faversham
Cheers
Posted
Full Member
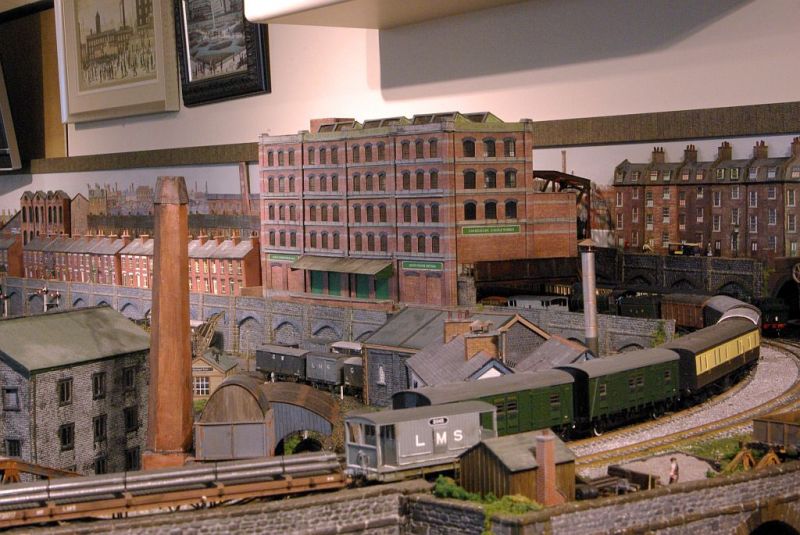
Here is a reminder of a project I started last summer when I was relaying the Engine Shed area.
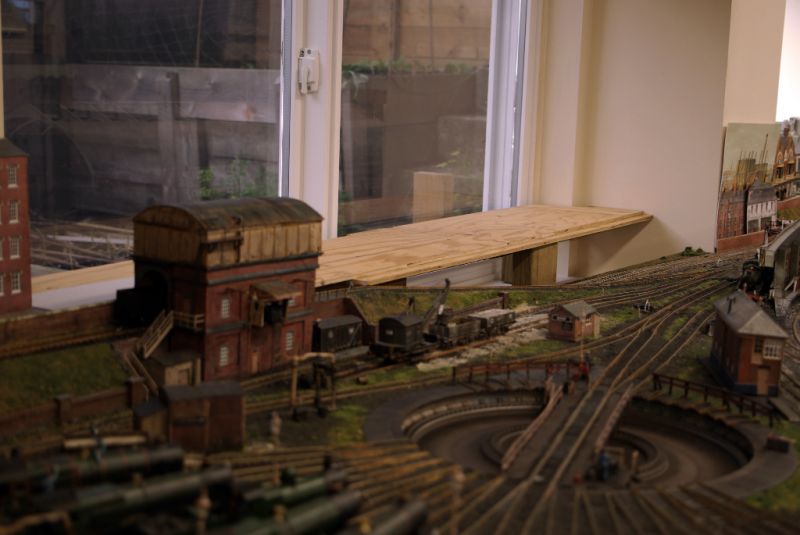
We live on the North Shore mountainside. The train room is on the lower floor …..15' above street level at the front, 10' underground at the back. The windows are let into the concrete house foundations hence the thick walls.
The resulting deep window sills have always been a challenge particularly as they are, in places, a 4' stretch across the layout.
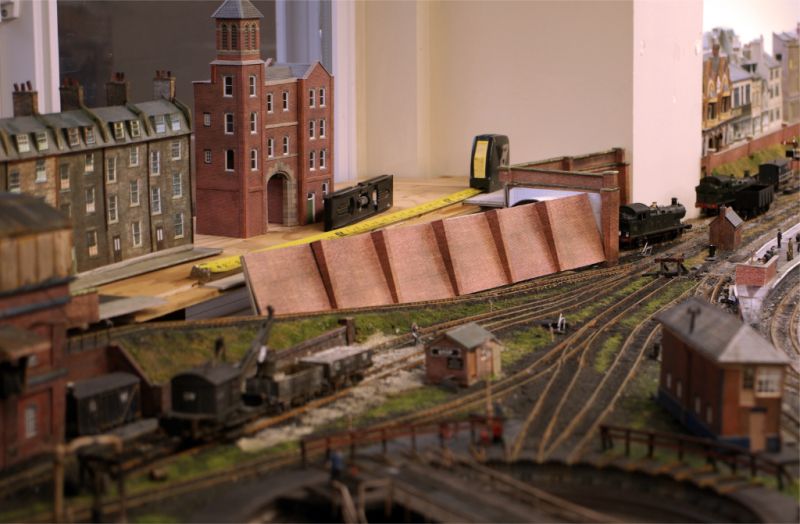
I constructed a raised shelf which will eventually have some form of permanent street scene. Note the tacky unconvincing Townscene cut out on the pillar
The twin tracks on the left climb from the lower level on a 1:40 gradient. I wanted to cover them by extending the new shelf and adding a retaining wall to link in with the coaling stage ramp. For obvious reasons this structure had to be removeable.
Hidden sidings, on an incline, 4 feet away……what could possibly go wrong!
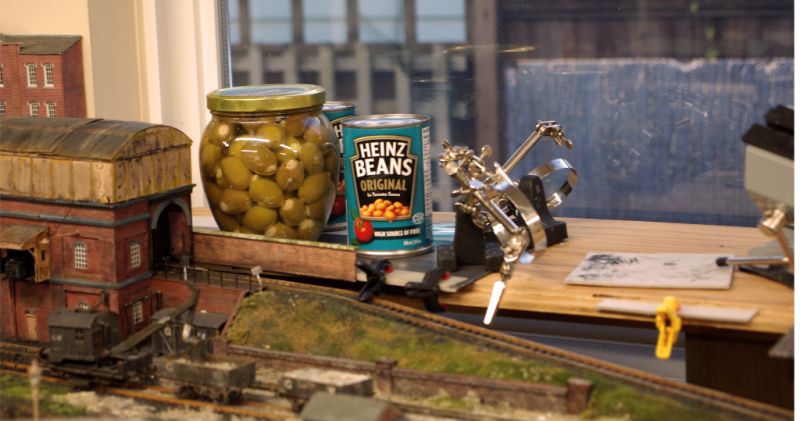
I rather like this still life……anything heavy I could grab without it being noticed to hold down a card extension while the glue sets. This provides a fixed point for the removeable section to notch into
A Scalescene Tunnel mouth provides the fixed point at the other end:

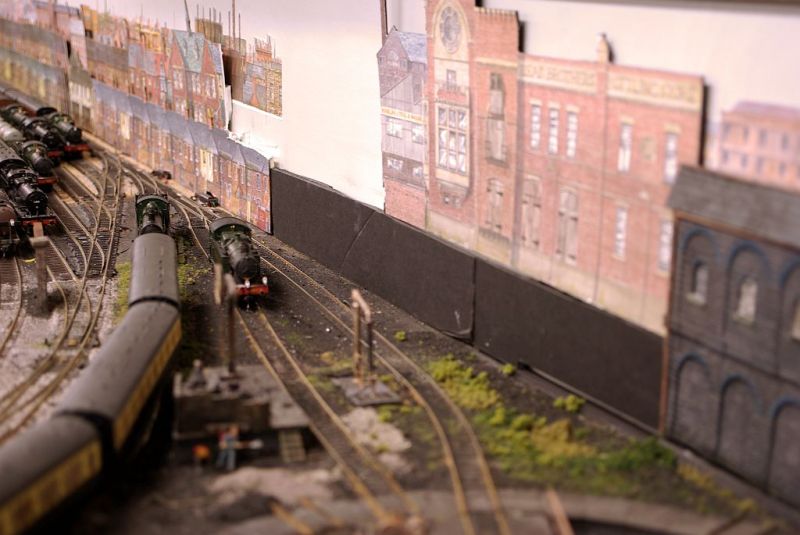
This shot illustrates the challenge of setting up the Scalescene wall so that the base matches the ramp angle and the top is horizontal and lines up with both the fixed wall running off the Coaling Stage and the tunnel parapet ……all measurements done while standing on a stool stretched out over the station forecourt…..not fun at all
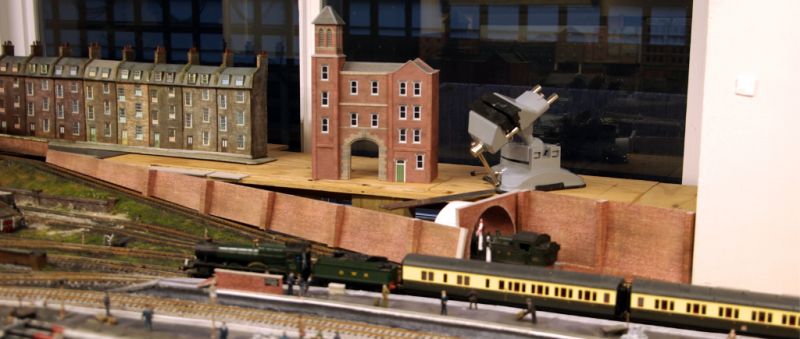
This attempt was not entirely successful!
Start again….. but this time complete the tunnel parapets first
There are issues with the tunnel roof which rises above the street level datum but hopefully I can conceal it with a custom designed building
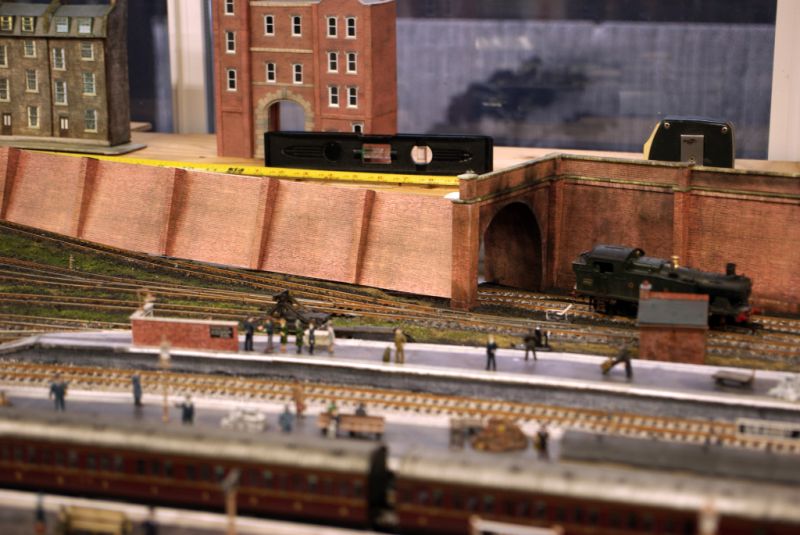
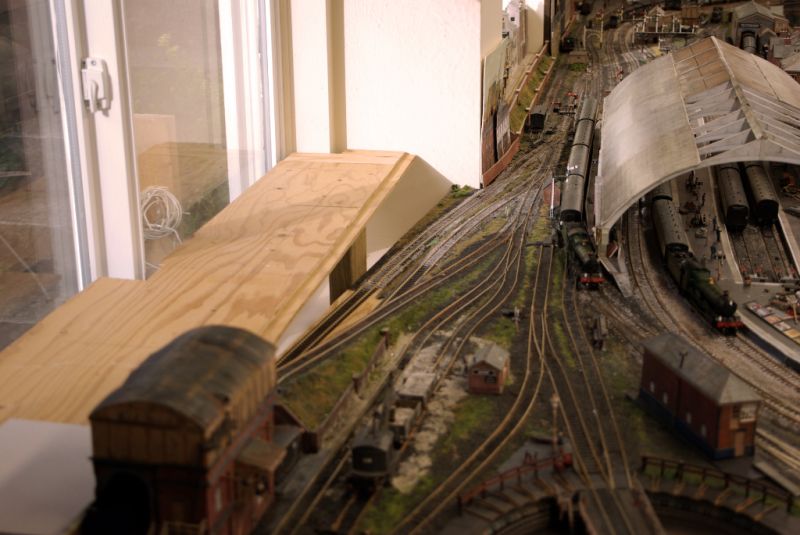
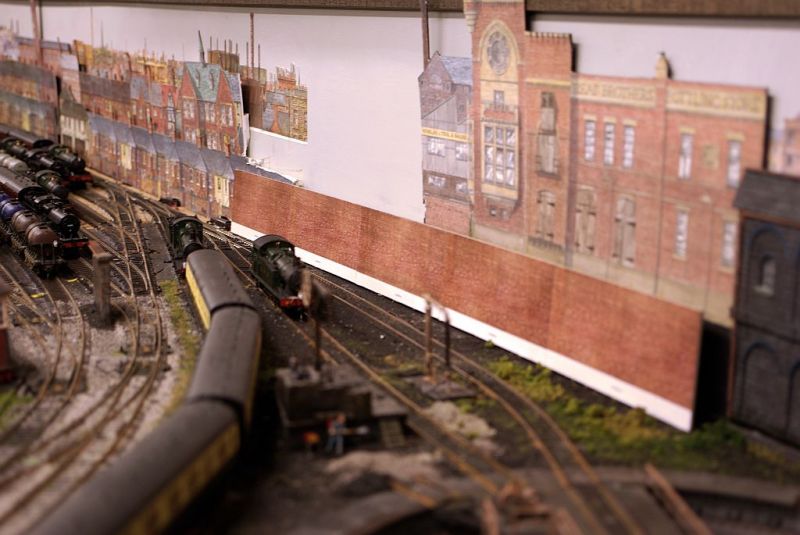
Second time lucky……..some of the angles/lines are a little suspect but will be hidden to some extent by the station roof.
The grass at the base conceals the gaps where it rests on the ramp. Look closely at the far buttress (just in front of the emerging wagons). The buttress is glued to the tunnel mouth. The removeable wall lots in behind it.
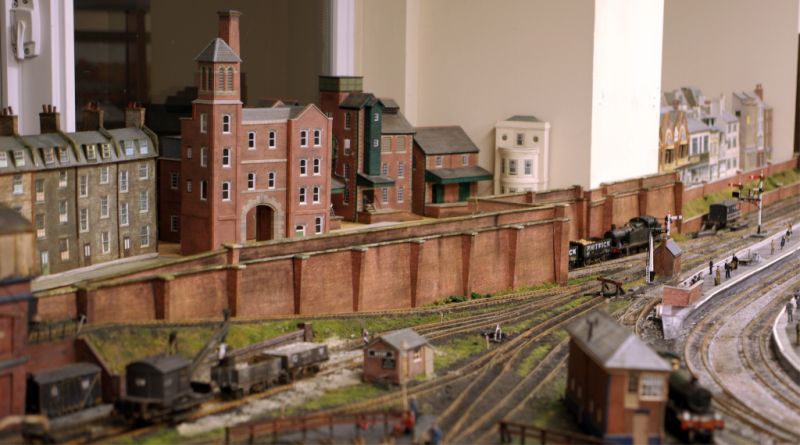
Somewhere in my trash bin is a shot of the unit removed but for now you will have to take my word it works albeit without a lot of hassle. For starters part of the station roof and attached buildings have to be removed first .
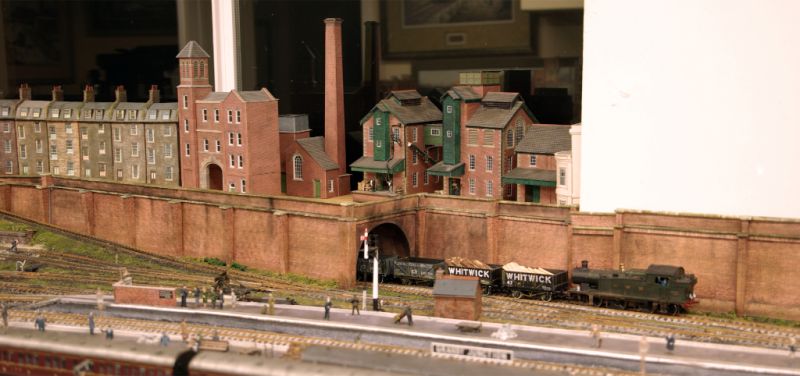
The buildings, mostly from the old brewery are just plonked for now……eventually they will be glued to a lift off base. I am taking my time deciding what will be the most effective grouping. I want to link the scenes on the two window sills with some credible ultra low relief on the cream foundation pillar……..I have a wild idea of doing something with Scalescenes Castle Folly

Regards from Vancouver
Posted

Site staff
Ron
NCE DCC ; 00 scale UK outline.
NCE DCC ; 00 scale UK outline.
Posted

Full Member
just when methinks that you have run out of things to do on Granby and will turn to automated signals ( semaphore of course) and then putting sound into one of those pesky panniers you go and find something else to do ….
:thumbs :thumbs
Posted
Full Member
Doing that John, would have tested the back muscles? And of course, we are not as flexible as we think we are!
Sure did. I am not too flexible at the best of times….many years ago I had two vertebrae fused together so that doesnt help!
Glad its done but it will be a while before I sort out the buildings
Cheers
John
Posted
Full Member
You guys……always trying to tempt me. :lol:Ah John ,
just when methinks that you have run out of things to do on Granby and will turn to automated signals ( semaphore of course) and then putting sound into one of those pesky panniers you go and find something else to do ….
:thumbs :thumbs
I spend so much time operating that the buildings take a back seat…….In addition to the window sills, the brewery has to be finished and at the other end Station square is still an empty space……the problem being its a very convenient parking place for Coffee Mugs and Wine glasses before ducking under.
Working Signals (semaphore) maybe….one day.
Best wishes
John
Posted

Legacy Member
I note you are being tempted with auto signalling it would be a nice addition to Granby and would add an extra dimension to Railroad &co operating but as with all things its a lot of wiring and of course cost.
I will be doing it on my layout but it will be light signalling not semaphore
Brian
OO gauge DCC ECOS Itrain 4 computer control system
Posted
Full Member
The pain was both physical and mental…….the little people waiting on the platform took a fearful pounding!I can see that must have been a real struggle to do John not easy reaching over to do things like that and all the time there is the risk of wrecking something in front of it. Thats why on my new layout scenically im trying to work outside in but im sure as time goes by i will make modifications and have to reach over.
I note you are being tempted with auto signalling it would be a nice addition to Granby and would add an extra dimension to Railroad &co operating but as with all things its a lot of wiring and of course cost.
I will be doing it on my layout but it will be light signalling not semaphore
Brian
And that of course is another problem with semaphore signals …..they are very vulnerable to hands and arms reaching over…..I am forever reglueing / repairing mine, particularly on the low level branch. I do agree though that working signals with RR&Co would look great.
Best wishes
John
Posted

Full Member
The pillar could carry a flat warehouse perhaps? The area is large enough??
Barry
Shed dweller, Softie Southerner and Meglomaniac
Posted
Full Member
Thanks BarryNice work John. I know the brewery etc are just plonked but it looked like a good grouping. Sometimes, things just get plonked and actually they look pretty good!
The pillar could carry a flat warehouse perhaps? The area is large enough??
Barry
A Scalescene warehouse is my default solution to the pillar…..I have built enough! The latest one can be done in ultra low relief and I could clad the three sides. I just have a fancy to attempt the Castle using the same approach……if I can pull it off I think it might make a pleasing contrast to all the red brick. If it looks awful I guess I will just pull it down!
Best wishes
John
Posted
Full Member
A castle next to a brewery! Lady Gwinevere Ale or how about a pint of Sir Percival?
Sounds a great idea.
Barry
Shed dweller, Softie Southerner and Meglomaniac
Posted

Full Member
Often, one saw tunnels apparenty disappearing under housing and yours is so "credible". The finished article is stunning.
I also like your little people - far more realistic than the usual "OO" figures. Does their rank/social standing dictate which bottle you had to sample in order to supply their stand ? If so, who would be atop a Chateau Margaux, Petrus or Gevrey Chambertin - I couldn't see the names on most "stands" but then realised a driver or fireman wouldn't command such a lofty position ………………..
'Petermac
Posted
Full Member
Thanks Peter, thats very kind of you.Yet another impressive piece of engineering John.
Often, one saw tunnels apparenty disappearing under housing and yours is so "credible". The finished article is stunning.
I also like your little people - far more realistic than the usual "OO" figures. Does their rank/social standing dictate which bottle you had to sample in order to supply their stand ? If so, who would be atop a Chateau Margaux, Petrus or Gevrey Chambertin - I couldn't see the names on most "stands" but then realised a driver or fireman wouldn't command such a lofty position ………………..
I think scanning real live people makes the poses more realistic ans somehow the clothing, open jackets for instance, seems to "drape" better.
No hierarchy with the corks……just what comes out of the box first and virtually all Chateau Plonk…certainly none of the exotic wines you mentioned! :lol:
Best wishes
John
Posted

Full Member
Phil
Posted
Full Member
I haven't painted any of the scanned people but I know from experience that getting the paint at the right thickness is a priority not to obscure the detail, probably a couple of thinner coats would be better.
Where is the "Agree" button? :lol:
Posted
Full Member
In the spring of 2017 I spent a few months building this quite substantial Scalescene Warehouse. It was designed to mask the end of the storage yard as one entered the train room.

Aesthetically its great and visitors are suitably impressed. Operationally it has proved to be somewhat impractical. Its designed to lift off in the event of a stall which is fine when most of the operation is roundy roundy. Its not so good now that I am focussing more on end to end operation with increased use of the storage turntable.
If I am honest I will admit to being pretty happy with a 95% success rate when automatic uncoupling kadees. This means that 1 in 20 schedules require a swift touch of the hand of god. Again fine when reaching over low relief terraced housing. Less so removing a very large warehouse and all its supports. When testing and developing new schedules or even running intensively I found the warehouse and tunnel were spending more time off the layout than in place!
Time to think again:
Regular followers will know ,despite carefull cropping, its been like this since February :oops:
Last week I finally started to build another Scalescene retaining wall
Unlike the one on the other side of the room this is quite straightforward…….and quite long……almost 3'
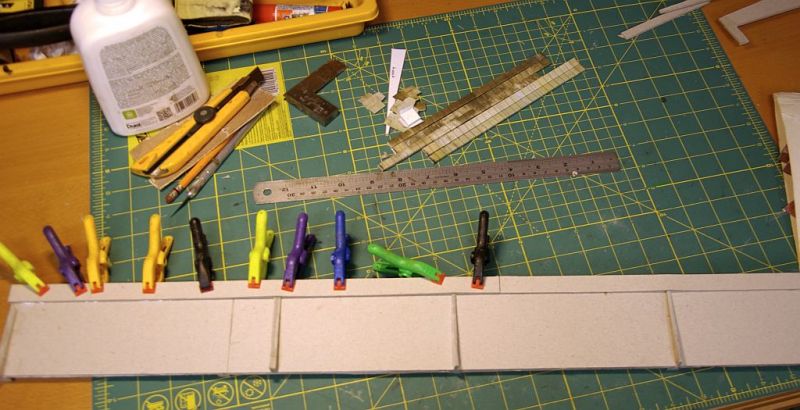
Buttresses are the most tedious and time consuming task

Clockwise from top left……Template glues to 2mm card
Cut out each individual segement
Laminate in pairs………………best like this to get a smooth matching front surface
Finally into fours
Scribe and cut out cover layer
Sandpaper
Wrap and Glue
Buttresses glued to wall along with plinth wall at base

Rear wall and supports The rear wall adds rigidity and doubles the width of the base for the main wall capping.
Yesterday I added the Main Wall capping, Buttress capping, Parapet wall and capping.

Only capping is provided in the print out for the parapet wall. I add mock pillars from scrap to match the buttresses.
Like all John Wiffen's designs the added elements both vertical and horizontal create an attractive structure but also one that is surprisingly robust.
It still needs weathering and bedding in but first I have to build a low relief Warehouse to go alongside the Townscene Cutout…………otherwise job done
I am getting quite used to making these walls……even so it probably took about 15 hours of modelling.Typically I do between 1 and two hours morning and afternoon. Breaking it up makes it less tedious and allows the glue to dry properly!
Regards from a very sunny and warm Vancouver
Posted

Full Member
I imagine such builds must be satisfying and I am looking forward to the time when I need to create similar and other infrastructure.
Best Loire Valley wishes,
Bill
 Last edit: by Longchap
At 6'4'', Bill is a tall chap, then again, when horizontal he is rather long and people often used to trip over him! . . . and so a nickname was born :)
Posted

Full Member
Re wall buttresses, have you considered gluing two layers of 4mm balsa together, cutting an 8mm x 8mm piece of the reqired length and then cutting it diagonally to get the required shape?
As my painful hands get worse, I have started using balsa strip and sheet for laminating as it cuts so much more easily than 2mm card.
Best wishes,
Doug
'You may share the labours of the great, but you will not share the spoil…' Aesop's Fables
"Beer is proof that God loves us and wants us to be happy" - Benjamin Franklin
In the land of the slap-dash and implausible, mediocrity is king
"Beer is proof that God loves us and wants us to be happy" - Benjamin Franklin
In the land of the slap-dash and implausible, mediocrity is king
1 guest and 0 members have just viewed this.