Granby Junction 1948 N. Wales
Posted

Full Member
GWR/LMS OO Gauge DCC RR&Co
[user=1460]jcm@gwr[/user] wrote:Thats very tempting…..hadnt realised they were so close…………however we are supposed to be heading to Hay on Wye :roll:[user=434]John Dew[/user] wrote:If you're doing Steam, it would be very remiss of you (as you're almost in the same area),
Thanks Bill. That sounds like a great trip (Swindon not the Xing :lol:) I have never been to the museum but we are just planning the itinerary of a trip to Europe next year. I think I have convinced Mrs D that a pub near Swindon would be the perfect stopover after arriving at Heathrow. :thumbs
I guess your busy season is winding down now and you will have more time for modelling now?
Best Wishes
John
not to include Didcot and Pendon as well!
Not sure I can convince Mrs D that we need two days to recover from the flight!:lol::lol:

Posted
Full Member
Hope the move goes well….to quote Robbie Burns….†Lang may your lumb reek†:lol:
Posted
Full Member
Ah, you might only need one day to recover, but if you're flying back[user=1460]jcm@gwr[/user] wrote:Thats very tempting…..hadnt realised they were so close…………however we are supposed to be heading to Hay on Wye :roll:[user=434]John Dew[/user] wrote:If you're doing Steam, it would be very remiss of you (as you're almost in the same area),
Thanks Bill. That sounds like a great trip (Swindon not the Xing :lol:) I have never been to the museum but we are just planning the itinerary of a trip to Europe next year. I think I have convinced Mrs D that a pub near Swindon would be the perfect stopover after arriving at Heathrow. :thumbs
I guess your busy season is winding down now and you will have more time for modelling now?
Best Wishes
John
not to include Didcot and Pendon as well!
Not sure I can convince Mrs D that we need two days to recover from the flight!:lol::lol:
from the same airport, you could always get back to that area a day
early, and do Didcot & Pendon as a relaxation before you fly!
Added bonus that Mrs D can't complain about railway overload if it's
split over 2 days, one at each end of your trip. ;-)
PS, no-one is unimpressed by Pendon!
Jeff
Posted

Inactive Member
Max
Port Elderley
Port Elderley
Posted
Full Member
Not sure where we are flying back from yet…..but good idea I will work on it:lol:
Cheers
John
Posted
Full Member
Cheers Pete.
Posted
Inactive Member
Max
Port Elderley
Port Elderley
Posted
Full Member
We have enjoyed a very fruitful summer…..literally:


If Petermac happens to look in, these are Tuscan plums not Agen I am afraid

Well all that bounty had to be harvested and cooked/stored. Wrapping apples in newspaper reminds me of my childhood in Formby where we used to store them between the joists in the attic……..but we didnt call it an attic……it was known as the cock loft! Why would it be called that in an Edwardian semi? Is the term still used I wonder.
So not a lot of time for modelling, but I did manage to replace the spice mixture round the sand house with finely sieved real sand. Not sure why I didnt think of that in the first place!
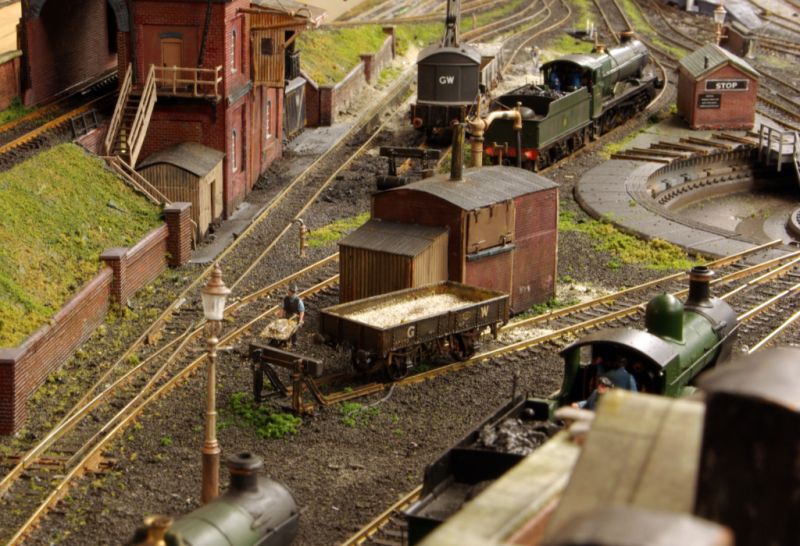
Not quite so colourful but definitely more realistic.
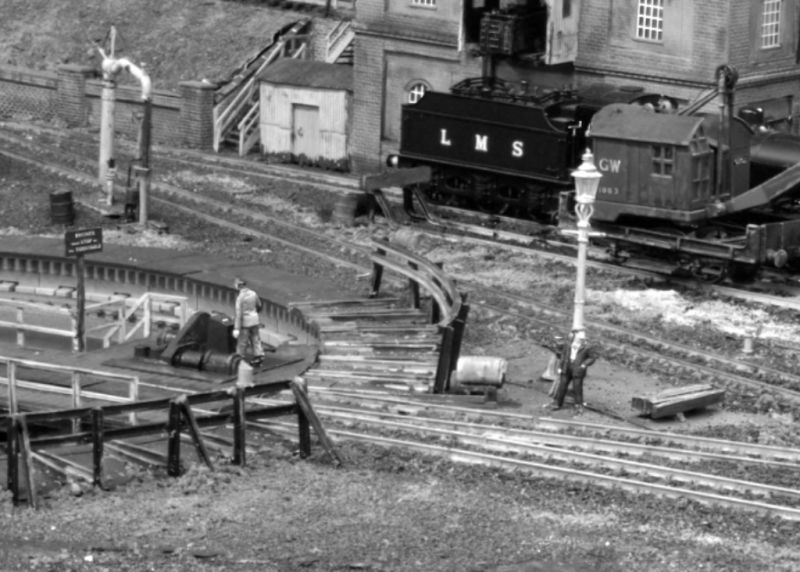
I have finally replaced the water columns and lamps in front of the GWR shed……which is still sans doors
Lamp close up…..apologies for quality
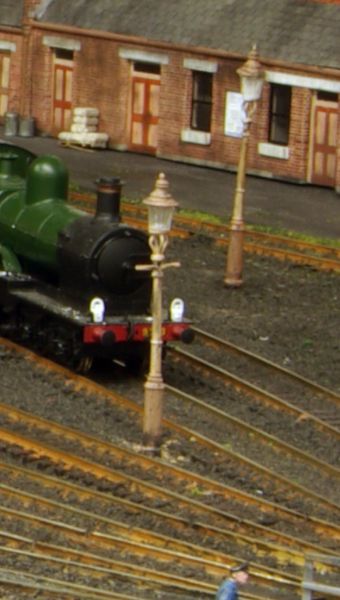
The photographs I have seen of GWR Engine Shed lighting are rather more utilitarian. I suspect these lamps may be more appropriate for branch goods yards but I am rather fond of them.
Closeup of one of the Water Columns. Like the lamps they are another excellent example of Mikes models. I am so glad I stocked up when they were more readily available.
The steps are from a collection of shed detail made by Gem that I bought 20 years ago ……I think they are equally difficult to find today
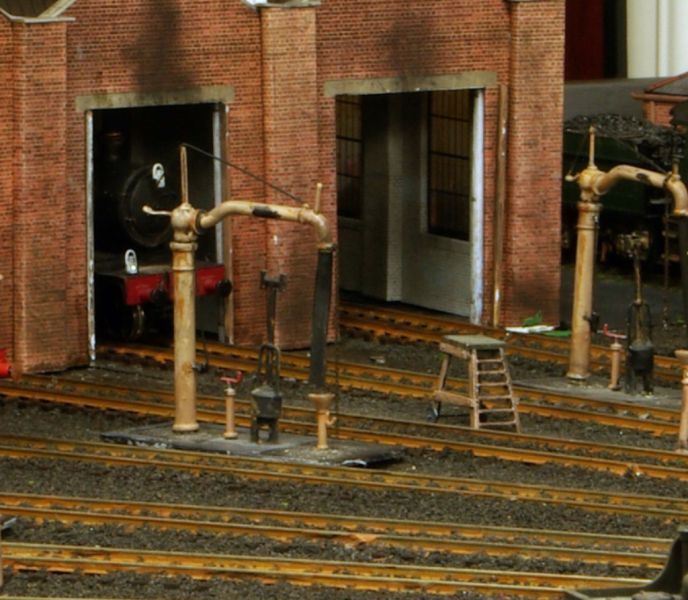
The fine detail on the columns and lamps is very vulnerable to the hand from the sky descending to clean track or re-rail a loco. I have lost count of the number of times I have had to repair them. I delayed putting them in place until I was totally satisfied with the track. Next job is to bed them in with ballast. Time to find the wok lid

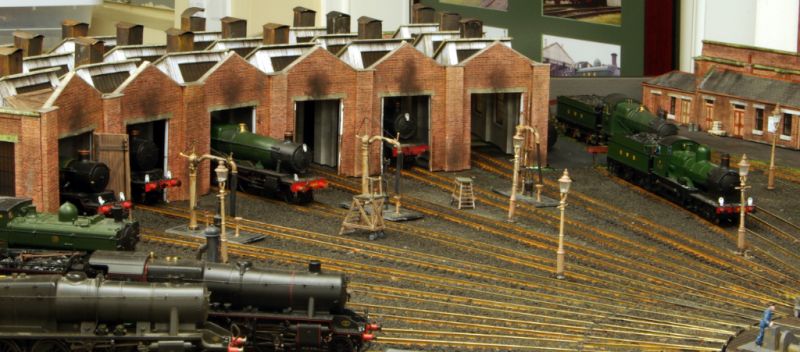
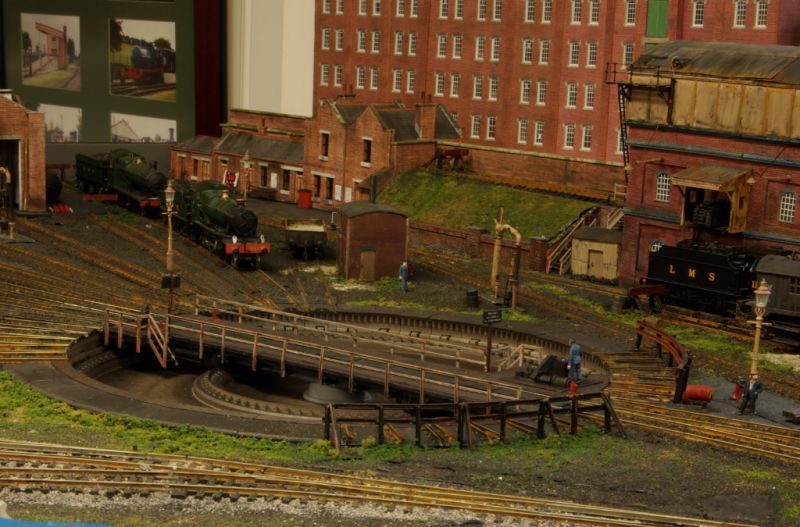
This is the view that visitors have when they enter the room

From left to right 6 road GWR shed, single road GWR workshop and two road LMS shed. The workshop can be set in permanently but the engine sheds have to be removable…..just in case. Their actual positioning has to be very precise because the track entry tolerances are so fine. This weeks project is to create "concrete" surrounds that will allow the buildings to be easily lifted off and always put back in the same place……….always assuming I can creep in from the garden!
Regards from a sunny Vancouver
John
.
Posted

Inactive Member
It just gets better and better all the time, and those steps……… amazing!
And your comment: "The fine detail on the columns and lamps is very vulnerable to the hand from the sky descending to clean track or re-rail a loco" —— just think what it's like in "N" scale!!!!!!!!!!!!!!!!! :lol:
Ken,
'It don't mean a thing if it ain't got that Swing'
Posted
Full Member
I have to be honest…..the steps are a white metal kit…..so it was just super glue to assemble, paint and weather…..but I admit they do look the part.
N gauge would terrify me.I never cease to be amazed by you and Marty.
Best wishes
John
Posted
Full Member
We have lived here almost 40 years now and I am still not quite used to having Roast Turkey and all the trimmings (including yams) for dinner in early October.
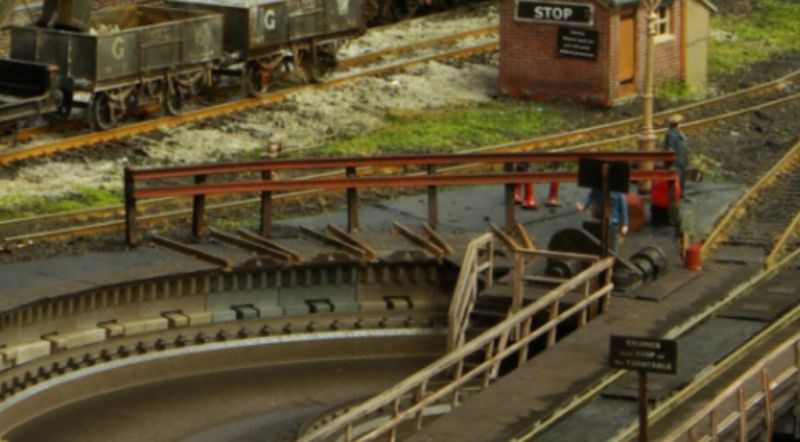
Change of plan…..instead of bedding in the GWR shed this weeks focus has been the turntable and its immediate surroundings.
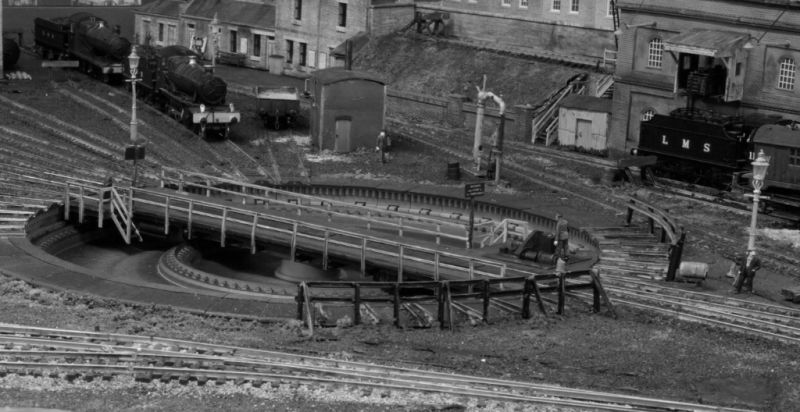
By way of reminder here is how the Fleischmann turntable looked, straight out of the box last May
The Green House was removed very quickly and I put on a coat of grey undercoat to hide the wasp stripes but then got on with other things while contemplating the best way to make the turntable look more like a GWR prototype.
The standard GWR turntable seems to have had a narrower bridge supported by above ground girders. I did think about drastic surgery and adding Dapol girders. This would have involved cutting away the two side platforms and support wheels built in. :shock:
Fortunately, and with great relief, I found a number of photos showing GWR well turntables with side rails on the bridge.
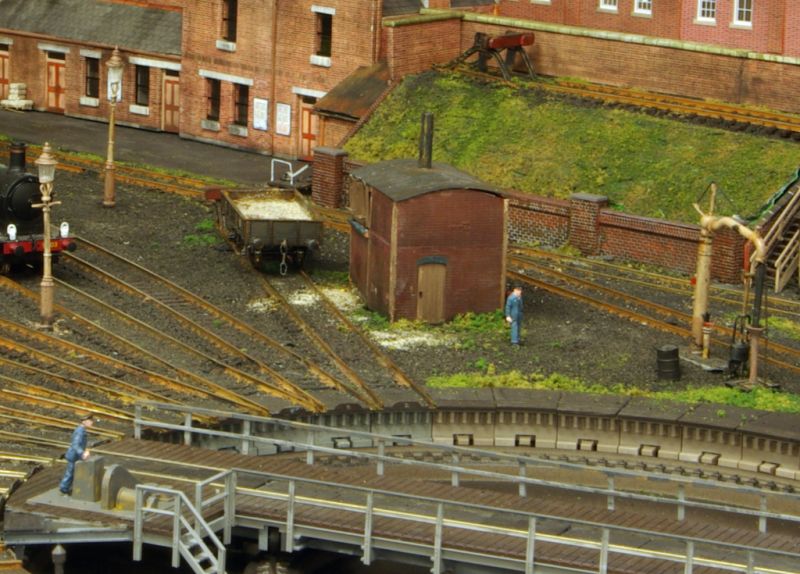
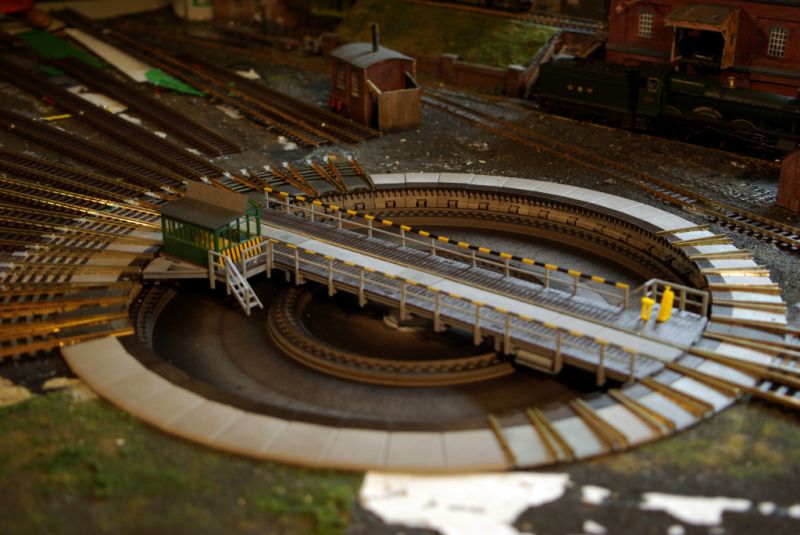
The bridge had to be removed for an electrical modification (more on this later) so I took the opportunity to do some detailing,painting and weathering
The observant will note that the lineside hut now has a new location. It was previously on the "concrete" pad next to the turntable but on reflection I felt it made the area too crowded.
I think this is better

The stop blocks are soldered up from spare bits of rail……the curved rail was stripped off #2 radius set track.
Not sure how proto-typical this. The prototype didnt often have rail stubs on the perimeter. This is an intrinsic part of Fleischmann's design. Every exit must have either a facing exit or a stub. As a result of the electical mod these stubs can be live so the stop blocks are not solely decorative.
Ideally the vertical supports should be lined up with the tracks but that created clearance problems with some locos
The bright yellow machinery under the green house has been suitably darkened and greased. The slots that held the House have been covered by a riveted plate from the Wills Vari Girder pack ……..super useful pack to have handy
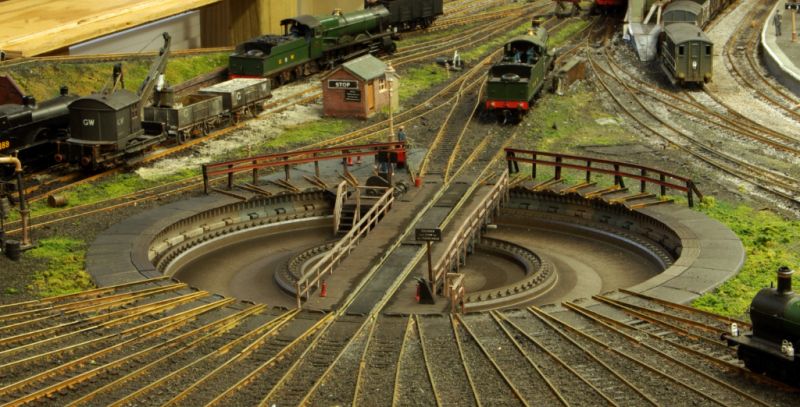
The bridge rails are supposed to look as though they havent been painted since before the war. Streaked with rust and grime.
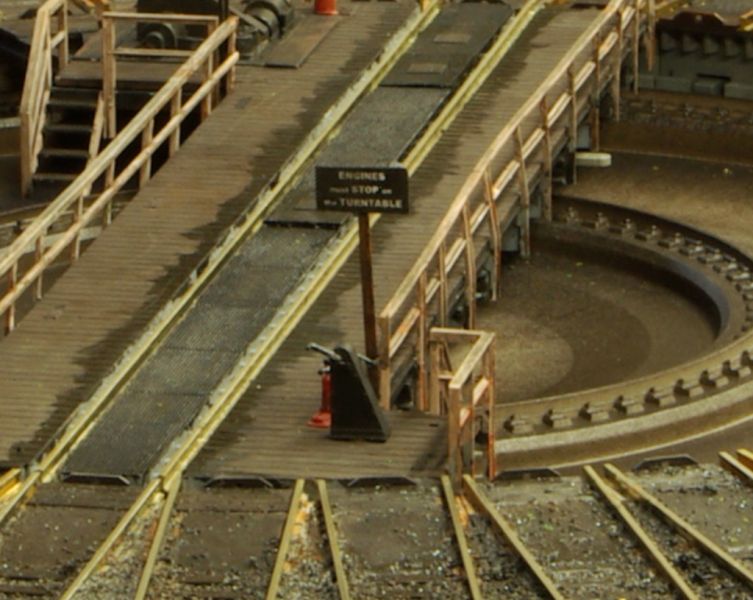
Many of the photos I checked out showed a board like this at each end of the bridge.
Bridge boards weathered and oil stained next to the tracks. The Wills plate can be seen top left .
So thats it…..job done
I have to say from an operating aspect the turntable is an absolute delight. The indexing is totally reliable and the locos roll on off extremely smoothly. It may not look quite the part but I will sacrifice that for consistent operation.
Probably time for a video!
Posted
Inactive Member
Yes. Another movie extravaganza will be welcome. :cheers
Max
Port Elderley
Port Elderley
Posted
Full Member
Cheers Pete.
Posted

Site staff
Shame about the rail stubs, but you've got around that well.
Ed
Posted
Full Member
Posted
Full Member
I guess a reno takes far more time than starting from ground zero although the shed area looked pretty much like ground zero 6 months ago!
In the past with a new project I have been able to flit back and forth but this one seems all consuming……recognising that its just an over large train set :lol:
Best wishes
John
Posted
Inactive Member
Posted

Full Member
Posted

Legacy Member
I have the same Fleischmann turntable John i use all LDT stuff to control it from memory i think you tend to use all Lenz equipment?
Brian
OO gauge DCC ECOS Itrain 4 computer control system
Posted
Full Member
[user=1886]DaveH_Murcia[/user] wrote:
Luv it. Will be watching out for that video and the description of the electrical mods. It's still my intention to take your lead and go with the Fleischmann turntable as well but given rather heavy expense on Traincontroller and other stuff recently don't want to upset swmbo.
Thanks Dave ……I really want to get the shed permanently back in place but I will try and get a video done before Christmas.
Usual disclaimer but Fleischmann is definitely the way to go with RR&Co. It is expensive but , as I learned, buying a turntable that is not fully supported is a false economy!
When budgeting dont forget you will need a a decoder to interface with TC. The Fleischmann Turncontrol unit, which I bought, is almost as expensive as the Turntable……which explains why you havent seen too many new locos on Granby this year.
There is a less expensive alternative from LDT……….I think it requires more programming to set up but I know a number of people who have used it successfully.
Ok…….the modification
The bridges connects electrically to the exit track connections, and facing dead end stubs that are set into the turntable perimeter. A built in switch ensures only one end of the bridge is live.
If a loco drives on to the bridge it cant exit the other side without either the bridge moving or being manually switched
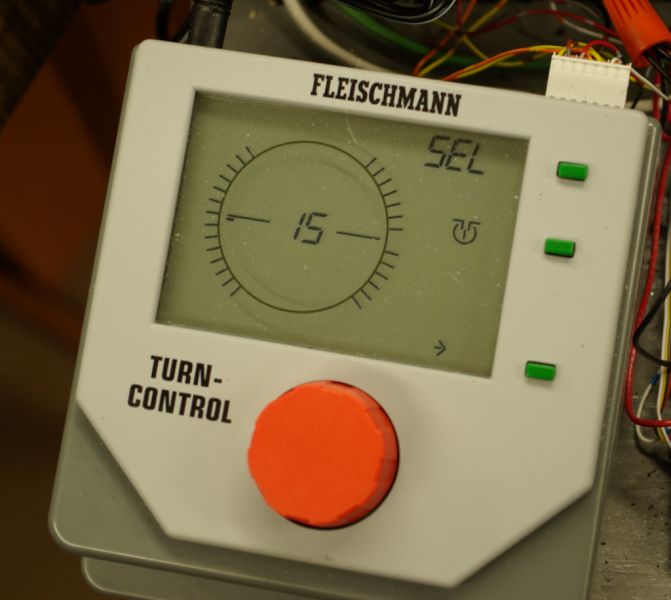
Bottom right is a small arrow indicating the right exit is live. Press the adjacent green button and the left hand exit becomes live. Perfect if you are operating manually with the Turncontrol unit……..not very good if you are operating automatically with TC.
The solution/modification is neutralise the switch…..
Remove the bridge.
The underside looks like this

The switch is the white box on the left. Two screws released allow you to turn the electrical unit over

Solder two jumpers (the orange wires) over the switch connections and the job is done. Make sure the jumpers dont foul the wipers when you replace the unit.
You probably want to file this away for next year?
Regards
John
1 guest and 0 members have just viewed this.