Granby Junction 1948 N. Wales
Posted

Full Member
GWR/LMS OO Gauge DCC RR&Co
Thanks for the good wishes guys………hope everybody following this thread had a great Christmas and New Year :cheersI promise to try and get some more panniers in Dave. :lol:.
This is a very brief post to start the year.
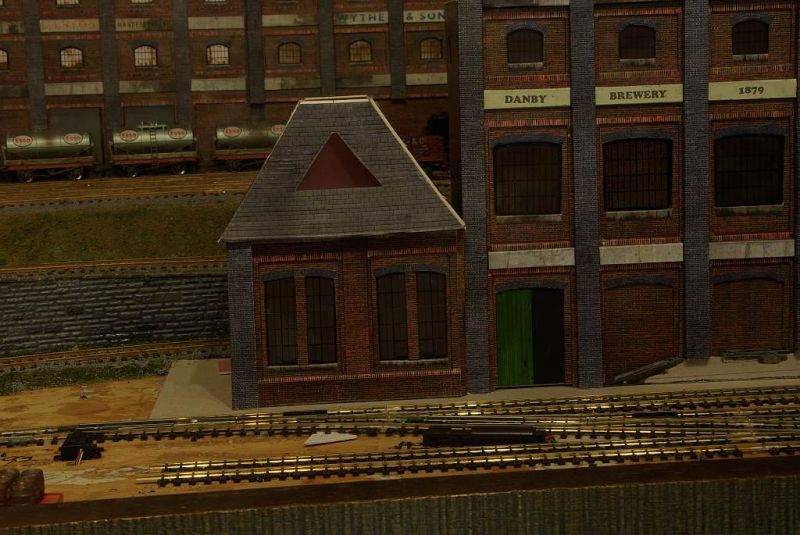
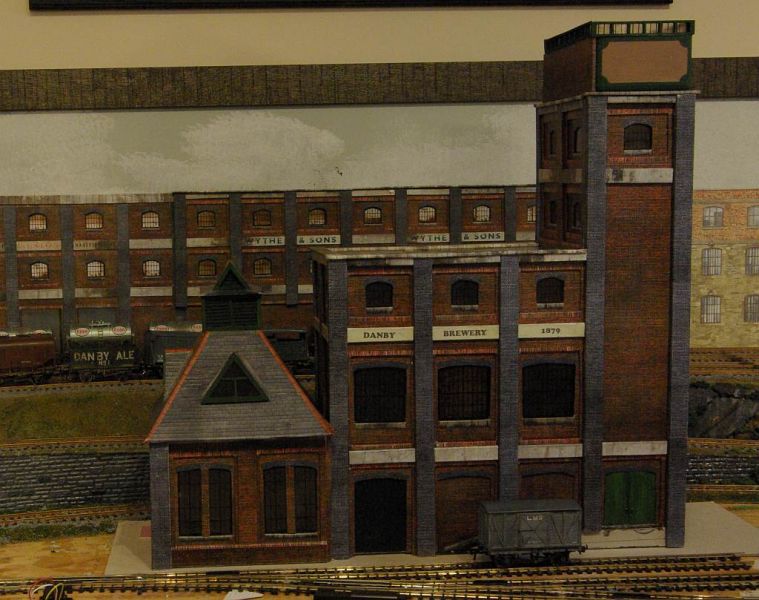
Progress on the brewery……my attempt to construct something vaguely resembling the current header photo….. has been slow but steady.

The basic structure of the Brew tower is complete. The water tank is almost ready to go on top of the tower. Two big jobs still to be done…the sack hoist and the vented hip roof
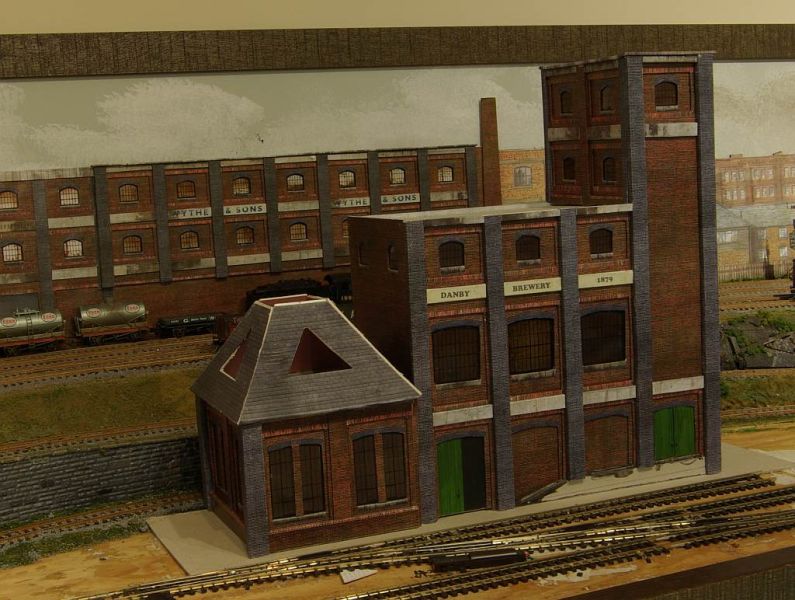
The Copperhouse, on the left, needs vents on top of the roof and gable windows. Hopefully I can get this done and post some construction shots next week
The three brewery point motors were finished..a Peco surface mount and a pair of the new Cobalt SS motors
The Cobalt SS Motors merit a post of there own……great idea but my initial experience has revealed a disturbing flaw. After a period of inactivity they "forget" their position and require a double command to initiate……I am writing to DCC Concepts to report this……when I hear back I will write a separate post.
Finally to wrap up my Dean Goods post ……here is a rather fuzzy video showing just how slowly the Oxford Dean Goods can crawl at speed step one……its a bit like watching paint dry but if you want to waste 65 seconds of your life ……play it and see what I mean:
http://www.youtube.com/v/fqsEnUx8BUE
Regards from Vancouver

Posted

Inactive Member
The Brewery is looking good. :thumbs
Max
Port Elderley
Port Elderley
Posted
Full Member
Best wishes
John
Posted
Inactive Member
You need to remove the watch?v= and replace it with /v/
Then when it changes to
Max
Port Elderley
Port Elderley
Posted
Full Member
Posted
Inactive Member
Max
Port Elderley
Port Elderley
Posted
Full Member
I do like that brewery.
Cheers Pete.
Posted
Full Member
Call that slow!!! You should see me when the wife gives me a job to do.
I do like that brewery.
 Thanks Pete
Still a long way to go with the brewery am afraid but I keep plodding away.
Posted

Full Member
At 6'4'', Bill is a tall chap, then again, when horizontal he is rather long and people often used to trip over him! . . . and so a nickname was born :)
Posted
Legacy Member
reg
Posted
Full Member
Peaceful plodding produces pleasing progress :)
Excellent Bill…….slightly disappointed you didn't work pannier in:lol:
:cheers
Posted
Full Member
Thanks Reg.Coming along well John , quite impressed. Hope the extreme weather we are reading about does not affect your goodself too much. At least it may mean you get snowed in to the railway room . :lol:
All the extreme weather is on the East Coast……..we had snow over Christmas ……about a foot in total but it's all getting washed away now by normal Vancouver winter weather……rain
:cheers
Posted

Full Member
Great work, love all of the detailing and your weathering is excellent.
Thank you for sharing, John :)
Oh, Dr Beeching what have you done?
There once were lots of trains to catch, but soon there will be none.
I'll have to buy a bike, 'cos I can't afford a car.
Oh, Dr Beeching what a naughty man you are!
There once were lots of trains to catch, but soon there will be none.
I'll have to buy a bike, 'cos I can't afford a car.
Oh, Dr Beeching what a naughty man you are!
Posted
Full Member
Glad you enjoyed it…….and thanks for the comment about the weathering…..I have always weathered the buildings…..hides all manner of mistakes…..but it took almost ten years to pluck up the courage to do my nice shiny locos:lol: I still have a few to do though.
Best wishes
John
Posted
Full Member
The first was a Peco Side Mount with which most will be familiar
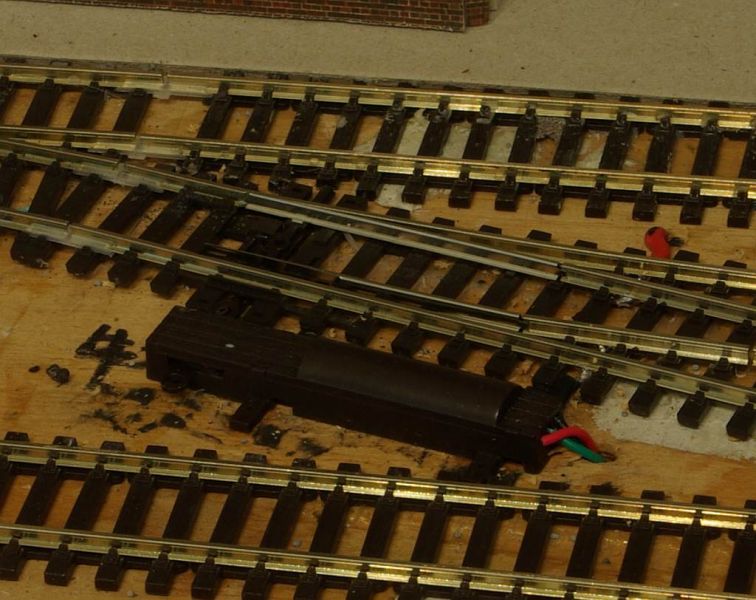
Rather large footprint but easy to install. I hook them up to a DCC Concepts Solenoid Decoder, to switch the polarity of electrofrog points and integrate with my RR&Co system.
They are not very powerful and can have difficulty overcoming the resistance of a Peco point spring. Remove the spring and you can run the risk of the blade moving because it is not held in place by the throw arm.
For the two remaining points I decided to try a pair of the recently introduced SS Cobalt Motors

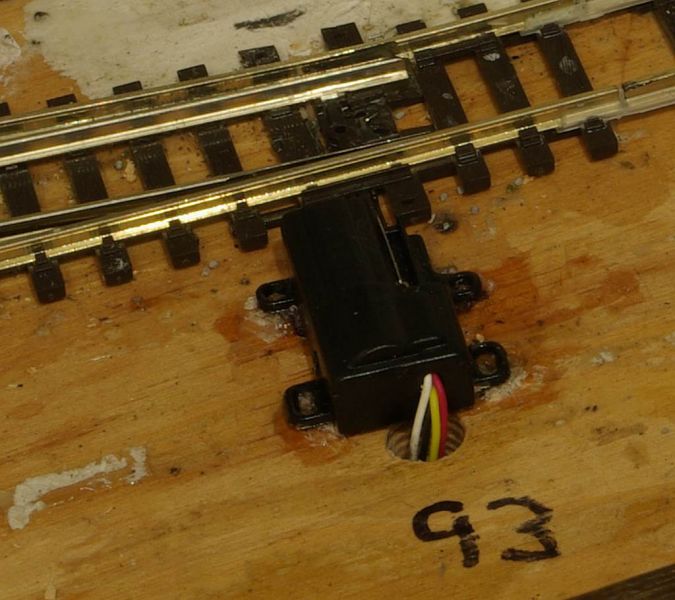
The motor connections are "plug and play" hence the oversize hole for the wiring
http://www.youtube.com/v/Az9sdIVPNVU
The Peco spring is removed and the stepped motor holds the blade in place despite the apparent flimsiness of the link arm.
You can adjust the length and velocity of the throw on the decoder but its still a bit tricky to find the sweet spot to optimise the throw hence all the abandoned screw holes
The decoder will be hidden by the brewery building.

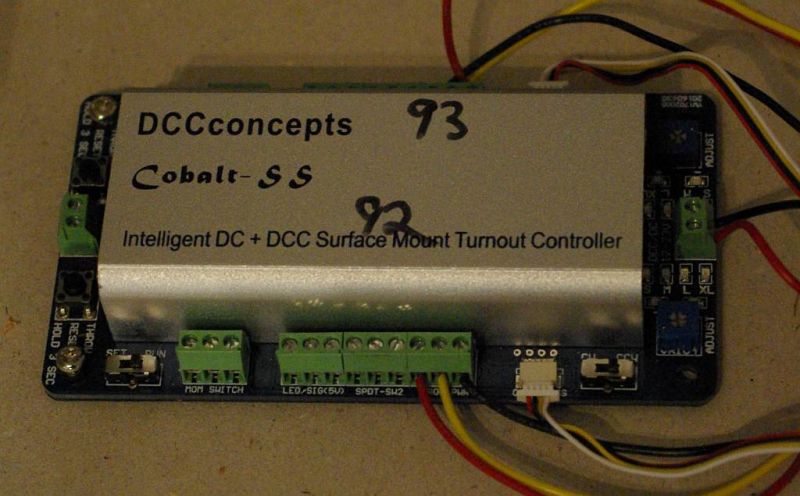
Bottom right you can see the plug in connection for the point motor. Power is supplied by the DCC bus which can be daisy chained to the individual point connections. The only wire that needs to come directly from the point is the frog connection….yellow wire bottom centre.
There are connections for a push button switch, an LED and a spare SPDT switch………redundant for me because I use the RR&Co switchboard on the computor or Ipad.
I like the small footprint and so far have been impressed with the mechanical operation. Unfortunately there is a software issue.
After a period of inactivity (as little as 30 minutes) the unit loses memory and "forgets" its last position. If the blade was left at position [+] and you want to move the blade to position [-] pressing/entering [-] has no effect……you have to press [+] before pressing [-]…………not good!
I wasted a ton of time trying to resolve this before emailing them DCC Concepts. I got this reply by return:
"We have recently found that there is an issue after powering down if they are set to CCW. The problem has been resolved in software and the current units cannot easily be reprogrammed. The next production batch will have the amended software.
The immediate fix is to run with the switch set to CW and use the reverse extension as supplied with the motors and control board.
If you do not have enough reverse connectors, we will send one out to you".
The fix works on one motor and they are sending me a reverse extension for the other.
.
DCC Concepts provide some very innovative products which I will continue to buy but I do wish they would carry out more exhaustive pre-launch testing.
Apologies for the techy post…..next post back to the brewery and at least one Pannier.
Regards from Vancouver
Posted
Full Member
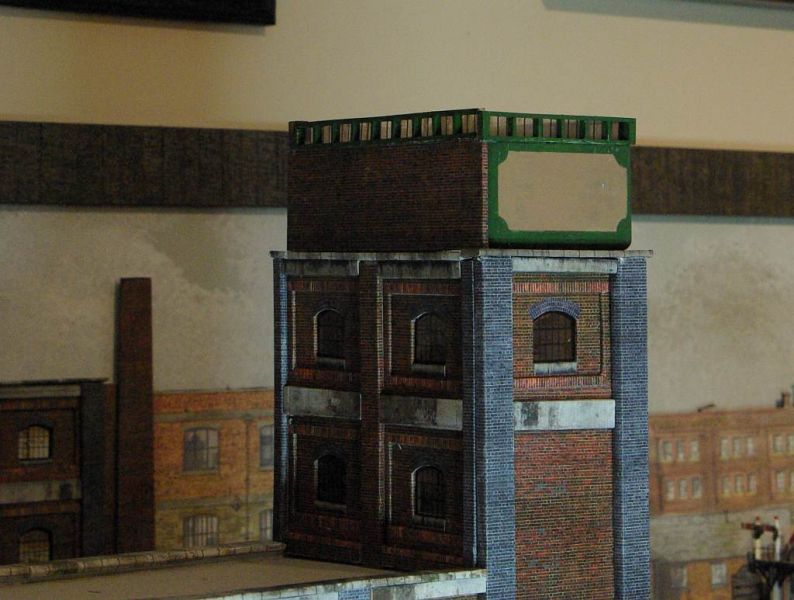
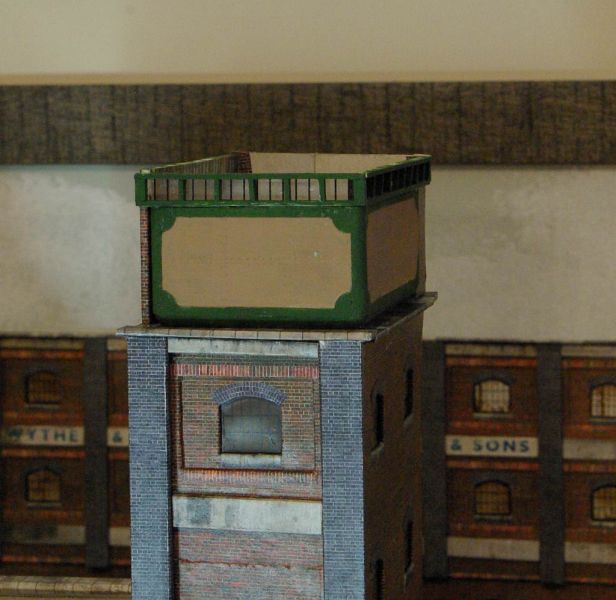
The copper house roof now has gable windows and a ventilation turret. Apart from adding gutters and drain pipes, its complete.
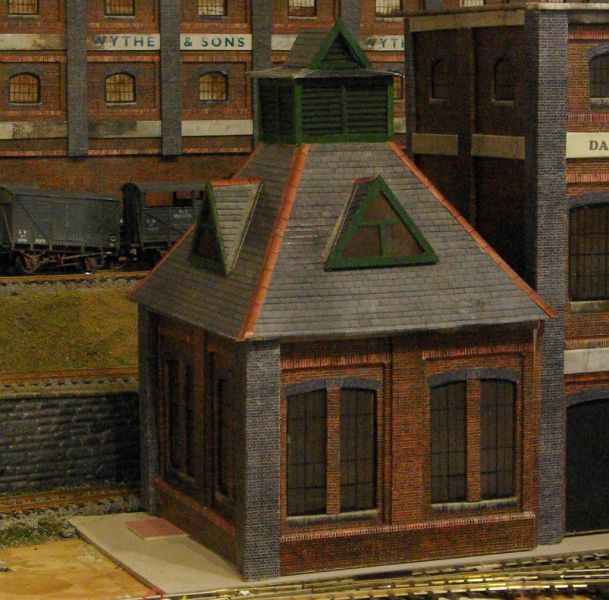
It would have taken forever to try and make individual louvres for the ventilators and I suspect the end result would have been disappointing.
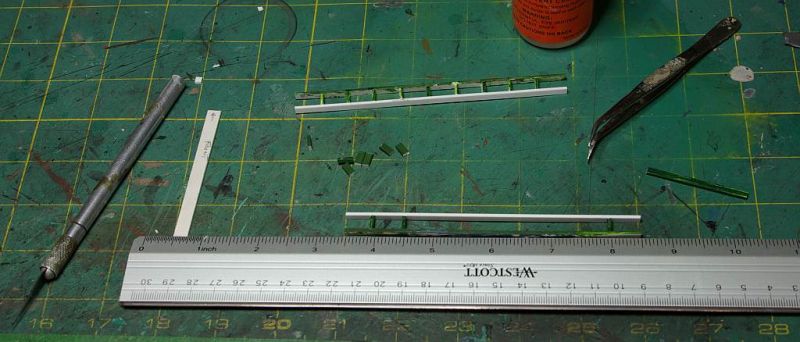
The ridged plasticard I used to create faux louvres was still quite time consuming;
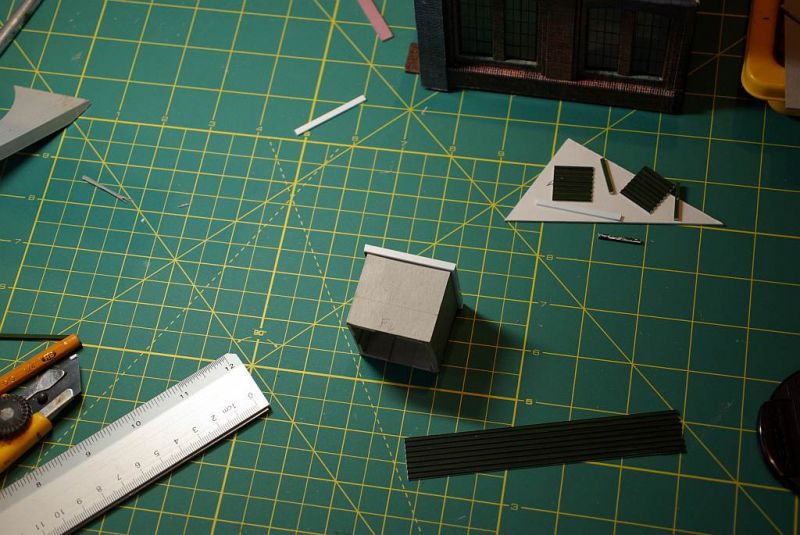
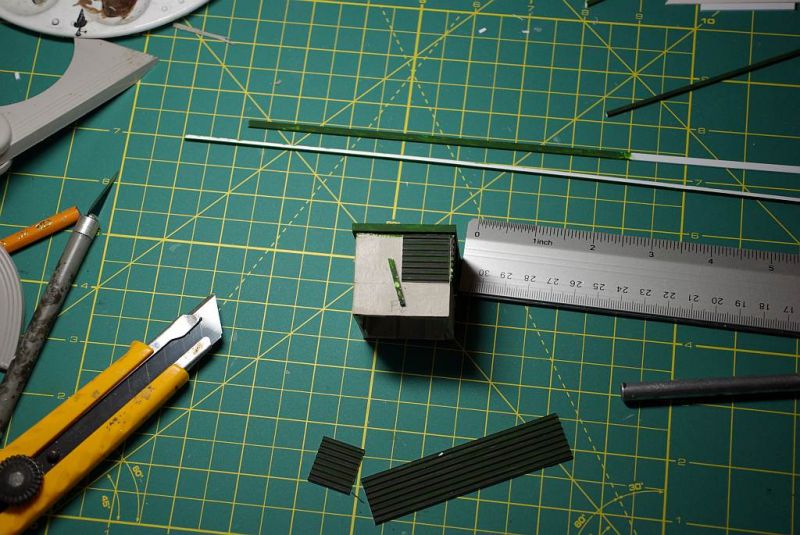
The main brewery building will have these vents right round the roof so the turret was useful practice
The part finished water tank is now on top of the the grist mill tower
Hook Norton has a continuation of the tower wall on one side of the water tank. I copied this feature, even though I dont understand its original purpose, because it helps conceal that the water tank (a Dapol/Airfix kit).is smaller than the towers standard Scalescene footprint. It also supports the gabled roof that finishes off the structure
I guess this is the first display of Danby Brewery's colour scheme. Green was bound to be the main colour from the moment I ordered "Coronation", a Barclay 0-4-0 from Hattons.Choosing the second colour took rather longer as the two tone effect on the Tank will be repeated below on the Sack Hoist and thus become a prominent feature of the entire bulding.
Another feature that will be replicated on the hoist is a row of narrow windows or each floor
The windows for the tank was a useful learning experience:

Still to do…….Sack Hoist, Vents and gabled turreted roof on the main building and gabled roof on the water tank

The brewery project could occupy all my available modelling time but I am trying to restrict it to just 2 or 3 days a week so I can continue to run trains.
I am developing a fairly complex routine involving both a milk train and a parcel train.
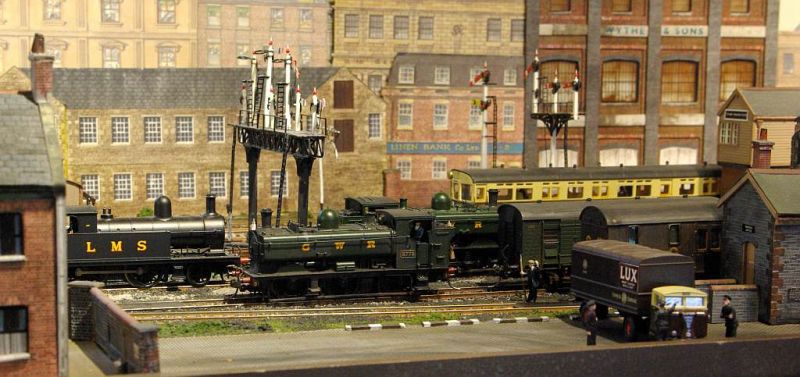
Last week I started a small component of this routine…..a sequence involving the station pilot ( a pannier naturally!) shunting some parcel vans from the depot in preparation for pick up :
More to come.
Regards from Vancouver
Posted

Full Member
Posted

Full Member
Posted
Full Member
[user=19]Marty[/user] wrote:
Aah…at last…a pannier :lol:
Tony, from Brisbane, has been badgering me to reduce the Pannier ratio in my posts but they are true maids of all work and just keep popping up!gdaysydney wrote:
Thanks Dave……..still a lot more to do. Just hope I can get it done before the Spring. Seed catalogues have rather ominously started to appear :shock:Nice work JohnðŸ‘ðŸ¼
Best wishes to you both
John
 Last edit: by John Dew
Posted
Full Member
I sometimes think my posts are a bit verbose so this time I have tried to tell the tale with photos and minimal explanation.
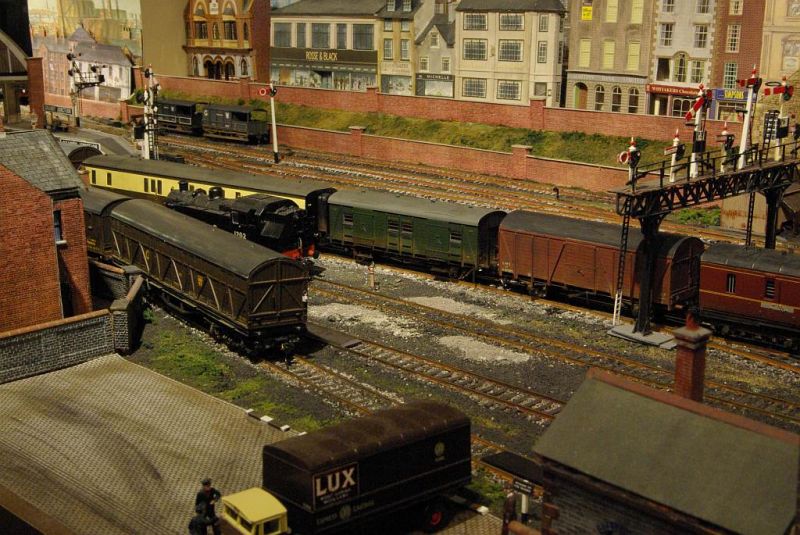
The first stage involves the station pilot moving two outgoing vans from the parcels siding to the outer trailing siding off the Up line.

The parcels depot was something of an afterthought……the facing platform, Bay #1, has to be used as a head shunt.
The incoming Ellesmere Autotrain, seen above, normally uses Platform 1 so it has to be redirected to Bay #3

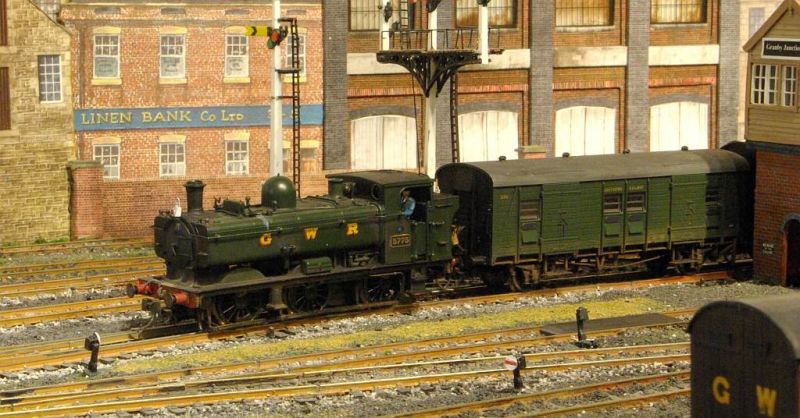
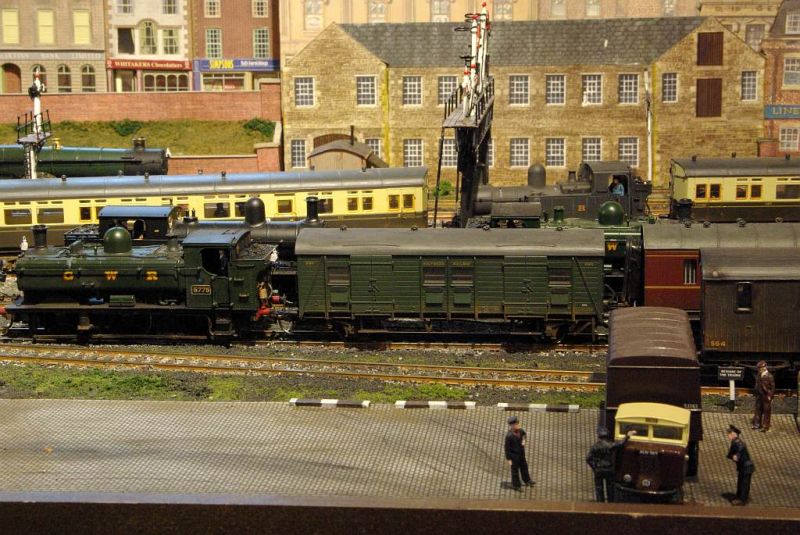
The pilot leaves the vans in the siding and returns to the Parcels siding to clear the Depot siding eady for the incoming vans
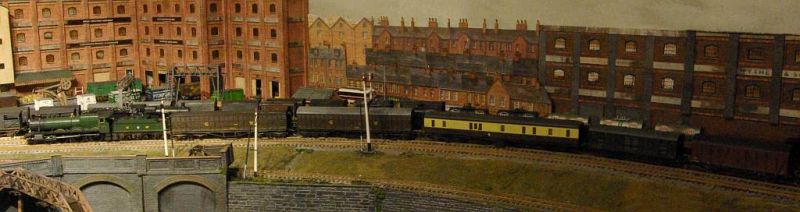
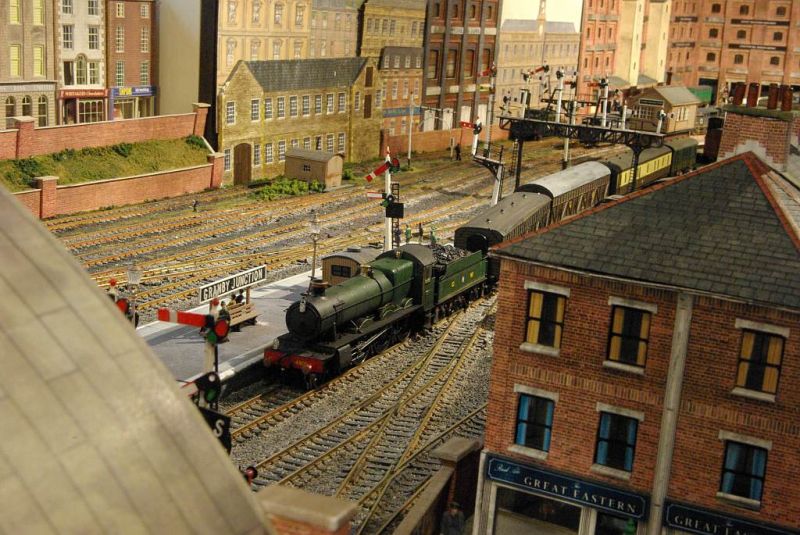
In this shot, taken from a passing aeroplane, the 10.05 Birkenhead-Wolverhampton parcels hauled by an unidentified Hall approaches Granby Junction.
The train consists of a fixed rake of 4 vans plus 2 vans at the rear which will be exchanged at Granby.
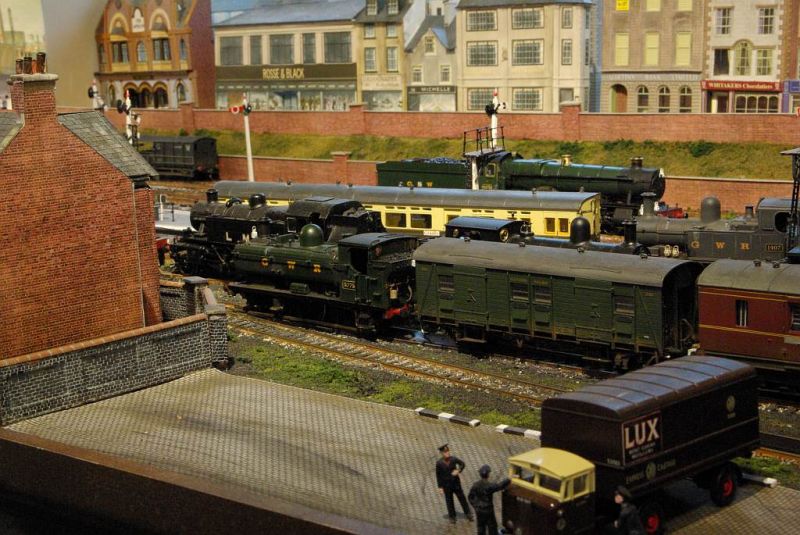
The Hall enters Bay #3 just vacated by the autotrain on its return journey to Ellesmere…
.
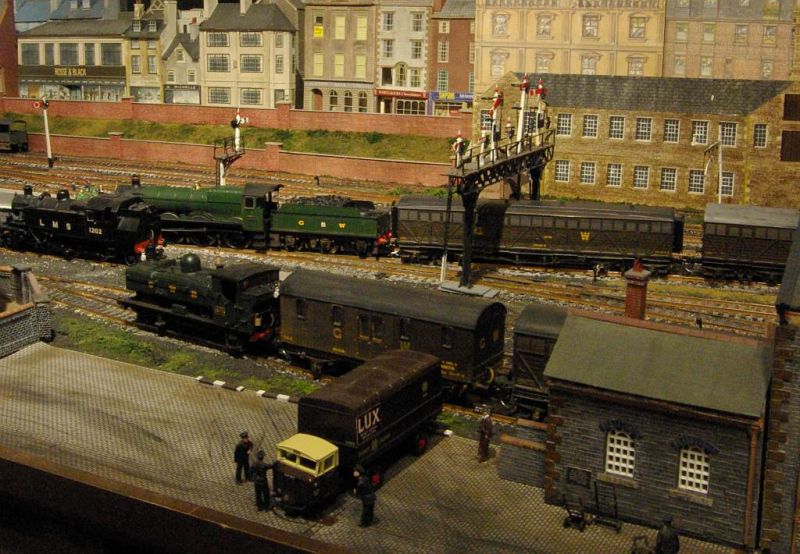
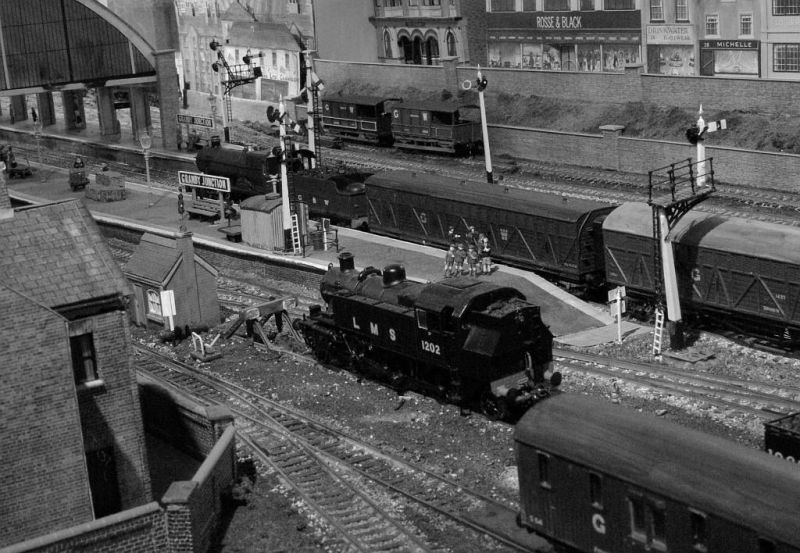
Once clear of the Bay entrance the train reverses into the second (inner) trailing siding

The two incoming vans are uncoupled ready to be transferred by the pilot to the now empty Depot siding
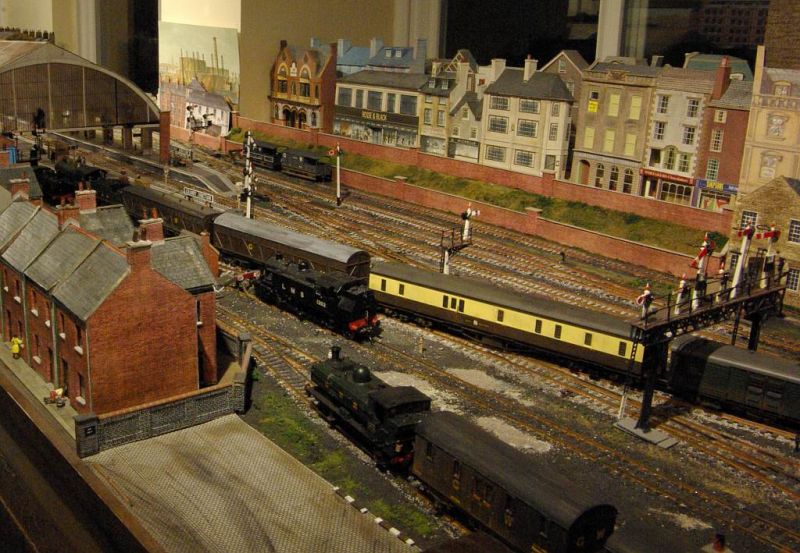
The Hall…..4905 Barton Hall… returns to Bay #3 and, once clear of the entrance points, reverses into the outer siding to pick up the two vans previously left there by the pilot.
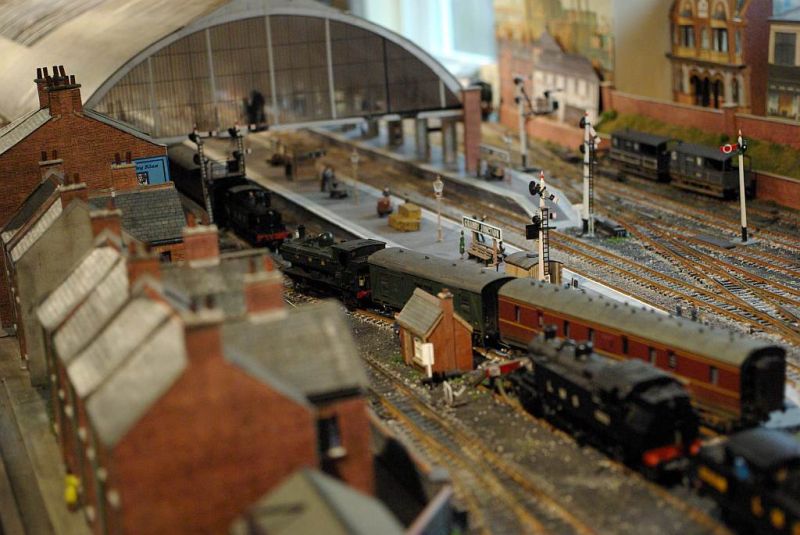
Barton Hall moves the completed train back on to the main Up line ready to resume its trip to Wolverhampton.
I have some slightly better shots of the train leaving the station which I will post later.
Regards from Vancouver
John
1 guest and 0 members have just viewed this.