Granby Junction 1948 N. Wales
Posted
Legacy Member
GWR/LMS OO Gauge DCC RR&Co
Yes a pump house or feeder stream emerging from under a building would work.Richard. A sorely missed member who lost a brave battle in 2012.

Posted
Legacy Member
Richard. A sorely missed member who lost a brave battle in 2012.
Posted

Full Member
Yes a pump house or feeder stream emerging from under a building would work.
Perfect
I think my basin may have to become a wharf……through traffic only
 I dont think I can accommodate 70' + x 70'+……anyway I will keep working on it
Many thanks for all the input Richard :cheers
Posted
Legacy Member
Its a general belief that model canals dont take up much room - a quickly dispelled myth when you try to lay them out on paper in a prototypically correct manner :roll:
Richard. A sorely missed member who lost a brave battle in 2012.
Posted
Full Member
This shot shows the rail bed exiting the bridge on a 36" radius curve and entering the penultimate arch
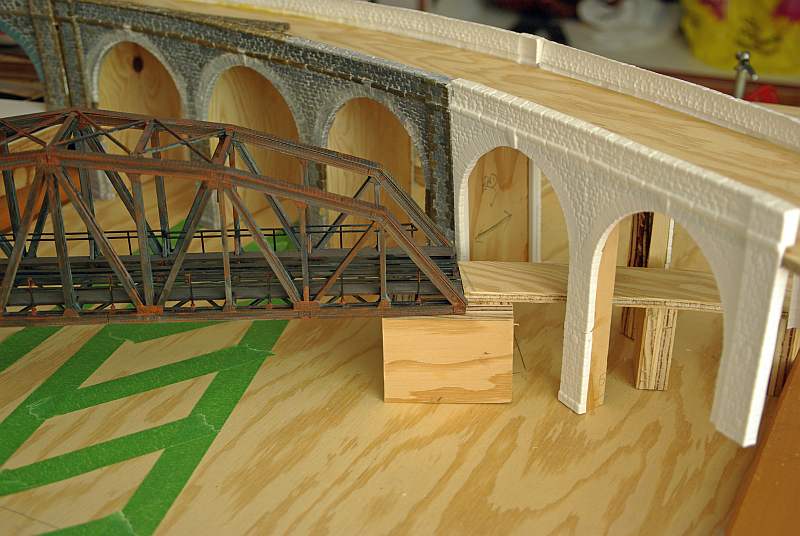
And this shot shows it exiting through the last arch. You can really see the skew effect here
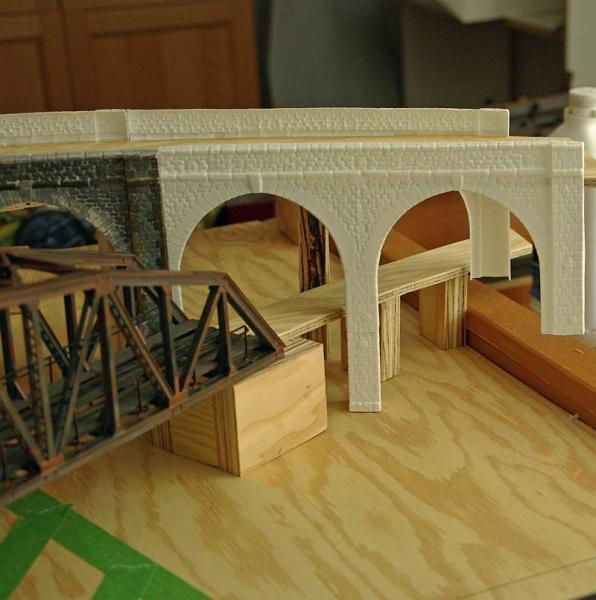
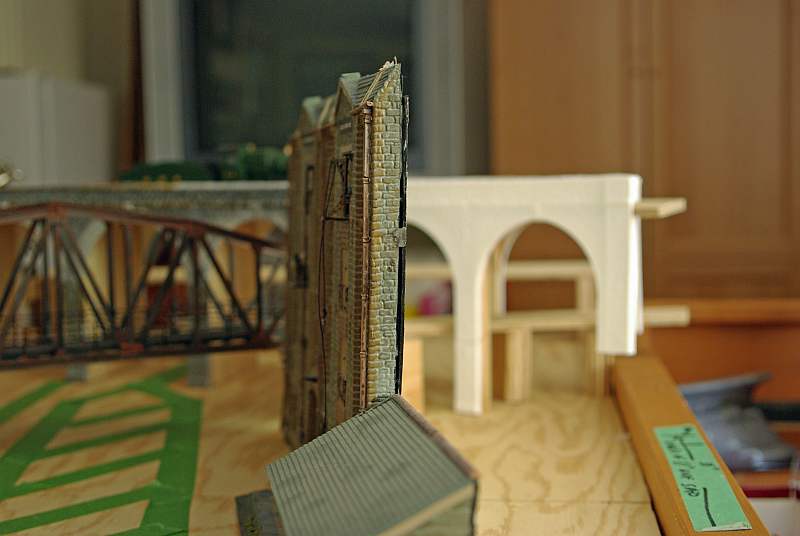
The cut away pillars will be clad with stone sheet and the two end pillars will have wooden supports added and be similarly clad. The bridge support will be clad as well
The viaduct itself will be embedded into a rock face and the railway will enter through a tunnel portal…….the raised track bed will be concealed by an embankment or a rocky causeway………..I guess I will have to determine which came first…..the viaduct or the Girder Bridge……I suspect the former is the more plausible.
Its a little unrealistic but once dollied up will, I think, look ok………….particularly as the skew has forced me to put the canal at an angle and I now have room for this Warehouse
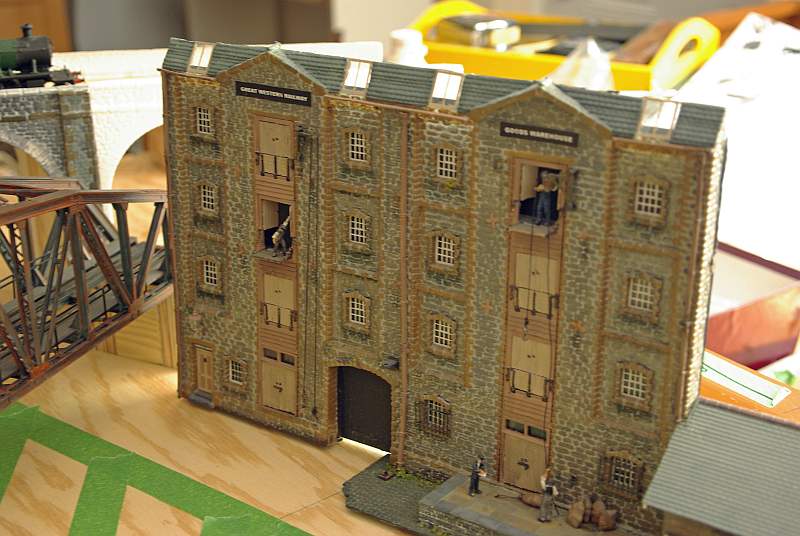
This is another Langley kit which I have had for some time. I used it as a back scene on my last layout but there is a lot of cool detail which will look better close up as a warehouse for the canal wharf
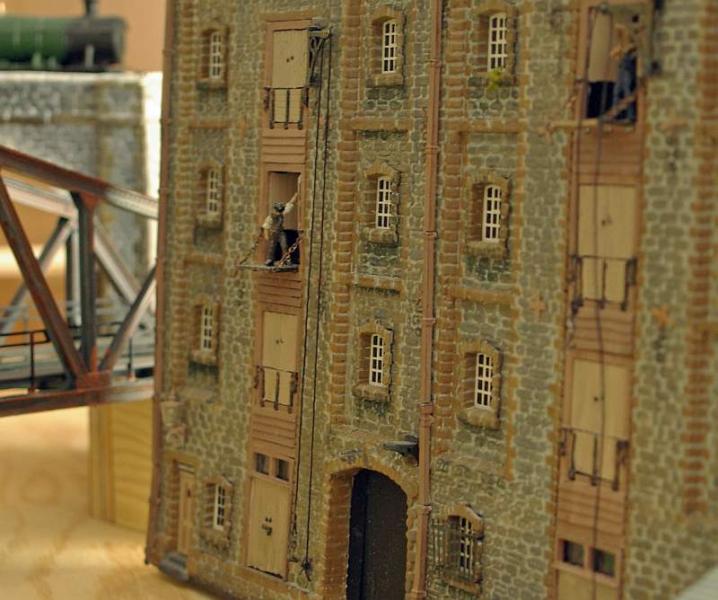
I guess I will have to invent some legend about a GWR wharf because I aint going to repaint it!
You can see it will effectively mask the exit from the bridge.
Of course there is a snag :hmm
It is ultral low relief so I will have to get involved in some pretty major scratch building
Now the bridges are sorted I can mark out the canal . For clarity I have temporarily moved the bridges

The first scrappy bit of green tape shows the right edge of the main road which enters from under a bridge on the main branch baseboard,skirts the triangular girder bridge support and exits through the the first viaduct arch.
The third arch will have a road servicing the Warehouse
The canal enters from the bottom via a downstream or lower lock into the wharf (diagonal tape) which thanks to Richard (Wheeltapper) is a scale 30' wide by 80' long…….at the end of the wharf it narrows to 8' to go through the second arch with a tow path on either side as it approaches the upstream or upper lock
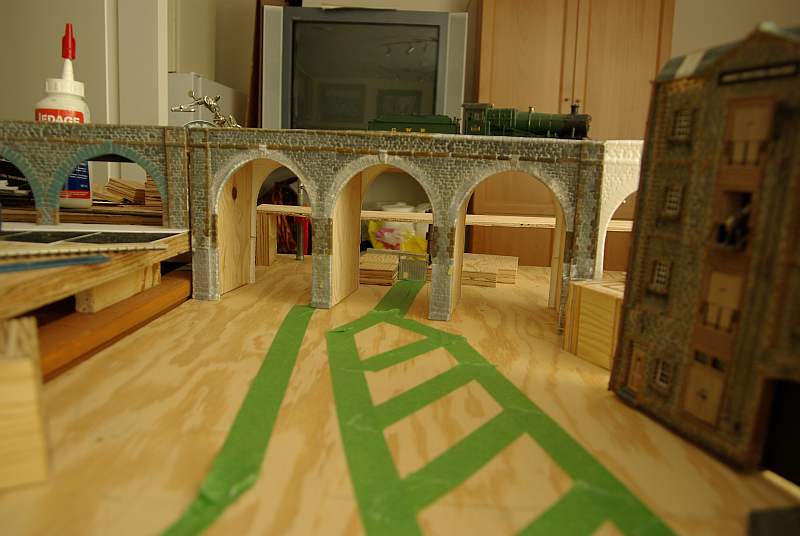
Is this typically how the canal would narrow down?
The next shot shows the lock and how I am going to build up the surrounding ground around the lock with 3/4" ply
I believe I have got the lock gates wrong …….this is a top gate and should be in the lower lock
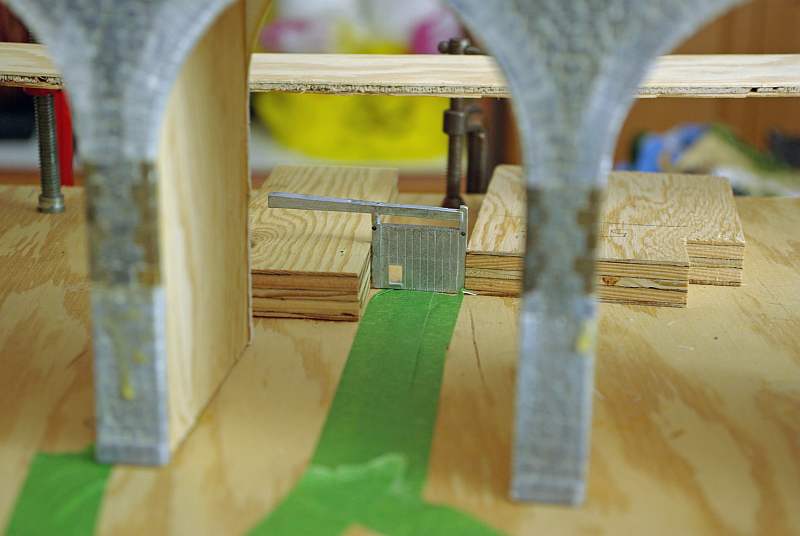
And these are bottom gates and should be on the upper lock

I have deliberately squared off the wharf at this end to maximise the loading area
Comments, queries and advice much appreciated before I start cutting the canal outline from the 1/4" ply overlay (the lower lock will actually be cut into the duck under itself). Hopefully I will get a seal of approval from Richard
Kind Regards
Posted

Inactive Member

Max
Port Elderley
Port Elderley
Posted
Guest user
That Ware house is a lovely kit which suits prefectly to area you want to use it so well worth spending the extra time scratchbuilding the back of it.
I can see this part of the layout is going to look really interesting
Brian
Posted

Full Member
I suspect you're right that the girder bridge would follow the viaduct in age but I do like the way you've intertwined them to get around an awkward corner. When it's all landscaped, it will look great.
Richard's the expert, but I'm pretty sure you're also right about the lock gates although in many (if not the majority of) cases, particularly on "broad" canals, there were twin gates both top and bottom of the lock. The single gates tended to be used mainly on the narrow canals - it was all to do with strength in that the double gates form a stronger barrier than the single one.
Now - watch Richard tell me I'm talking out of the top of my hat (maybe Mr Brunel's hat :roll:) !!!
 hmmmutley
Right or wrong, it's going to look fantastic.
'Petermac
Posted
Guest user
:doublethumb:lol::lol::cool:
Posted

Full Member
I really like the Langley kit, but you have stated that you will not be re-painting it. That scratchbuild will be very interesting, adding on to it and not re-painting it? Not sure I could do that. Maybe I can learn something here. :lol:
Wayne
Posted
Full Member
Thanks Max……….OHS is oz for what in Canadian?:lol:Coming along nicely, JD. I particularly like the warehouse. A few OHS issues there!!
Posted
Full Member
I am afraid I havent mastered multi quotes……could anyone give me a hint?
Meantime
[user=6]Petermac[/user] wrote:
John that viaduct and warehouse look wonderful. Langley kits you say. The stonework is really good. :thumbs:thumbs
The Warehouse is a plastic extrusion or forming just like the viaduct and retaining walls. Its quite thin and I typically back any free standing structures with card or ply.
The kit comes with plastic loading doors but they sell a number of white metal add ons like the window corbels (?), drainpipes and loading doors which look a lot better than the plastic version……the figures are all from Langley along with a gibbet crane which I have temporarily mislaid:roll:
Wayne
The paint comment was primarily in relation to the GWR Light and Dark Stone paint scheme and my sneaking feeling it shouldnt really be a GWR Warehouse on a canal but I have one or two cunning plans to deal with that
I hadnt thought about the actual stone work too much but the actual building is so thin I will attempt to build a completely new side wall………..I may try and squeeze in a bit of extra frontage to look like a a later extension and that will justify the different stonework both in colour and texture…………the roof will be an issue though
I am going to have to discipline myself not to start this right away otherwise I will never get track to the other side
Regards to all
Posted
Guest user
Thanks Max……….OHS is oz for what in Canadian?:lol:Coming along nicely, JD. I particularly like the warehouse. A few OHS issues there!!
OHS - I think Max means
Occupational Health & Safety
Posted
Full Member
Its called workers comp here
Posted
Full Member
In Uk we called it "elf n softy" - far more efficient at putting people out of work than any recession !!!Oh Elf n safety……………didnt have that in 1947!
Its called workers comp here
'Petermac
Posted
Full Member
Richard's the expert, but I'm pretty sure you're also right about the lock gates although in many (if not the majority of) cases, particularly on "broad" canals, there were twin gates both top and bottom of the lock. The single gates tended to be used mainly on the narrow canals - it was all to do with strength in that the double gates form a stronger barrier than the single one.
Now - watch Richard tell me I'm talking out of the top of my hat (maybe Mr Brunel's hat :roll:) !!!
Right or wrong, it's going to look fantastic.
Langley offer a double gate set but I opted for the single lock kit because even then I was worried about space……so the locks and approaches will be 8' wide and only the wharf will accommodate more than one narrow boat
I am just waiting for Richard to give the ok and then I will start cutting out
Having read Waynes Lake thread I have decided to use resin for the water rather than varnish and I have just ordered some Magic Water (I hope it is magic)
Now that I am pouring rather than painting I think I will have to install the lock gates, side walls and canal embankments first
A couple of questions
[1] Is 2' +- about the right depth from the tow path to the water level
[2] What type of brick/stone was used for the embankments……can I use the same sort of stones that are on the viaduct or will they be too big…………..I will have grass in places but the wharf and lock entries will have to more solid
I thought the forum was strangely quiet and then realised everyone (or almost everyone) is getting set up for the England Game………………because of the tides I have to get my real boat back into the water just as they kick off……..bummer:twisted:
I am taping it so I will have to spend the next few hours not listening to the radio…..even in Canada
Posted
Full Member
If you get your Magic Water before me, good luck! I hope it works for the both of us. I'm glad I was able to save you the problems I've run into.
I'll be ordering my Magic Water shortly.
Wayne
Posted
Inactive Member
Max
Port Elderley
Port Elderley
Posted
Inactive Member

Max
Port Elderley
Port Elderley
Posted
Full Member
John,
If you get your Magic Water before me, good luck! I hope it works for the both of us. I'm glad I was able to save you the problems I've run into.
I'll be ordering my Magic Water shortly.
Wayne
Well it has a shorter distance to travel……I got a personal email from Dave Williams as well as the paypal stuff……………I will let you know how I get on
Learning from you I am going to do some test pours to understand how it flows and to get the colour right
1 guest and 0 members have just viewed this.