Granby Junction 1948 N. Wales
Posted

Full Member
GWR/LMS OO Gauge DCC RR&Co
Thanks Nigel……something to remember next time!Best wishes
John

Posted
Full Member
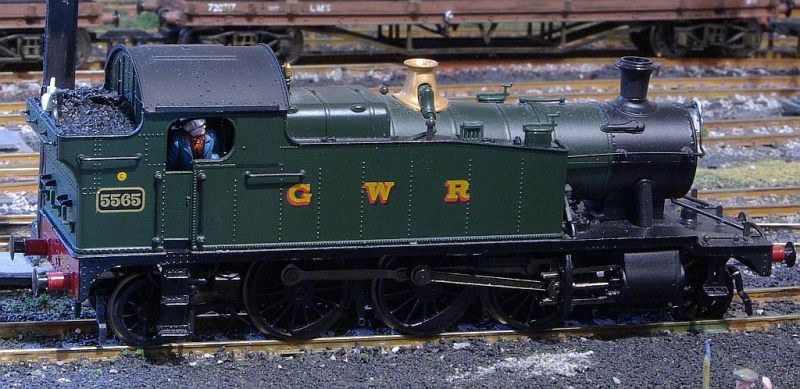
The small prairie…..an iconic GWR branch loco and an excellent model by Bachmann. I originally ran them on Granby II and 15+ years later they are still extremely reliable and super smooth runners.
When I started building Granby III and switched to DCC they were the first locos that I converted. They seemed perfect for the branch passenger service
This involves a loco exchange at Granby and a loco run around at the lower level Cynwyd branch,,,,,,,all run automatically with RR&Co .
The B Set hauled by 4550 rolls into Cynwyd (note the bus carefully placed off the bridge :lol:)
Crawls to a halt and uncouples

Runs around the carriages
and approaches the train to re couple………………..
Which is where things started to go wrong. The NEM pocket that holds the Kadee coupler is mounted on the pony truck rather than the body. There is, of course, a lot of sideways movement on the bogey wheels. As a result there is no guarantee that the coupler will be centred on the loco body………..thus there is no guarantee that the loco will couple!
The hand of god is not a good idea at the best of times……on an automated routine it is the kiss of death as the loco charges up Cynwyd Bank leaving the coaches at the platform……… blocking the entry of the also automated auto train……mean time the hand of god is elsewhere.
The immediate solution was to bench the Prairies….one has to be ruthless. They were replaced with Panniers and ever since the routine has run seamlessly……..well almost, but thats another story.
But I still hankered after the prairies and from time to time I would dust them down (literally) and give them another try……..all to no avail
Until I finally hit on a solution……..and here is the proof on a rather fuzzy 16 second video
[yt]KRu9AmrGKC4[/yt]
How I did it ……tomorrow hopefully
Posted

Full Member
Posted

Inactive Member
Max
Port Elderley
Port Elderley
Posted

Site staff
Posted

Full Member
Are you using extra sharpening with your latest pictures?
Phil
Phil
Posted
Full Member
[user=19]Marty[/user] wrote:
Afraid not……its the side play on the wheels within the bogies that causes the problem :shock:Hmmm… check rails to keep the bogie straight?
Ed wrote:
Nice try Ed….I hadnt thought of that but I wonder how the bogey magnet would react to the uncoupling magnet? :shock:Magnet …………..
Ed
Phil.c wrote:
No sound Phil other than the wheezing and groaning of some quite old motors :lol:.I thought you had DCC sound John?
Are you using extra sharpening with your latest pictures?
Phil
Max and Petermac have been trying to persuade me for ages…….but so far I have resisted the temptation……plus I am more than a little deaf.
I should have known you would pick up on the picture quality……very sharp of you……(sorry :lol:). I am afraid that yet again I have been idle.
This was taken with my normal camera a 10 year old Pentax SLR on a tripod at f22. Cropped in photoshop elements and resized for the forum with Irfanview. Someone , could have been you, suggested sharpening after resizing so I have been doing that for the last few months
The station shots were taken in haste using my new all singing/dancing iphone (the old one died) I followed my usual routine of cropping, resizing and sharpening……I wasnt too impressed with the sharpening but thought I had better continue to be consistent……..probably shouldnt have done so
Before sharpening

after
the picture quality of the iphone is surprisingly good but I think I will need to pay more attention to lighting. I should probably play around with the iphone editing features as well
More new tricks to learn I guess
Best wishes from Vancouver
Posted

Full Member
Cheers
Andy
Andy
Posted

Legacy Member
:thumbs ;-) :cool:
Owen
web-cam http://82.2.74.174:8081
if the lights are off no cam
if the lights are off no cam
Posted

Full Member
Posted
Full Member
Hi AndyHave you packed out the bogie to remove some of the wheels side play?
I think I need all the side play to negotiate the curves…..particularly with my dodgy trackwork :shock: :oops:
Silver Fox wrote:
Hi OwenI would of thought that adjusting the back to back woud do the trick,it does for me?
:thumbs ;-) :cool:
Owen
The back to backs are fine…..the issue is the kadee on the pony truck always being exactly on the body centreline

nwood wrote:
Hi NickI'm interested in finding out how you've done it John. I have two 45xx's and suffer the same problem, especially when trying to couple on a slight curve.
I suspect you will not like it much ….unlikely to meet Much Murkles high standards :oops:
I guess I missed my deadline……..I am trying to make a proper video of the routine and then I got sidetracked watching some Rugby :roll:
Hopefully later this evening
Regards to all
John
Posted
Legacy Member
:thumbs ;-) :cool:
Owen
web-cam http://82.2.74.174:8081
if the lights are off no cam
if the lights are off no cam
Posted
Full Member
I decided to make a somewhat longer video showing the routine and it took far longer than I anticipated and its still pretty rough anyway. You can see it at the end of the post…….do let me know what you think
Now for a health warning. I am a broad brush coarse gauge modeller. If you are a sensitive soul skip to the bottom of the post…..the locos are sufficiently far away and out of focus so you will be unable to see the scary bits :lol:
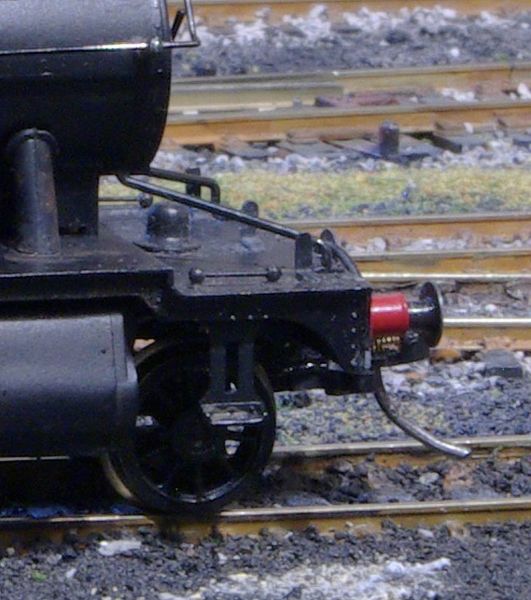
I explained the issue in the last post. With the NEM coupler pocket mounted on the pony truck it is impossible to ensure that a Kadee coupler will always be positioned in the centre of the loco.
The obvious solution is to mount the pocket directly on to the underside of the chassis…….but that of course will foul the pony truck when it negotiates a curve. Even a coupler on its own will foul the truck.
Surgery has to be applied to both coupler and truck. The coupler has to be cut very short and the pony truck carved back……completely removing the redundant NEM pocket and , I am afraid, the guard irons .
It gets worse……the chassis is set quite deep into the body so there is not even a mounting point…….and at the front the body fixing screw is right below where the coupler will be mounted
The solution was to build up very small layers of plasticard in each corner so that they neither cover the screw or foul the truck
Then mount a very thin full width plastic bridge on the two layers…….I probably worry too much. I havent taken the body off since I chipped the loco in 2008!
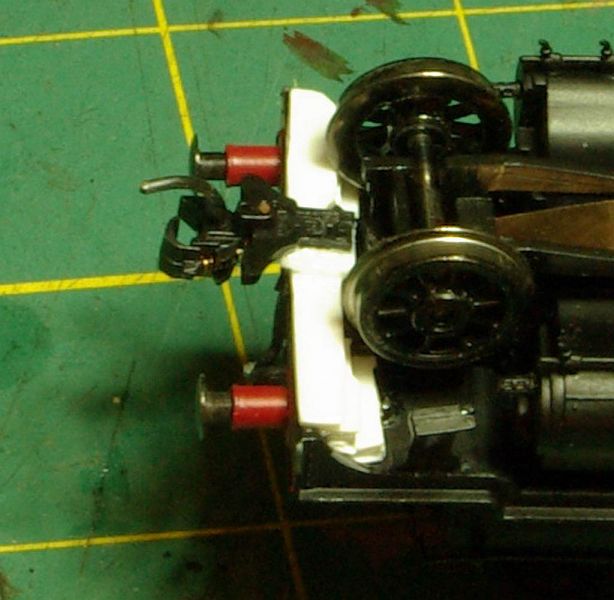
The rear was easier ….no fixing screw to worry about

I could, and should have made a neater job of cutting the plastic shims
After I had taken these shots I added a refinement :lol: by drilling both the shortened coupler and base. Then glueing and screwing the coupler to the base
Here is a side view showing how much depth had to be built up
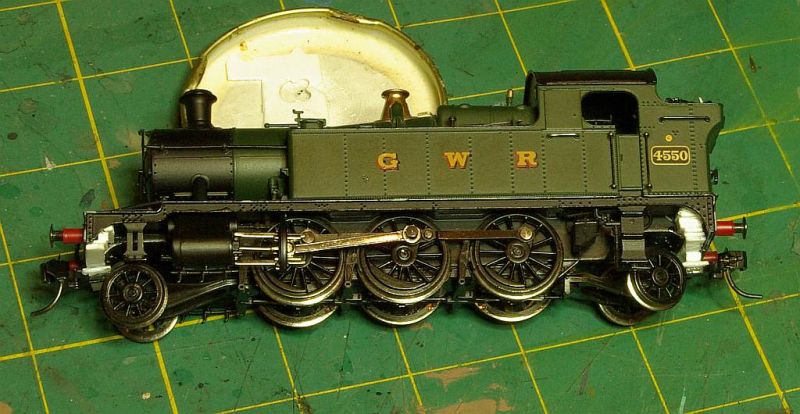
Now a before and after albeit using different locos
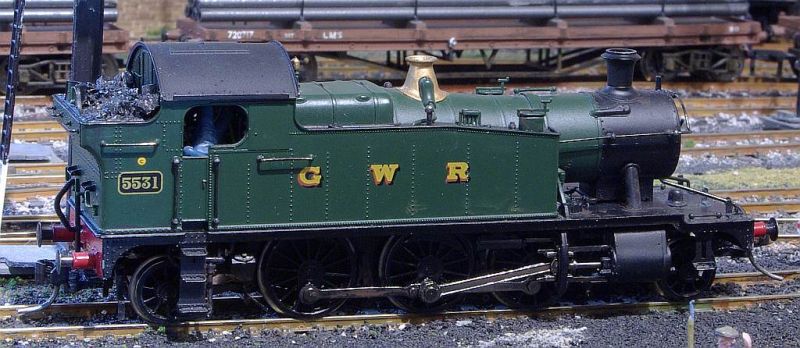
Apart from a missing head lamp and a fireman apparently standing on his head…..I like to think the only difference is the missing guard irons
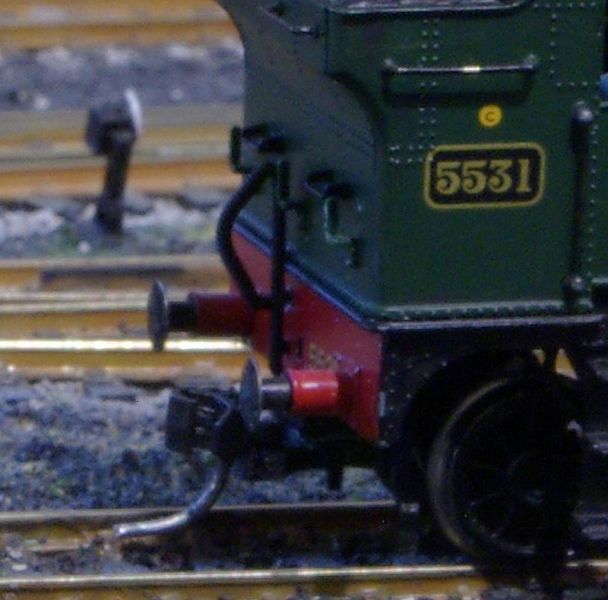
For the unconvinced a couple of closeups
Finally the video……its a bit shaky and I apologise for the music.
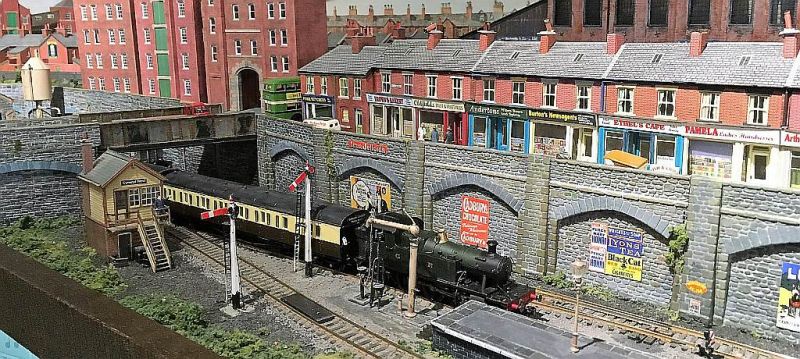
Its primarily about the Prairie and a B set……but there is some background at the beginning you may like.
A 64xx Pannier sandwiched between two auto carriages from Ruabon. An LMS 3F hauling steel pipes to Birkenhead, a Dukedog with empty Oil tankers heading to Ellesmere Port and LMS 8F shunting Iron Ore Wagons
All with one mouse click…….one continuous shoot…..I just edited out the delays built into the run around
[yt]IocDDSrch5U[/yt]
As part of the freight sequence there is a double header Pannier goods which didnt make the cut……next time perhaps
 Last edit: by John Dew
Posted
Site staff
Not noticeable from normal viewing angle and it works :thumbs
Ed
Last edit: by Ed
Posted
Full Member
Summer is long gone. Fall in Vancouver is damp at the best of times……this year has been the wettest October ever. Despite the opportunity to do lots of modelling I have spent forever deciding which of my "Big Three" unfinished projects I should start first. Is it just me or do we all get more indecisive with age?
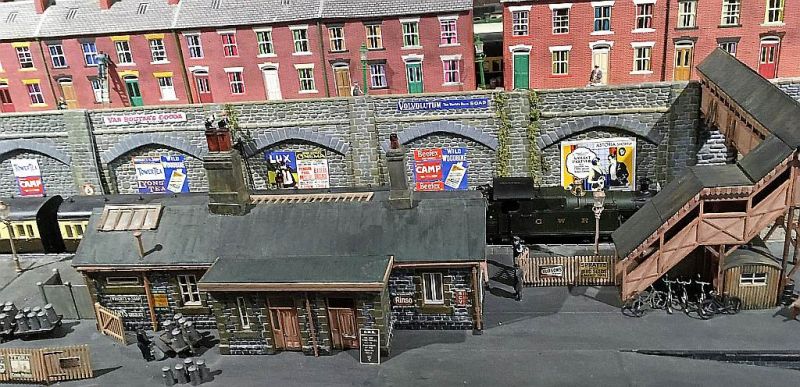
Finally a decision has been made (I think). The mess and yard offices for the shed will continue in a holding pattern (thats 4 years and counting)…..ground will not be broken for the Station Hotel and General Post Office until 2017…..instead I will both refurbish and complete the low relief buildings that screen the storage sidings that occupy most of the right hand side of the room
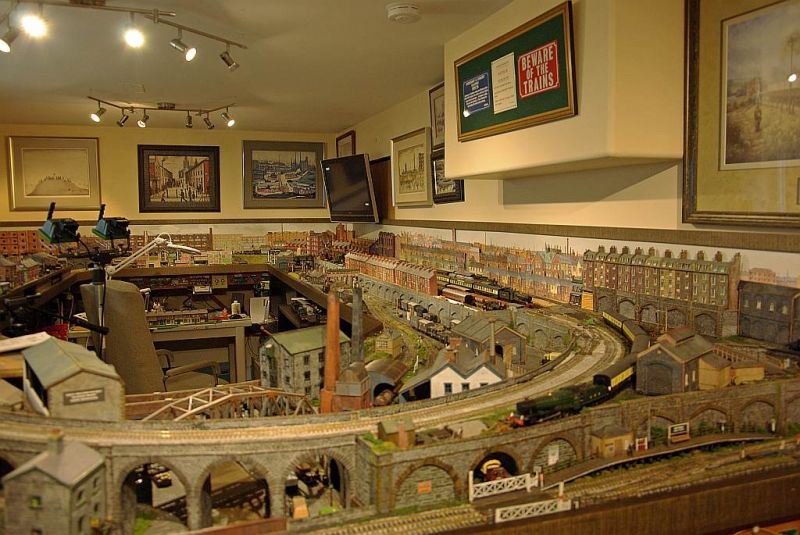
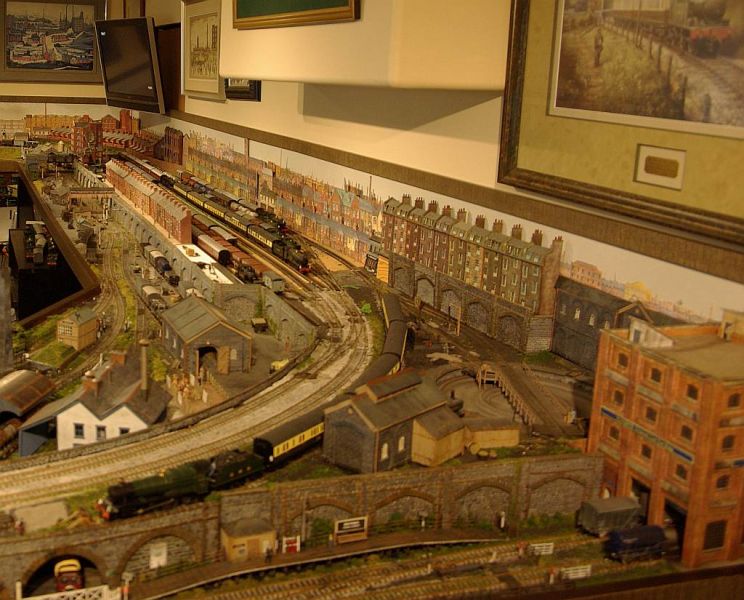
When one is inside the operating well, the low relief Metcalfe terraces are quite effective as a screen. However this is not the case on entering the room. Once one has passed the large Scalescene Warehouse there is nothing to conceal the storage sidings
Over the years I have tried various solutions….none successfully. I decided that a road bridge over the exit tracks could work but I couldnt figure out how to make a credible transition with the extremely narrow terrace street……so I just let it stew for a while and worked on the other side of the room.
I think the recently released Scalescene low relief Warehouse and Loading Bay kit may provide the answer.
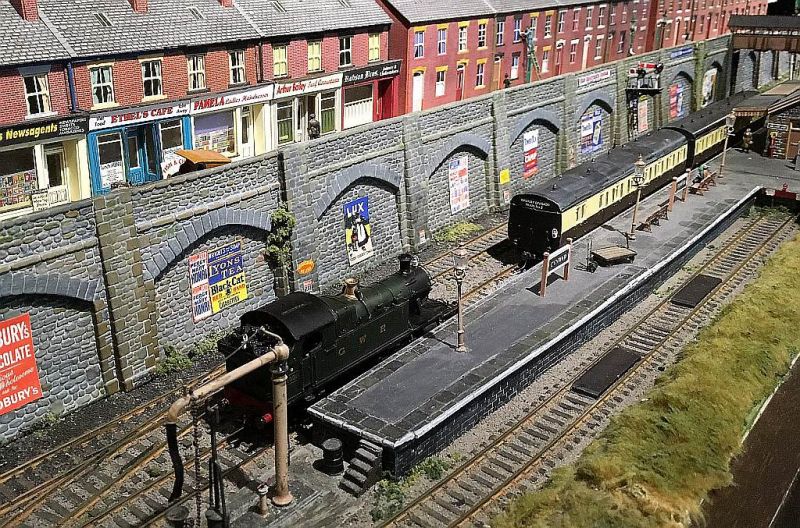
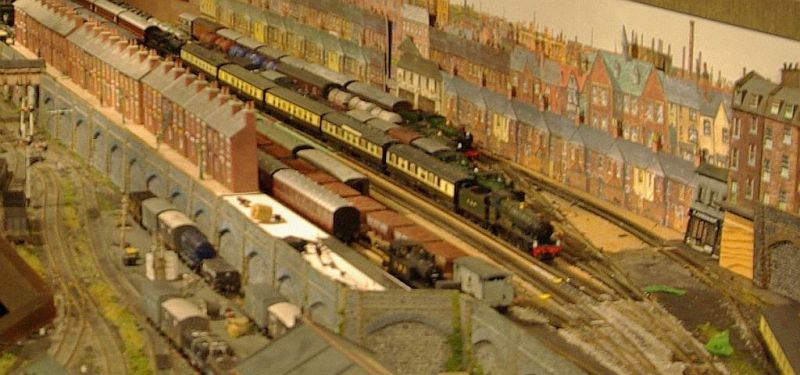
Before I can start I need to do a lot of repair work on the Metcalfe Terraces……they feature on the first page of this thread and are at least 9 years old……and it shows :oops:. Over the years they have been badly knocked about……..whenever there is an issue in the storage area one or more of the modules are removed and they are now more than a little scarred……chimneys are particularly vulnerable.
Once thats done I need to start on the shops at the end……….here is a quote and original photo from my very first post on this thread! :oops: :oops: :oops:
Although I have been careful to avoid TV shops, Pizza Takeaways and other time period giveaways a guy in another forum pointed out, quite rightly, that the Fascia lettering is still a big giveaway……you did not see those fonts (the Newsagent is a glaring example) in 1947……at some stage I will have to do some remedial work:
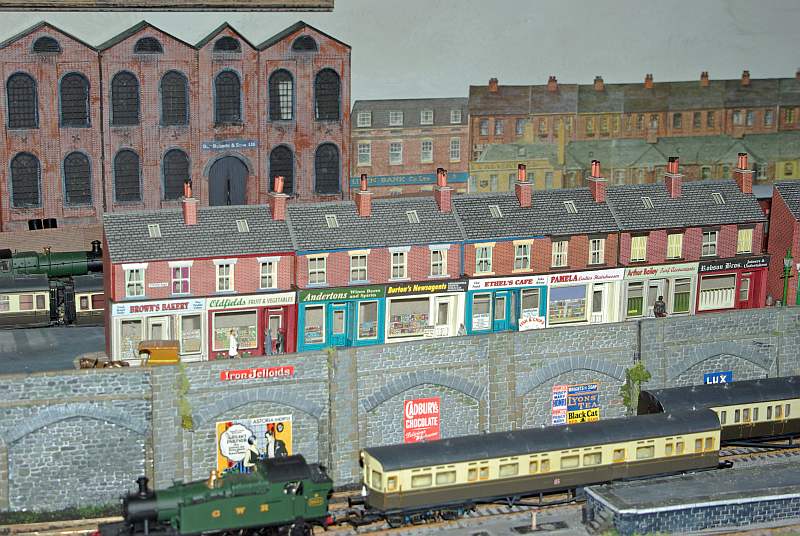
So thats at the top of the To do list!
At the very end there was this further group of Metcalfe High Street Shops
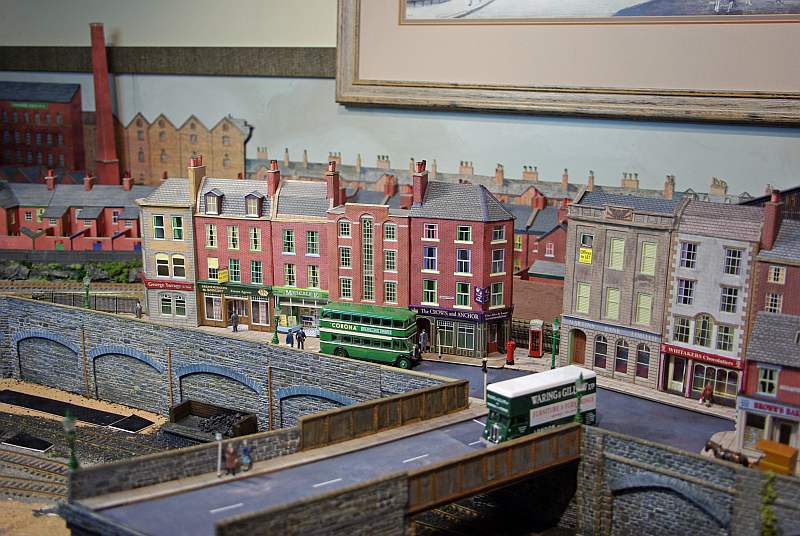
Nice models but, as I said at the time, they look out of place in this context. So they will be moved to the high street cameo that I have been roughly assembling on the window sill above the main line into Granby.
In their place I have some Metcalfe Factory components that at one time I was going to use at the other end
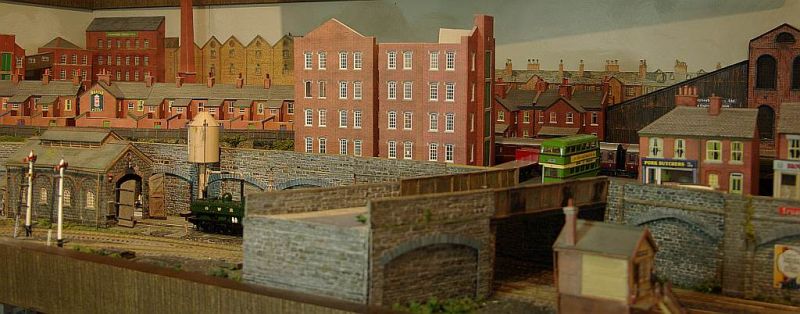

Repair the windows…..add a roof, backing and some detailing, maybe a factory chimney and hopefully this will make a more appropriate background screen.
Hope this intro, with snatches of history, is not too tedious……….more next week
Regards from a very very wet Vancouver
Posted
Legacy Member
:thumbs ;-) :cool:
Owen
Last edit: by Silver Fox
web-cam http://82.2.74.174:8081
if the lights are off no cam
if the lights are off no cam
Posted
Full Member
 ………I am an incurable optimist….the hotel perhaps?:hmm
Cheers
Posted
Inactive Member
Max
Port Elderley
Port Elderley
Posted
Full Member
Phil
Phil
Posted
Full Member
:pedal
following along.
cheers
1 guest and 0 members have just viewed this.