Granby Junction 1948 N. Wales
Posted

Full Member
GWR/LMS OO Gauge DCC RR&Co
Hi JohnRemember this photo
Pinning the arches should give you the rigidity
Paul

Posted

Full Member
Indeed I do……..in fact I meant to mention the pinning option in my reply to Gary
If I were starting all over again that is how I would fix the main roof support walls to the baseboard/platform
The last section is trickier not only because of the cantilever but also because one has to allow for platform height on the far side
:roll
How are you progressing with your roof?
Cheers
Posted
Full Member
I think I just posted the current status pics

I did start on the Large overall roof, but then realised it was larger than the layout, so have built 6 supporting arches for the small overall roof, but have gotten no further :oops:, my excuse is I have to pull the layout apart for the rewire so would run the risk of too much damage, and I'm sticking to that. :roll:
Paul
Posted
Full Member
Hence the carefully phrased question:lol:
I was pretty sure you were doing the large roof but recognized the small inner arch and got confused:roll:
I will continue to watch with interest
Cheers
Posted
Legacy Member
thanks Brian,as I am in the process of building said station my confidence of building a large nissen hut has increased tremendouslyThat will be a superb roof John, King's Cross is an overgrown Nissen hut by comparison. Good photography too.
 mutley
:thumbs;-):cool:
my webcam link http://86.19.184.67:8080
Posted
Full Member
:thumbs
Actually, current thinking is a bit of both, as the layout is elevated, the idea is to use the small overall roof for approx 18" of the platform, merging into the full overall roof for the last 2" of the layout, representing a lower level terminous station. I've got a while to sort it out as I'm still working on the buildings at the other end.
Back to your layout, you could use brick pillars to support the girders to the correct height, MDF covered in brick paper, the MDF would take the glue for the pins well.
Paul
Posted
Guest user
Posted
Full Member
Lots of reasons no doubt…..gardening / sailing / sunbathing / drinking cool libations….. the list goes on
This July has been super hot (rather like the the UK?) so I am afraid that I have been even more indolent than usual.
Here is an update on the tortoise* like progress of the station roof.
*There is a joke about cobalt lurking there….but its just too hot.
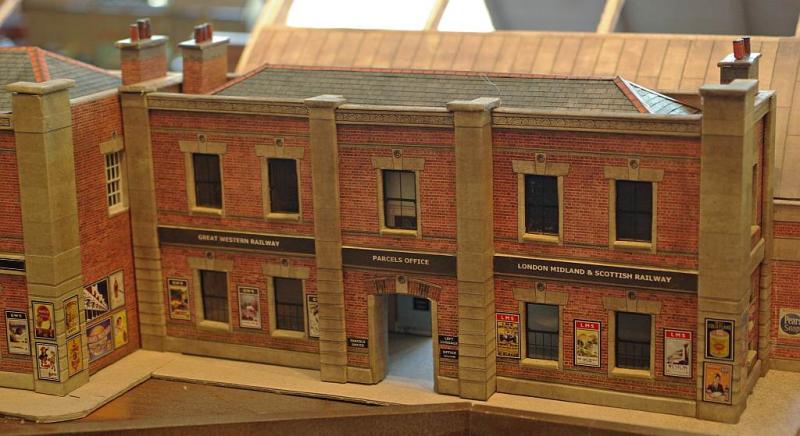
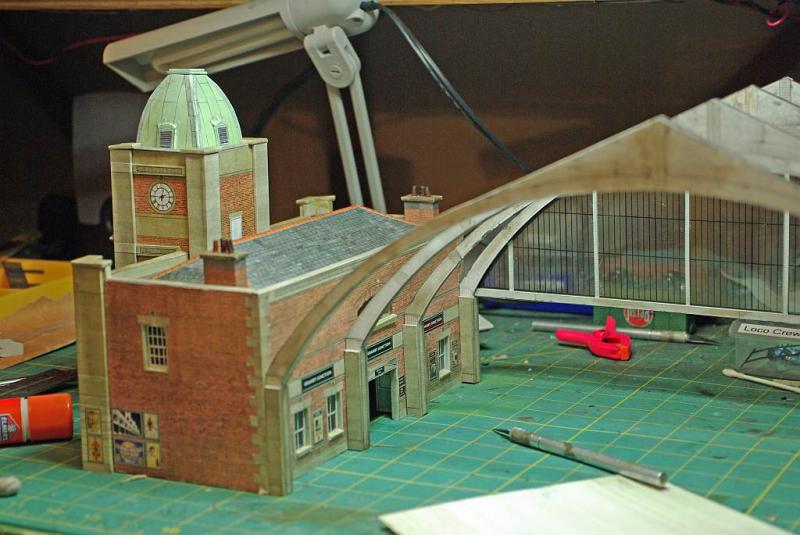
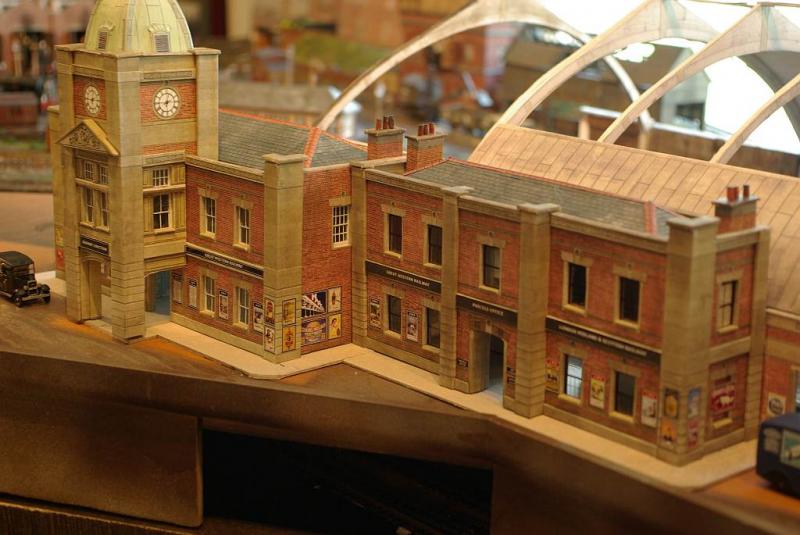
The right hand wing of the station has been detailed. It was going to be the LMS Ticket office……but on reflection a joint Parcels Office fits in better
I have started fiddling around with the base pavement layers

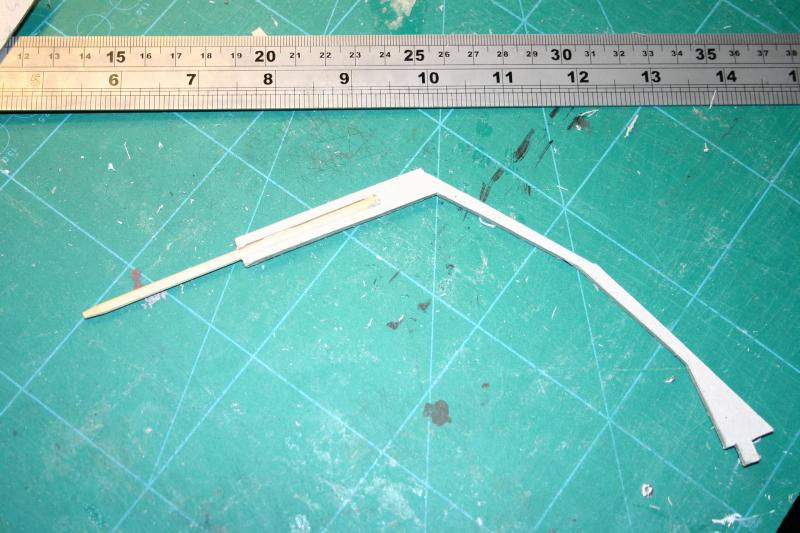
The cantilevered support wall has been clad with brick paper……….there are notches for 2 full arches and 2 shortened arches just one arch is roughly in place .
The support wall was originally one piece but I realised that it needed to be separated so that the sub assembly could stand square, after allowing for the difference in height caused by the platform height on the station side
As you can see clearance to the carriage sidings remains a little uncertain

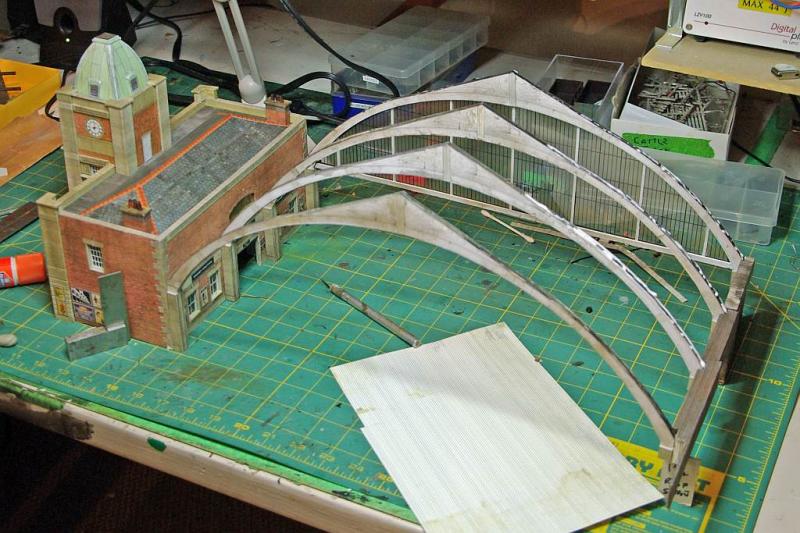
Ok the moment of truth…….which partially explains the delay…….to ensure everything is absolutely square, the arches have to be attached to the support walls, off site, on a flat surface.
The four arches glued square on to the rear of the station building
On the other side…….square on (hopefully!) to the cantilevered support wall

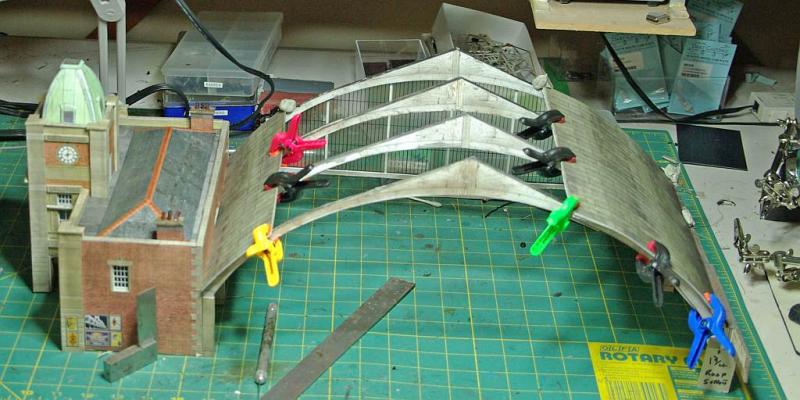
An overhead view showing both support walls.
The white blobs on the arches? I was just about to to fix the roof under layer (in the foreground) when I remembered the camera

Next ….fixing the roof panels
Anyone who has persevered with this thread from the beginning (2008 ???) will recall that I modified the Scalescenes plan to provide better visibility to the station interior.
Initially, I worried that, by eliminating some of the roof layers, I might have weakened the overall structure. Not so…..phase 1 which is almost 4' long has survived numerous removals from the layout.
I am happy to say that , despite the cantlilevering, Phase II is equally robust…….it is amazingly solid.
Now I just have to wait for the glue to dry and then check the clearances?
Posted
Full Member
- as usual, that building gets any bigger and you'll have to a larger mat. Have a word with Toto he may be able to loan you a very larger Matt.
Paul
Posted
Guest user
That structure is something else John. The result of many years of patient skill building.
Really amazing.
Cheers
Toto
Posted
Full Member
Thanks guys!…………..and thank you Matt for your earlier comment which I omitted to acknowledge:oops::oops:
Regards from Vancouver where it is just beginning to rain.
Its been pretty dire here with air pollution at record levels (Paris and one day Beijing :twisted:) because of the smoke from the forest fires in the interior
Posted

Full Member
Just spent a couple of very enjoyable evenings reading through all 60 pages of this thread.
Congratulations on a wonderful layout & some superb modelling :cheers
Compared to you I'm in the cheap seats.
I will drop back regularly for ideas & inspiration.
"The only stupid question is the one you don't ask"
Regards.
Tony.
Regards.
Tony.
Posted

Inactive Member
John's away on his boat at present, so he might not have a connection. It may take a while for him to reply.
I'll ping his email, so he sees it when he comes back on line.
Cheers
Max
Port Elderley
Port Elderley
Posted
Full Member
Hi Max.Hi Tony
John's away on his boat at present, so he might not have a connection. It may take a while for him to reply.
I'll ping his email, so he sees it when he comes back on line.
Cheers
That's no problem.
I was just commenting on his superb modelling.
I'm sure he'll be back on again at some stage.
"The only stupid question is the one you don't ask"
Regards.
Tony.
Regards.
Tony.
Posted
Full Member
Just got back last night. Internet service was pretty dire while we were away hence the belated reply.
Thank you so much for your kind remarks. I have to admire your perseverance in wading through all those pages……Alan should probably give you a special award for stamina:lol:. I sometimes worry that the sheer length of it is a deterrent for people looking at it for the first time. I am delighted you took the plunge and, even better, that you enjoyed it.
I am not getting much modelling done during the summer but will try and get an update done shortly
Kind Regards
John
Posted
Full Member
No bother it was only 60 pages :lol:Hi Tony
Just got back last night. Internet service was pretty dire while we were away hence the belated reply.
Thank you so much for your kind remarks. I have to admire your perseverance in wading through all those pages.…..Alan should probably give you a special award for stamina:lol:. I sometimes worry that the sheer length of it is a deterrent for people looking at it for the first time. I am delighted you took the plunge and, even better, that you enjoyed it.
I am not getting much modelling done during the summer but will try and get an update done shortly
Kind Regards
John
Glad to say it was worth the effort.
Its Summer here as well.
Was chucking it down here today just like any other Summers day :roll:
"The only stupid question is the one you don't ask"
Regards.
Tony.
Regards.
Tony.
Posted
Full Member
Dont seem to have done much modelling this summer………whenever I get a bit depressed at my lack of progress I dig into the archives to cheer myself up……………so here is Granby Station in November last year
In June I eventually added one of the kit bashed wings and started on the last roof section
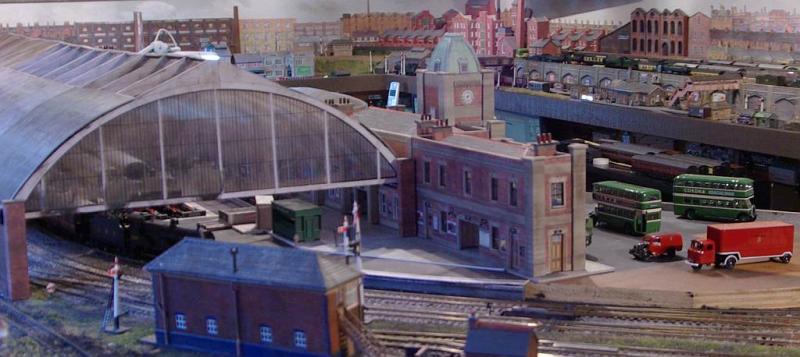
Finally…….the other wing is completed along with (rather obviously :oops:) the last roof segment
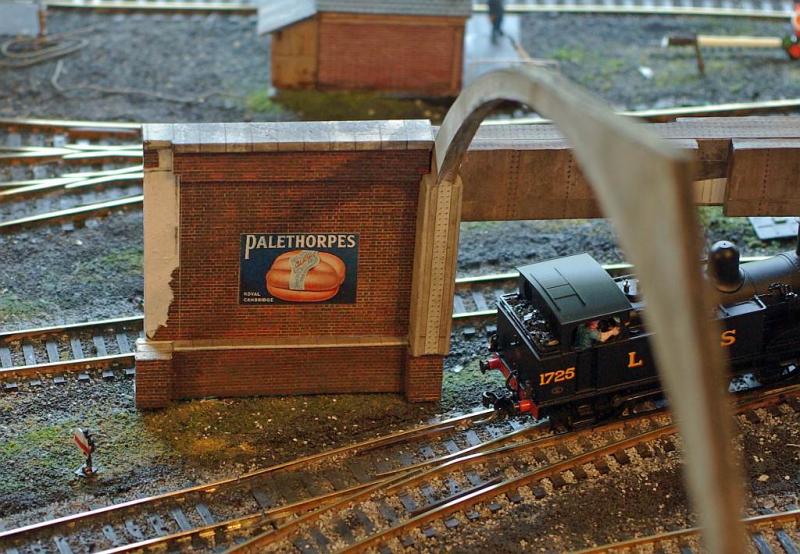
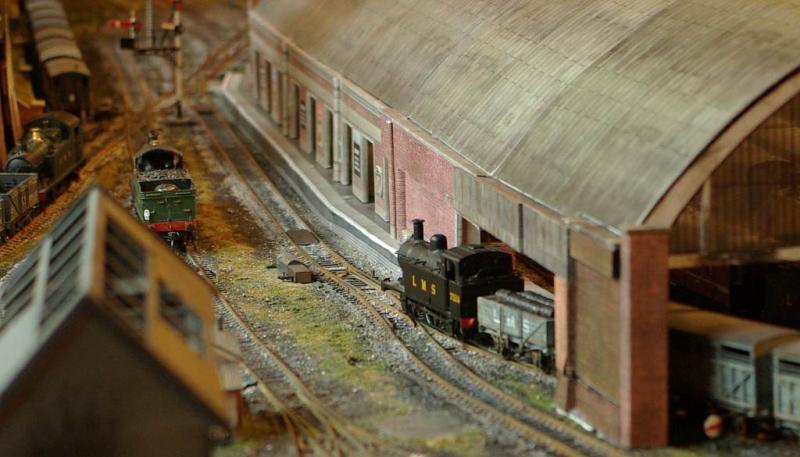
You may recall I was worried about the clearance for the relief line under the cantilevered roof
Happily all worked out ok……albeit with a lot of fettling…….the main column now has an unplanned bevel edge and there is a slight kink in the roof line…….but at least all the down trains now have an alternative route.
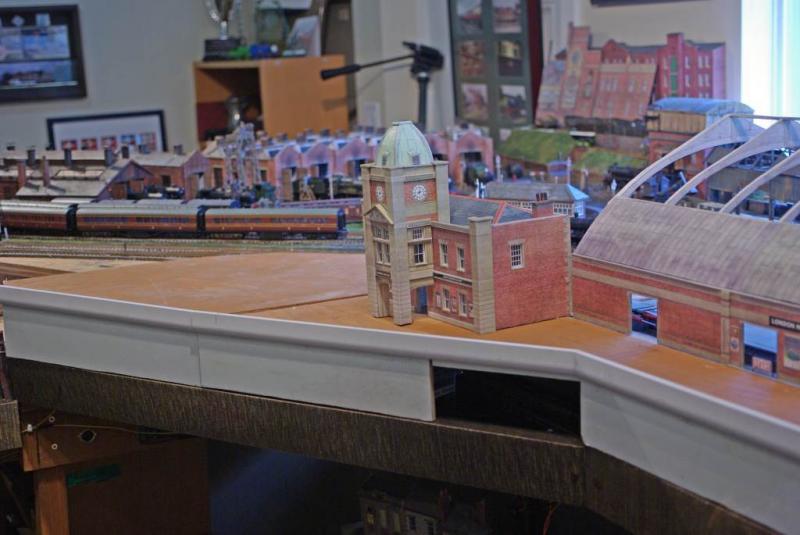
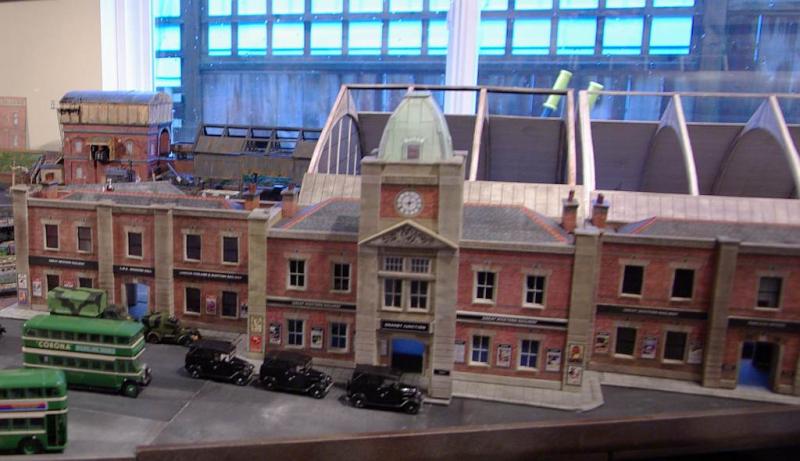
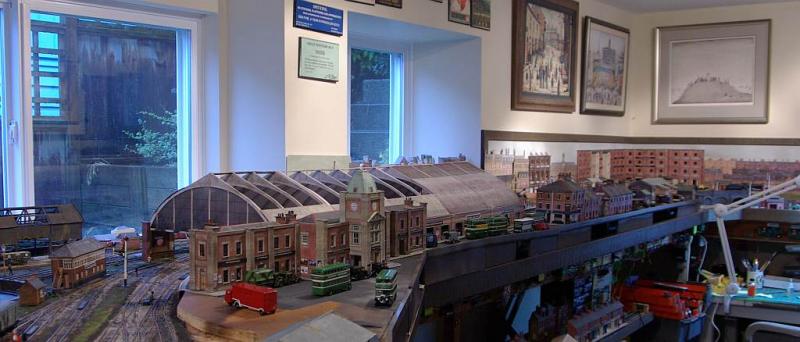
Some overall shots to put the Station in context……..looking South towards the door
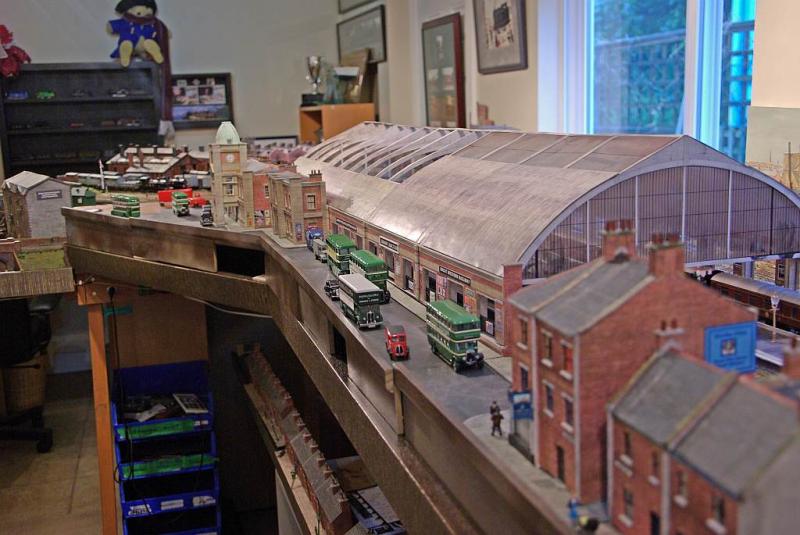
I have pretty much made up my mind that this street will be one way……I just have to add bus stops and some queues
Looking North
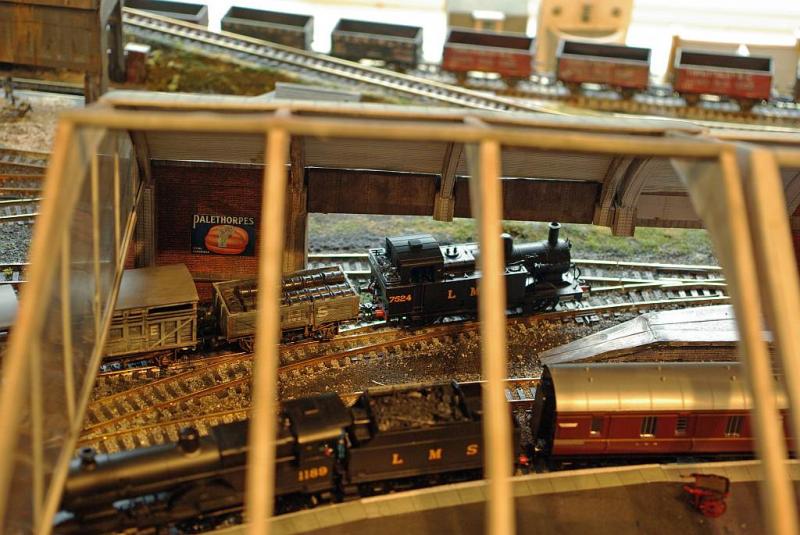
Finally over the roof tops of Granby Shed

The Red PO Van marks the site of one of the next projects……a General Post Office which will enclose the open side of Station Square.
There is also lots of work to do on the concourse behind the new wing………I have loads of people to paint and detailing to add both front and back
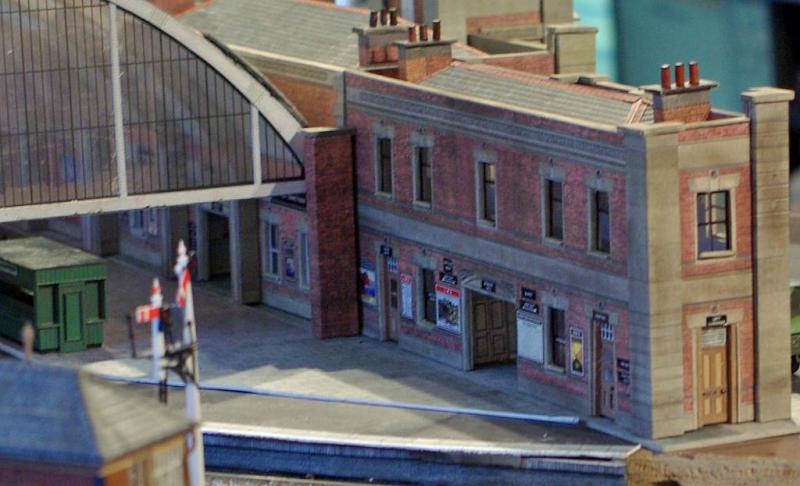
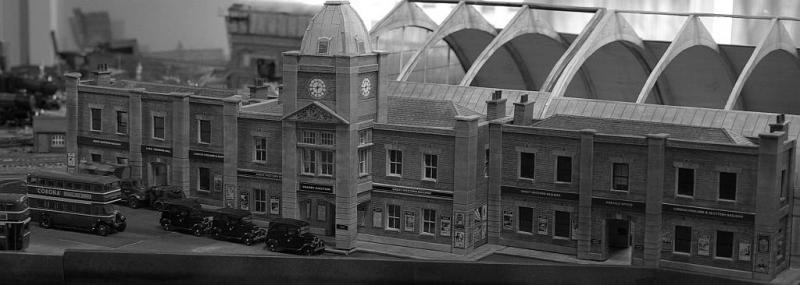
Meantime in Black and White here is a rather underpopulated view of the frontage
Posted

Full Member
With power outages I usually start with the RCD trip switches on the house circuit panel, then the reset switches on the power boards, after that it's checking for mains outages in the street… then my wiring :shock: …. not :lol:
I reckon you've got to the point now John where you shouldn't be surprised that you no longer get big, visible changes in the layout… all of the that sort of stuff must be nearly finished now?
The detailing, people, bus stops, etc that will really bring the layout alive, will be far more subtle but equally as important as the big changes… I'm actually looking forward to going back and detailing the bits on NE that I've envisaged but know must wait until the bigger bits are done.
… and I'm sure you've been testing and working with RR&Co too… steady as she goes sir.
The station looks grand in its setting, with the new extension fitting just right.
Looking forward to the GPO development around the square.
cheers
Marty
Posted

Banned
Cheers, Gary.
Posted
Guest user
The overall roof does it for me. Every time I look at that, especially the curves on the main supports. If only …….. Nowhere to put one but I'd love to be able to model it all the same.
Great photographs John …….. very inspiring indeed.
Cheers for now.
toto
1 guest and 0 members have just viewed this.