Going Small with a GWR Branchline 1890-1920
Posted

Full Member
GWR Branchline in EM Gauge 4mm Scale
Thanks Peter,Continuous? - I wish. I'm using C+L code 75, which was sent from the UK several years ago in 18" lengths to get a decent shipping rate.The only way I will get 36" long rail is by cannibalizing the SMP flexitrack I have. I'm using Templot, so no reason why I can't print out the whole assembly, but I'm limited for a flat, stable surface big enough to hold it all. One of the drawbacks of not having a fixed layout. Although I could use one the modules. Easier to build the turnouts individually and test before joining though.
The two points were assembled and then joined with overlapping butt joints (rails joined together on one copper clad, staggering the sides). I will do the same for the third turnout, and the extension to the curve.One of the positive things about using copper clad - inserting a section of track or joining sections of track does not depend on rail joiners. i just had another look at the photos of the yard points - only 2, not 3, catch points. So I think one in the closure rail of the second turnout which controls access from the spare and goods shed sidings should be feasible. Test run later today if it wams up a bit.
Nigel
.
©Nigel C. Phillips

Posted
Full Member
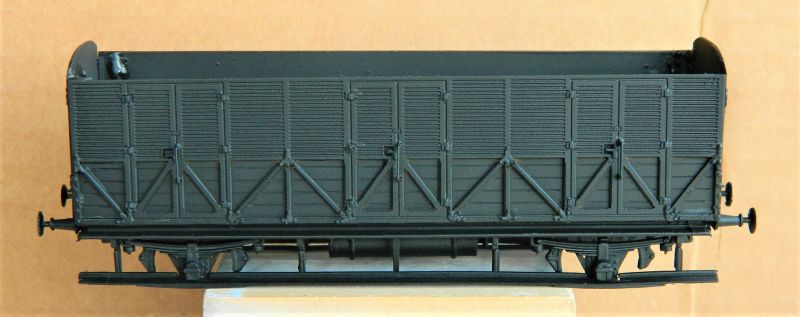
I finally finished adding (nearly) all the bits of brass to the Shire Scenes Siphon C body. (Forgot about the 2 destination label holders that go on the sides). Tedious to say the least. Handles, hingers, strapping. Good job the kit has spares, several bits went flying never to be seen again. It has had a couple of coats of flat black primer. The roof has had a couple of coats of semi-gloss white, weathering powders when completely dry and out-gassed. I added the gas lamp covers (bits of styrene rod and tube) and gas pipes (styrene rod) to the roof prior to painting. The van needs some vacuum and steam pipes on the ends as well, as most were fitted and steam heated when required. Plus some coupling hooks and chains/screw coupler. DIY for the pipes as I appear to be completely out. Job for tomorrow. I have a feeling that the ends should have some lamp brackets where those depressions in the frame are as a Siphon would normally be at the end of a passenger train..There is a nice photo of a Siphon C as built showing these brackets (Great Western Way, J.N. Slinn, HMRS,1978). Not in the etches, but easy enough to do.
This is a cheap and straight forward kit that is easy to put together using CA or solder, definitely passes the 3 feet/1 meter test. I am tempted to do another one but with a 6-wheel chassis instead. (Early Siphons were built using old 4- and 6-wheel coach chassis). All that milk and watercress needed fast ventilated vans.
Nigel
©Nigel C. Phillips
Posted
Full Member
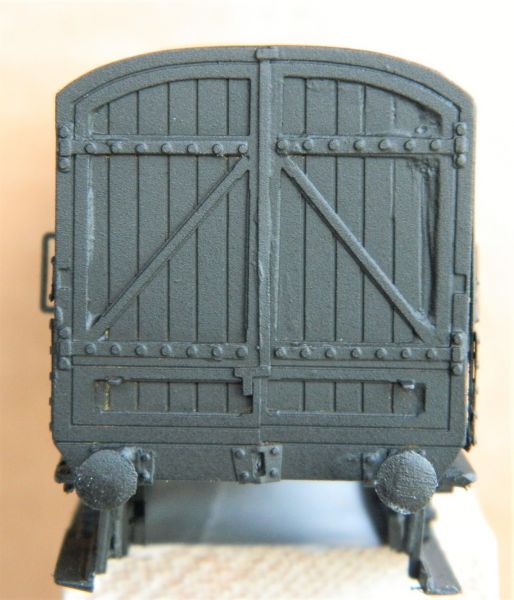
Roof detail and some pipes on the Siphon C. I'm going with steam and vacuum, one through the buffer beam, one underneath (that cutout needs filling!), although some were also fitted with Westinghouse air brakes and a third pipe as well. Some chain retailers needed, I have some fine ones in the spares. Dummy screw couplers ordered, meanwhile some lamp brackets to fettle, after that the final paint in GWR brown and some transfers and it's done.Not too much weathering, this was clean stock era.
Next on the list is a 4-wheel brake composite passenger from Shire Scenes. Ratio chassis and ends, brass etch for the sides.
Nigel.

©Nigel C. Phillips
Posted
Full Member
Connor
CC Weathering Services: https://ccgwr1.wixsite.com/ccweatheringservices/
CC Weathering Services Facebook Page: https://www.facebook.com/ccweatheringservices/
CC Weathering Services Facebook Page: https://www.facebook.com/ccweatheringservices/
Posted
Full Member
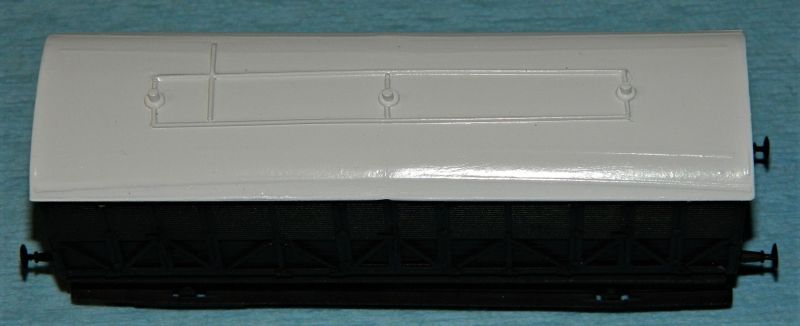
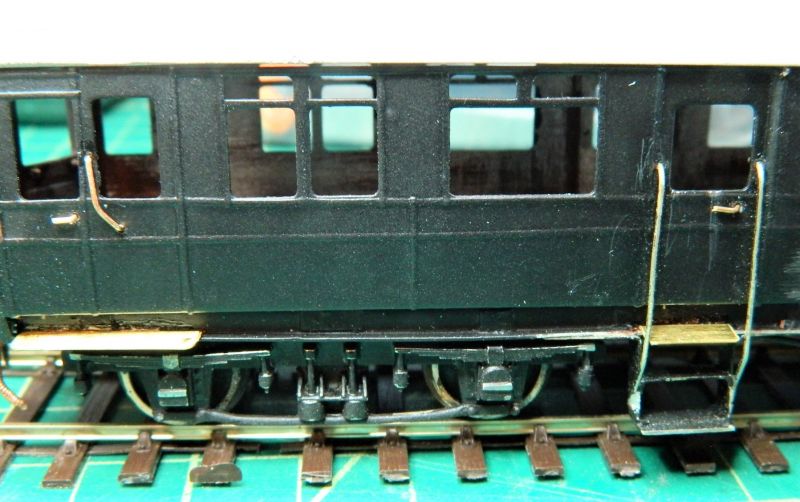
Rato chassis, roof has had 4 mm removed from the middle. Pristine white until I get around to weathering (batch mode, I have a lot to do).
The chassis takes EM gauge without modification except for relocation of the brakes (outwards). I strengthen the lower running board with black styrene strip as they are very fragile around the cutouts for the axle boxes.
Mansell wheels from Ratio, plastic with metal rim. Fine scale. Wheels moved out to EM gauge.
Weight is around 50 gm, internal lead stick-on chicklets, located over the axles.
Nigel
©Nigel C. Phillips
Posted

Full Member
Do tell ………………………………..
'Petermac
Posted
Full Member
Nigel
©Nigel C. Phillips
Posted
Full Member
I like them being called "stick-on chicklets" - much better than wheel weights …………………. :cool wink
'Petermac
Posted
Full Member
"And the things wot 'old the candles…"
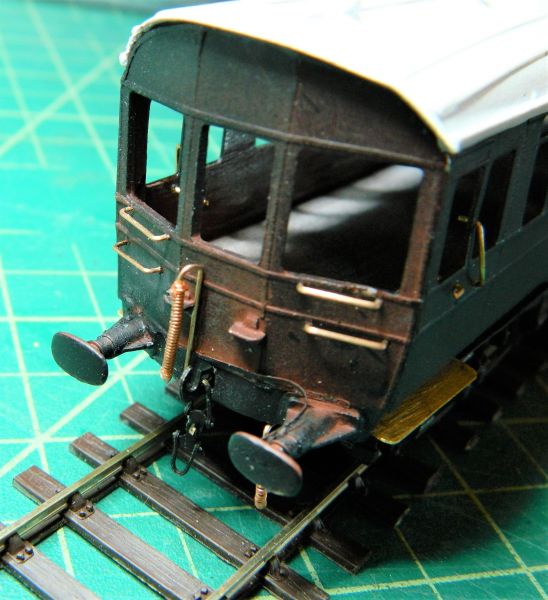
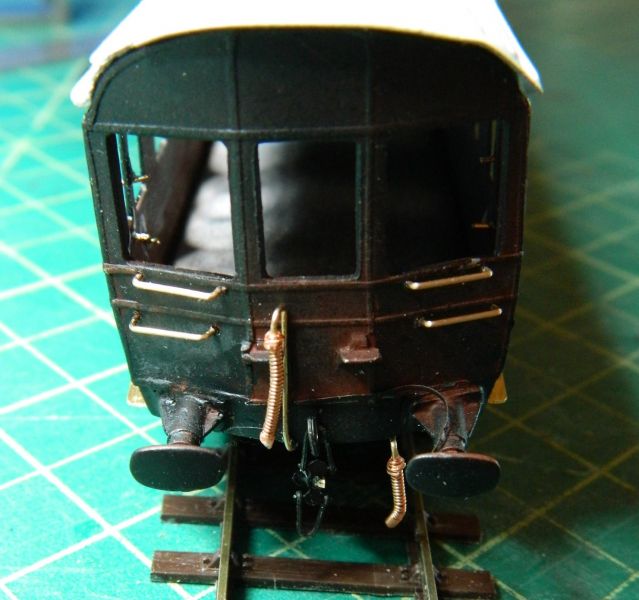
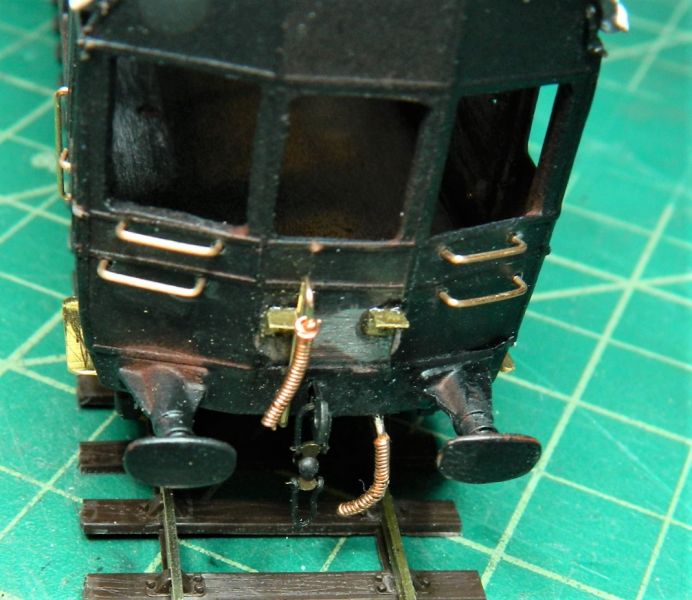
Brass foot boards (fret scrap) under the doors, handles and grabs (p/b wire), along with flexible steam and vacuum pipe connectors (P/B wire and copper wire), screw couplers (non-working, blackened brass) and a pair of steps for the modified end (scrap brass), have been added. I also reinstalled the passenger steps and the rails. Still needs some lamp brackets, and some steps and supports at ether end under the buffers. The coach is sitting on some track to make sure the lower flexible pipe connection doesn't foul the rails.
Looking closely at contemporary photographs the diagram N's had the triangular regulator plate above the driving end windows, but as this is a trailer I may omit it. If I go with this as an autocoach it will need the regulator gear attached on the coach and on the engine as well as the triangular plate..
After some thought I will be replacing the bogies for some 9' American ones, along with some new wheels. The wheels didn't take kindly to being pushed out to EM gauge in situ (the hub insulation disintegrated, resulting in an attack of the wobbles). The current bogies are really not the right ones, as well as being designed for an OO wheelset. And it's impossible to get new wheels in without taking the bogies apart (not sure how they were made, probably castings soldered up with the wheels in place).
Nigel
©Nigel C. Phillips
Posted
Full Member
'Petermac
1 guest and 0 members have just viewed this.