Going Small with a GWR Branchline 1890-1920
Posted

Full Member
GWR Branchline in EM Gauge 4mm Scale
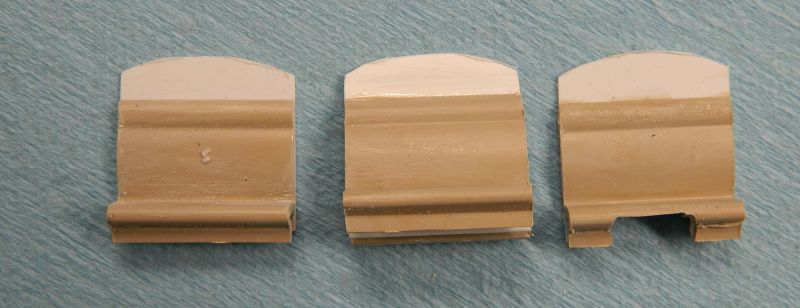
Hi All,Thanks Bill. More an issue with the plastic now very far removed from being flexible. Looks like it was meant to compress and then expand outwards on the sides, with a lip keeping things in place. I simply removed the lip. Job sorted! No, not quite, as it needs to be a bit longer. Some styrene strip should sort it.That is the result of it being cut too short and not straight to start with. I'm thinking super-magnets either end attached to the roof underside, keeper plates in the cab and luggage compartments to keep the roof in place.
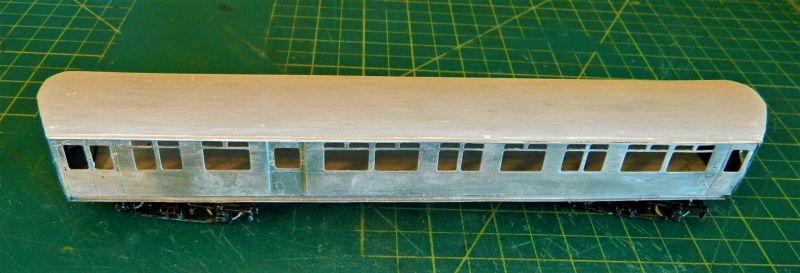
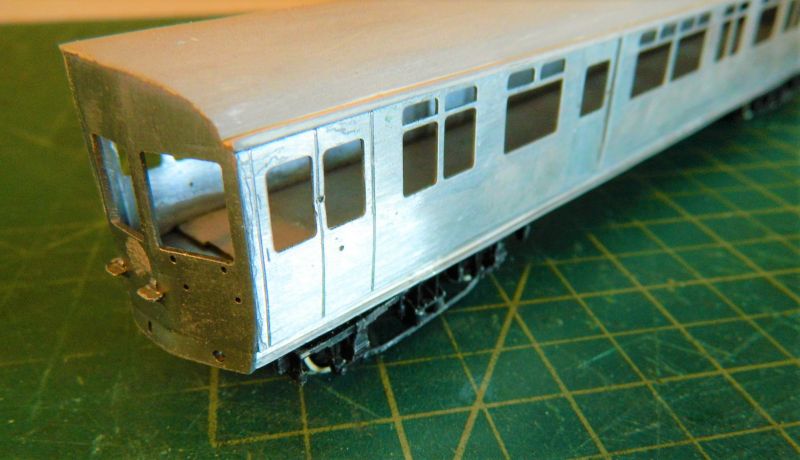
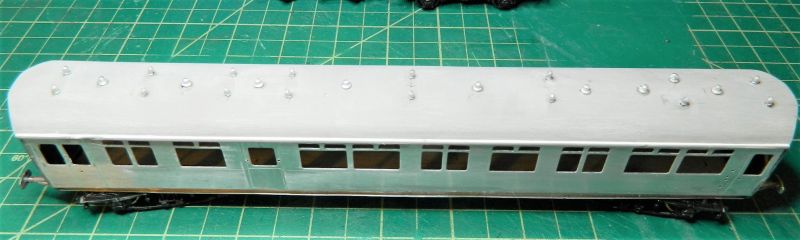
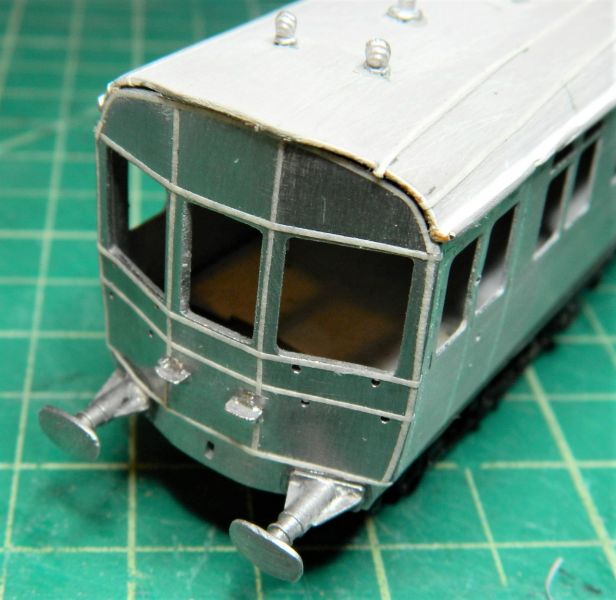
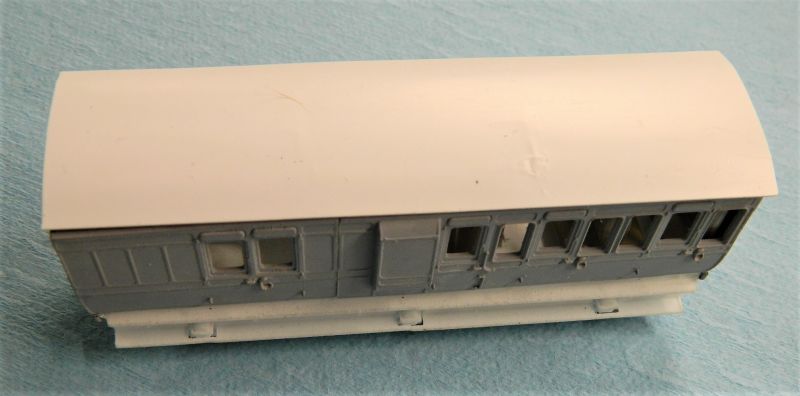
The roof ventilators were in the wrong positions for a diagram N, so they have gone, as have the roof panel linings (turned out to be tape rather than molded into the roof). Nice clean sheet. New rain barriers, new ventilators, and new gas lamp covers and their associated plumbing (fine solder wire) should be going on tomorrow. After that on to the chassis.
The tool boxes were out, so I also did a cut and shut on the Ratio 4-wheel coach body shell left over from the Siphon conversion. It now sits nicely on top of the 3D print of a 6-wheel Siphon chassis from Stafford Road. Managed to get straight cuts, so no filler required. Needed a bit of fettling of the chassis length and removal of the NEM coupler housings. It has been fitted with some Mansell fine scale wheels I had in the spares, the body needed some material removing from the underside where the wheel treads were rubbing. No issues with EM gauge, except I needed to put some pinpoint bearings in the holes. Next up will be getting that middle wheel set mobile and floating so it turns the corners and gives a bit of compensation. I now have a 6-wheel brake 2-compartment 3rd composite. I expect the chassis will need some work once it has had a coat of grey primer and all the print striations appear. I will know tomorrow if the weather stays fine enough for the rattle can.
Nigel

©Nigel C. Phillips

Posted

Full Member
Michael
Posted
Full Member
Thanks. With most of this I am just winging it. Common sense usually works. One of the issues with rebuilding an old kit is you never know what you will find.
Nigel
©Nigel C. Phillips
Posted
Full Member
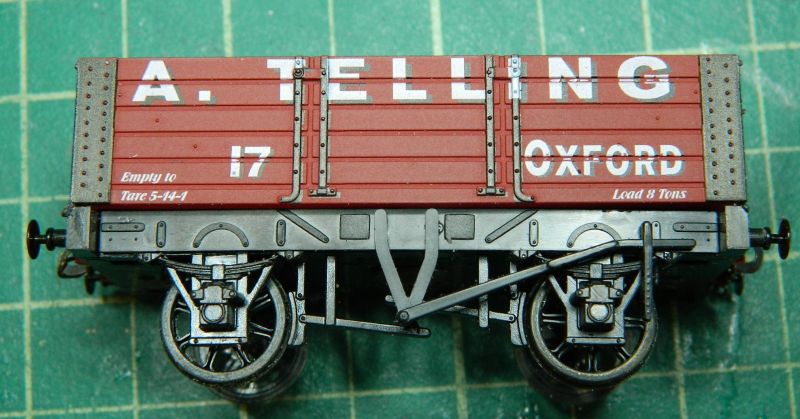
Wet and windy this morning, so some modifications of a couple of Dapol wagons that came from Hatton's recently. One is an older model, a Wynnstay Collieries 10 tom coal wagon (cannel coal, large rabbit droppings), tension hook couplings, the other is a new model, an A. Telling 8 ton wagon, a coal merchant from Oxford (house coal, small rabbit droppings), Dapol's effort at "NEM" couplings. The 8 ton wagon has a representation of wooden sole frameing - nice detailing, and brakes on one side only. Pre-RCH. Telling is listed in Kelly's Directory.
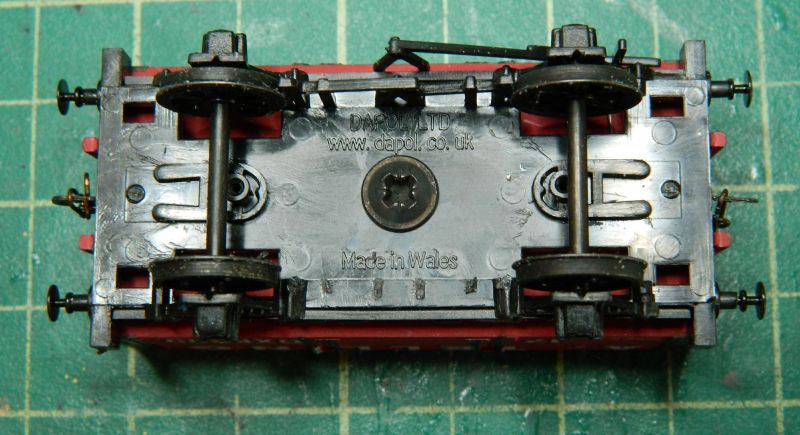
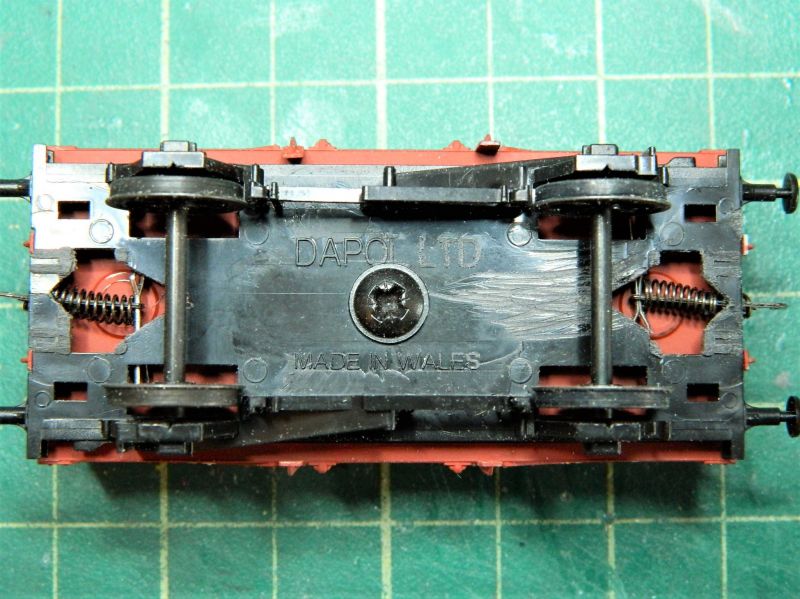
Couplings were removed from both, Smith's 3-link couplers and hooks mounted, and a bit of height removed from the coal load to allow some real coal to be added later on.The new model was easy, the older one required some hacking to get the coupler spring installed. EM gauge wheels installed. No fettling required, brake shoes line up nicely with the wheel treads..
Yesterday I got as far as the shell ventilators and gas lamp covers on the roof of the autocoach before it got too cold, the weather is much better this afternoon so a job on the patio.
Nigel


©Nigel C. Phillips
Posted
Full Member
Just noticed on the Wynnstay wagon - Colleries. Last time I checked in the dictionary it was spelt Collieries. Clearly Dapol did not use the spell checker. Made in Wales, so no excuse about the Chinese not understanding English. At least they didn't use Glofeydd!
Nigel
©Nigel C. Phillips
Posted
Full Member
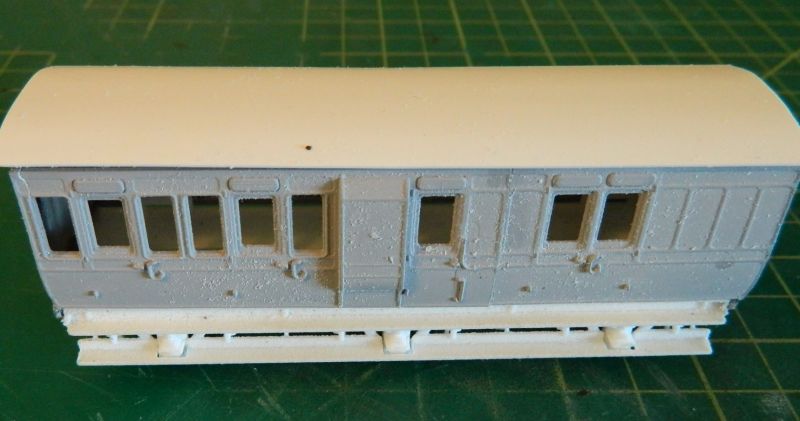
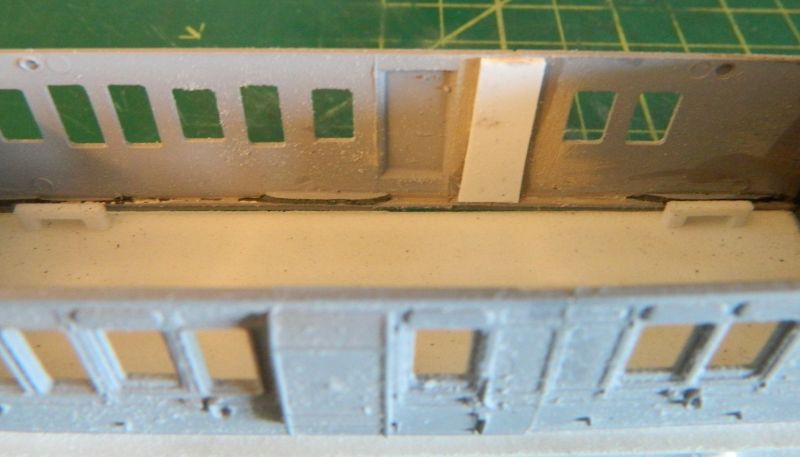
I had a look at what some paneling might do to the appearance of the autocoach/trailer. Based on one end quite a lot it seems. So, only more one end and 2 sides to do. Hope there is enough tape. The roof lining needs something a bit more substantial than the lining tape, which is a PITA to get to follow the curves, some styrene rod probably, curved to shape, or even some brass rectangular rod will be more suitable (and easier to replicate).
One of the consequences of COVD-19 is that I am running out of Gibson fine scale wheels for the vans and wagons! Only enough left for another 2 wagons/vans.
Nigel
©Nigel C. Phillips
Posted

Full Member
Well spotted Nigel - I'll bet half the world hadn't noticed. Obviously Dapol didn't. Can you get a rebate based on "Goods not as described" …………………. :lol: :cheersHi All,
Just noticed on the Wynnstay wagon - Colleries. Last time I checked in the dictionary it was spelt Collieries. Clearly Dapol did not use the spell checker. Made in Wales, so no excuse about the Chinese not understanding English. At least they didn't use Glofeydd!
Nigel
Having said that, I wonder if Mr Wynnstay could spell ?
'Petermac
Posted
Full Member
Collery as a noun does exist, nothing to do with coal. Ah well. Wynnstay was the family seat of the Williams-Wynns' for nearly 500 years. The family were hereditary directors of the GWR during the 19th century. Had a locomotive class named after Sir Watkin Williams-Wynn. The "Sir Watkin" class 0-6-0 tank engines.
Nigel
©Nigel C. Phillips
Posted
Full Member
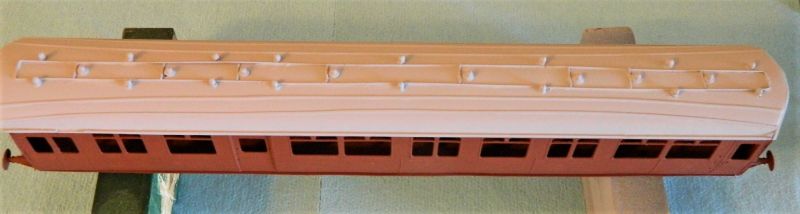
More progress on the autocoach/trailer. Roof fittings done (shell ventilators, gas lamp covers. both white metal, gas supply piping using phosphor bronze rod, rain breaks using styrene strip, pretty busy roof), now with a couple of coats of grey primer. I extended the length of the roof using styrene strip (1/16" either end). Paneling on the body shell done, now with a couple of coats of red oxide primer. The effect is actually quite subtle. Needs to be in a certain light. Not as the GWR would do it, but at least it gives an impression of panels in the right places. The final finish will be in GWR Crimson Lake, so a red primer is appropriate. Priming done at this stage, as the panel lining is pretty fragile without a coat of paint, and it gives me an opportunity to correct any faults while I do the handrails, steps, lamp brackets, etc. Photos are much less forgiving than eyes for this. And of course the bolections and interior (partitions, windows, floor, seating, lights)..So far I am quite pleased with how this backdating of a GWR icon is turning out.
The 517 body shell also got a couple of coats of green, in this case Krylon Sherwood Green satin finish, which is a pretty good match for a 517 at the turn of the 20th century. Next step is building a chassis for the shell.I have the old K's, as well as a SE Finecast kit. I think the SE Finecast kit, as it can be easily compensated. As long as I can get the horn blocks from the UK.
All painting done using rattle cans.The dome, safety valve and chimney top on the 517 need to be in a brass/copper finish, that will be done using Vallejo brush on metallic paint. I need to find some whistles as well. Should be a few in the spares somewhere.
The autocoach/trailer constitute 50% of the passenger rolling stock, further progress will require a return to normal, as I need another kit for a 517 or a Metro class locomotive. Or even a class 2021.
Nigel


©Nigel C. Phillips
Posted
Full Member
'Petermac
Posted
Full Member
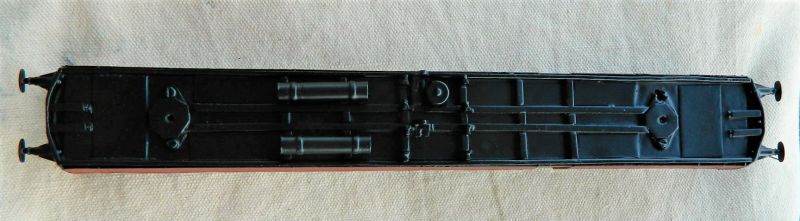
They trundled along at 30-35 mph maximum, so not a speedy coach. Most roofs of this period had noticeable covers for the gas lamps, or even bigger ones for oil lamp burners. Most photos were taken at ground level, so all the items on the roof are rarely seen, usually only the ventilators. Throw in the gas pipe work (and this is a simplified version) and it can get really busy. Cleaned up when they went with electric lighting, but some were still running with gas lights until they were condemned. This is the short 59 foot long branchline version, there was a longer 70 foot version for suburban work. Most of them had 2 gas tanks, one either side. The BSL model has no real under-frame detailing, so something else for the list.
Great Eastern and Great Northern passenger coaches were just as bad. Even bigger ventilators than the GWR.
Nigel
©Nigel C. Phillips
Posted
Full Member
Life is certainly easier nowadays …………………………
'Petermac
Posted
Full Member
The GWR gas production facility was at Swindon (thanks to Chubber for the information), using coal oil from Scottish coal mines (sent all the way from Scotland in GWR tank wagons). "Cordon" tank wagons would be sent out to fill up coach tanks as required. This was not LPG, so probably fairly frequently. Princess Risborough would be a logical distribution location, as it was a destination for several autocoach service - Aylesbury, Banbury, High Wycombe, Thame. That said, I can see an emergency arising where a Cordon wagon was sent to Watlington to fill up the autocoach and the spare 6 wheel brake third coach kept in the carriage shed. There were pressure gauges and valves mounted on the solebar of the coach, the guard would check and arrange for a fill as required. Given the small number of early morning and night services, probably a couple of times a week.
The reason the piping on the roof is busy is that where were 2 supply lines, one for the pilot light, one for illumination. The valves were under the control of the guard. Trimming wicks and topping up oil in oil lamps was probably under station staff control, one of the reasons why even a small station like Watlington employed a staff of 7. And why there was an oil shed (not just for signals).
Autocoaches and trailers were kept where the first train of the day started, for a branch line this was usually the terminus. Autocoaches were limited to around 2 hours/30-40 miles for a trip, after that it required coaches with toilet facilities.
All of this accompanied by copious paperwork. Hence all those cubby holes in the guards office on the coach.
Nigel
©Nigel C. Phillips
Posted

Full Member
I knew you'd get the roof sorted and quite simply too, which was good. The twin pipe gas piping is spot on and the body panelling, particularly with the crimson lake, will look splendid.
Have fun with the interior and the bollections!
Best,
Bill
At 6'4'', Bill is a tall chap, then again, when horizontal he is rather long and people often used to trip over him! . . . and so a nickname was born :)
Posted
Full Member
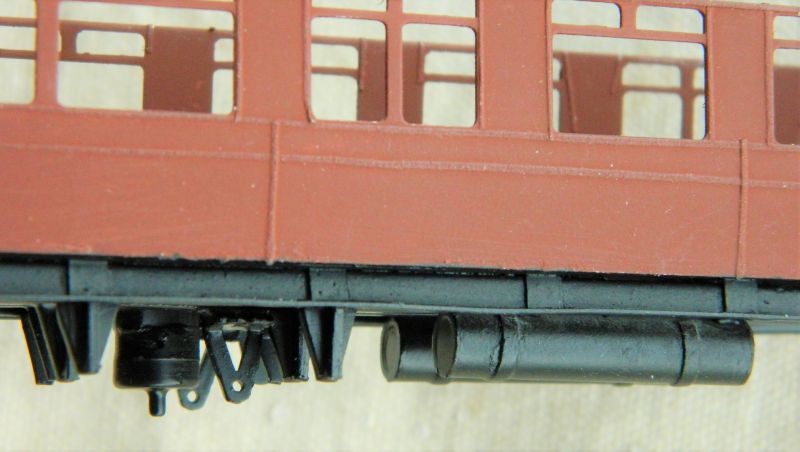
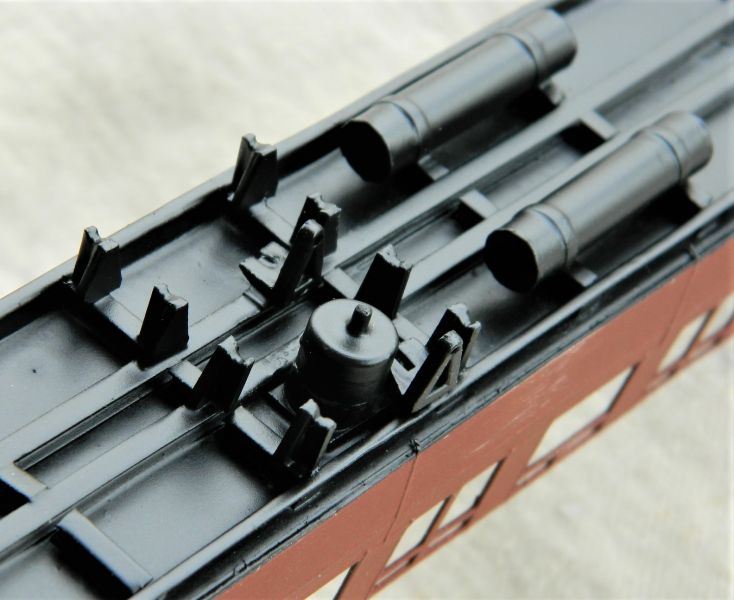
Thanks. A bit of chassis detailing next while it's still in undercoat. Ga s tanks, vacuum cylinder and V hangers, some cosmetic brake rods, and those 4 queen post trusses., Lots of wivets. No counting please .
Nigel
©Nigel C. Phillips
Posted
Full Member
Frame plates. framing, gas tanks, queen posts, V hangers and vacuum tank. Tasteful rattlecan black primer/paint. No wire for the tension rods, on order with the turnbuckles.
Nigel
 ,
, 
©Nigel C. Phillips
Posted

Full Member
Posted
Full Member
Thanks.
Nigel
©Nigel C. Phillips
Posted
Full Member
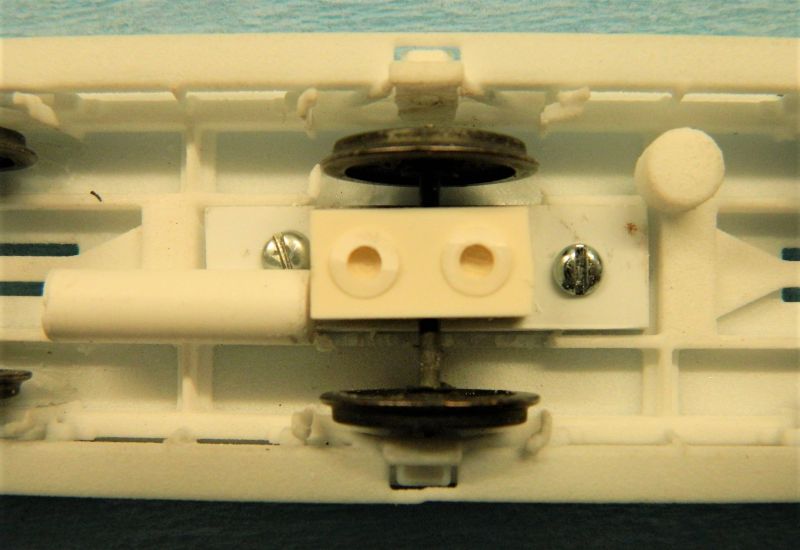
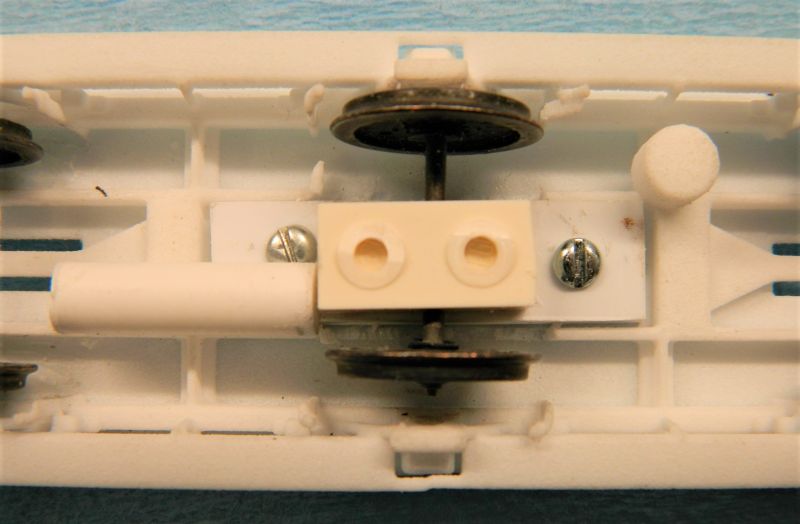
Some work on the 6-wheel brake third today. After a bit of pondering, I bodged together a central axle holder that allows some sideways movement, and reduced the sides of the 3D print to give a bit more room. Not trusting CA glue with 3D nylon the axle holder is also attached with 2 screws. The 6-wheeler now runs around 24" radius curves without a problem. I also gave the axle a little bit of vertical and lateral movement I am thinking about some light springing to keep the wheels centrally located. I don't want to take the wheels off the axle, the insulating bushings will probably not take another insertion of the axle. More pondering. I also did a quick gas tank, styrene tube and sheet.
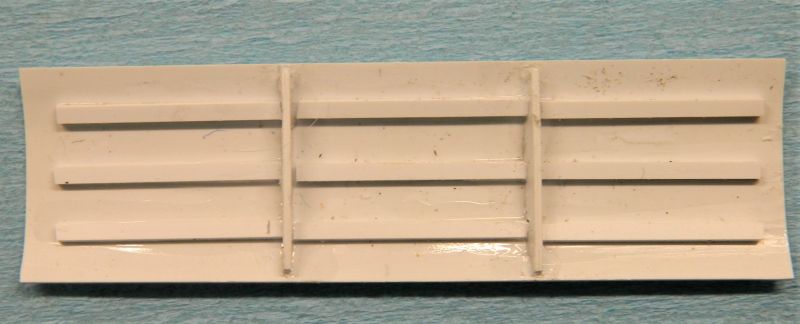
A roof was curved to shape from styrene sheet, and kept in curve with a couple of ribs and lateral stringers. I also built some seats (Ratio) and partitions (styrene sheet). Roughing in at the moment, they will go on a removable floor rather than try and attach them to the floor of the print..
I was looking for some spare V hangers for the vacuum cylinder, none around, so maybe some from styrene strip.
Plus I had a visitor to the 14th floor today from up north who seemed blissfully unaware of social distancing. Absolutely no interest in model railways either. Disdainful hoots in fact.
Nigel


©Nigel C. Phillips
Posted
Full Member
I wasn't aware there was a problem glueing 3D prints - is it flexible/waxy/too smooth or what ? To me, I'd have thought that the ability to take glue would be one of their prime deciders when choosing their print material. :hmm
How did your northern friend manage to pop by - I thought you lived in an appartments with just a balcony …………were you flying a maple leaf flag as a welcome message or something ?
'Petermac
1 guest and 0 members have just viewed this.