Boghouses / Tŷ Bach
Posted

Full Member
N / OO9 Two scales one gauge
For those following the electrical issues I connected the two points which will feed the upper fiddle yard today. These are electrofrogs and will lead to dead-end sidings. They behave exactly as I expect: continuous power to the route set and no potential to the other (as opposed to no power because the non-set route will be ++ or - - not isolated)I haven’t figured out why the electrofrog 3-way point does not behave the same way but it does have frog wires which those mentioned above do not.
The points on the main running area which cause stalling do appear to be Unifrog which may be a problem. I have yet to find a means of routing power through the frog when operating the points manually.

Posted

Site staff
Regarding the frog switching, surely the point blades switch the frog when being operated manually.
I though Peco always stated their points should work straight out of the box and you don't have to add any additional frog switching.
Ed
Posted
Full Member
Yes the gradient is steep at 30% but some Welsh narrow-gauge mountain lines have or have had some very steep sections. The Ffestiniog has 1:68 which taxes even a Double-Fairlie with an average train.
In modelling we always have to make compromises. Gradient is one of those. Many models include utterly unfeasible gradients were they to be applied to the main line.
I can only just (by 1.5mm) obtain the clearance required above the N-gauge yard in the distance available. If the gradient were eased I would have to reconfigure the entire fiddle-yard arrangements.
Peco points should “work out of the box” but it seems that over the years that has been sacrificed. Electrofrog points used in pairs always need insulated joiners for example but insulfrogs can cause stalling and have that visibly-plastic brown frog.
Peco’s own “Wiring the Layout” publication is clear on some matters but not on others. It has not yet been updated to include the unifrog range.
Posted
Full Member
The intended double-deck fiddle-yard will be a single-deck but split-level affair.
Combining thoughts and problems has led to a modest re-design of the off-scene end.
I am dispensing with the three-way point and replacing it with two simple turnouts. That allows use of “normal” electrofrog points which create isolated dead-ends for the roads not set without need of frog juicers. They take up more space so only one and not three sidings will be long enough to hold the loco-plus-four-wagons freight and then only with millimetres clearance.
The mountain branch gradient, despite being within the capability of all locos on any train, looks too steep. Therefore it will be eased and with no need to now clear the lower level it will feed sidings beside rather than directly above it. Though at a slightly higher level to avoid the need to go up then down.
I may or may not replace the unifrog points on the layout with electrofrogs again to avoid a need for motors and juicers.
That leaves the crossover to wire up. I have the required switch. It does appear to rely on motor operation but Peco’s own wiring booklet is not clear on the subject.
More thinking required.
Full Member
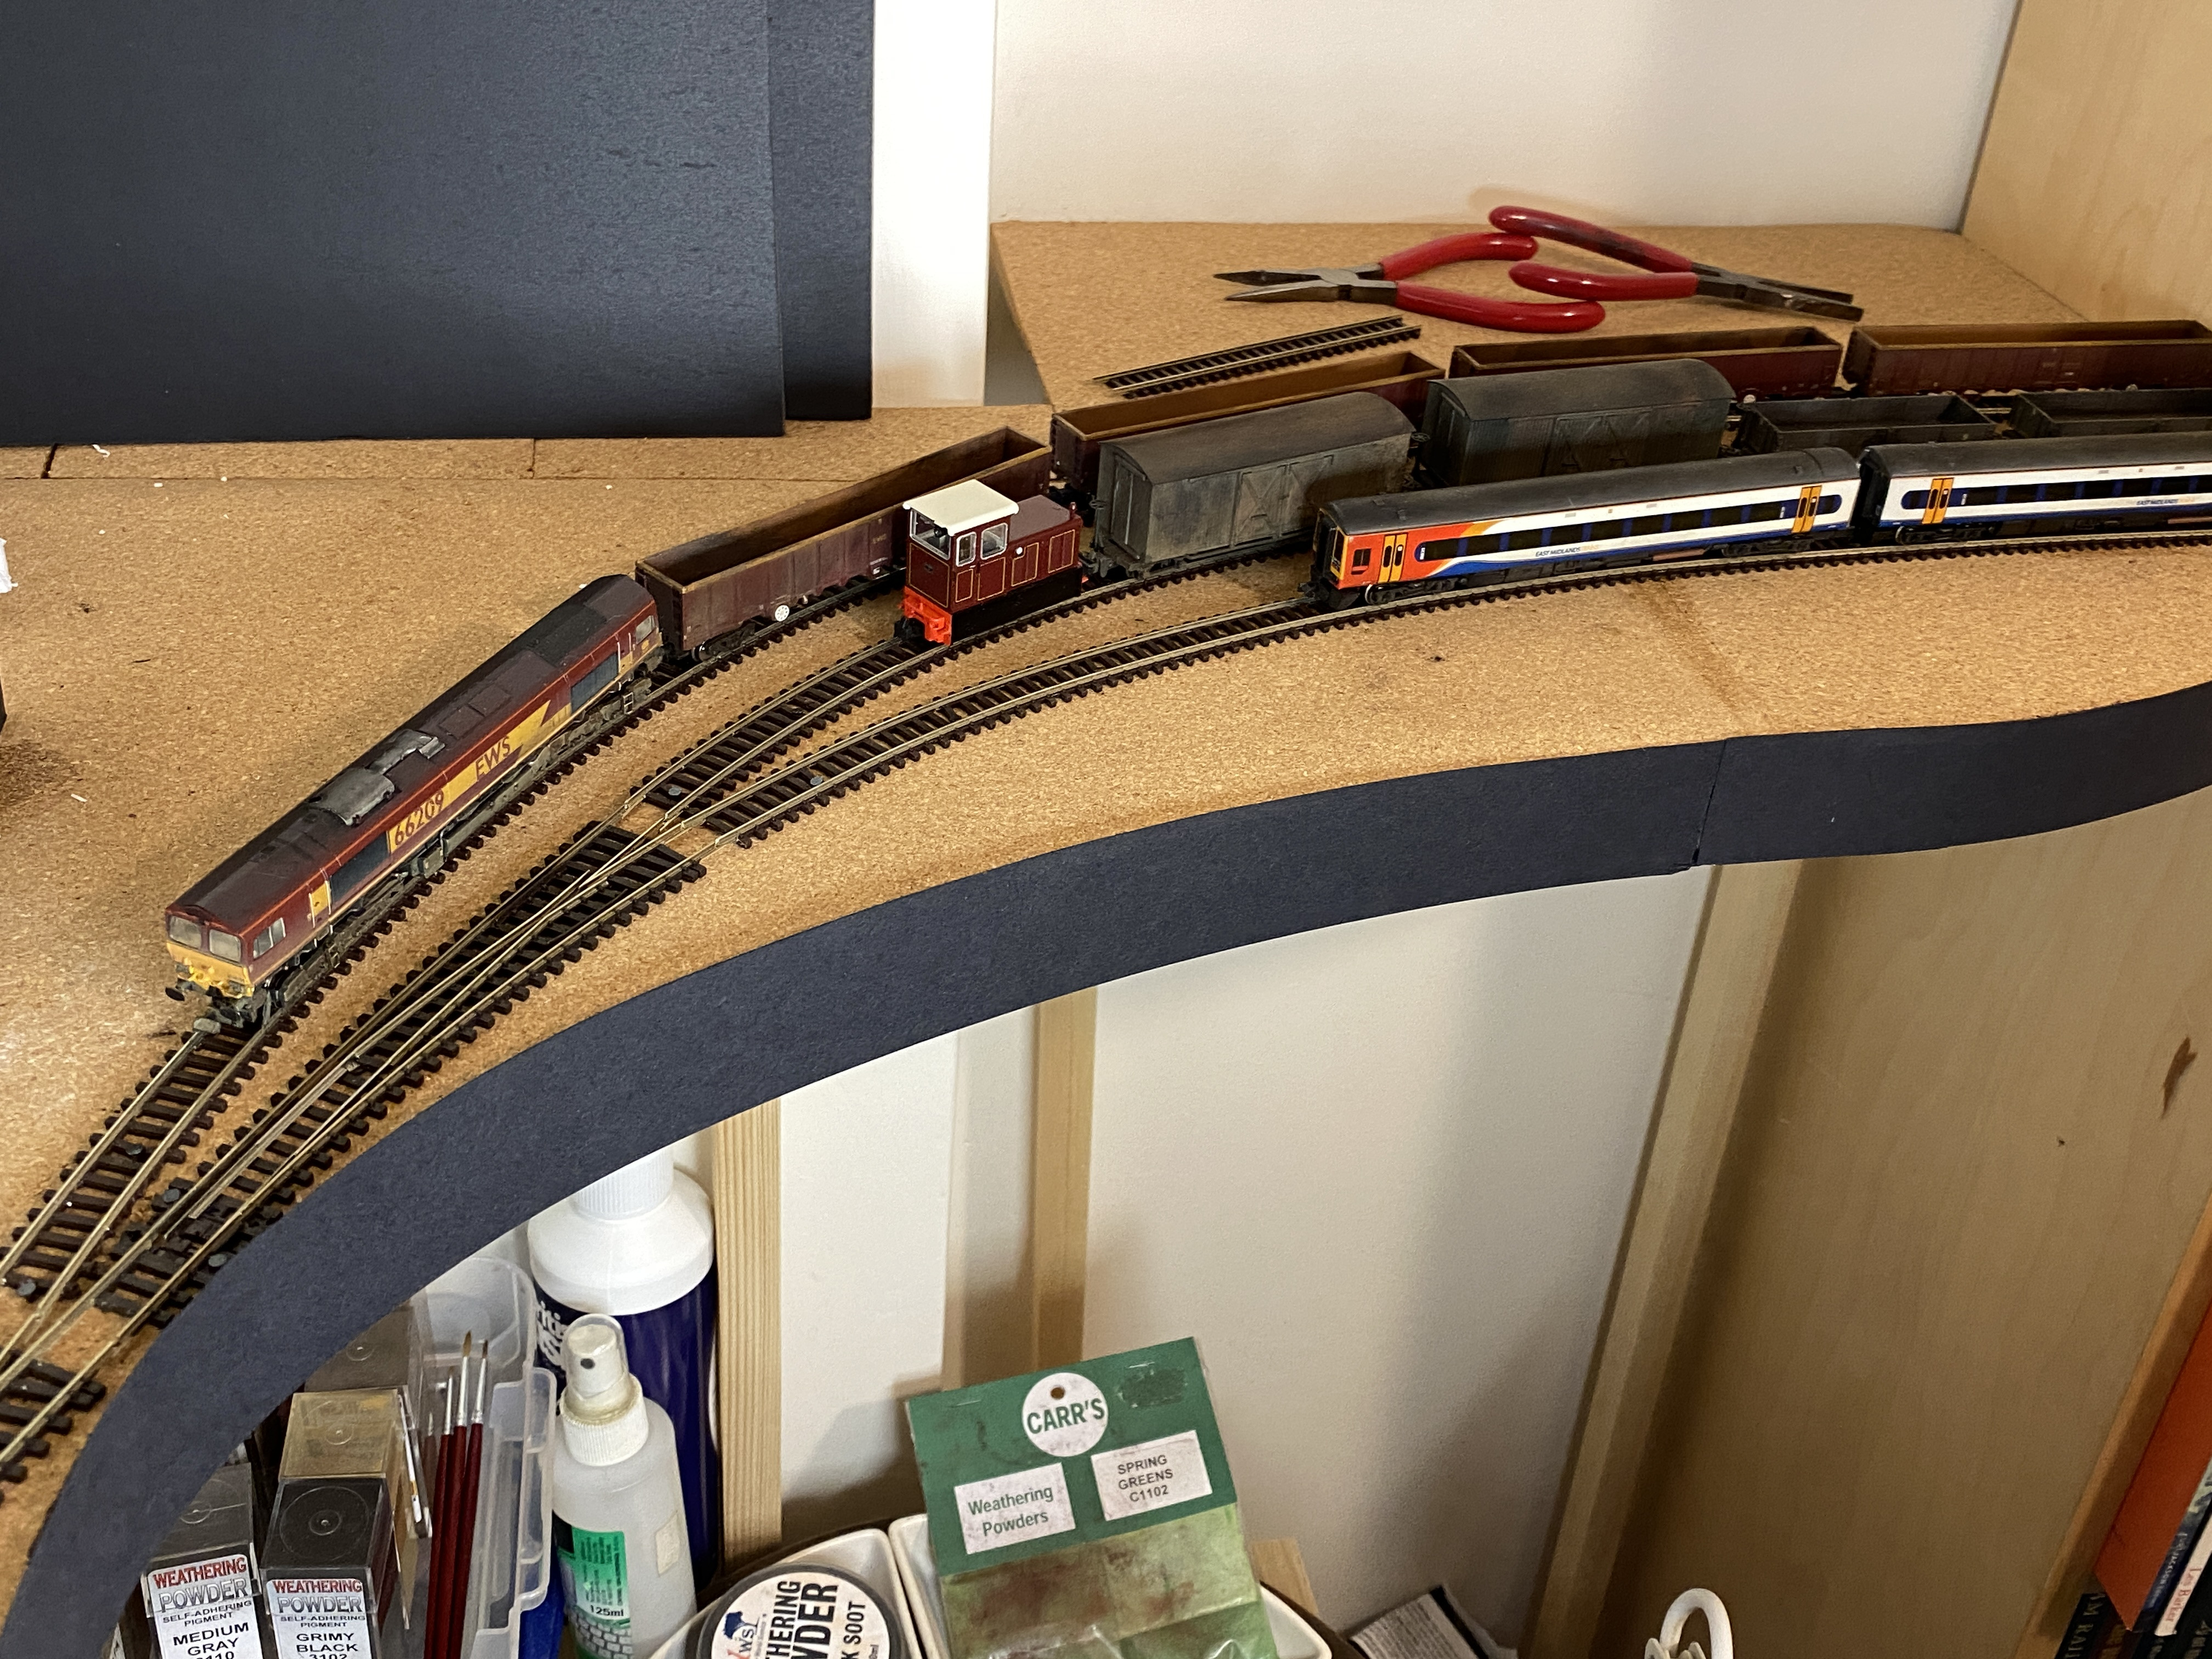
Despite having shortened two of the three sidings all which needs to fit will fit.
There will only be two N-gauge trains - one freight and one passenger - which leaves the third siding available to store stock of either scale on. The wider 009 stock will fit into any siding with an N-gauge train adjacent to it. Just!!!
Posted
Full Member
Waiting for parts.
The unifrog point issue will be resolved by replacing them with electrofrog points. That will mean slight re-location of the track ends since medium-radius electrofrogs are no longer available. I have had to opt for large-radius. The non-set routes will be dead-ends so will remain at no-potential. ++ or – Some modellers suggest it is not good practice to leave stock on a no-potential but "live" line. I can't see the problem but I could be missing something.
The mountain branch also awaits the arrival of a curved point. In order to fit the reconfigured yard space this branch will bifurcate halfway up the gradient and just off-scene. One track will be a short siding, adequate for the passenger train, and the other will be a longer siding suitable for freights / slates and the skip rakes. I may even be able to get a third, very short, siding in right at the top; there is the width but maybe not the length of board.
So I am awaiting parts before much more progress can be made. And the mail is now held to ransom by Storm Darragh so nothing is expected until at least Tuesday. Being where we are we seldom get mail delivered on Monday as the RM waits for a full van-load before coming out here.
Wiring up the crossover switch will probably have to wait until the New Year. I need to move the computer off the desk for its own safety during soldering. The only place it might go is into the spare room which is Sharon's office when she works from home. In between storms and holidays she is likely to be in there most days until early January.
Full Member
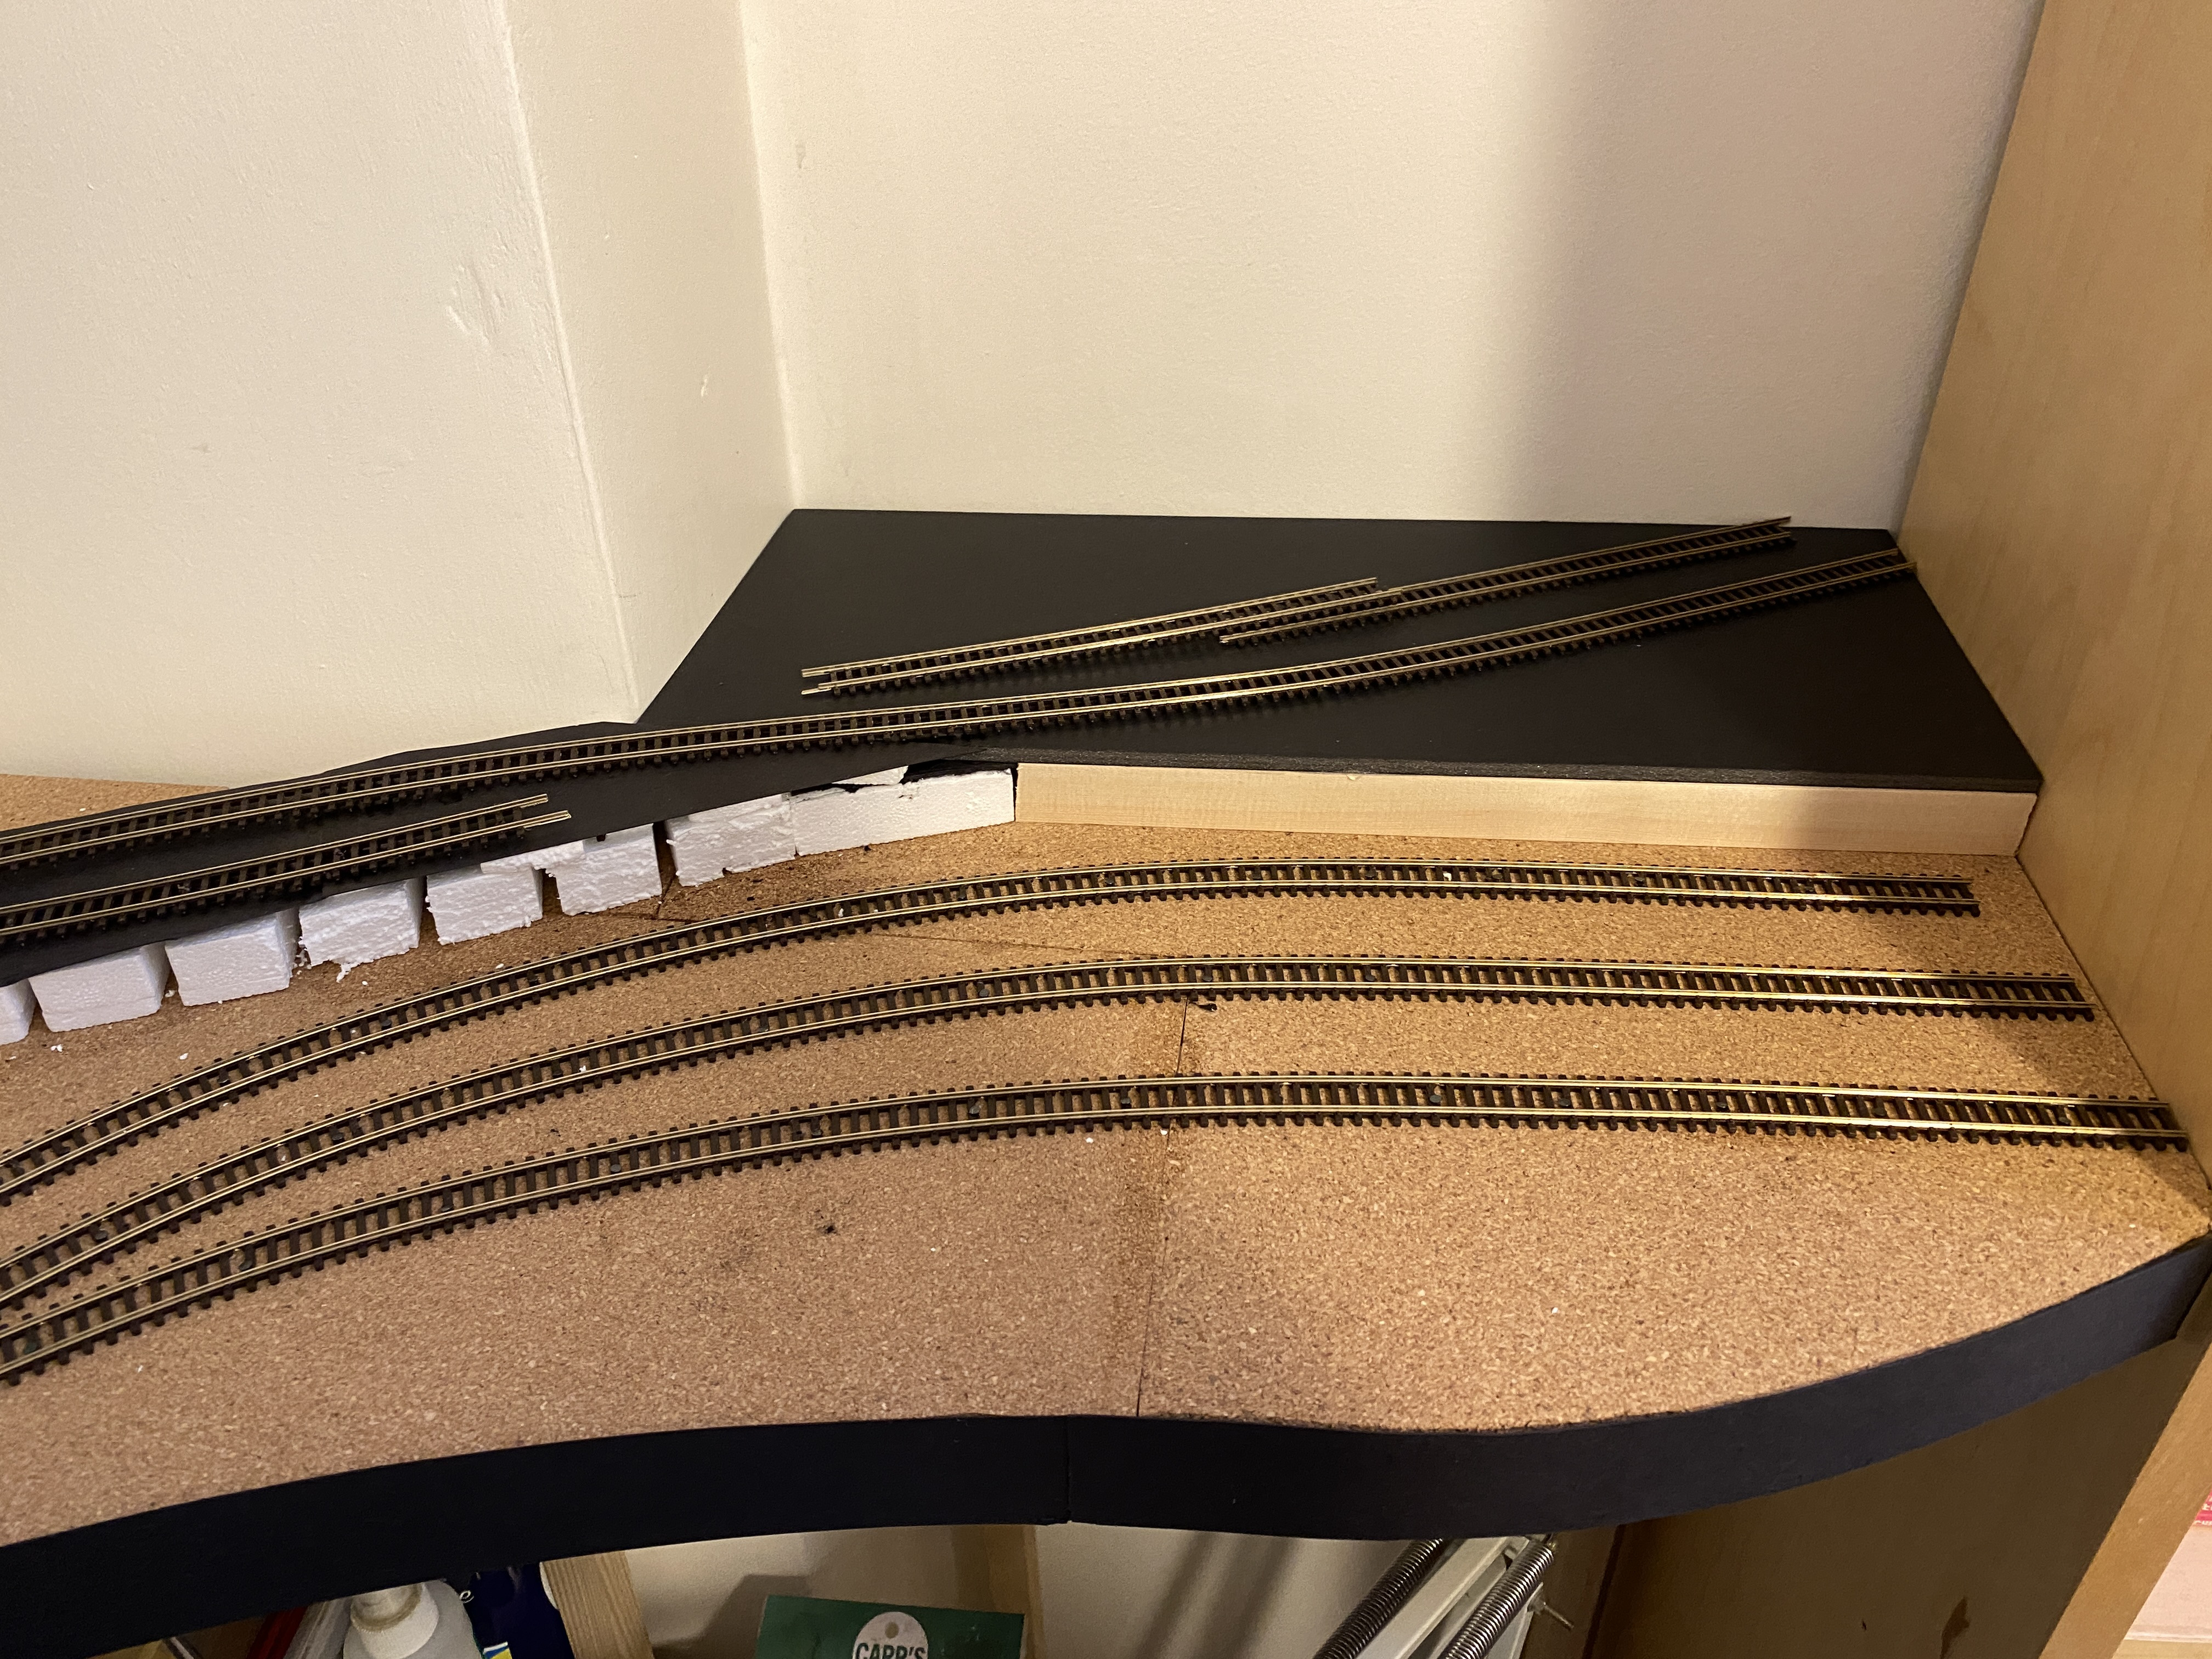
Construction is Woodland Scenics 3% gradient poly-blocks cut as required and topped with card to allow a solid surface. The upper level platform is foam-board mounted on timber off-cuts.
I shall face the poly-blocks with card when the track laying is done. Just to make it look tidy.
Full Member
The upper (00-9) yard tracks are in.
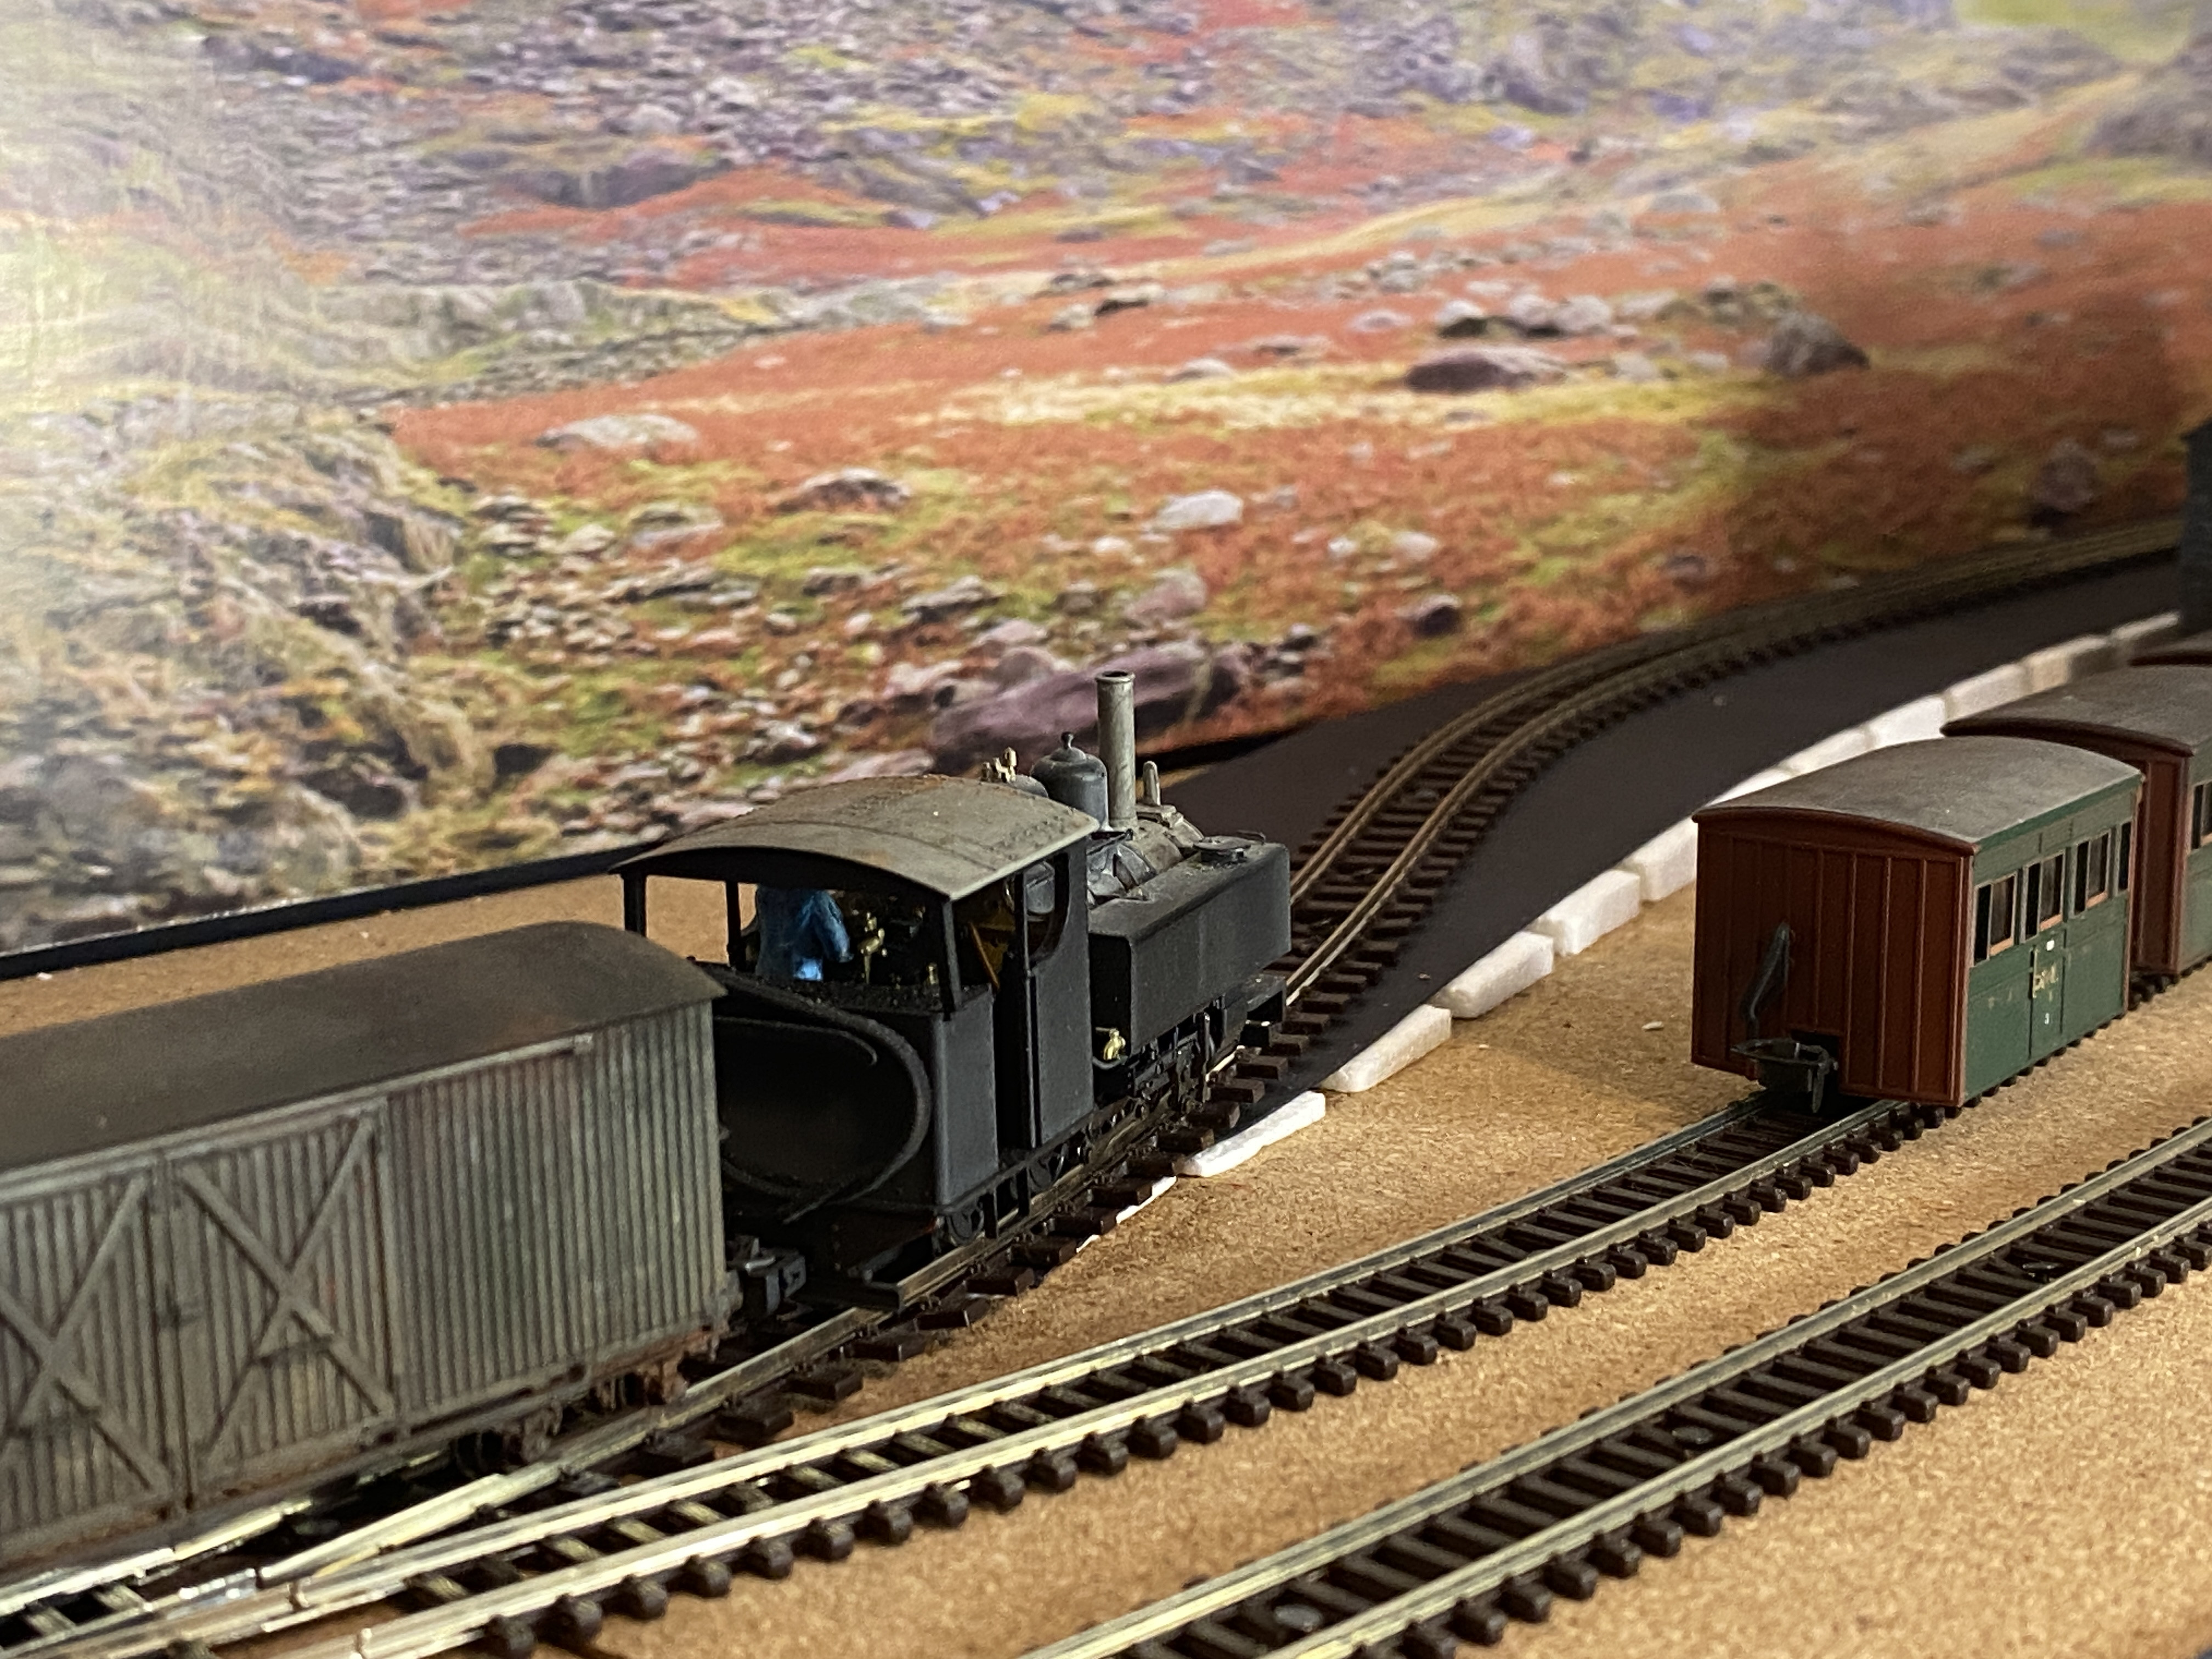
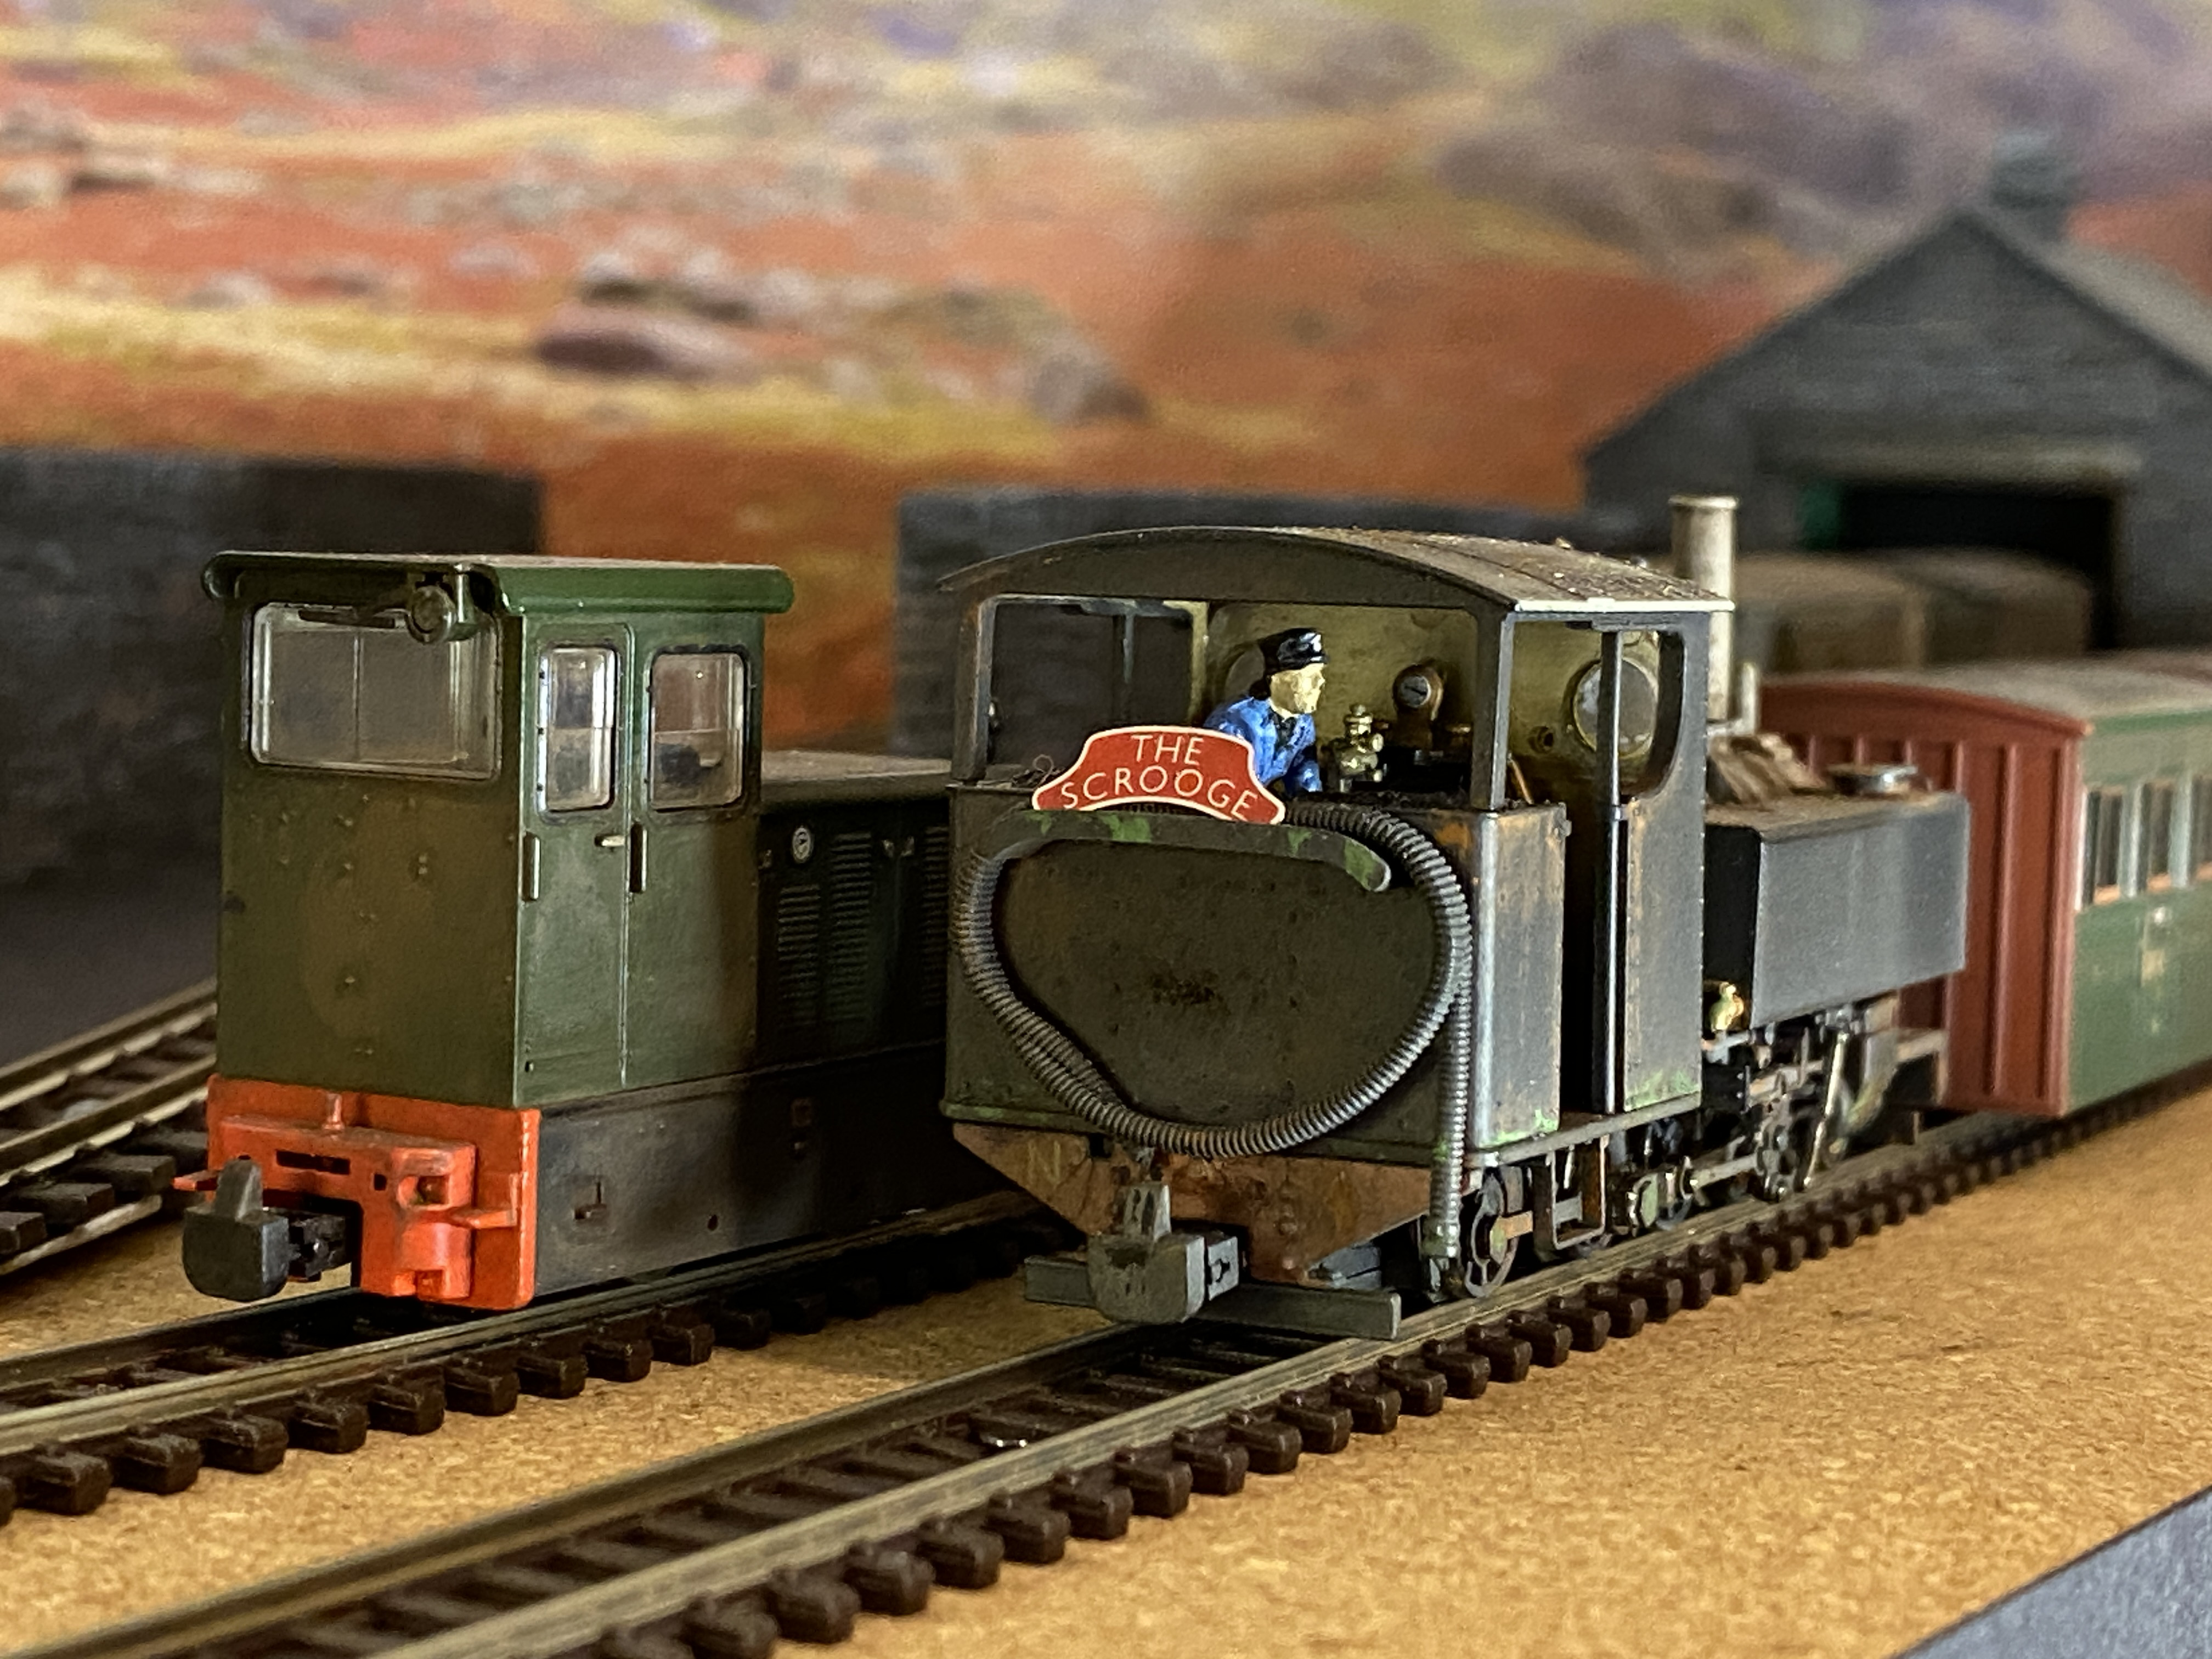
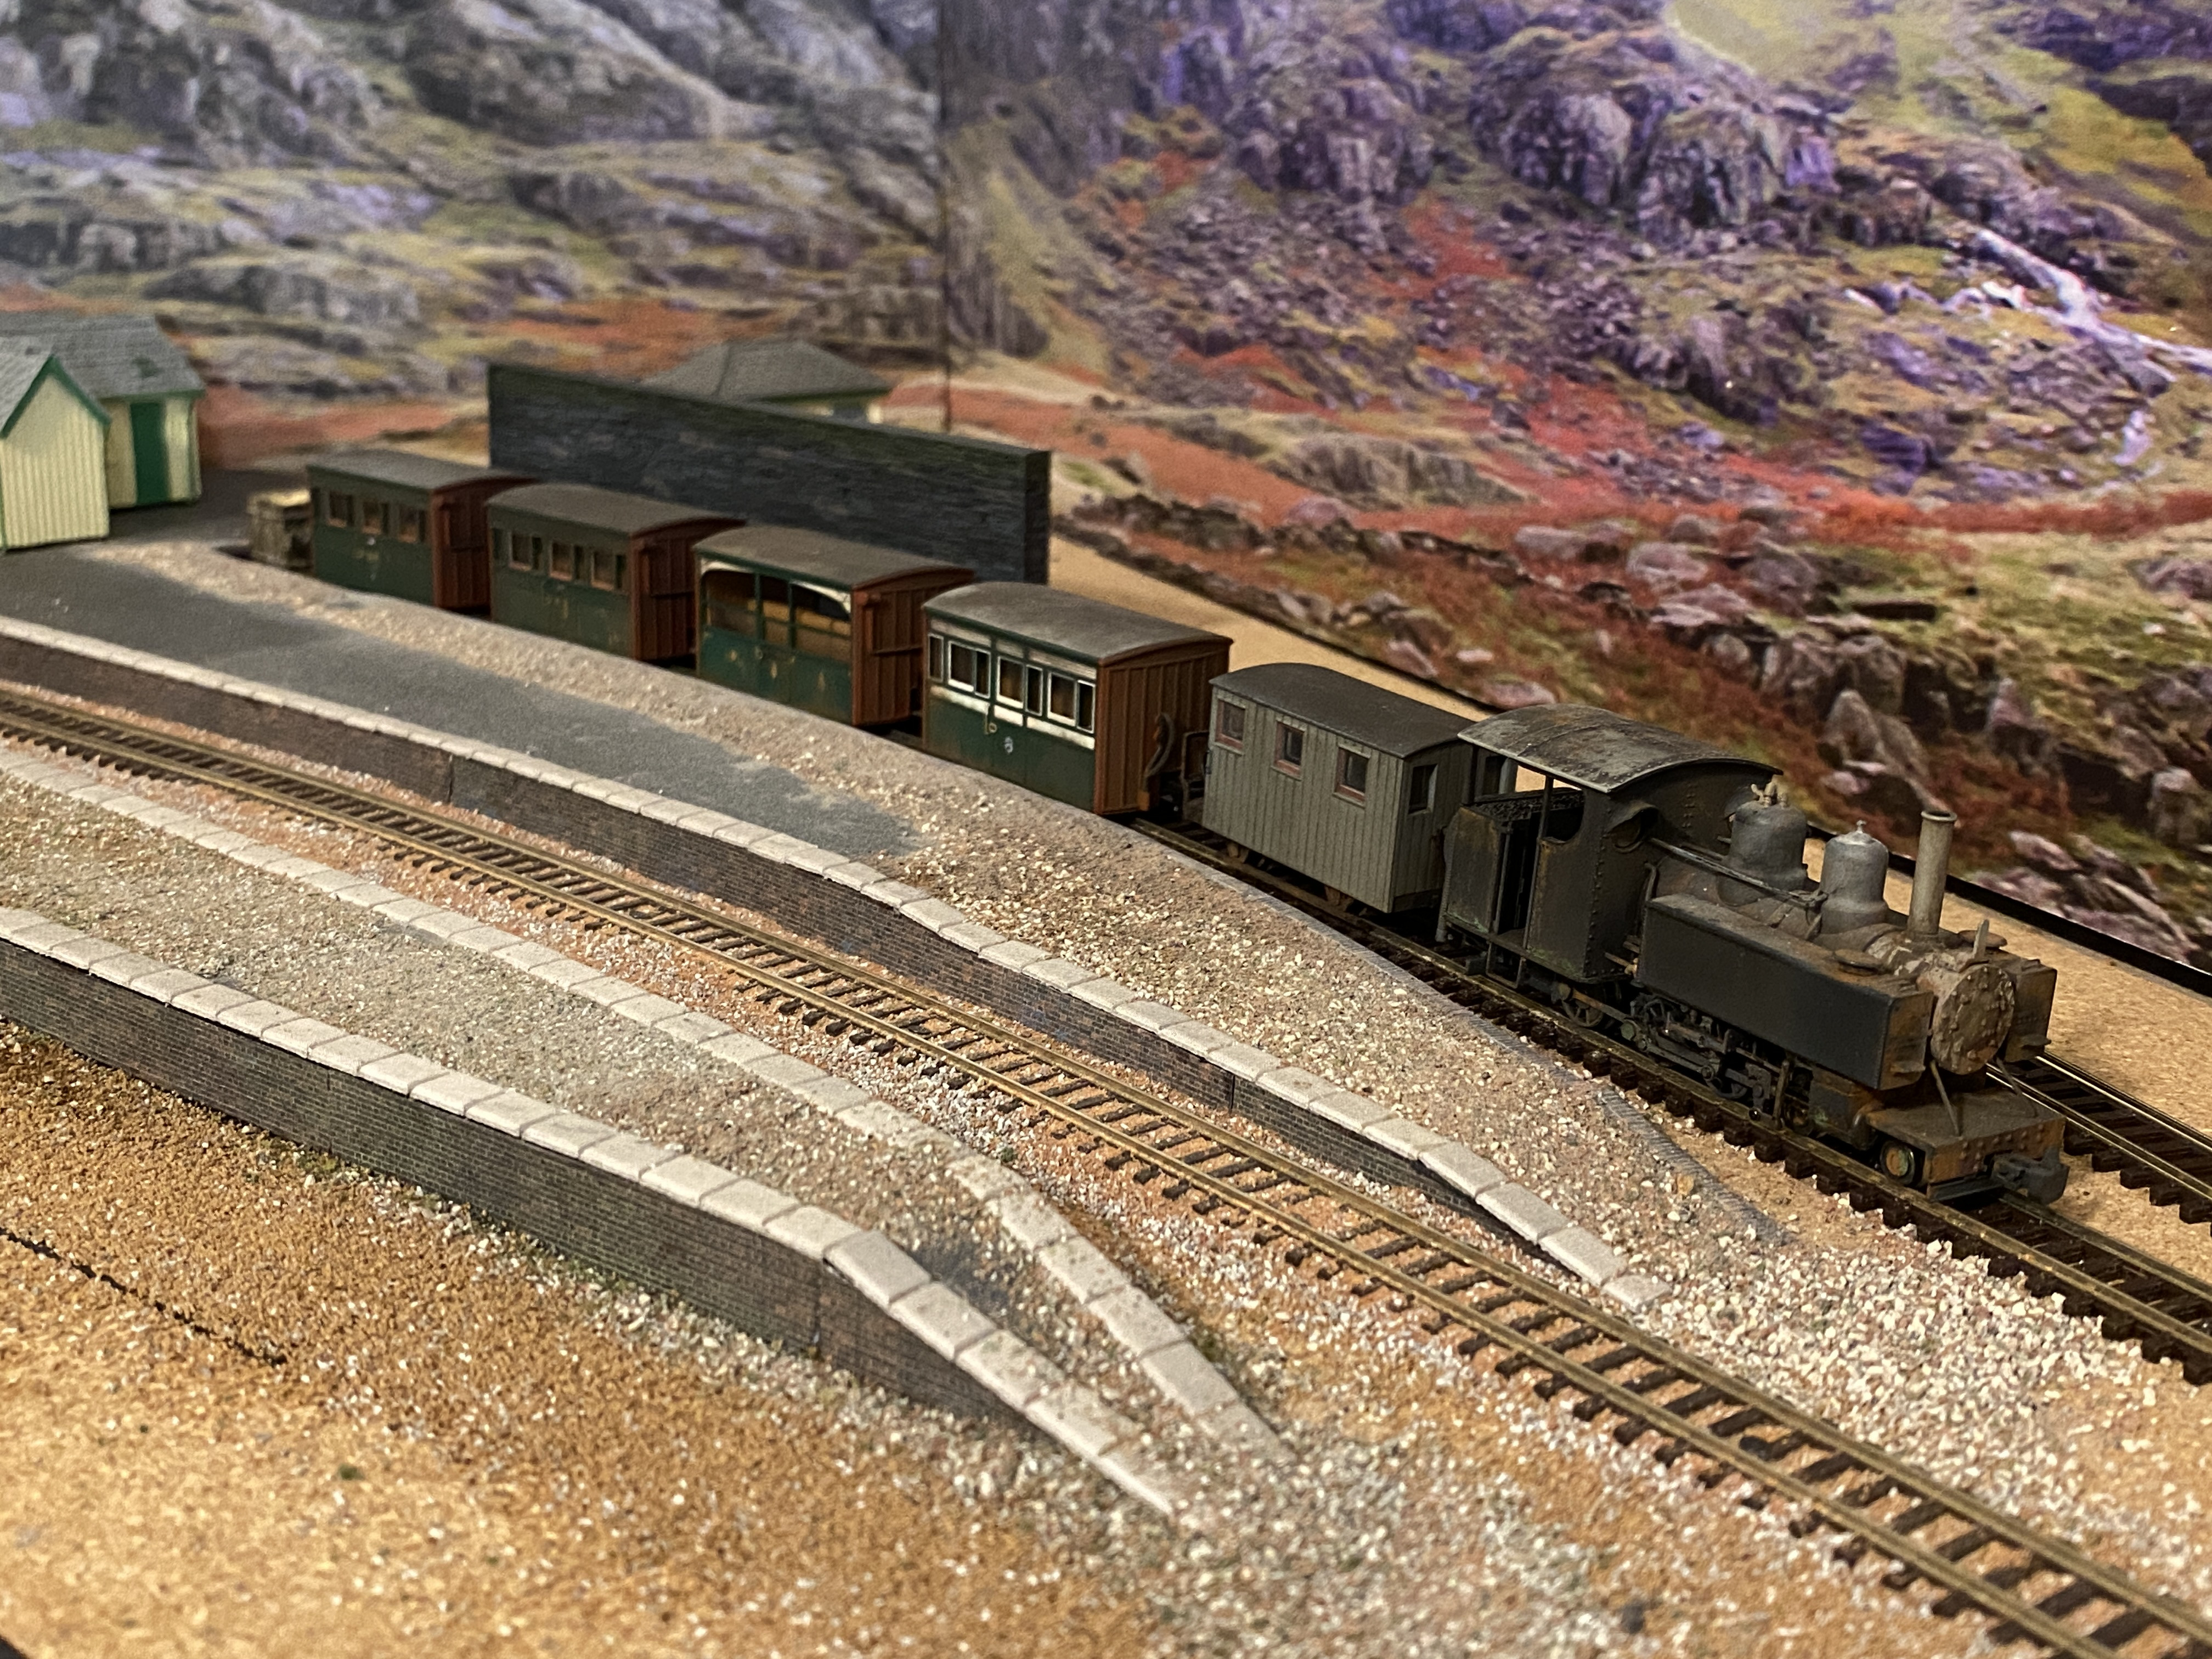
A Bagueley-Drewry arrives uphill with a train of slate and ballast empties. And with a deft change of one point the main-line Hunslet leads the bug-boxes down the mountain
The N-gauge stock awaits its turn in the lower yard. Maybe impatiently as the N-gauge backscene is set!
Full Member
It all runs as I want it to.
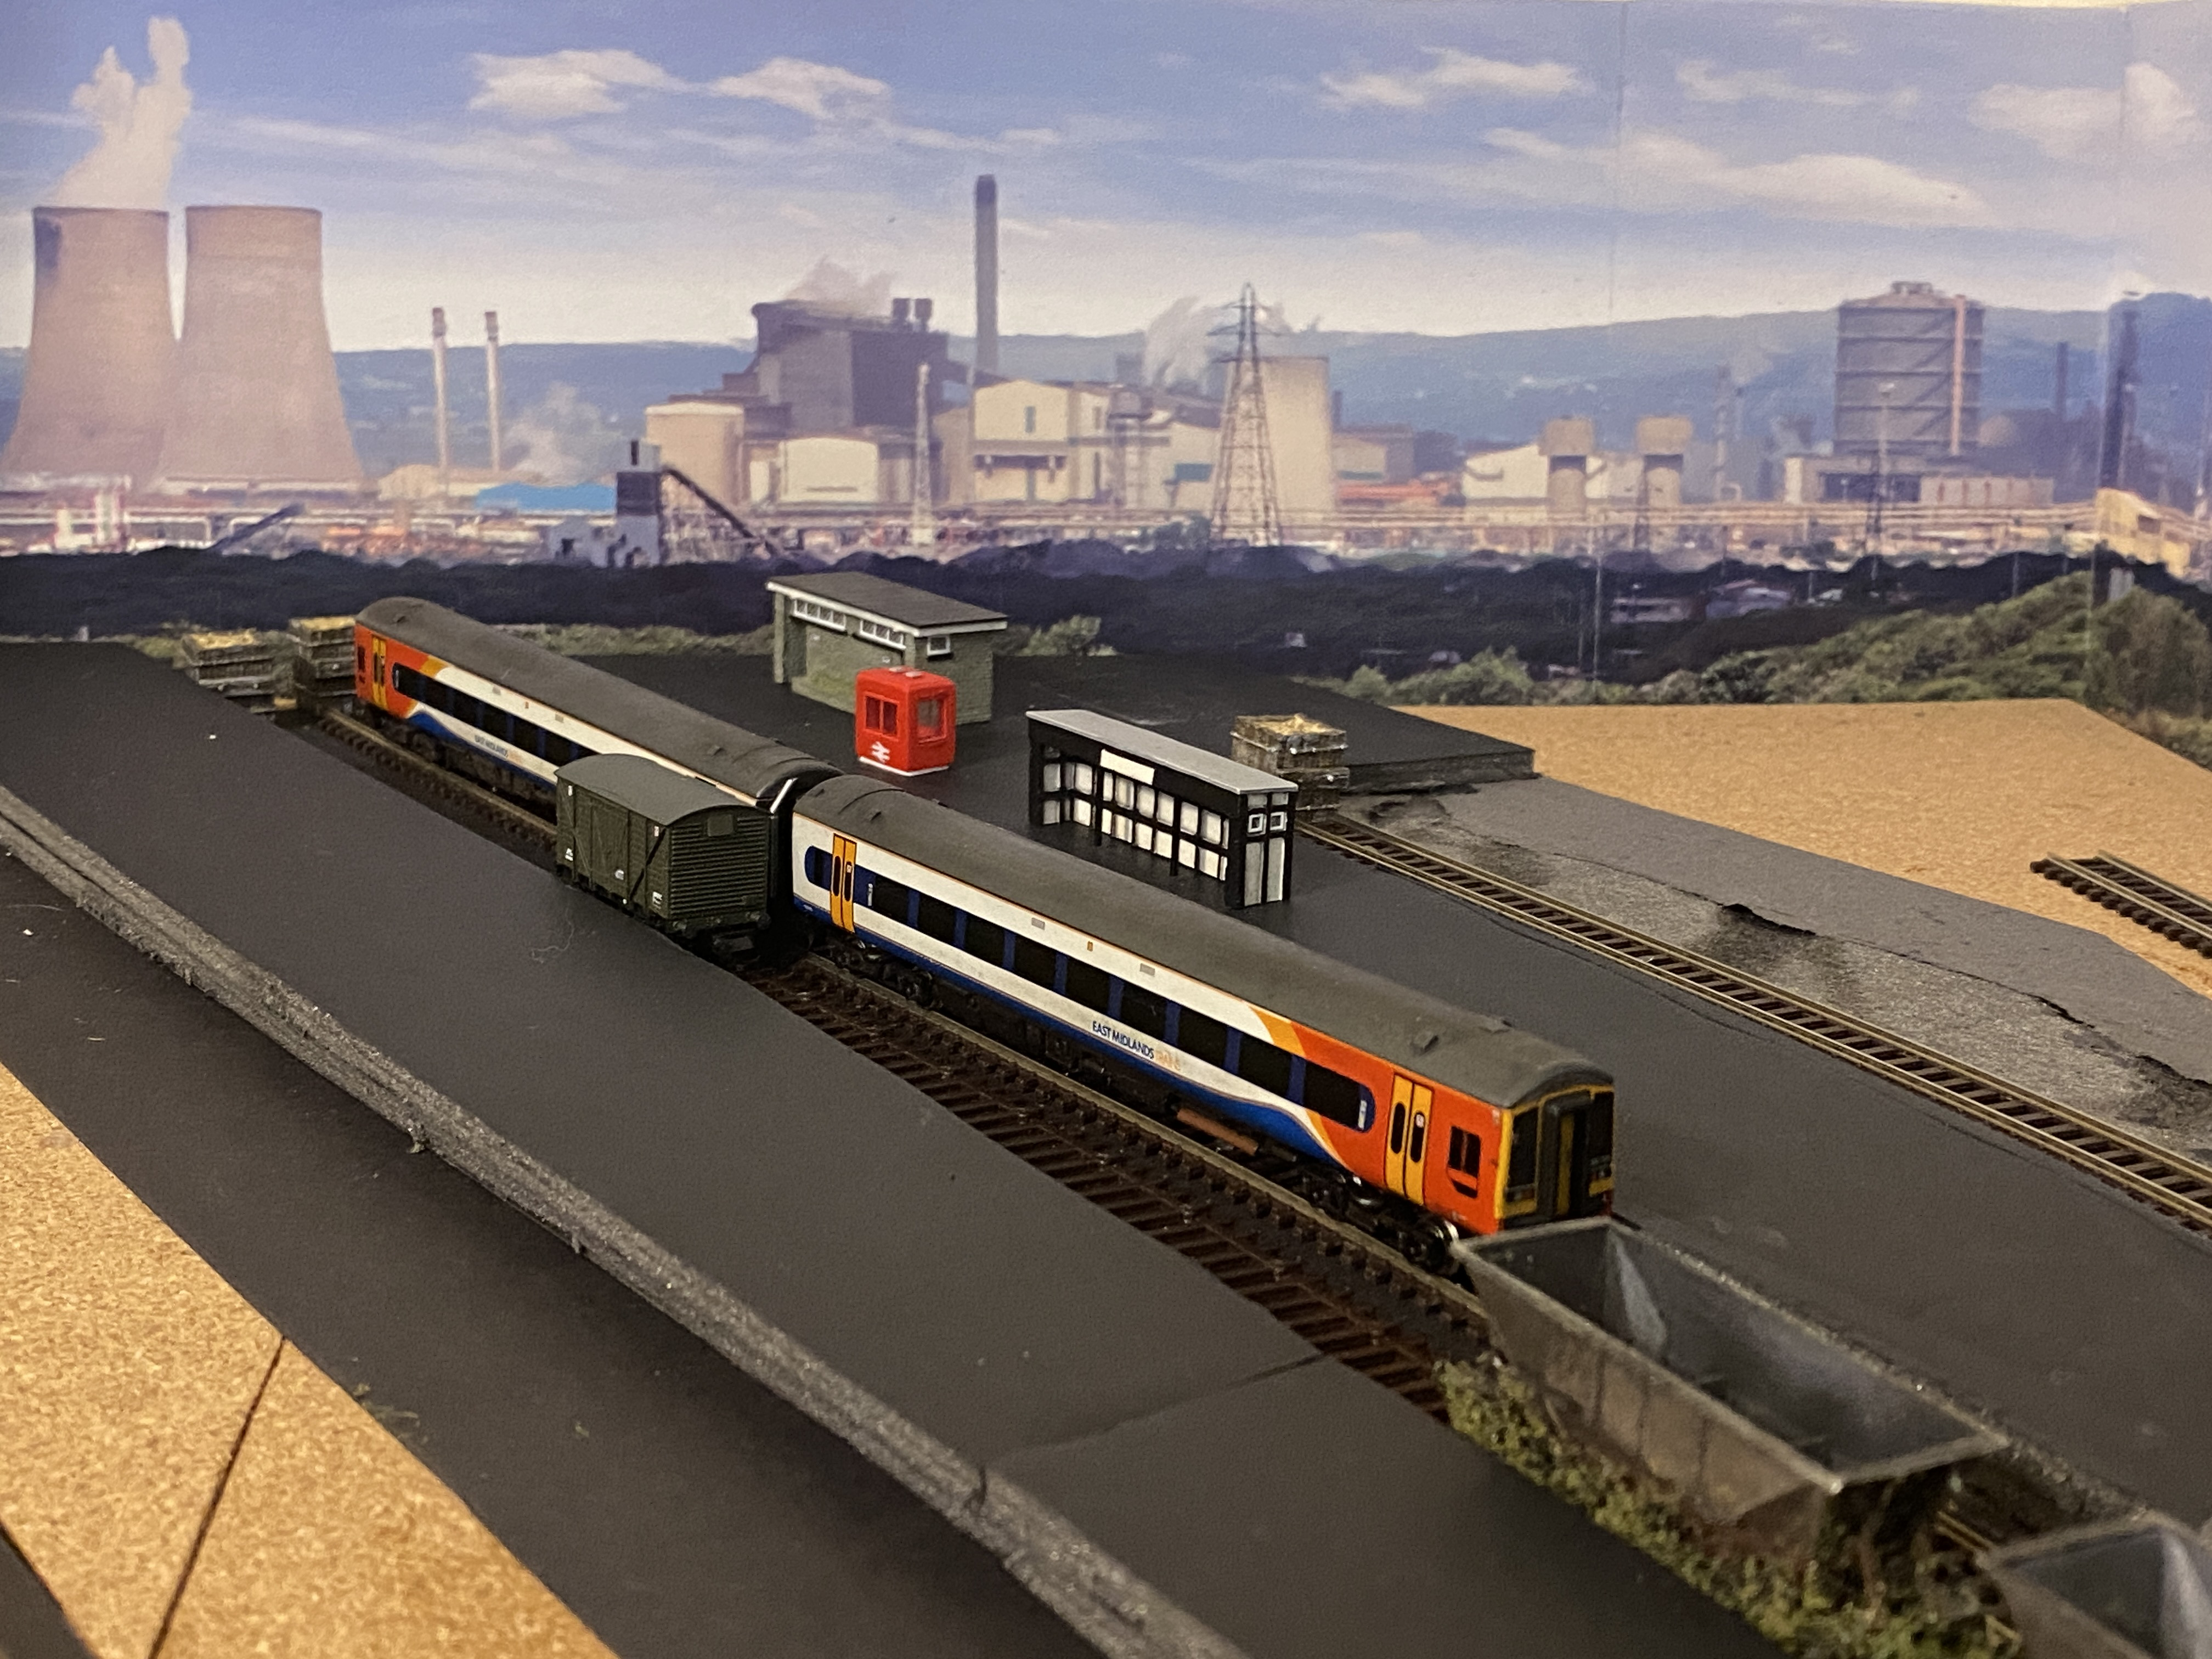
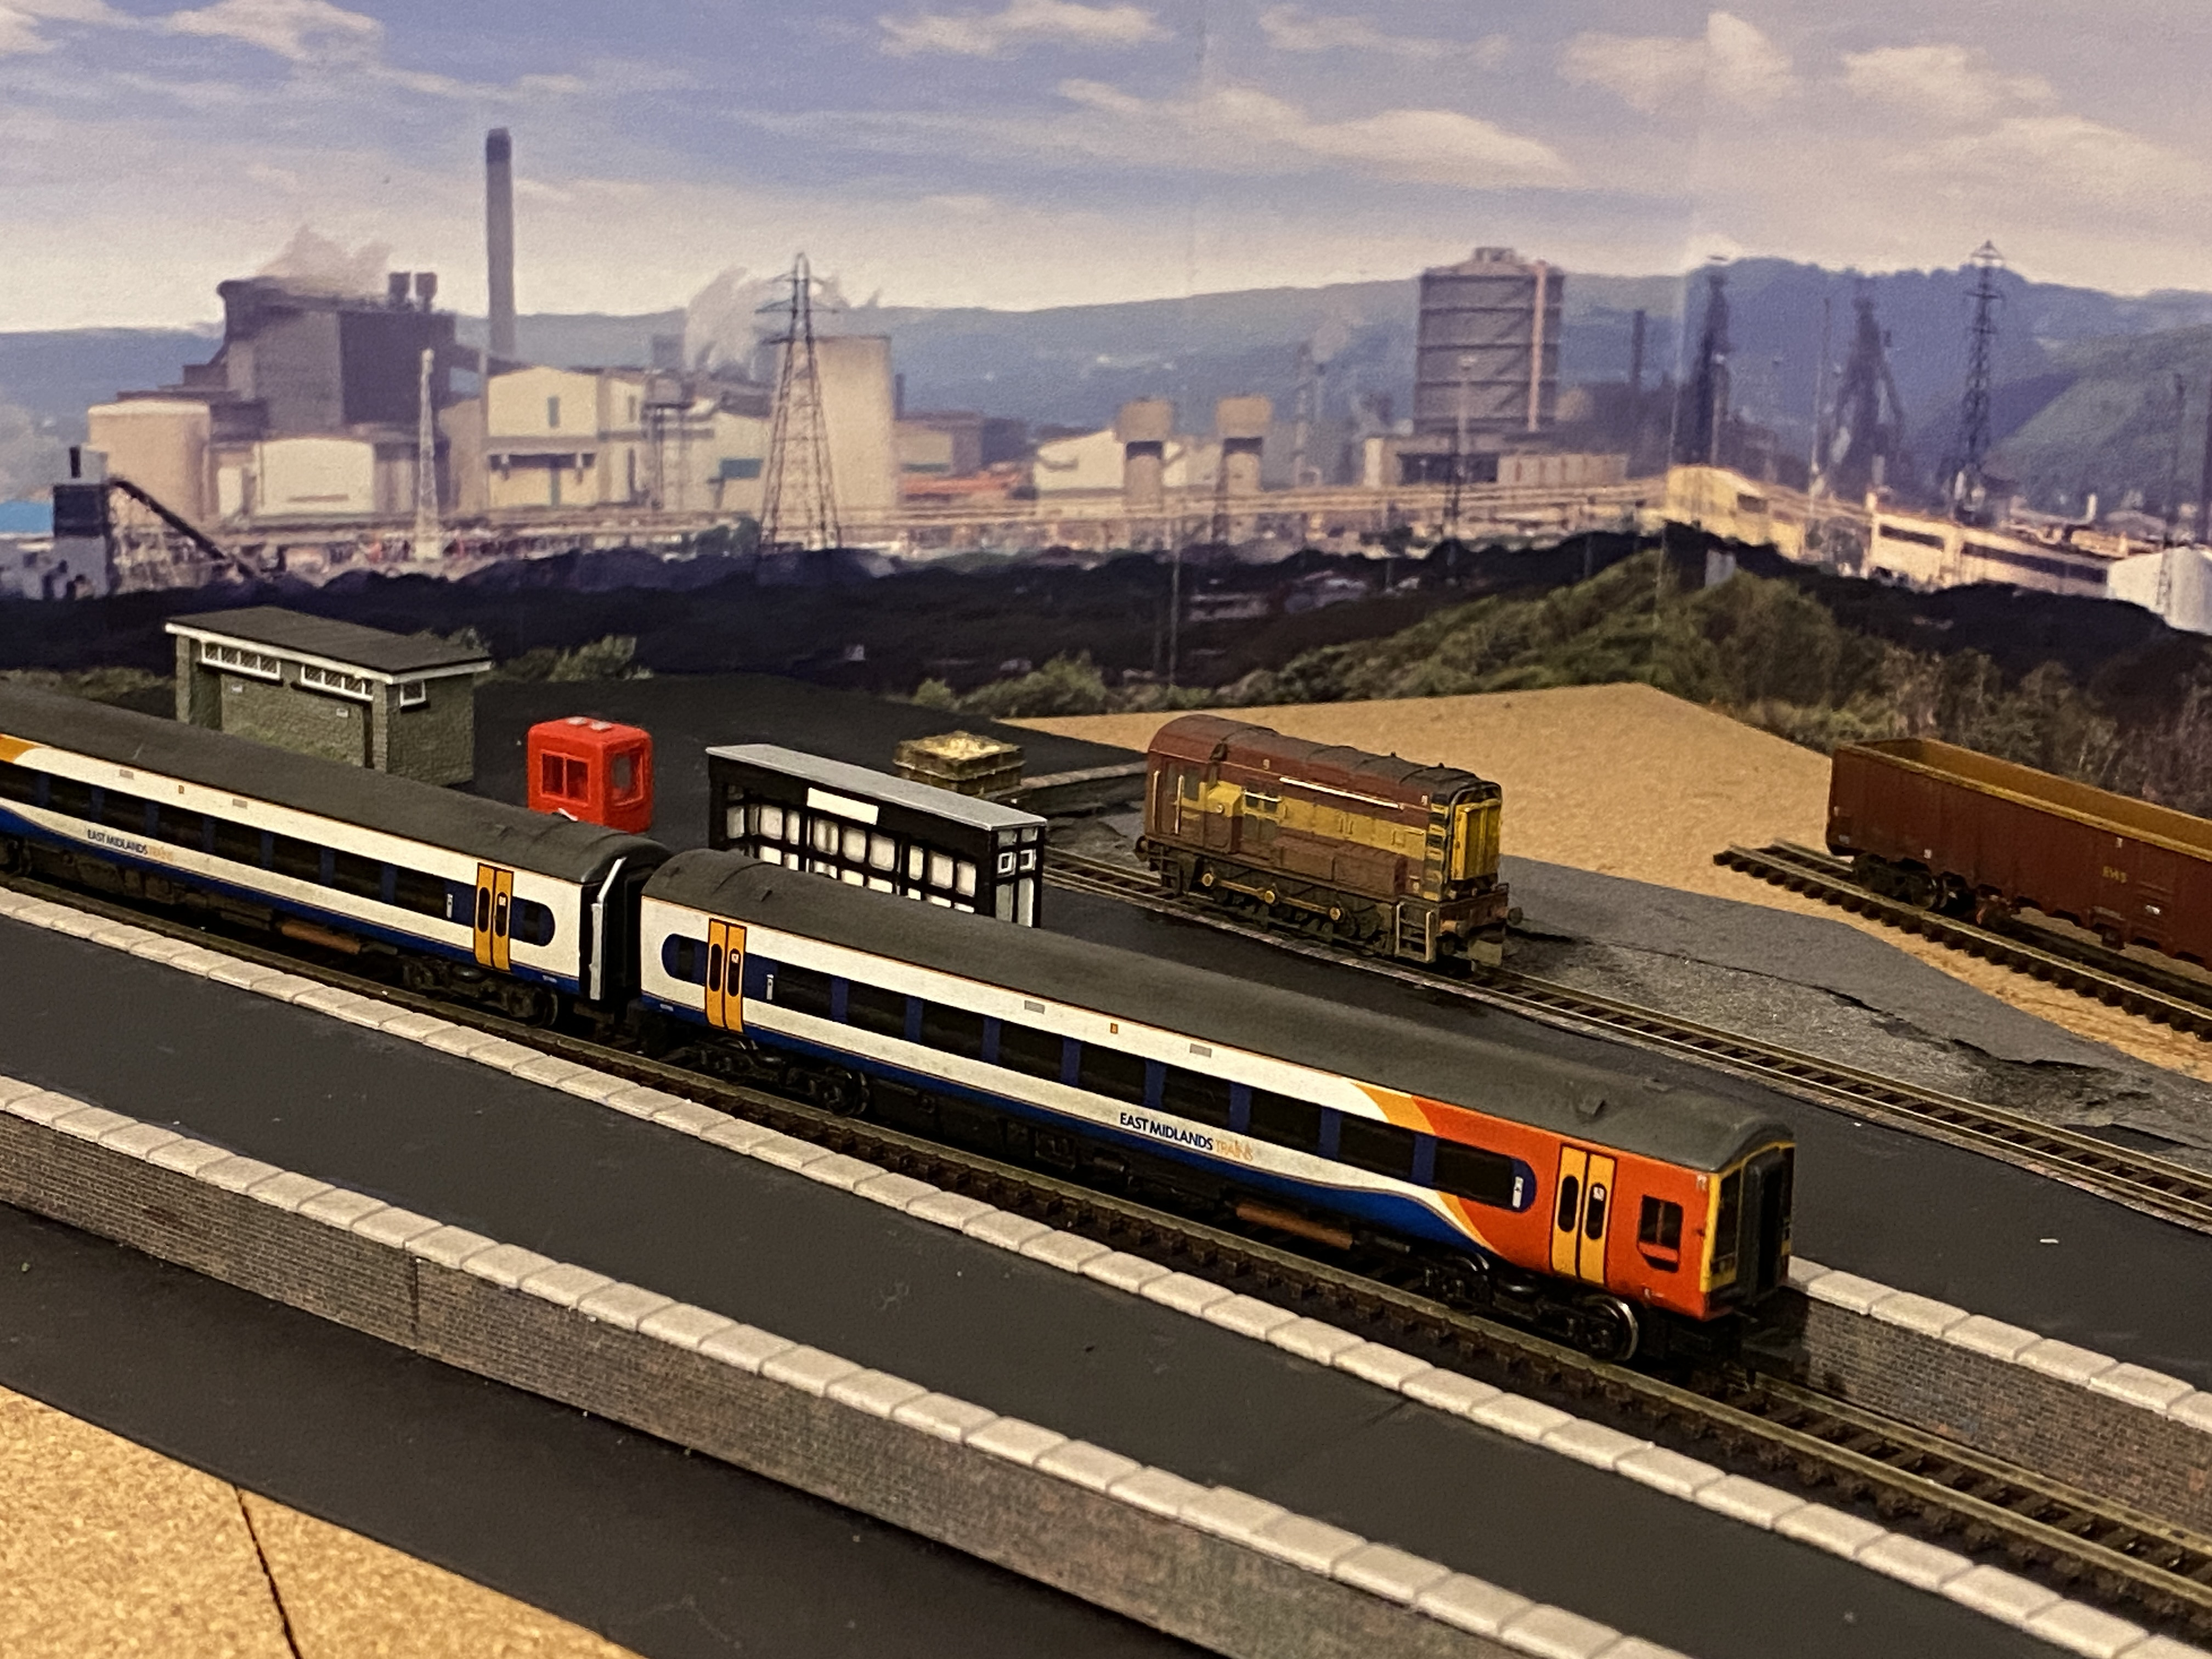
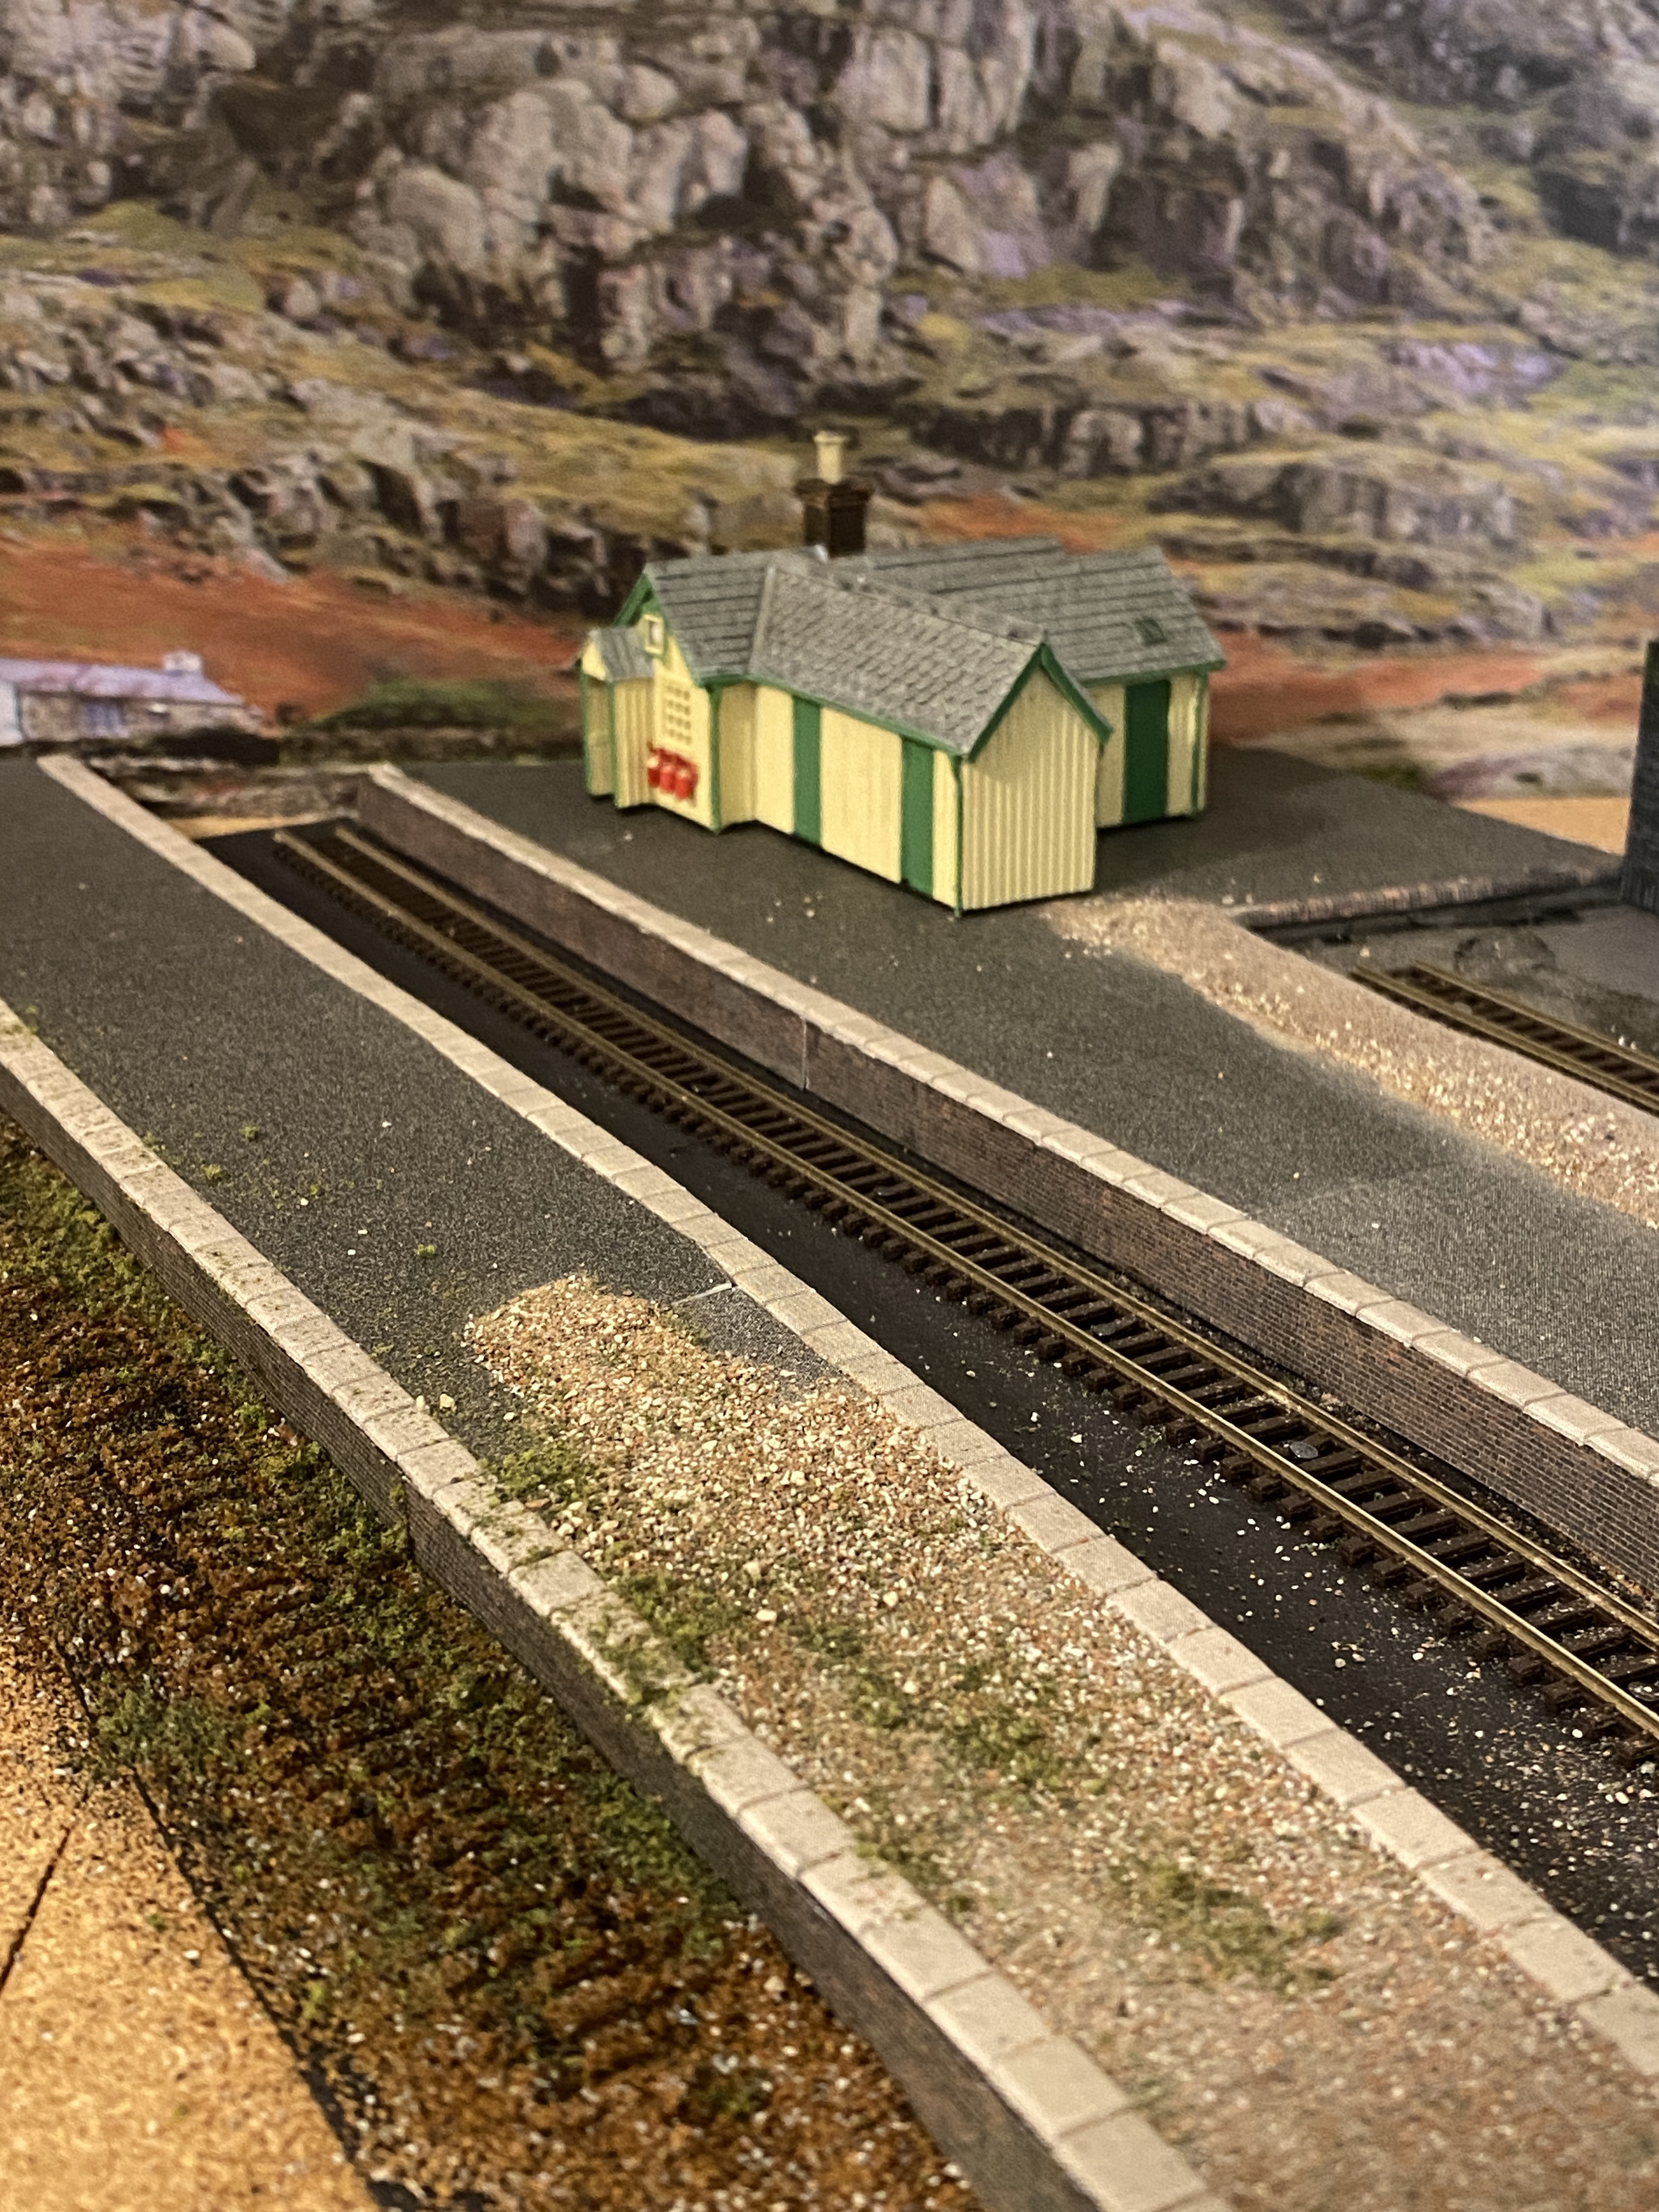
The N-gauge class 158 passenger train at Boghouses.
And the OO-9 Baldwin leading a freight up the mountain away from Tŷ Bach with the passenger stock resting on the shed road. The gradient has been slightly eased.
Posted
Full Member
I bought the first 009 loco, a Baldwin, for use on Porthgarrow. I then saw a very good price advertised on a second similar loco. As Porthgarrow is a show layout I bought the second one as a reserve. If one loco fails on show and you haven’t a spare you have no moving train.
The second loco was weathered more heavily than the first and normally sat “on shed” as a dumped rusty hulk.
At one show the first loco had been running non-stop for two hours so I decided to swap them and rest the warm one. The rusty one at first refused to move. Thinking I had maybe bought a dud and that was why it was cheap I resigned myself to having a static display while the “A” loco rested.
One of “those things” then happened. I accidentally turned the power control towards full instead of towards off.
Lo and behold! The rusty hulk not only started to move but it was hissing, wheezing, slipping and then chuffing!!! I had a sound-fitted loco bought as a standard (non-sound) item making sound on a DC layout. I then learned that this is both normal and that extra power is required but I had discovered both by happy accident!!
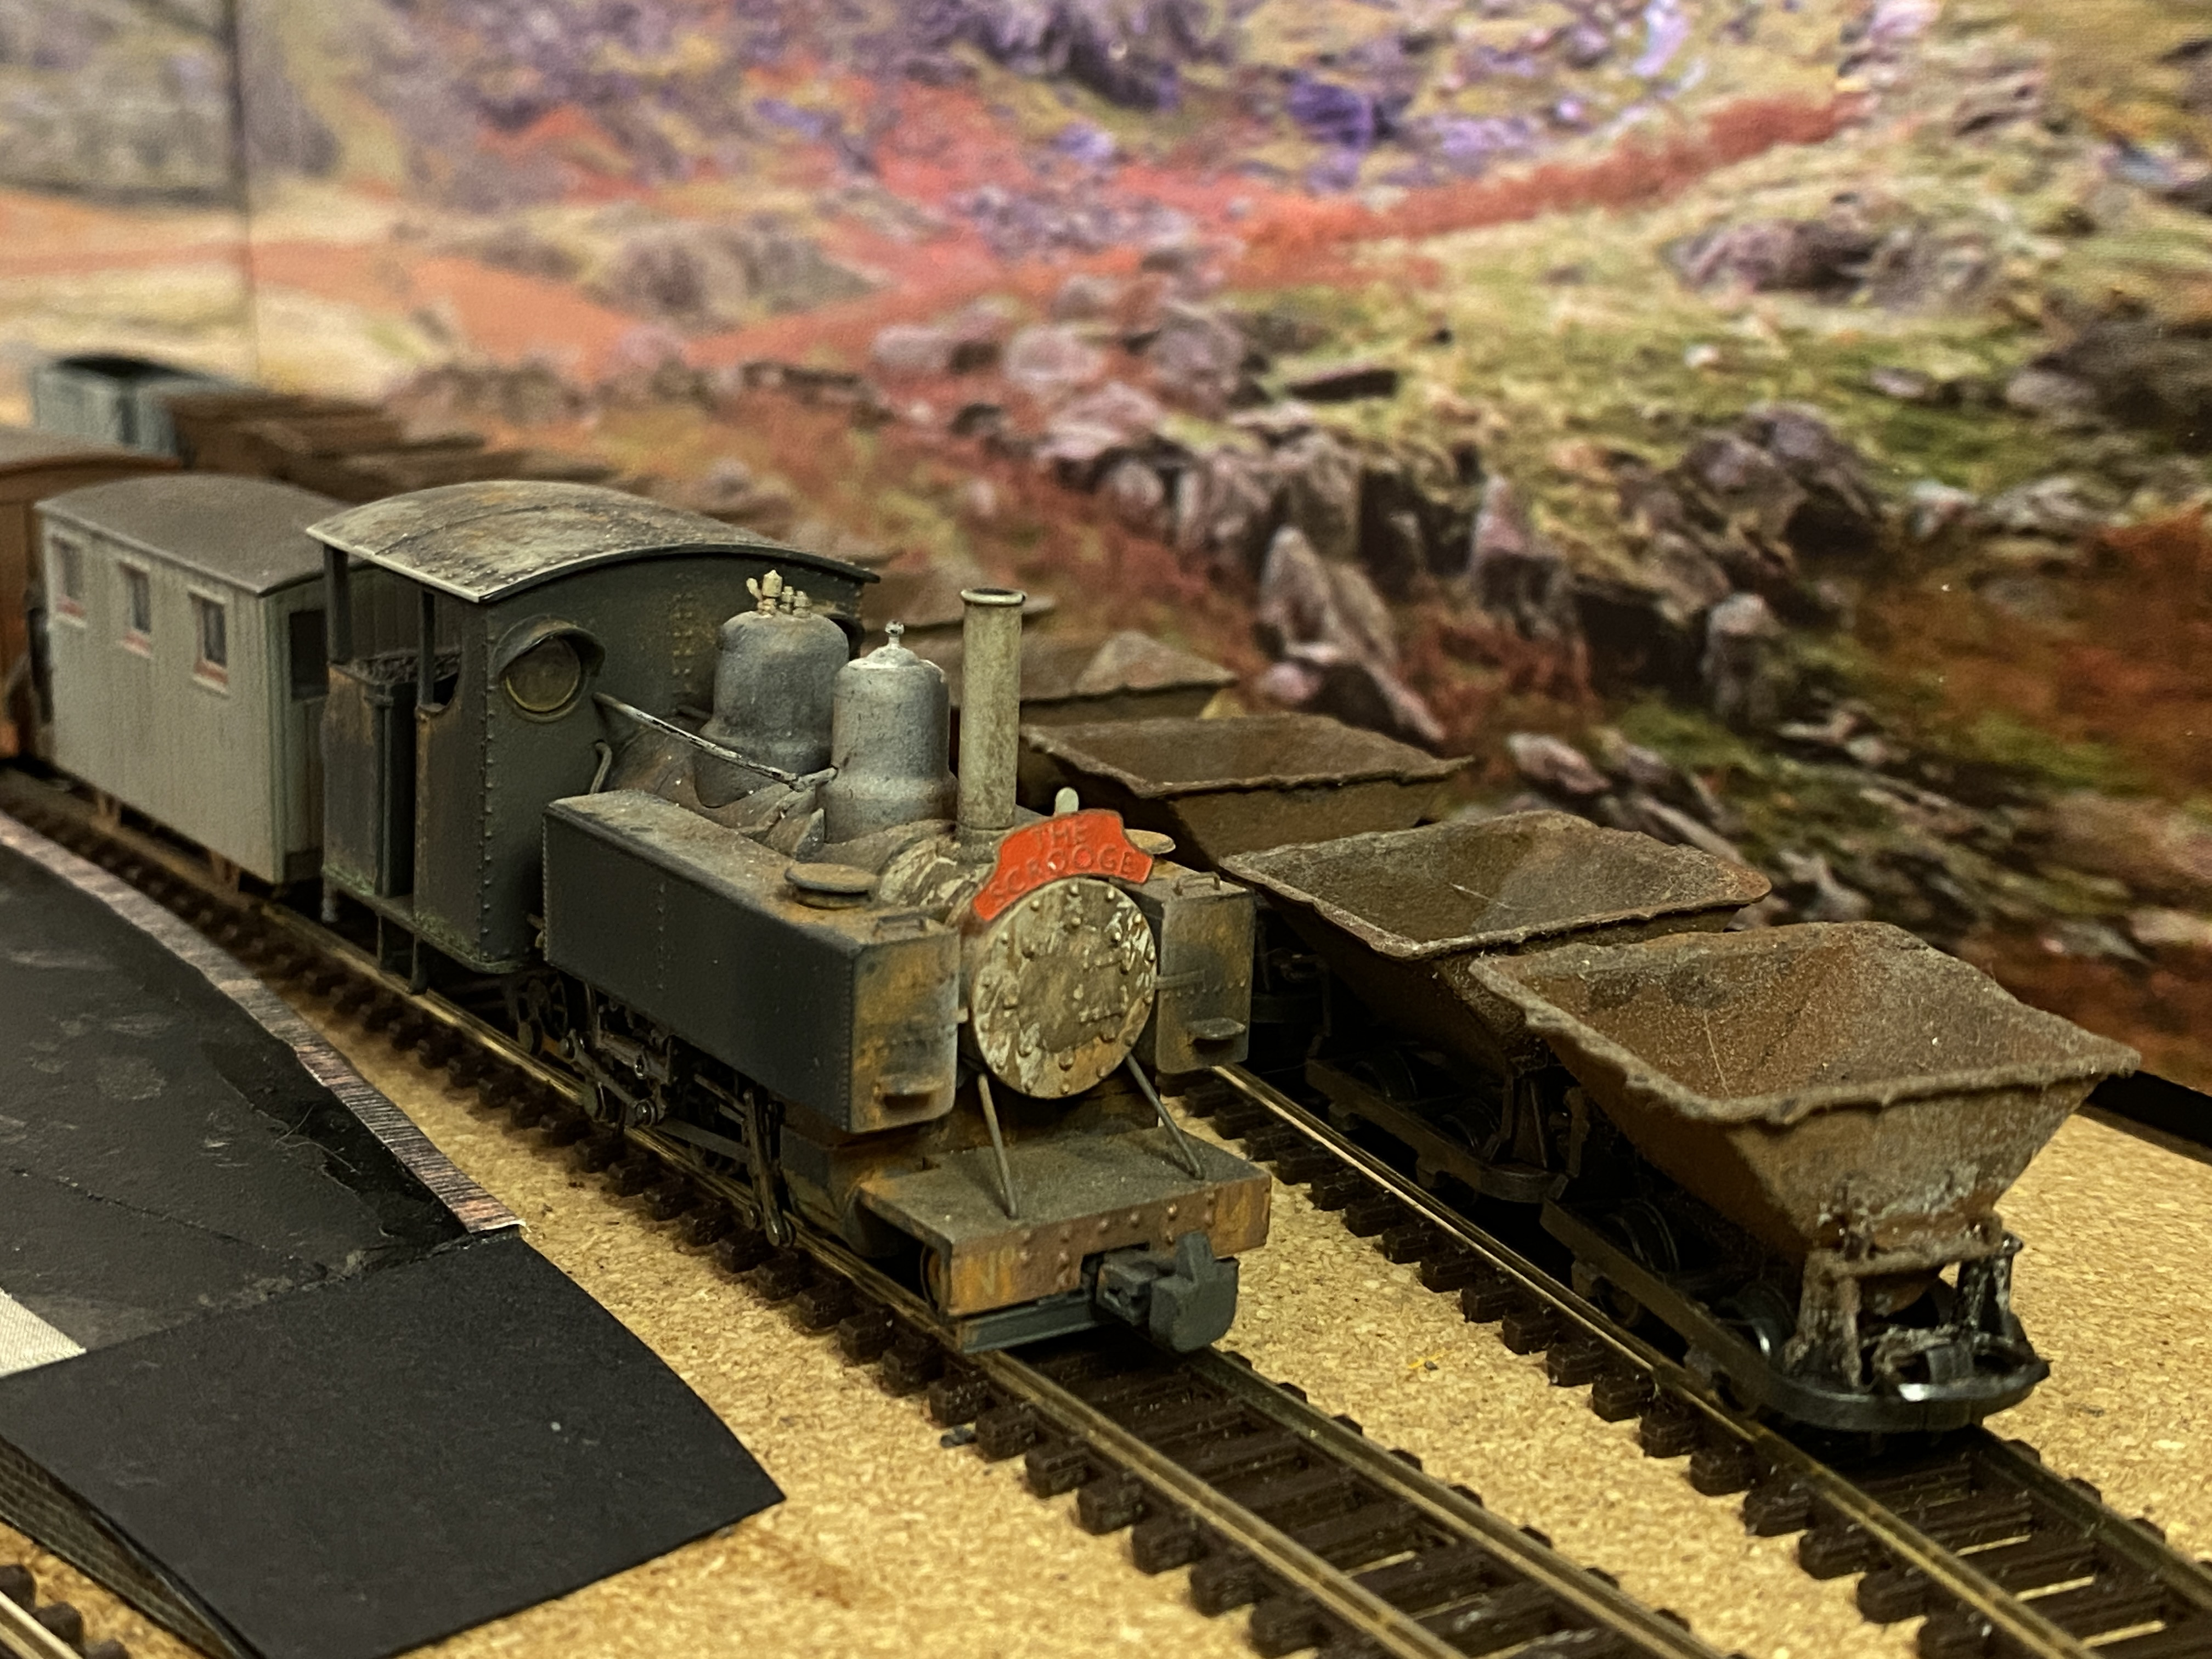
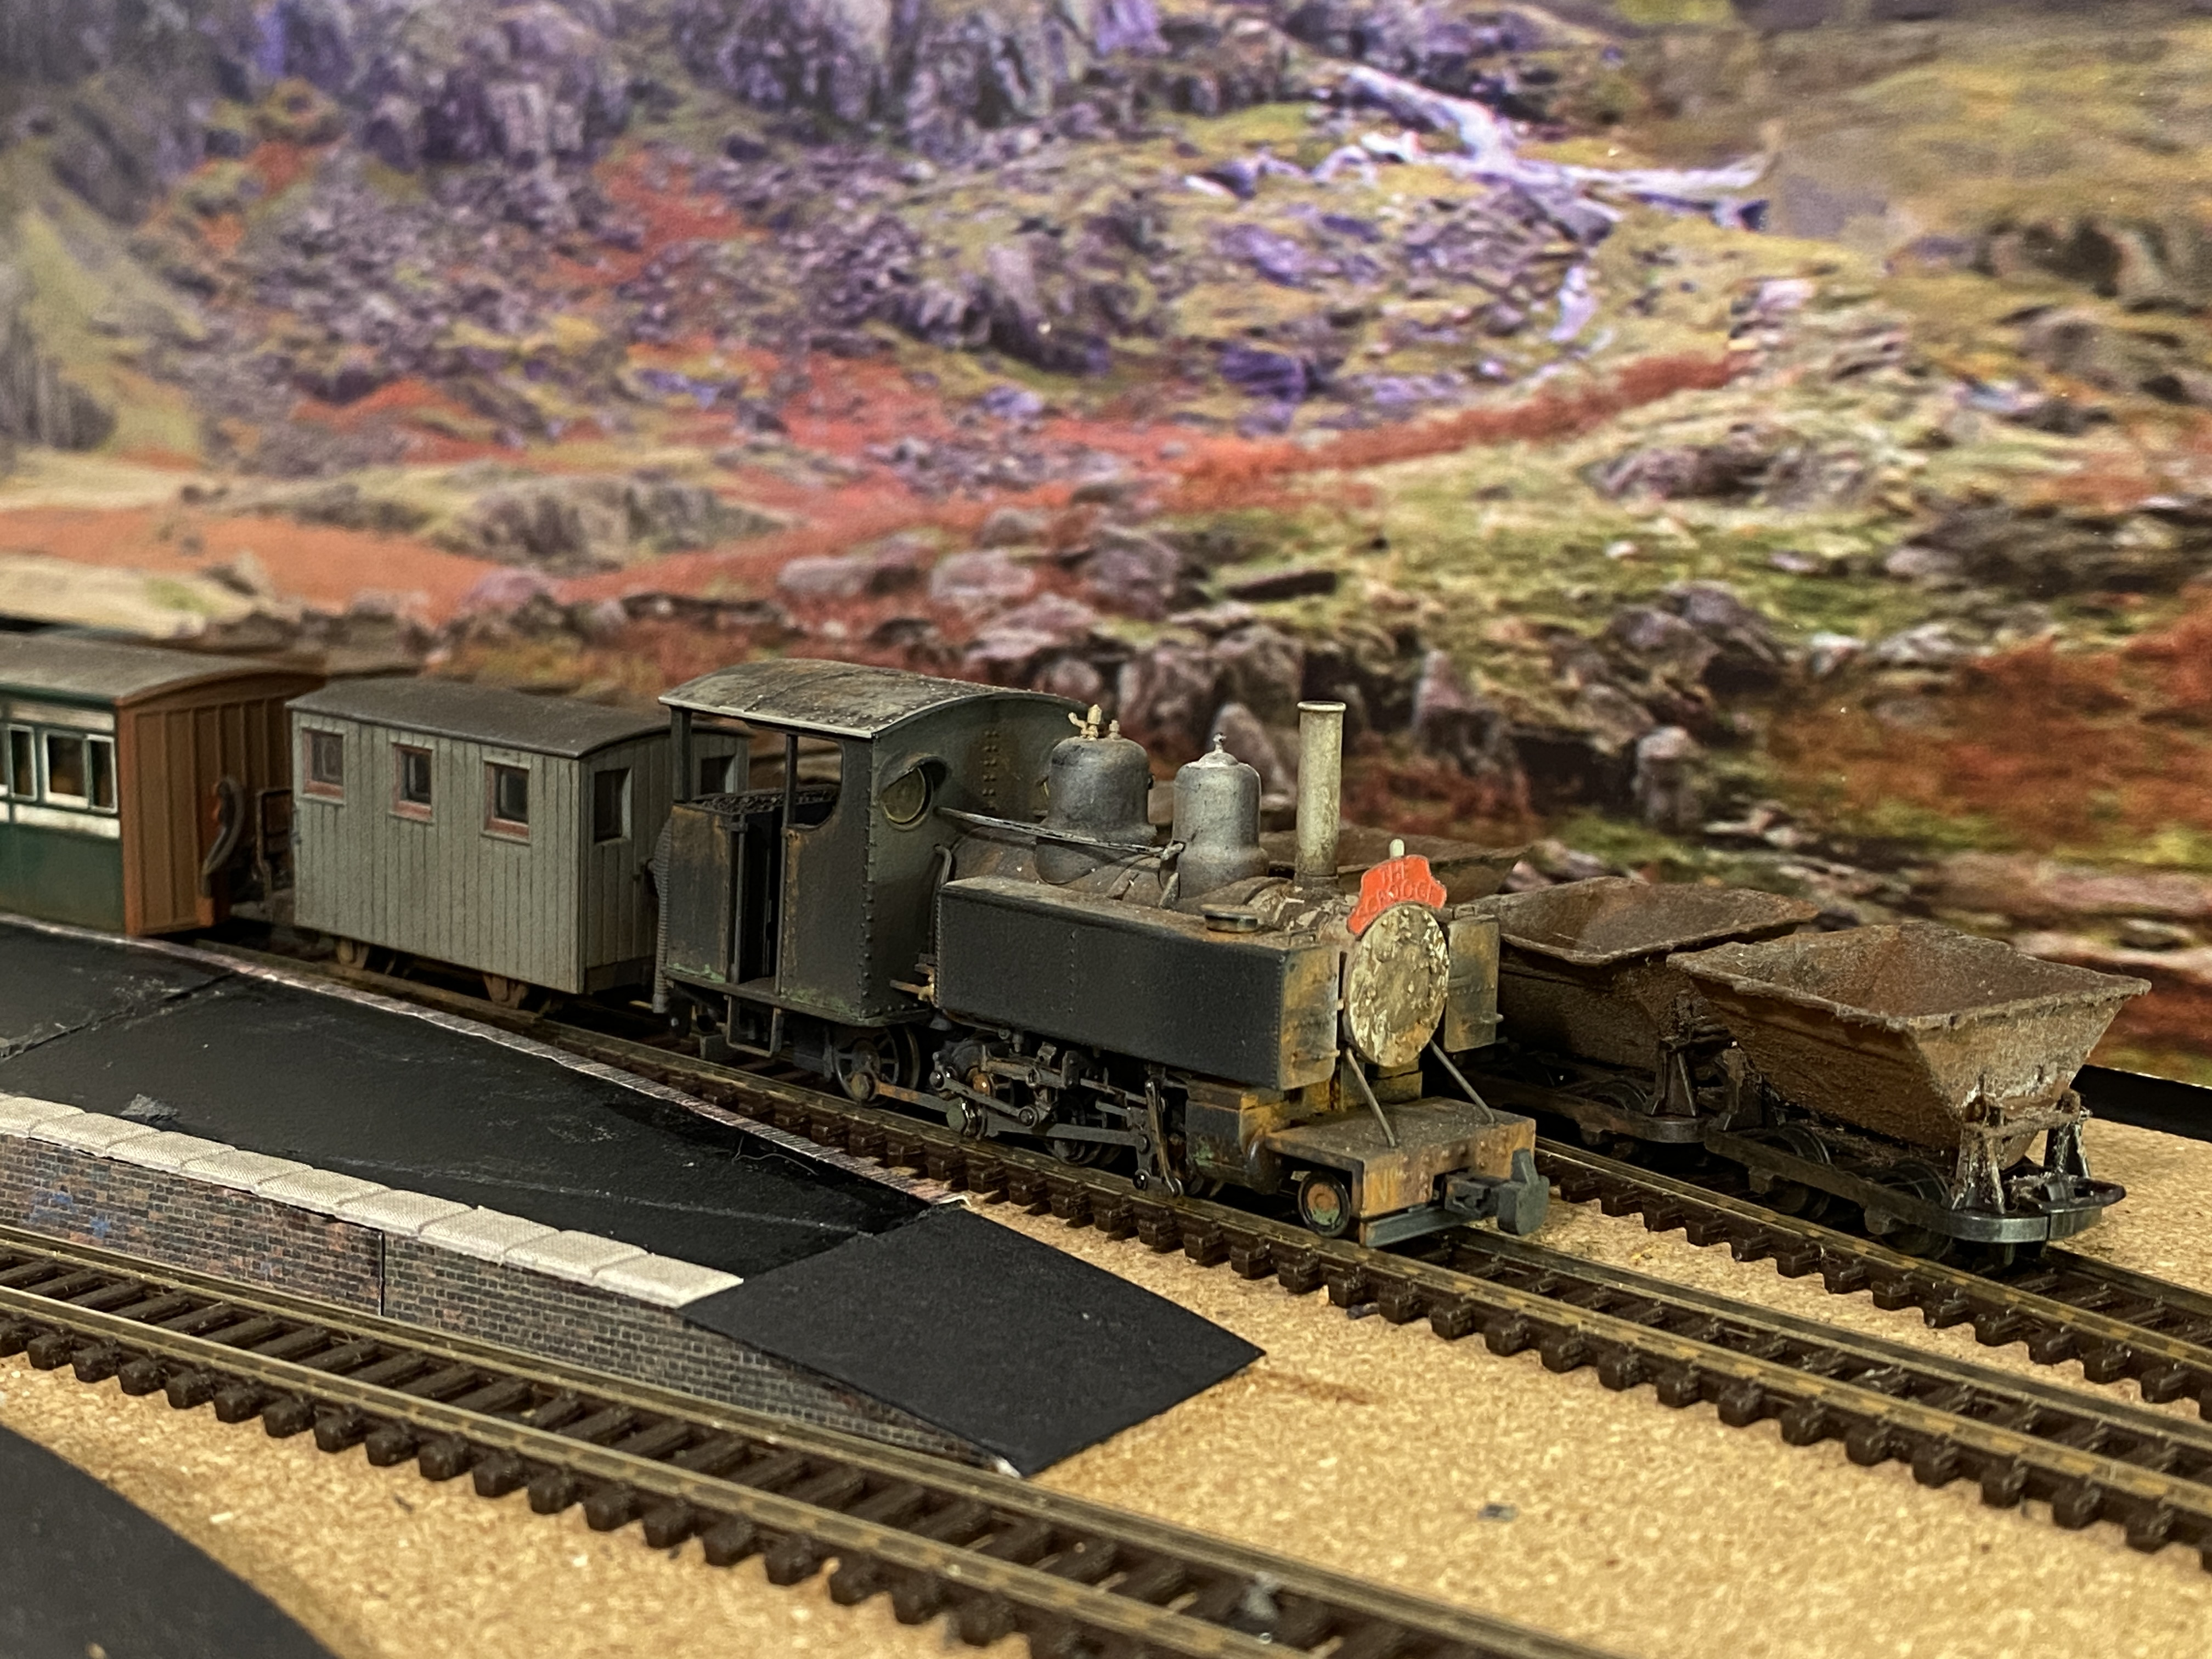
Today I called in at the club room and collected the stock off Porthgarrow, which lives there, for use on Tŷ Bach. The laden skips and the sound-fitted Baldwin have joined the rest of the 009 fleet in the cottage. Porthgarrow is not due on show until July 2025 so leaving the stock there served no purpose.
A slightly brisk start - as the controller needs careful handling to start the sound-fitted loco smoothly - and a climb up the mountain was caught on camera.

Full Member
What a good find and happy incident! The loco sounds marveleous

Cheers,
Claus
www.flickr.com/photos/ellef/
Claus
www.flickr.com/photos/ellef/
Posted
Site staff

Posted
Full Member
Cheers Pete.
Posted
Full Member
peterm said
Go on, Rick. Let the sound bug bite you.
From “Post #290,718”, 13th December 2024, 12:05 am
I don’t object to sound at that level. On DC I have no control over it and for reasons already mentioned I am not getting into DCC.
Full Member
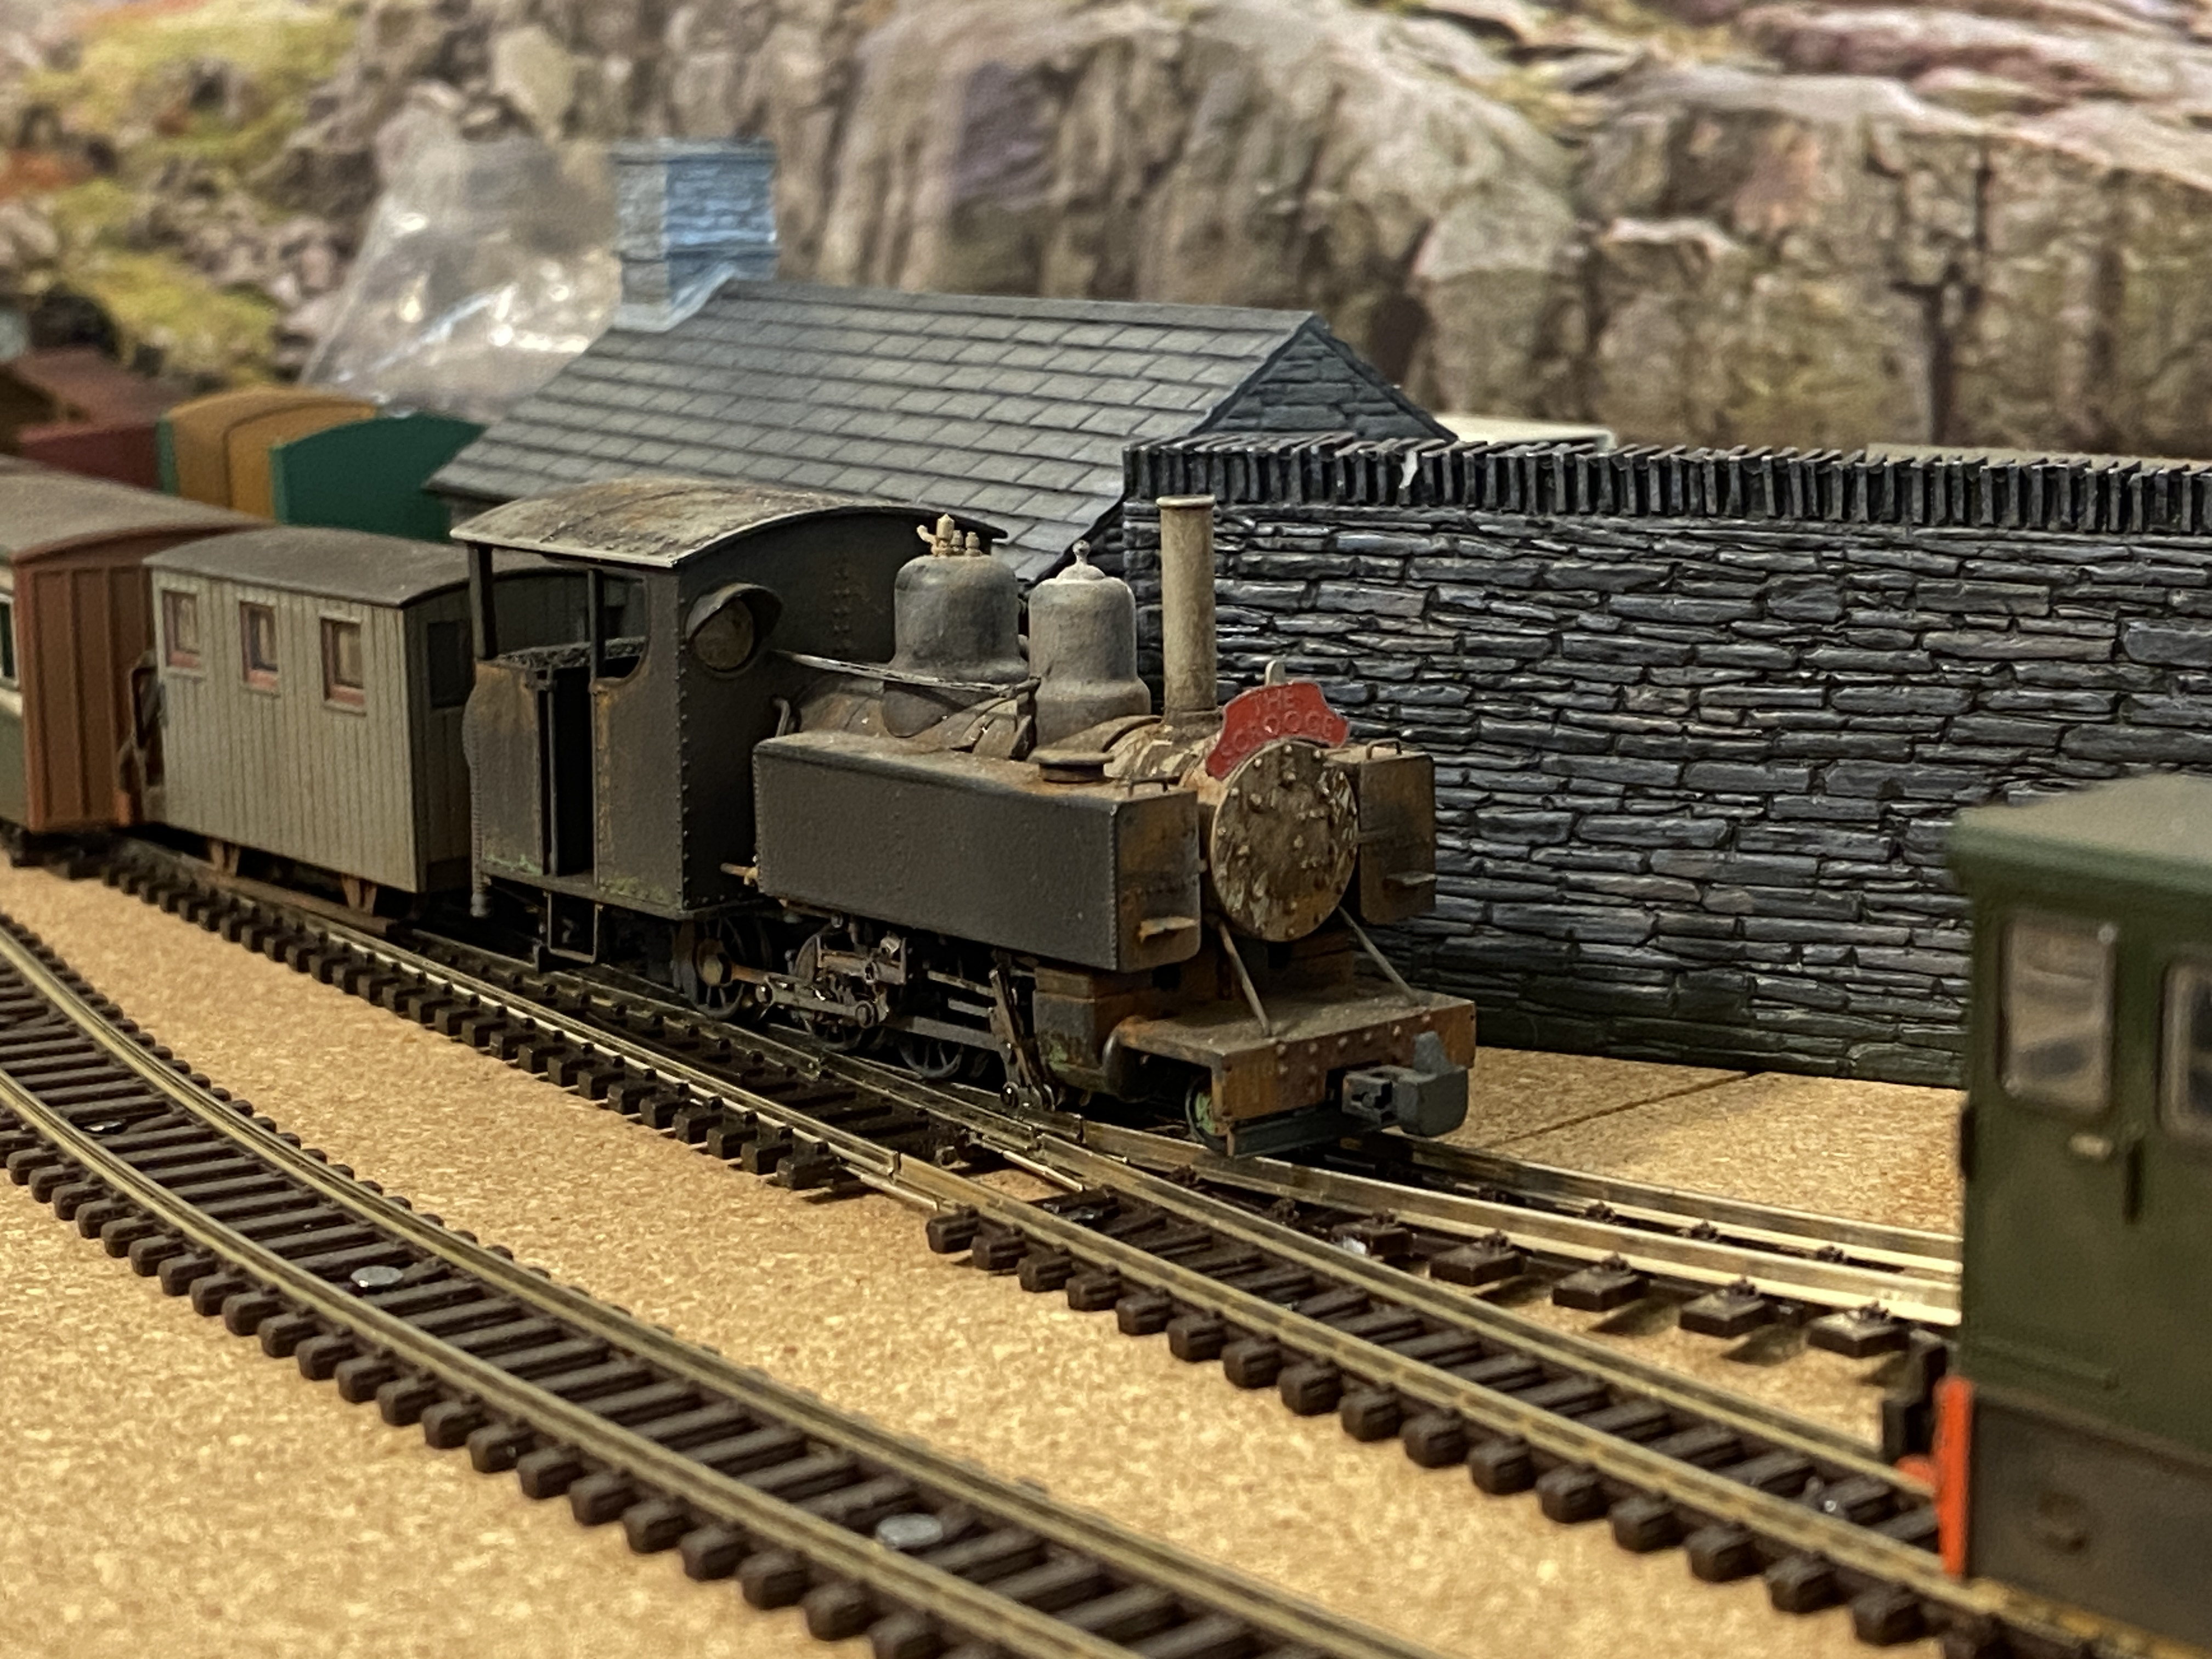
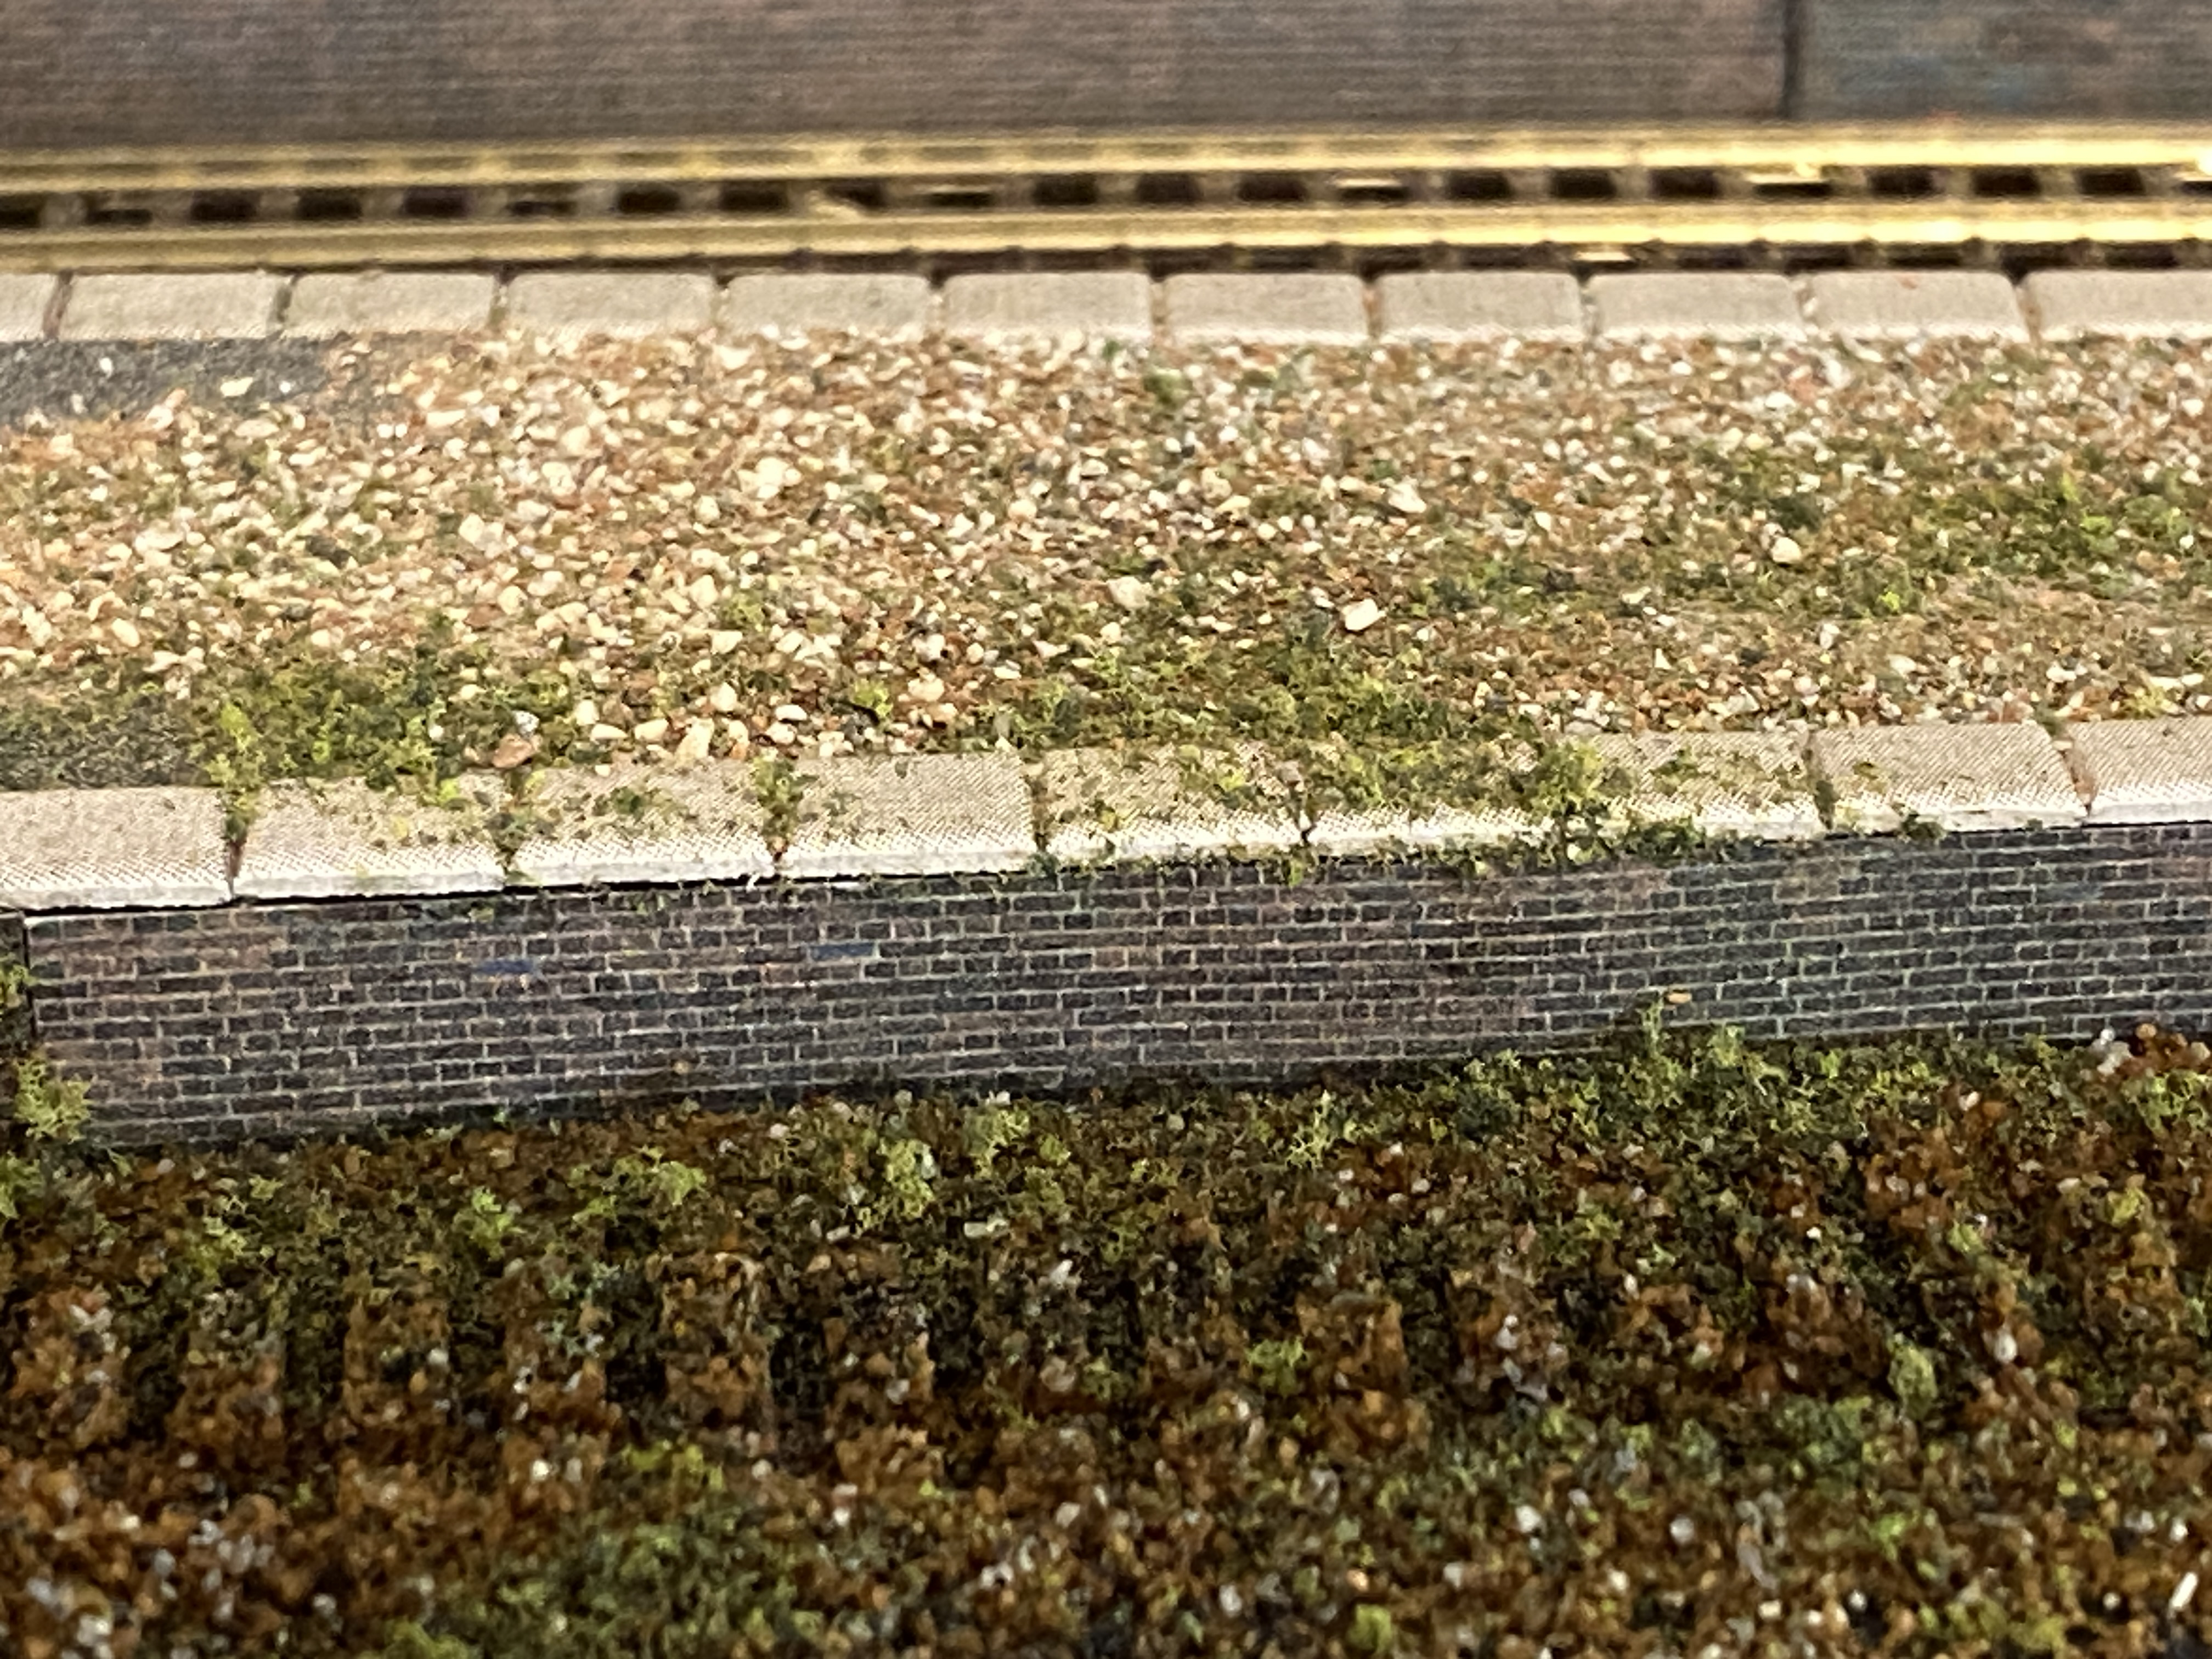
The faces are Scalescenes TX24 Dark Brown Brick. The coping stones are from Metcalfe pack P0210 “Stone Paving Slabs”.
With the use of two gauges some ingenuity has been applied to get a realistic appearance at both scales. The download was printed at 63% which is TT120-size. Approximately midway between 1:76 and 1:148. The coping stones are a size which scales up for 1:76 to around 18” x 12” and down for 1:148 to around 36” x 24”. Not utterly unrealistic either way.
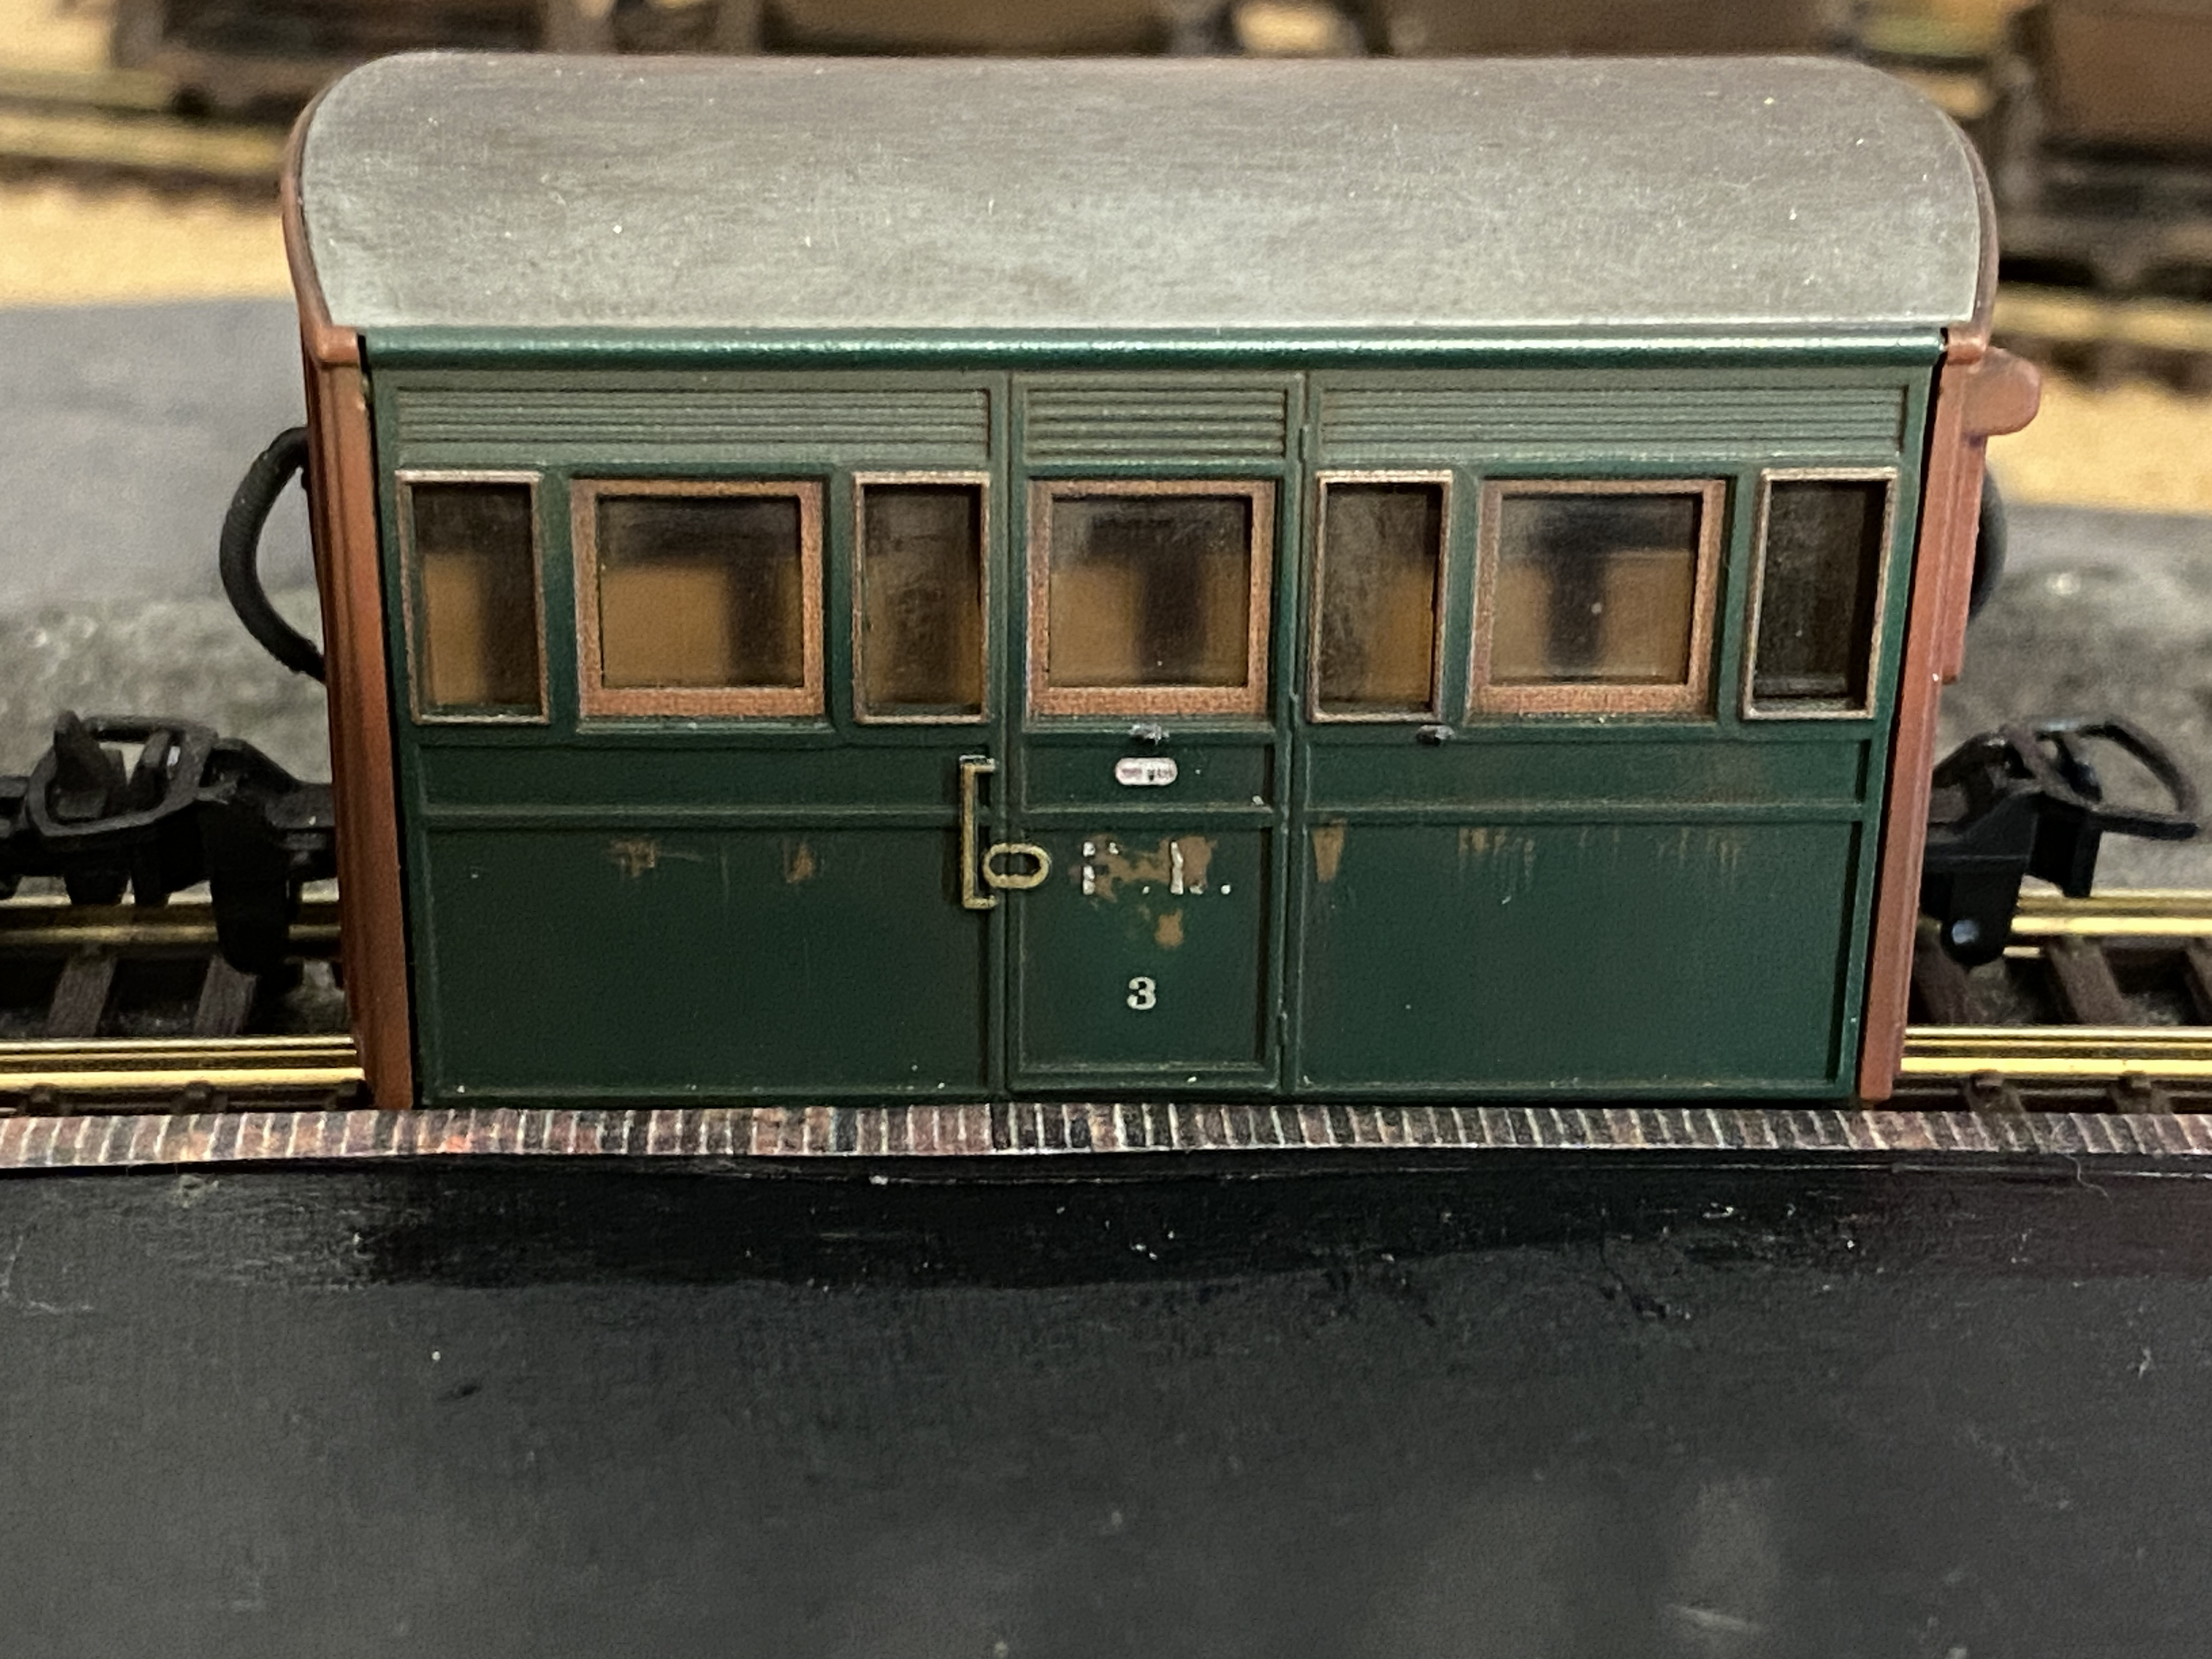
The 009 platform, which doubles as the N-gauge loco siding and which will have some redundant wagons on it, has brick edging rather than pavers. This is because the clearance to some carriage doors is minimal and the height of a card paver was too much compared with just printed paper.
In due course the platform surfaces will be infilled with a mix of materials. And then the ballast can go down.
We see the main-line Hunslet in the platform with a bug-box illustrating the minimal clearance. Slate wagons sit in the other active platform and skips are parked on the siding. The island platform nearest the camera is disused with track lifted

 And we see the N-gauge class 158 at its platform with a “gronk” class 08 awaiting its next duty and a “megabox” wagon on the siding
Full Member
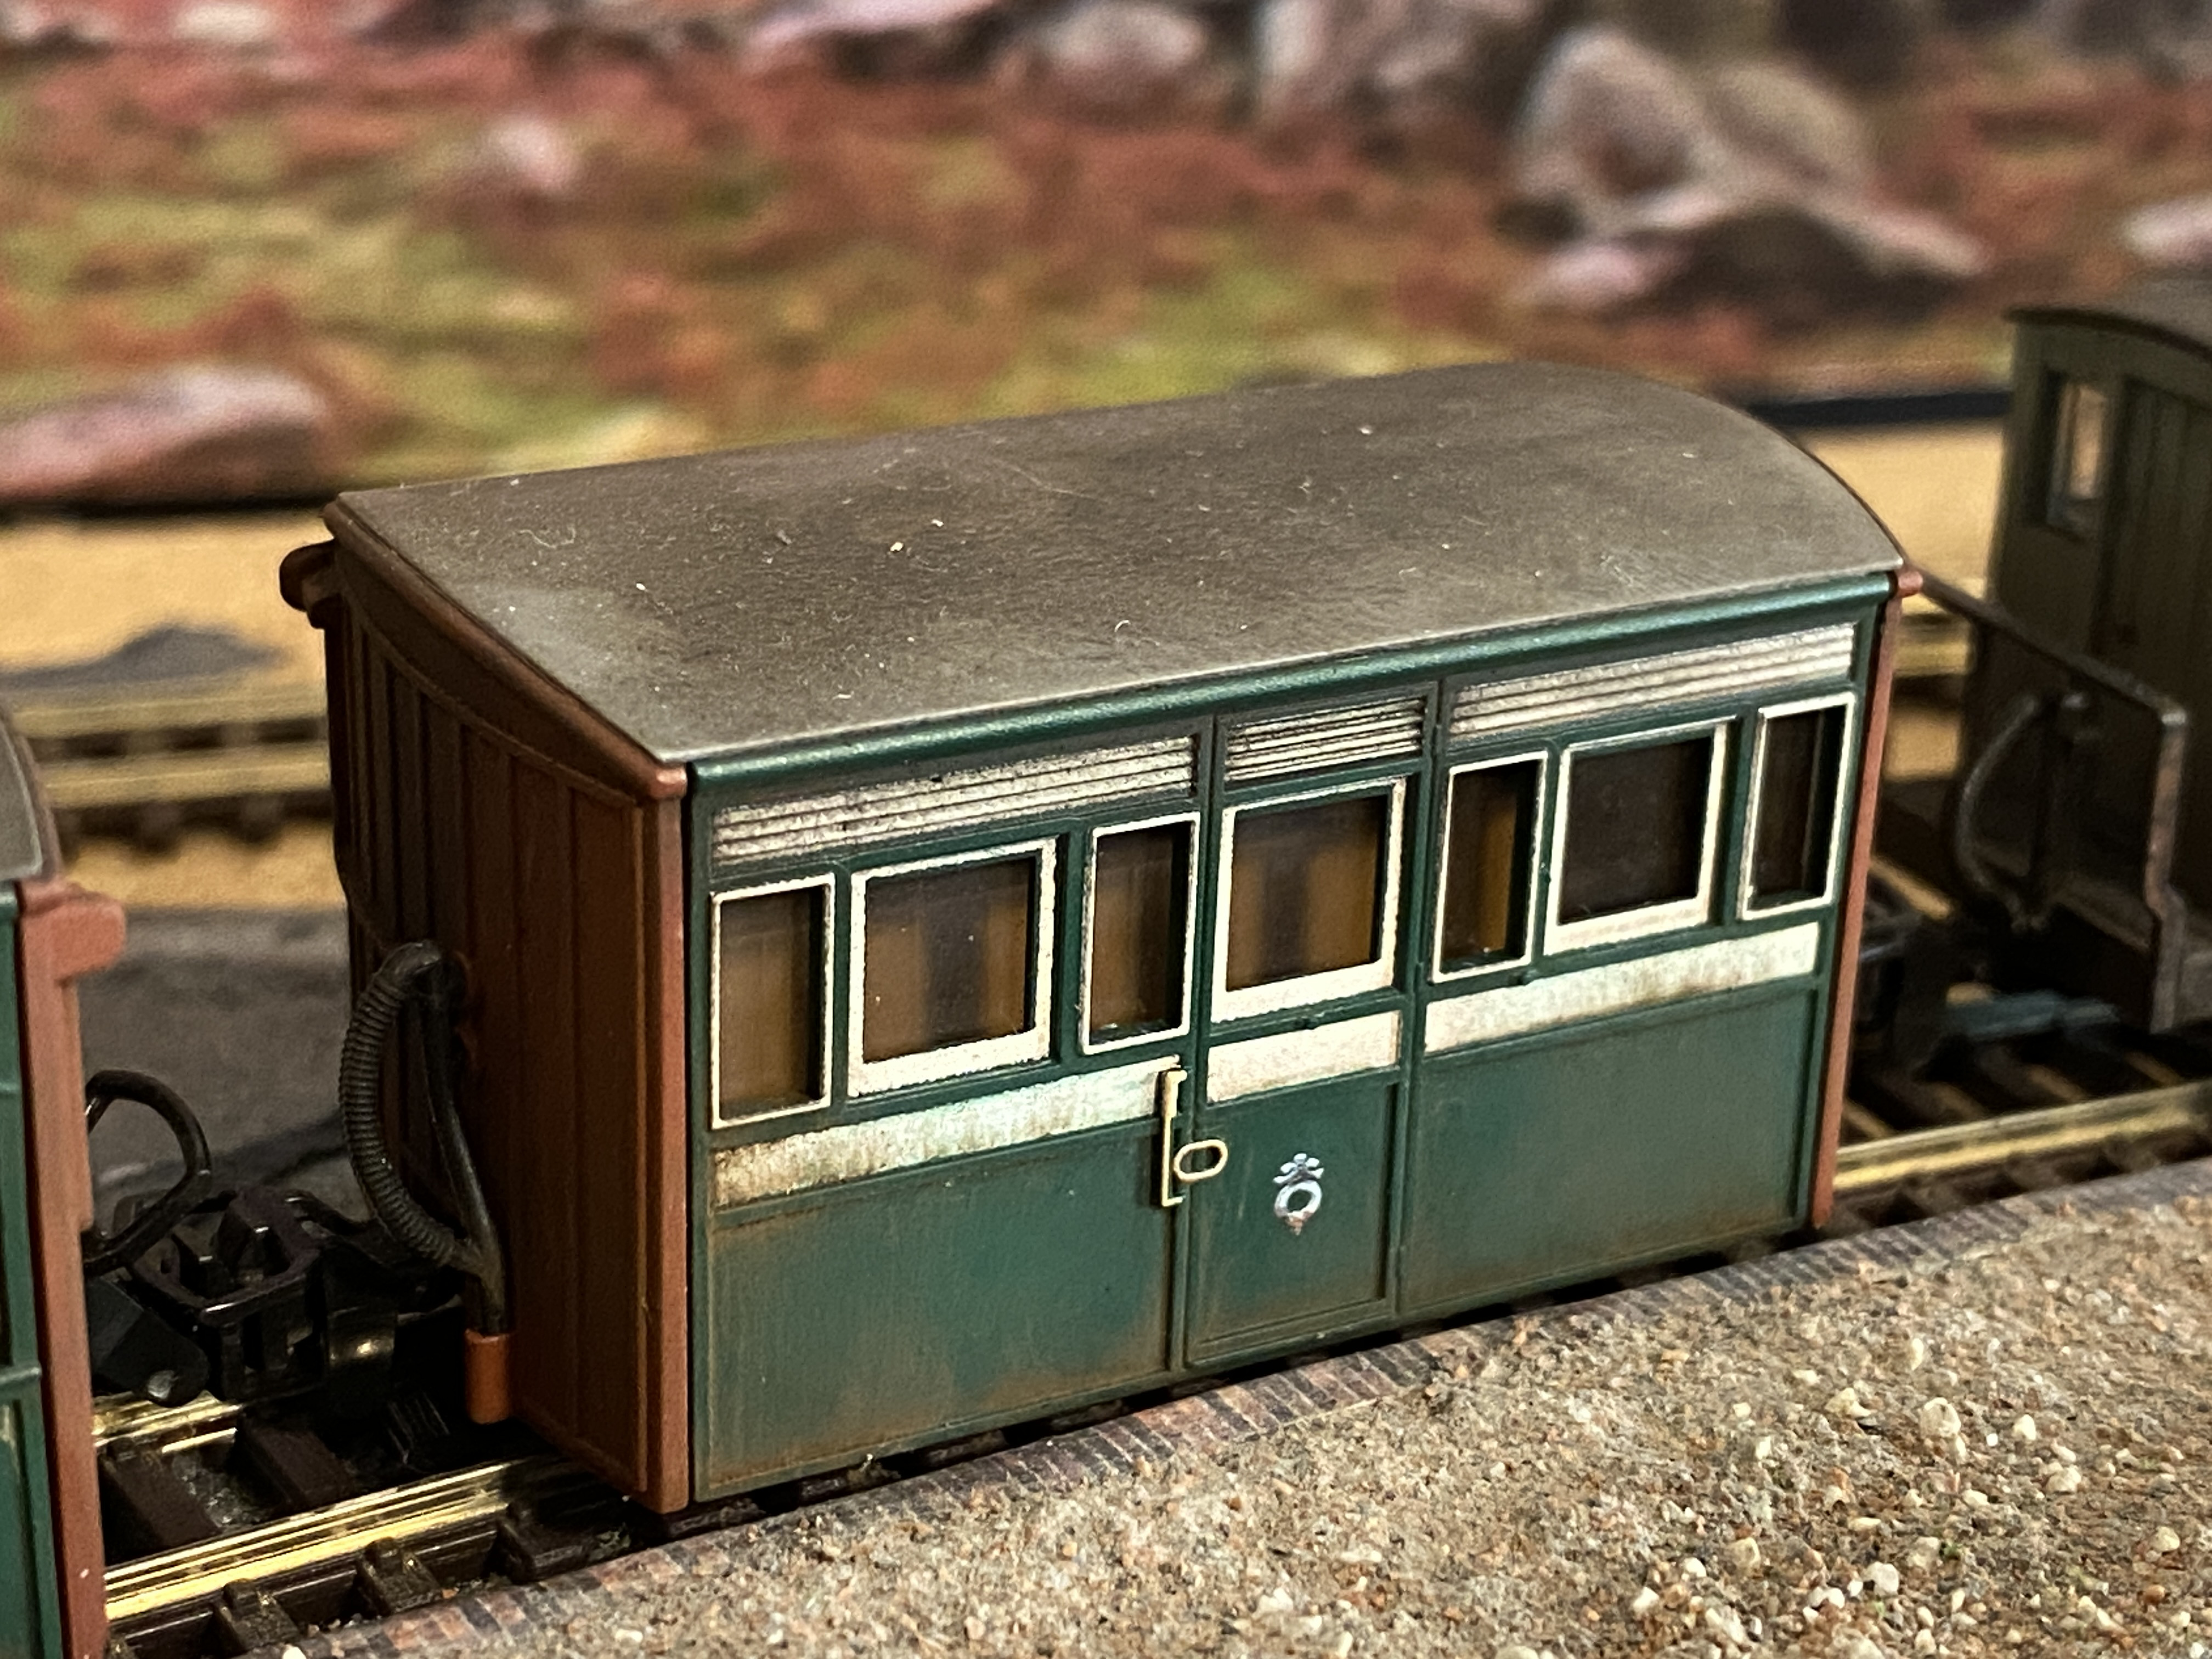
Pausing in the station after running
And off up the mountain to return the hill folk home.
 Last edit: by Gwiwer
Posted
Full Member
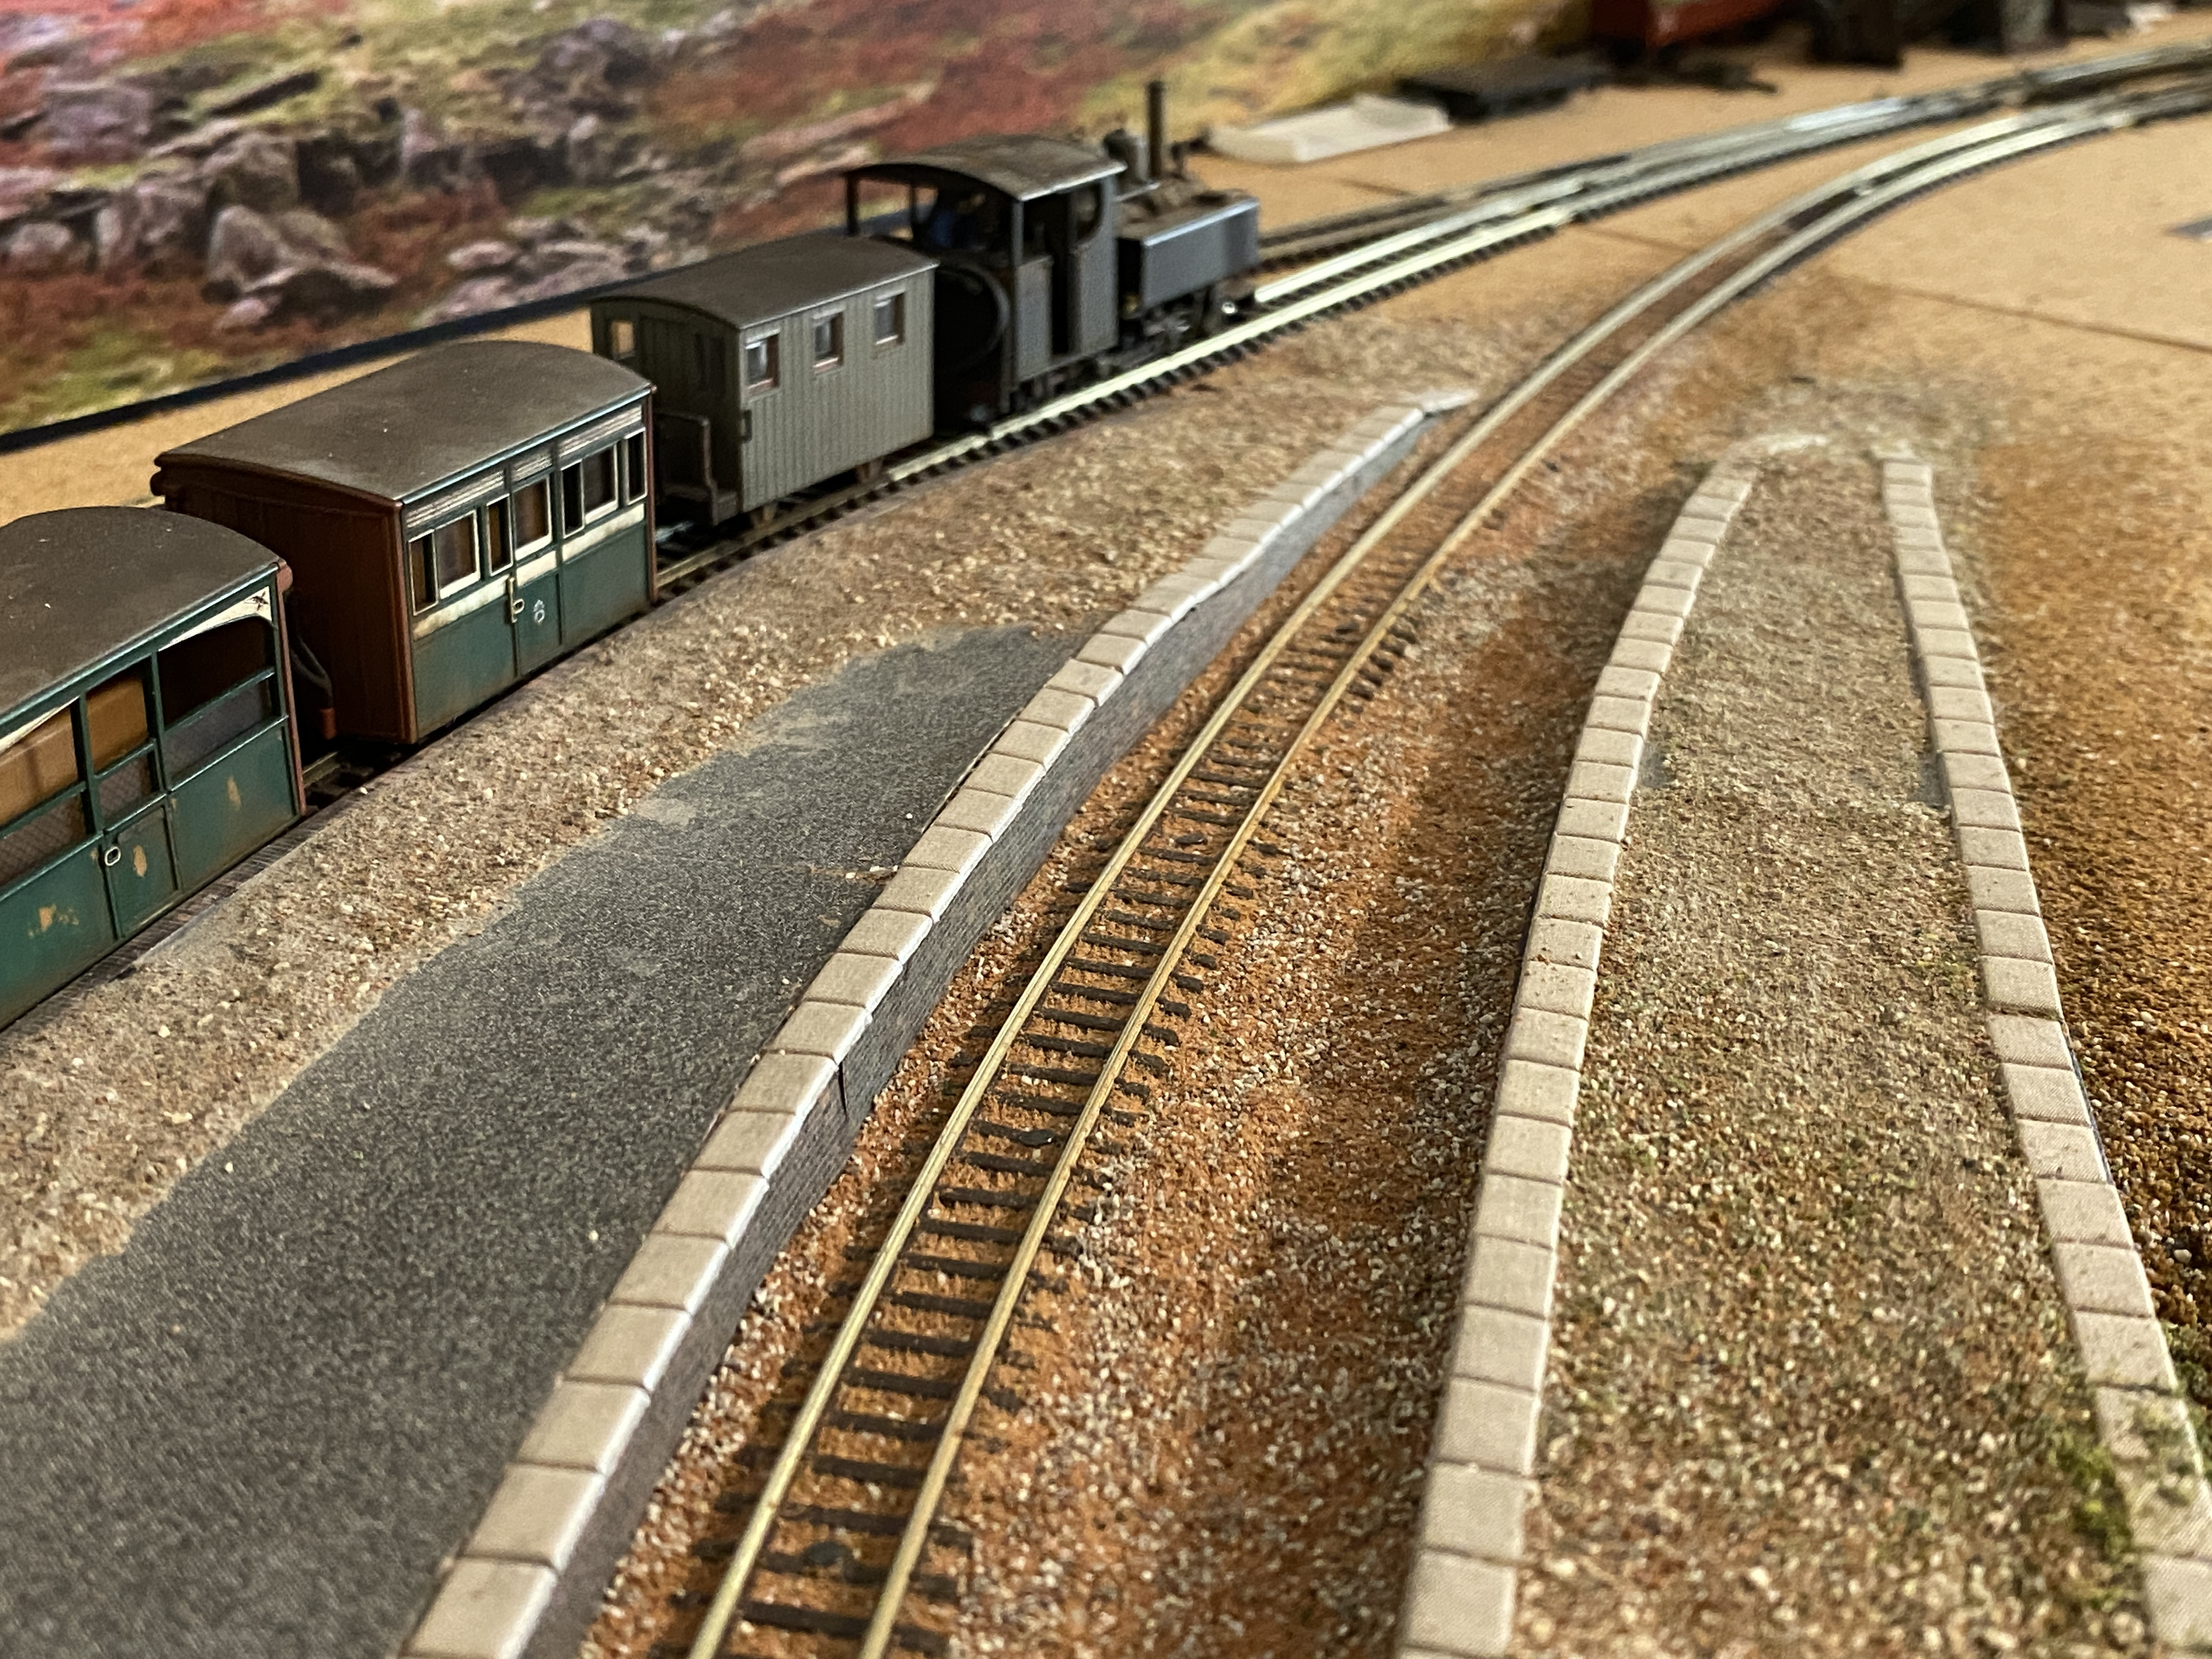
The ballasting has been started. As has the representation of now-lifted tracks. The platform surfaces are almost complete. Printed card has been used for asphalt areas and a mix of fine materials for the “gravel”.
Posted
Full Member
Hi Rick, I like the photos. How did you make the 'now-lifted tracks'?Gwiwer said
More progress.
The ballasting has been started. As has the representation of now-lifted tracks. The platform surfaces are almost complete. Printed card has been used for asphalt areas and a mix of fine materials for the “gravel”.
From “Post #290,736”, 15th December 2024, 9:58 pm
Cheers,
Claus
www.flickr.com/photos/ellef/
Claus
www.flickr.com/photos/ellef/
Posted
Full Member
Claus Ellef said
Hi Rick, I like the photos. How did you make the 'now-lifted tracks'?Gwiwer said
More progress.
The ballasting has been started. As has the representation of now-lifted tracks. The platform surfaces are almost complete. Printed card has been used for asphalt areas and a mix of fine materials for the “gravel”.
From “Post #290,736”, 15th December 2024, 9:58 pm
From “Post #290,737”, 15th December 2024, 10:11 pm
The “lifted” trackbed is done using a length of track settled into dry ballast but not pinned. The ballast is then sprayed with the usual PVA adhesive. After an hour or two - when the PVA has worked through the ballast but has not dried - carefully lift the track panel. I used tweezers as it’s N-gauge track and hard to grip with fingers.
Posted
Full Member
Gwiwer said
Claus Ellef said
Hi Rick, I like the photos. How did you make the 'now-lifted tracks'?Gwiwer said
More progress.
The ballasting has been started. As has the representation of now-lifted tracks. The platform surfaces are almost complete. Printed card has been used for asphalt areas and a mix of fine materials for the “gravel”.
From “Post #290,736”, 15th December 2024, 9:58 pm
From “Post #290,737”, 15th December 2024, 10:11 pm
The “lifted” trackbed is done using a length of track settled into dry ballast but not pinned. The ballast is then sprayed with the usual PVA adhesive. After an hour or two - when the PVA has worked through the ballast but has not dried - carefully lift the track panel. I used tweezers as it’s N-gauge track and hard to grip with fingers.
From “Post #290,738”, 15th December 2024, 11:13 pm
Thank you. The narrow railway at Wombat Creek may have a lifted track, too.
Cheers,
Claus
www.flickr.com/photos/ellef/
Claus
www.flickr.com/photos/ellef/
1 guest and 0 members have just viewed this.