00 Gauge - The Far North Line
Posted

Inactive Member
ScR steam in the 50's
Lovely photos, as ever, Richard. :cheers
Max
Port Elderley
Port Elderley

Posted

Full Member
Can I ask what you used to make the surface of the yard between the tracks?
cheers
Marty
Posted
Full Member
 Last edit: by Ben Alder
Posted
Full Member
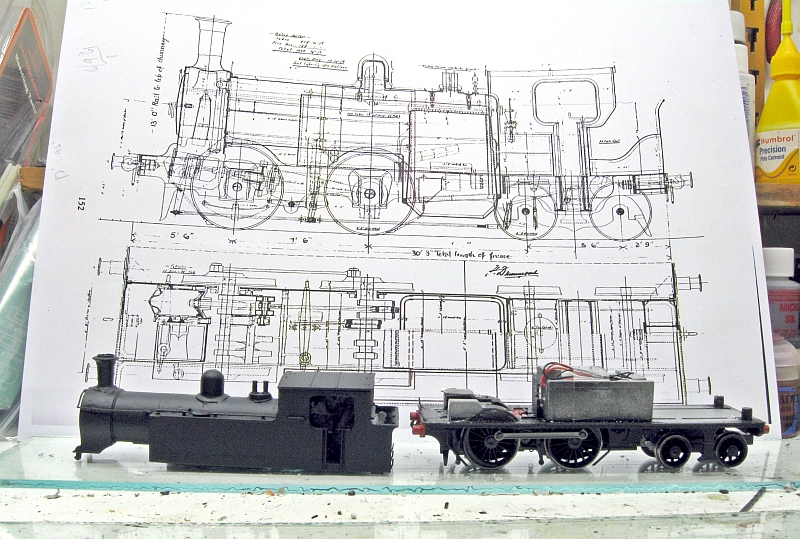
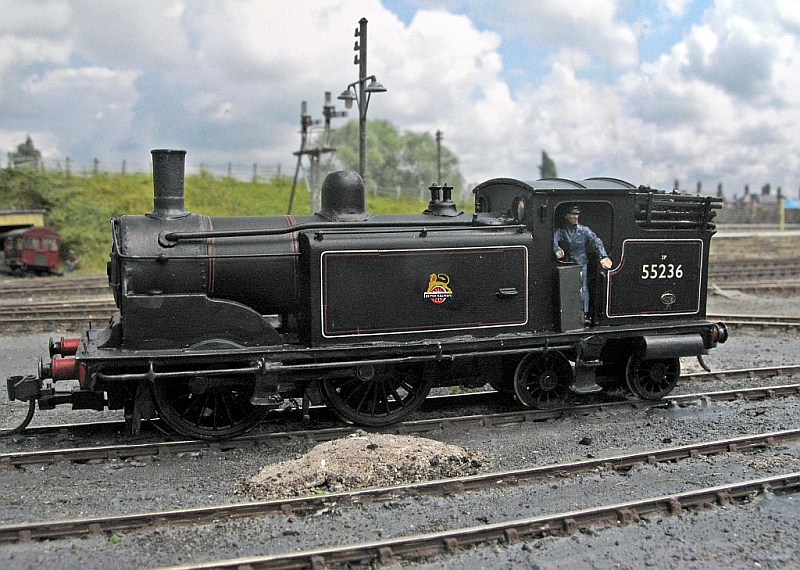
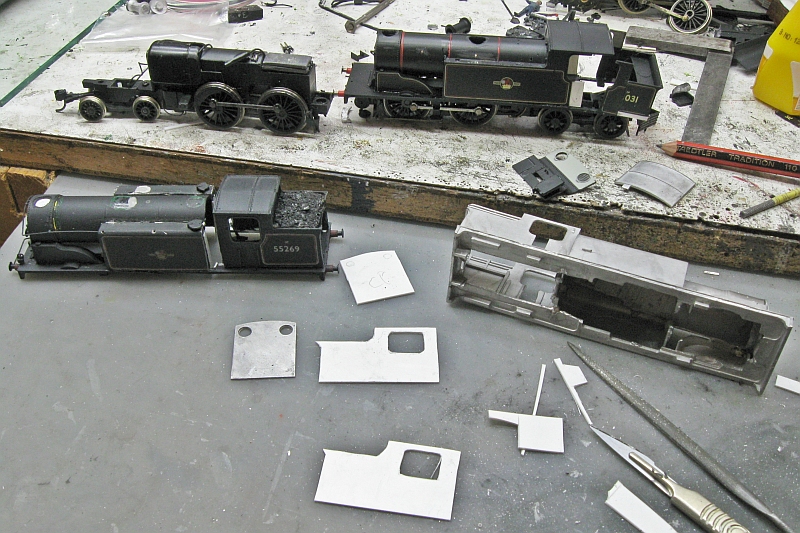
Pic of a partially finished conversion in front of the plan. Here are an 02 and the finished engine side by side..
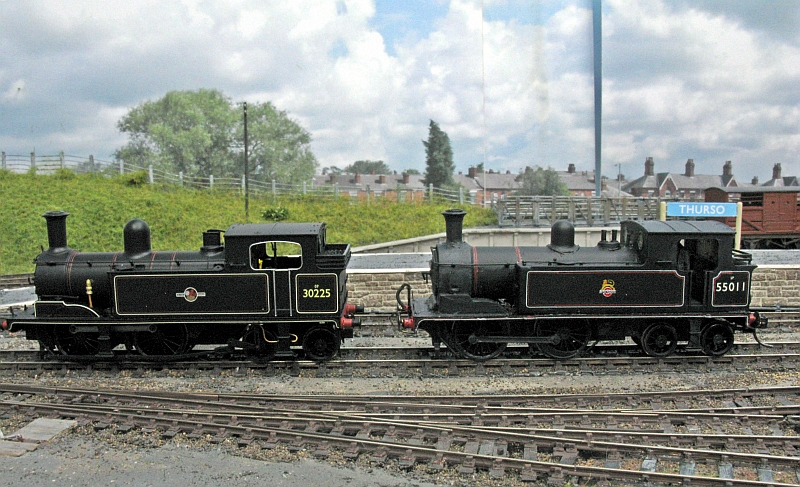
And the finished loco sitting at Helmsdale.

It is going to be weathered once the weather improves here - spray booth being the back door….
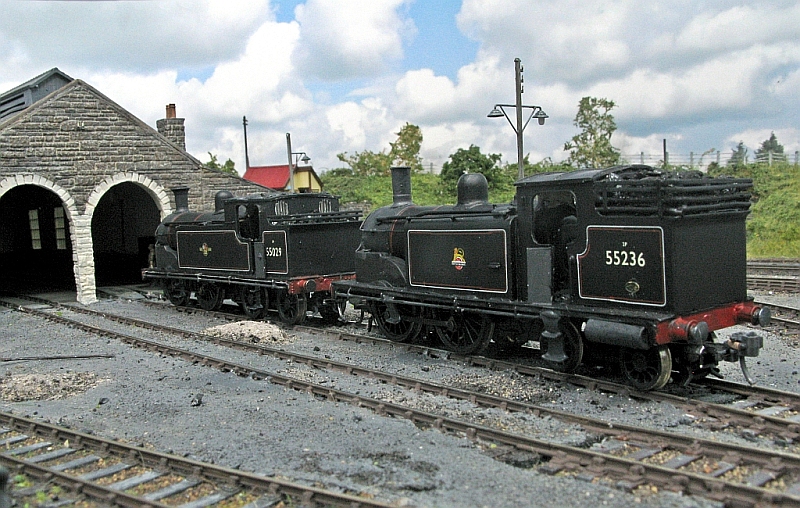
Having done one what-if, I took a look at another one that never made it - a larger tank similar to the C R type that was used all over Scotland in their later years. The drawing for that HR one bore a very close resemblance to the LSWR M7; perhaps nor suprising as the designers were brothers and a lot of their work suggests cross fertilisation. Once again, here is a model in front of the drawing.
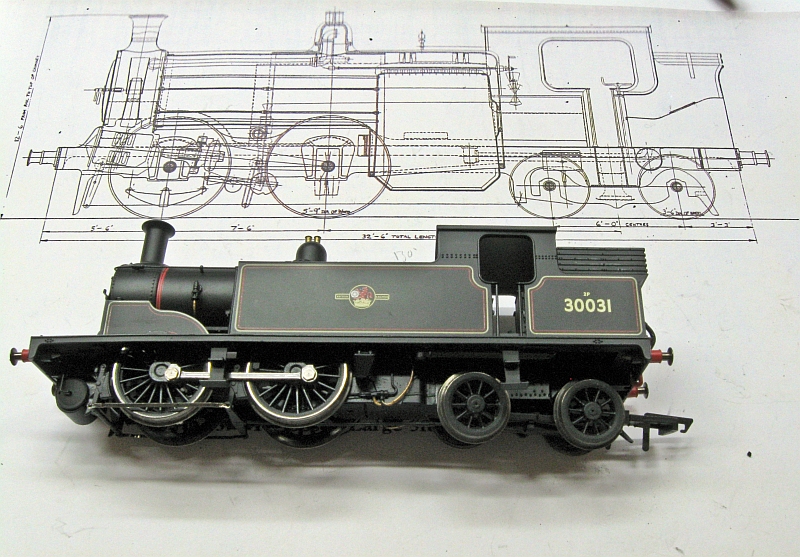
And the finished article on shed, again waiting some added grime.

All in all, an interesting straightforward exercise, giving me a couple of engines that certainly wont be on many other layouts, and might even perhaps never been modelled before….
Last edit: by Ben Alder
Posted
Full Member
Cheers, Pete.
it was already on fire when I got here, honest!
Posted
Full Member
The drawings were published in a book on HR locomotives, the name of which escapes me for the moment, but I can give you details if you want. There are several types that never made it to production, these two being the most easily modelled, but I might pursue this vein further in the future….
Posted
Full Member
Lovely bashes/make overs on those locos.
Marty
Posted

Full Member
Phil
Phil
Posted
Full Member
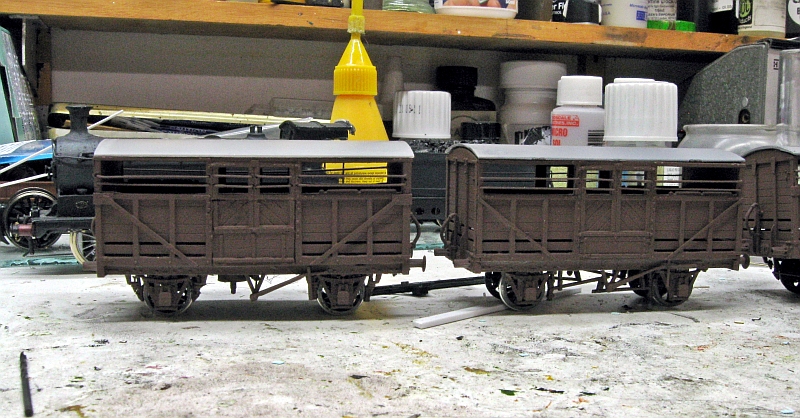
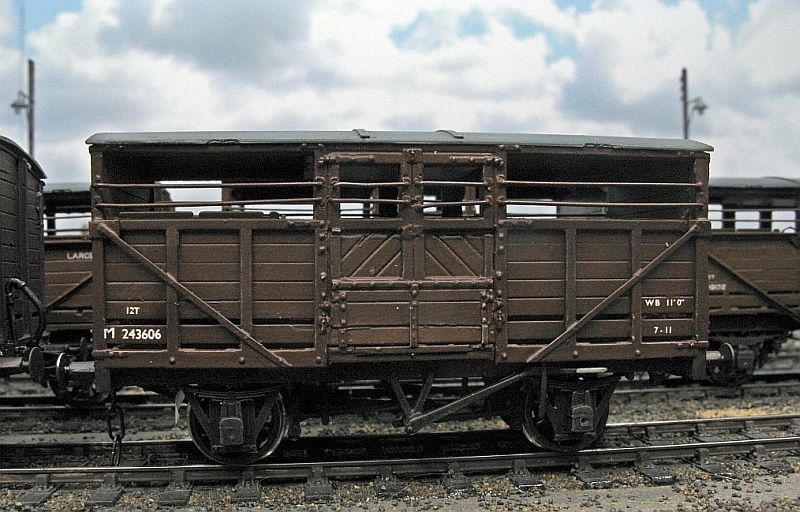
I have done about half a dozen of these, nearly all slightly different, but it didn't solve the problem of the later post war types with flush sides and a quite different overall appearance. However, careful study of the prototype and the kit showed that it could be tackled using the kit as a basis. In the end all that I used of the kit was the roof, ends and doors, both of the last two being altered, and in hindsight it would have been as easy scratchbuilding completely. Anyway, things proceeded and I set up a sort of production line, doing each stage at a time, and as it happened, went together in less time than I had anticipated.
Here is a shot of the parts laid out being worked on and awaiting attention, and a later pic with them assembled and ready for the paintshop. I used Archers river transfers on the bodywork, as test pics showed that the camera noticed their absence, so that was one detail that couldn't be shirked….

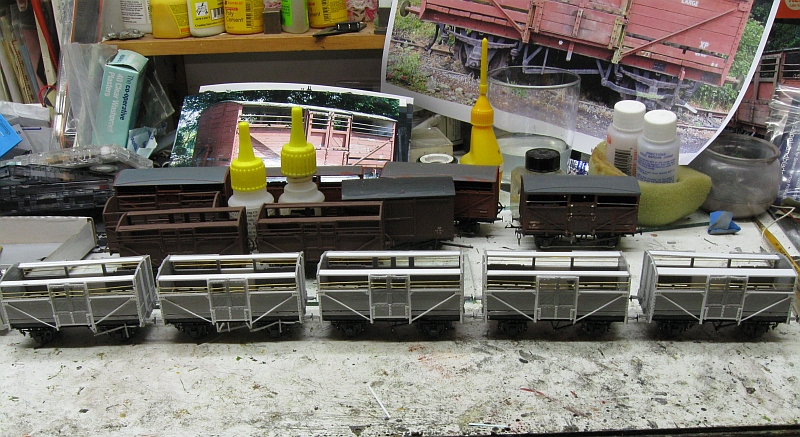
And a close up of one of them - there are several variations amongst them, mainly brakegear, and I have incorporated this in the build, even though it is hardly noticeable when on the layout…
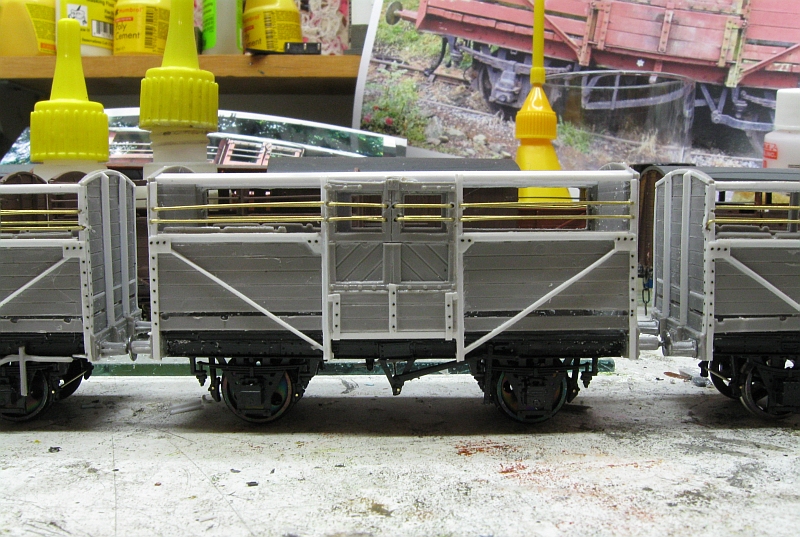
Finally, in service… a view over the yard at Thurso showing most of them and then two cruel close ups. It was quite a task, but is now done and won't need repeated. Judging by the rate of recent releases of R-T-R wagons, one of the later types can't be far away, but I like building things, and would rather get something running this way as opposed to opening a box.


Posted
Full Member
Phil
Phil
Posted

Full Member
Posted

Full Member
That's a fine job you've done with those cattle wagons. Well done!

Always try to look on the bright side of life!
Barney
Barney
Posted
Full Member
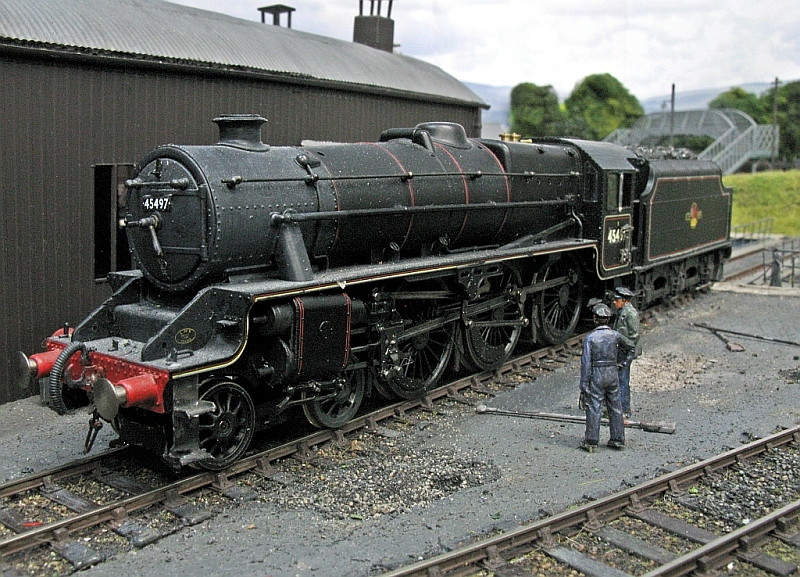
the two tanks on shed - the CR one and the proposed HR build.
Posted
Full Member
Phil
Phil
Posted
Full Member
The original bogie fixing is merely a collar over the stem and was prone to coming off so I replaced it with a nylon bolt and nut. A bit of experimentation was needed to get the right amount of springing for the bogie but once sorted it is going really well.
A bench view of the body - the earlier model was in the throes of renovation but I eventually gave up on it as being too much bother.
The bogie showing the mods. I have since cut back the Kadee to more or less buffer level as it looked so awful sticking out beyond the buffers.
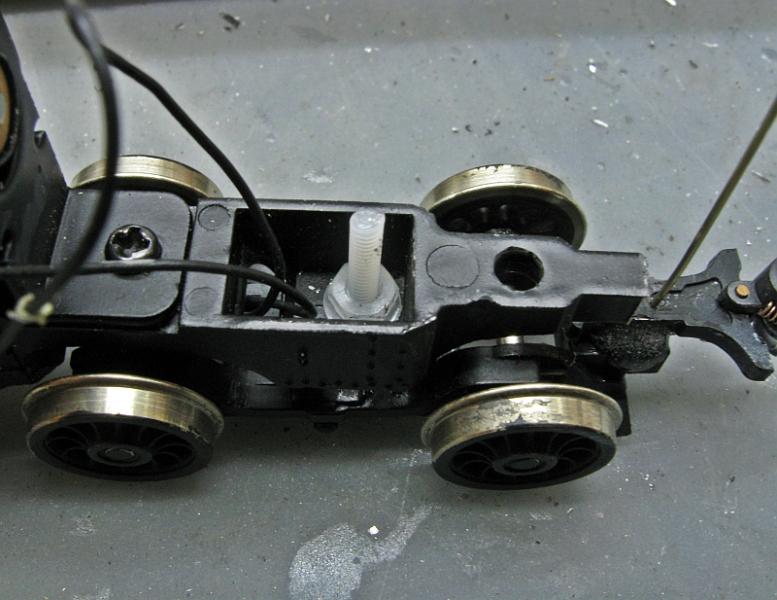
the offset pivot can be seen - I had to file away part of the chassis to stop the leading wheels catching, but it has made a noticeable visual difference…
Posted
Full Member
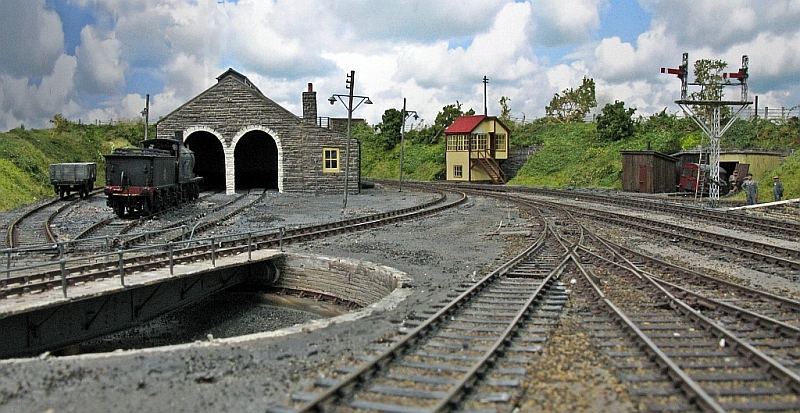
Here is the original Roco table.
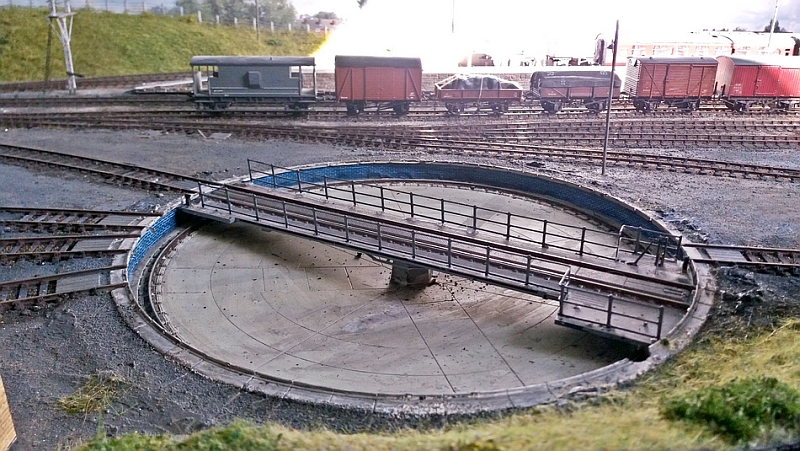
And a couple of shots of the kit one.

The Helmsdale one is not so obvious, and only has to work the one road, so a compromise was reached with it - adding cosmetic side frames that to my eye, transformed its overall appearance. The deck arrangements I have decided I can live with….
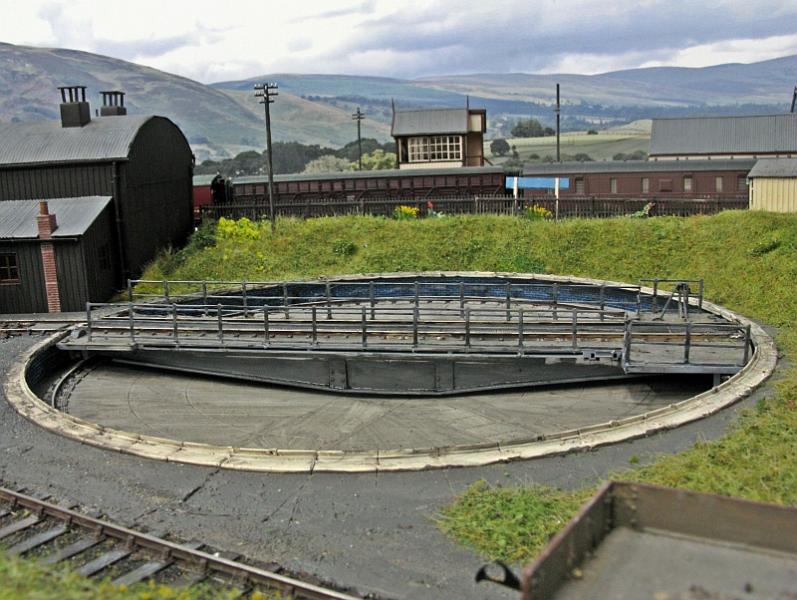
Helmsdale had a new table put in just after the war, and apart from the too wide deck at one end, this table will just about do for me. Thurso on the other hand had its original one, rails being bolted to it over the years to cope with larger engines, and a similar bodge to the Helmsdale table would not have worked.
Last edit: by Ben Alder
Posted
Full Member
A good last picture but I notice quite a bit of noise?
Phil
Phil
Posted
Full Member
There is a lot of noise on the last pic. I tend to shoot underexposed and lighten up before posting, but I was playing around with settings at the time and this was the only image I took in this position. TBH, they were more or less WIP shots to show me where any tweaking was required - the digital camera is Very Good at this….. and if I was taking a proper pic I would have done it in daylight to get natural shadows and lightfall.
I have lost most interest in photographing the layout just now anyway - there's only so much you can squeeze out of a small space, but this recent work has given some more angles so it might encourage me back behind the camera. I'm still busy at the bench and operating it though.
Last edit: by Ben Alder
Posted
Inactive Member
No joking; they look like reference photos from the prototype. :shock:
Max
Port Elderley
Port Elderley
Posted
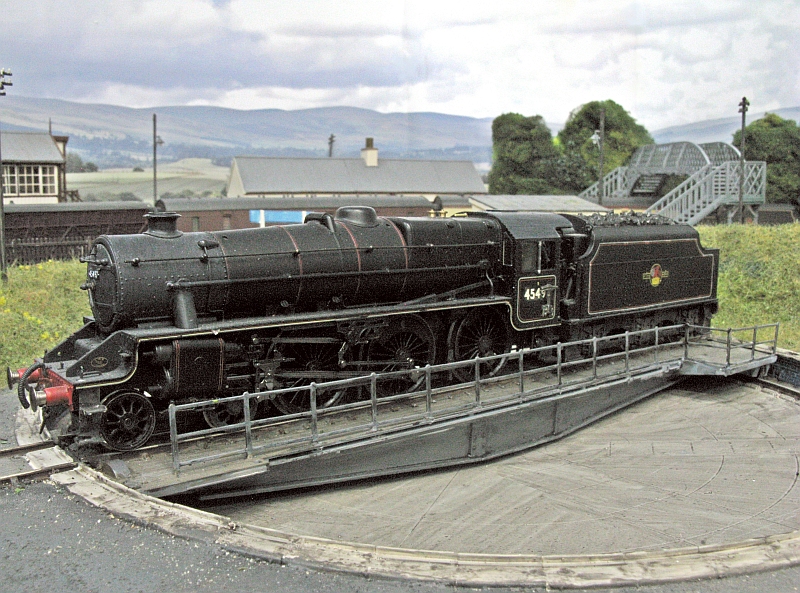
Full Member
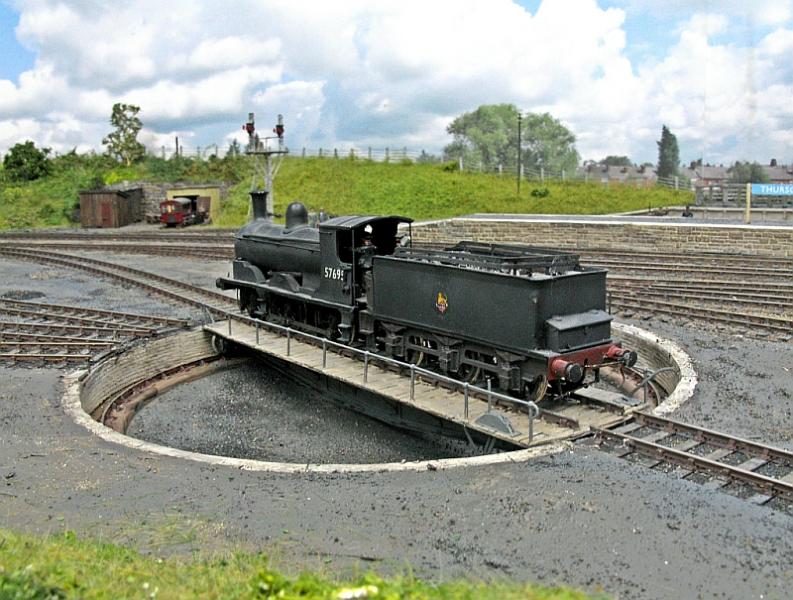
A view of the new set up at the Thurso shed and the Black Five on the turntable road at Helmsdale after being pointed in the right direction.
1 guest and 0 members have just viewed this.