00 Gauge - The Deene Railway
Posted

Full Member
End to End with Cassette Fiddleyard
Cheers EdJust thinking about what the next project will be, maybe a station building or possibly one of the few signal boxes I will need, not sure, depends what catches my eye when I am in the shed next.
Cheers
Andy
Andy

Posted

Full Member
I've not been doing much lately but getting back to it soon.
Phi
 Last edit: by Phil.c
Phil
Posted

Inactive Member
Max
Port Elderley
Port Elderley
Posted
Full Member
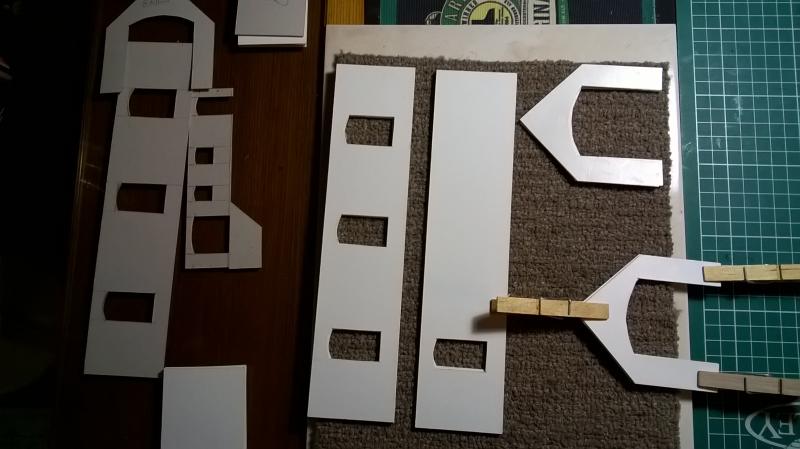
First the plan, mainly for dimensions and window placement.

Start cutting out the sides and ends, including a small side office/mess building.
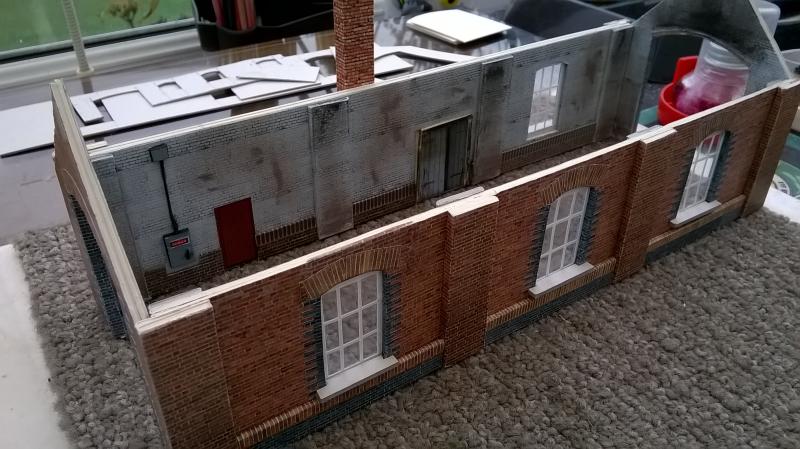
1mm Card laminated up to 2mm, the walls will be built from an outer 2mm covered in Red Brick with an interior 2mm covered in Painted Brick with the windows between the two layers.
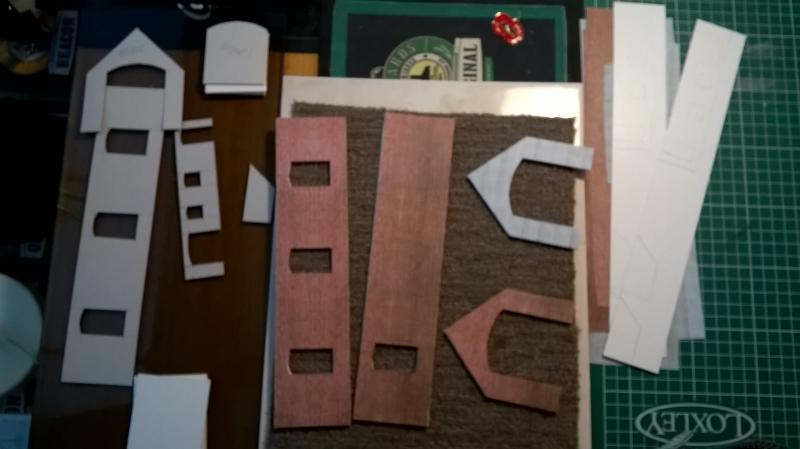
Mine is going to be Red Brick with Blue Brick trimmings, hopefully GWR,ish when its finished.
Started covering first layers with Red Brick and interier with painted brick, sorry for the blurry photo, my phone struggles with darker evenings.
First lot of Blue Brick edging cut and glued to one of the door ways, need to straighten that wonky brick.
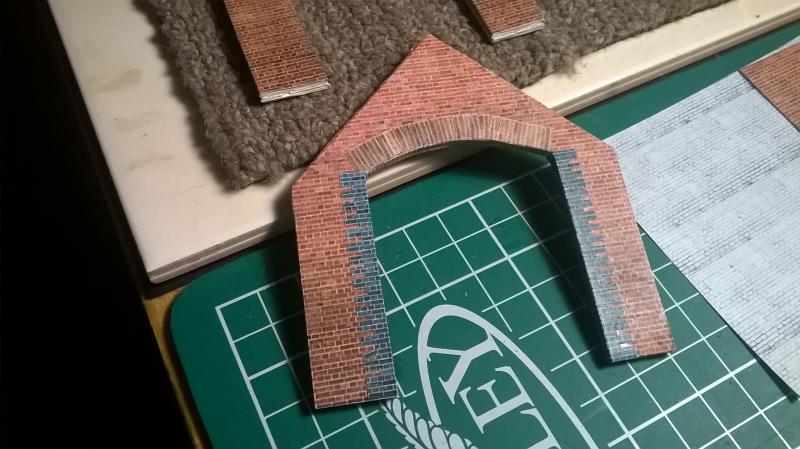
Next will be buttresses and more fidly blue brick, then need to sort the windows.
Cheers
Andy
Andy
Posted

Site staff
Regards
Alan
Born beside the mighty GWR.
Alan
Born beside the mighty GWR.
Posted
Full Member
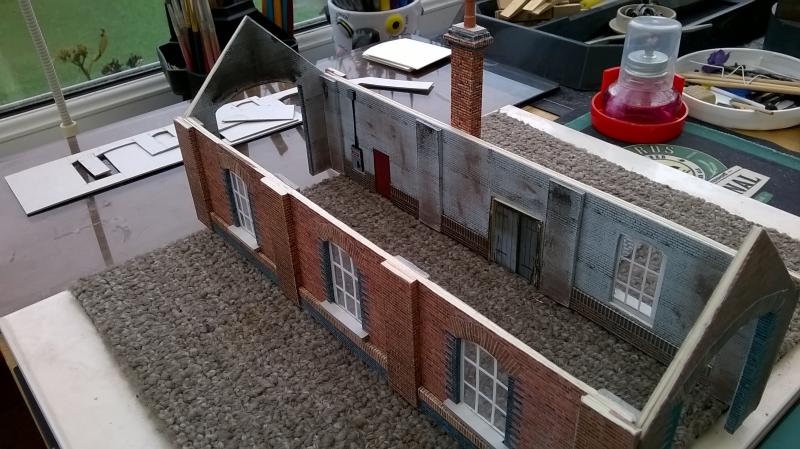
Windows are sticky labels cut through then the panels peeled from the glazing which is clear packaging

The grey card walls at the top of the first picture are spares that I cut for use as templates, so when I come to cut out the roof beams I can use the grey card end wall template to cut them from, likewise for the doors.
Cheers
Andy
Andy
Posted
Inactive Member
Max
Port Elderley
Port Elderley
Posted
Full Member
Cheers
Andy
Andy
Posted

Full Member
Bob
Posted
Full Member
Yeah basically, I stick a label onto some clear plastic, I use re-cycled packaging, mark out the frames and then cut through gently, you will feel when the knife stops dragging on the paper and slides along the plastic, and then when done you just peel off the label where the panes are.
You can slice top to bottom and left to right when doing the frames as you only peel the panes off, the little squares from where the frames intersect are not obvious one the panes are peeled off.
Chubber (Ex-Dooferdog) has the method with pictures in one of his posts, just can't find it at the moment
Last edit: by Campaman
Cheers
Andy
Andy
Posted
Full Member
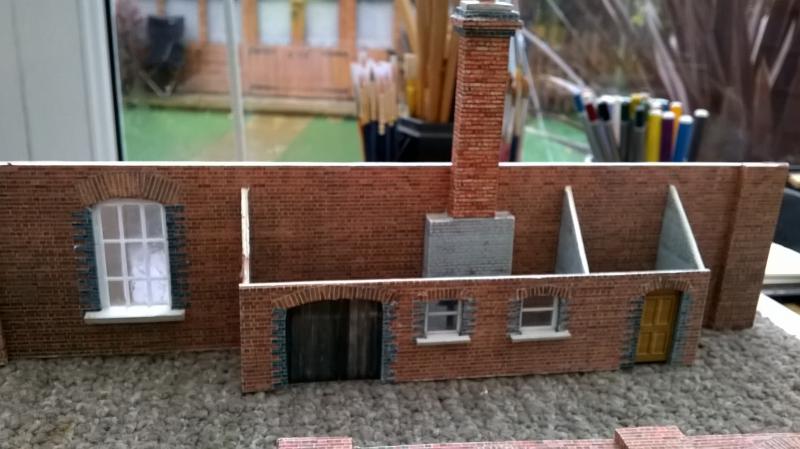
Started by making the inside dirty while I could still get at it easily

Then glued the four sides together
Then a bit more brick trim added, so now ready for the roofers to come in.
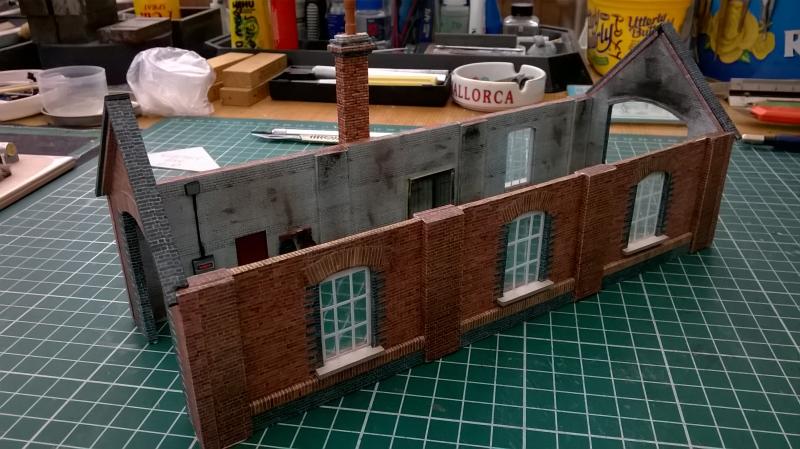
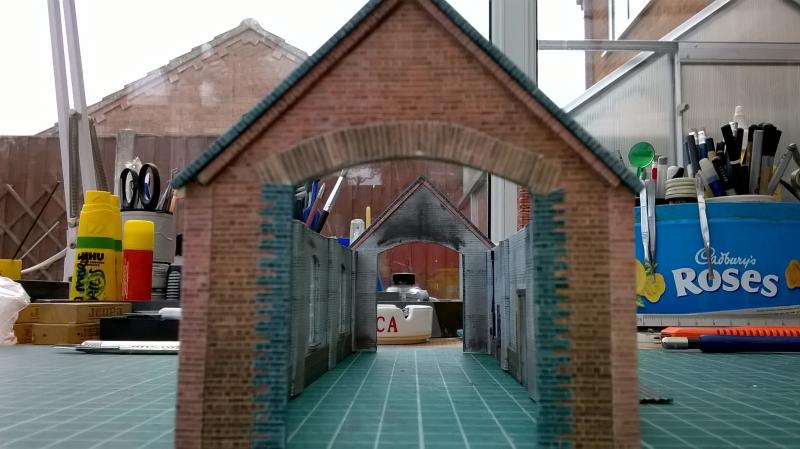
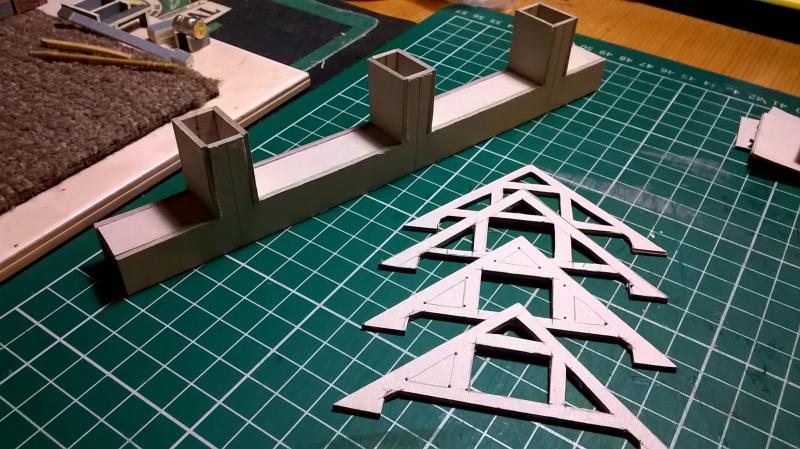
I need to decide on what kind of roof vents to do, individual smoke stacks or a full length pitched roof affair as it will refelct on how I do the roof trusses and smoke deflector thingies on the inside.
Cheers
Andy
Andy
Posted
Inactive Member
Max
Port Elderley
Port Elderley
Posted

Inactive Member
That`s a proper job mate……lovely work.thumbsthumbs
:cheers Gormo
Last edit: by spurno
"Anyone who claims to have never made a mistake, never made anything!!"
https://sites.google.com/site/greatchesterfordmodelrailway/home
https://sites.google.com/site/greatchesterfordmodelrailway/home
Posted

Full Member
Posted
Full Member
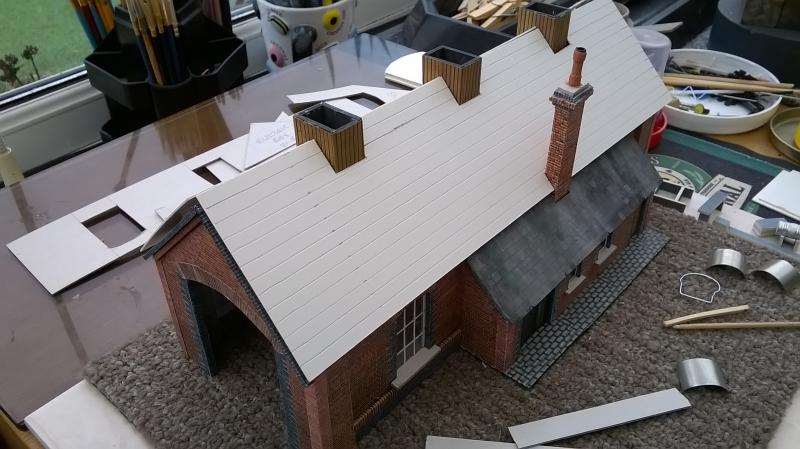
Started on the smoke hoods last night so may have some pictures for tomorrow.
Cheers
Andy
Andy
Posted
Full Member
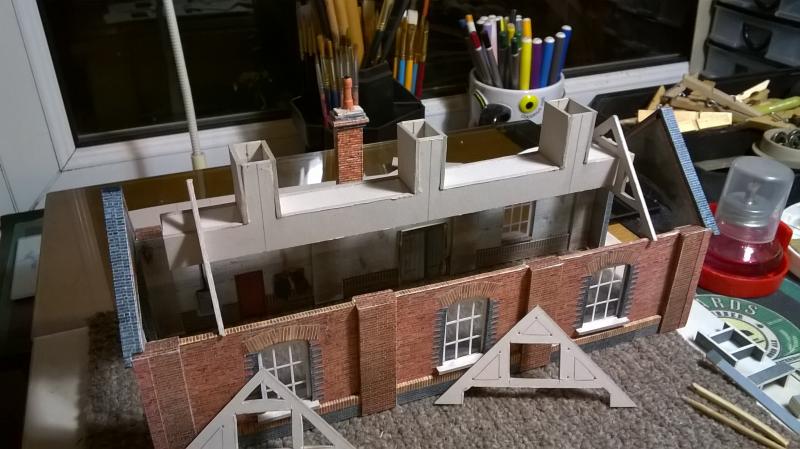
Early finish at work today so should see some progress over the weekend
Cheers
Andy
Andy
Posted
Inactive Member
That looks like a work of art to me………I think what it is that makes it so attractive is the design and the brick you have chosen. It all looks just right…….spot on in fact.:thumbs:thumbs:thumbs:thumbs:thumbs
:cheers Gormo
PS…..is that a home made chimney pot?????
Last edit: by gormo
"Anyone who claims to have never made a mistake, never made anything!!"
https://sites.google.com/site/greatchesterfordmodelrailway/home
https://sites.google.com/site/greatchesterfordmodelrailway/home
Posted

Full Member
Last edit: by spurno
Always try to look on the bright side of life!
Barney
Barney
Posted
Full Member
Hi Bob - You can slice top to bottom and left to right when doing the frames as you only peel the panes off, the little squares from where the frames intersect are not obvious one the panes are peeled off.
Thanks. That is a very good tip, which I would not have thought of.
Bob
Last edit: by Bob K
Posted
Full Member
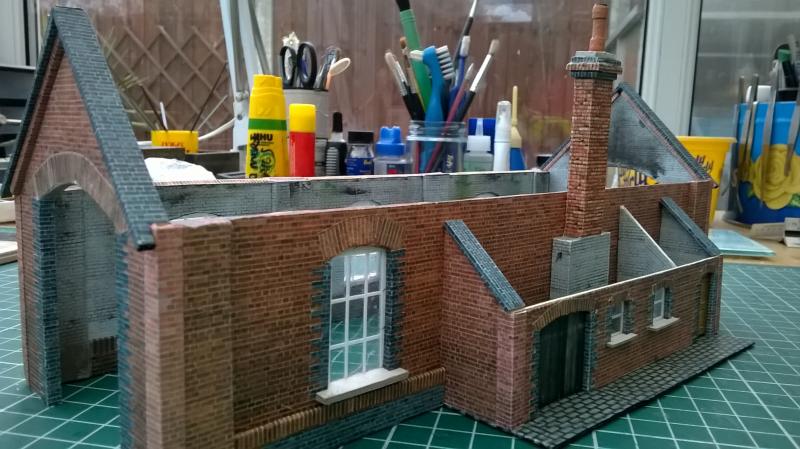
A bit more progress
I do like the scalescenes textures but the roof slates can look a bit uniform if you use them on all the buildings, I do sometimes print them out in Greyscale or adjust the colour hues, but for this one decided to do it the hard way.
Paper strips with the slates slit through, then laid in the same way as the scalescenes ones, painted using grey emulsion (tester pot), individual slates picked out in lighter and darker shades then hit with scraped pastel chalks.
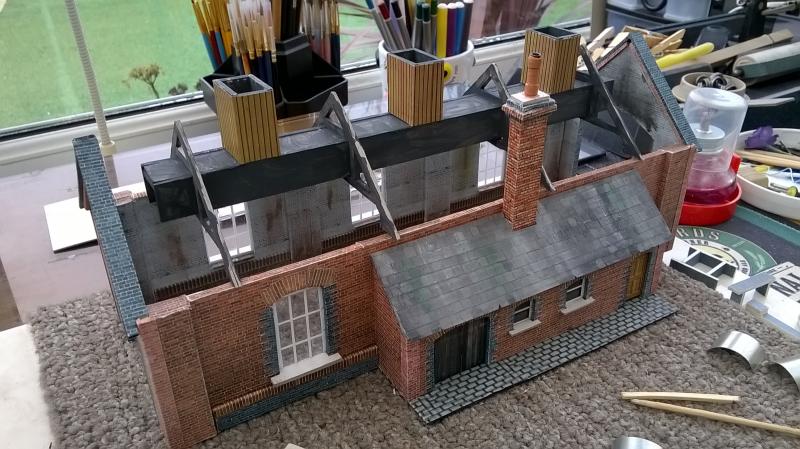
Roof formers cut and test fitted.
Slates then cut and applied but by the time I had finished it was too dark for a photo, so will try to get one in the next few days.
Last edit: by Campaman
Cheers
Andy
Andy
1 guest and 0 members have just viewed this.