00 Gauge - The Heatherburn Garden Railway.

Post

Posted
Rating:
#47792
Guest user
Thanks guys I might even get one as a header (pic 3 please ;-) ). Still lots to do last night I started on fitting the registration arms but having problems getting the brass to solder. I think that leaving the copper gantries outside for a week without paint has done somthing to the copper? I have found a way round it though by tieing the arms to the gantry using thin wire then soldering although I have some aroldite metal glue left (from fixing the exhaust!) that I might use to glue them on. No running session yet as I need to seriously rebuild the loco fleet to handle the climb round the rockery. Eventualy the gantries will extend out over the viaducts to the level crossing at the back of the garden. From here the branch splits away leaving the main lines on their own. In pic 2 someware between the gantries I will be building a bridge to break up the run secnicly. For this I will be building a mold for the concrete arch sections and casting them in resin. Upshot will be another westcoast product! :roll:
Back to the top

Post

Posted
Rating:
#47813
Avatar
Full Member
So glad you kept this layout Dave, i just love looking at the pics, i reckon its awesome.

Love all the new gantrys as well.

Phill
Online now: No Back to the top

Post

Posted
Rating:
#47885
Guest user
Thanks Phill have taken some more pics of the lorries and posted in other thread. ;-)

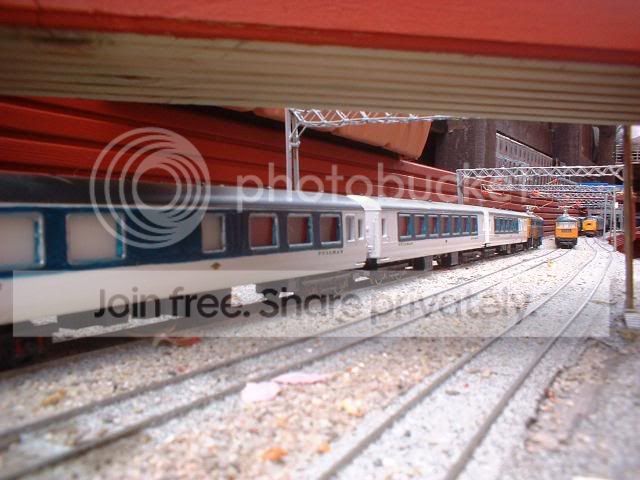
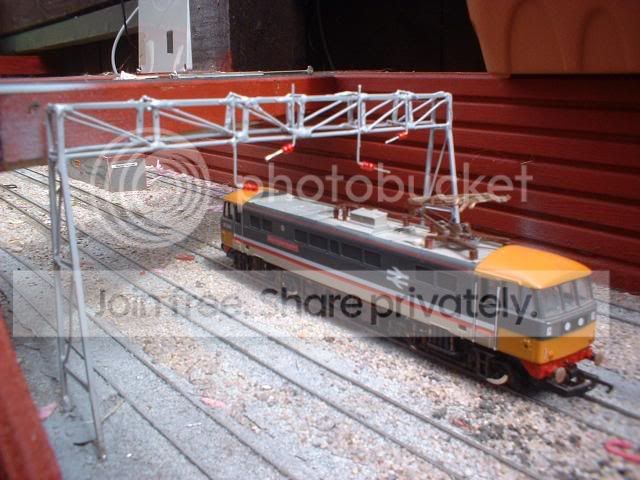
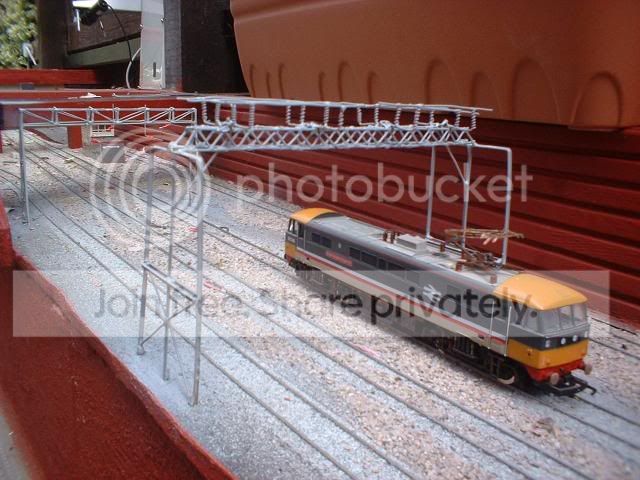
Right yesterday I attempted to glue the rest of the registration arms to the gantries. Needless to say this didn't work very well! After sitting back with a cuppa I relised I had made a major cock up with the gantries. Before I explain heres some pics of the gantries with the arms on…..


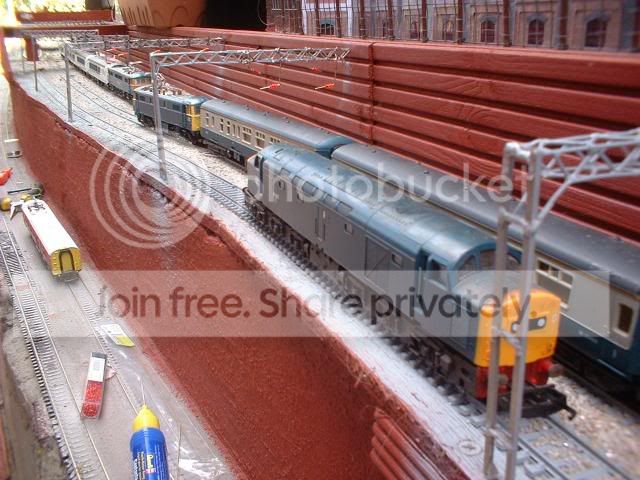
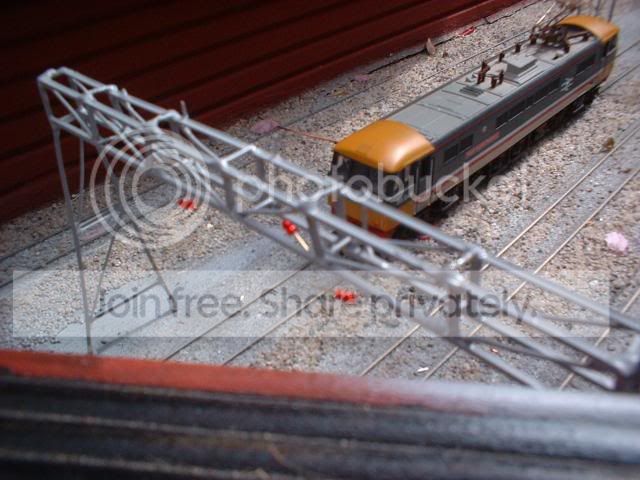
now pay attention to this last pic as this is where I went wrong….


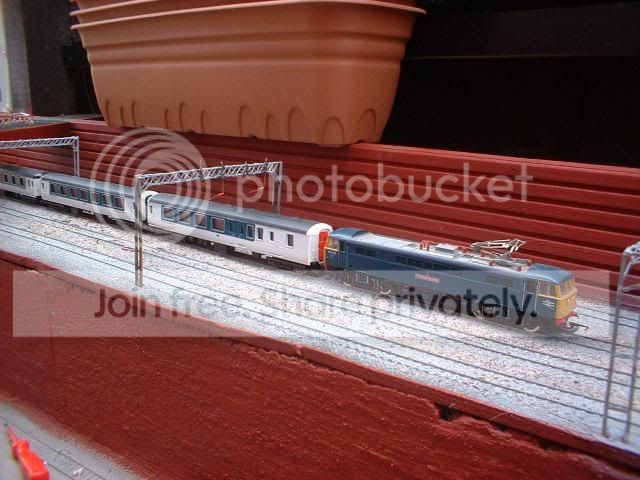
I decided that I needed to attach the wires to the gantry by the bridge. After doing a bit more research I relised I had built the wrong style of gantry so it was replaced with a WCML 'heavy' one……


now the reason for the change is so the wires can now be attached via some pulleys to some weights hanging down the sides. The next big change and I mean BIG is the replacement of the next gantry down the line with this…..


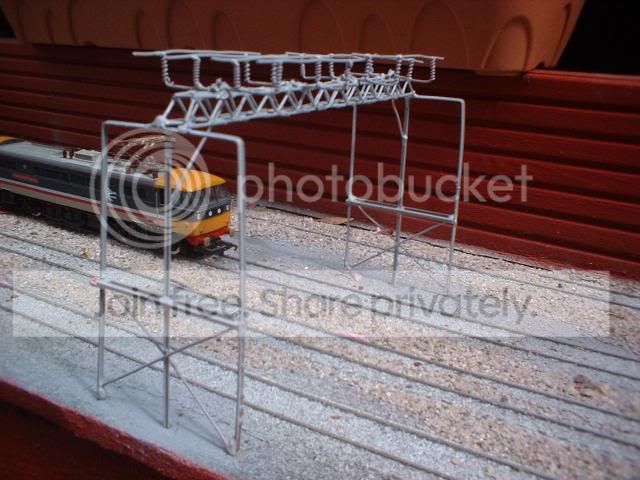
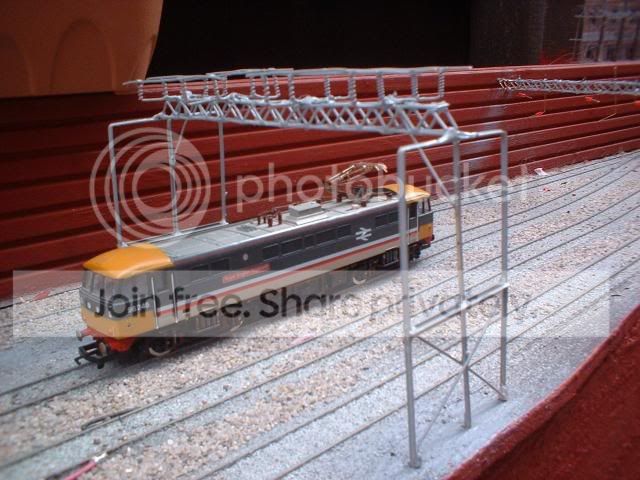
this 'beast' of a structure is to mount the booster transformers on. The transformers sit on in the spaces at the side and are linked to the wires via the bus bars along the top. Now my next decission is to replace the next gantry down with a 'heavy' one as per the prototype or live with it…….


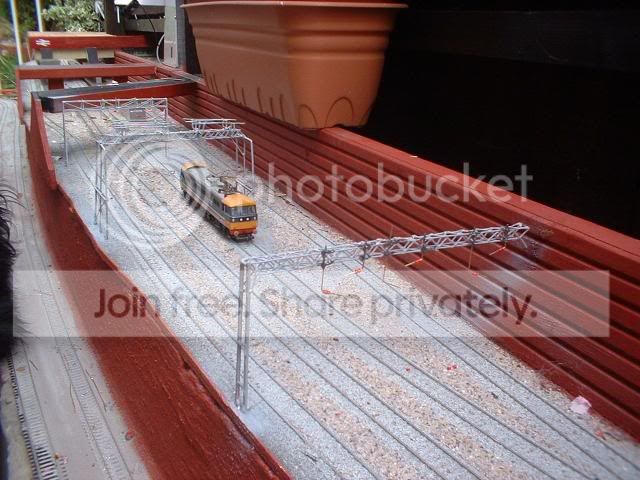
Also im undecided as to support the wires between this gantry and the new 'heavy' one. I could get away with attaching them under the booster gantry but realy I need to add two more gantries one either side. Watch this space…..
Back to the top

Post

Posted
Rating:
#47887
Guest user
Looking smart Dave

Re the wrong gantry replace it because you will never be happy if you dont every time you look at it you will think i should have replaced that

cheers Brian
Back to the top

Post

Posted
Rating:
#47888
Guest user
Missed a pic :oops:

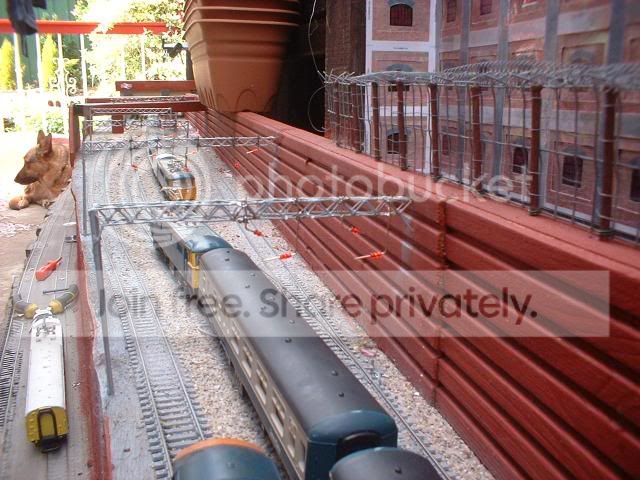
This is looking back down the line before I changed the gartries…..


;-)
Back to the top

Post

Posted
Rating:
#47944
Guest user
Not a very nice day for soldering outdoors. After rigging up some sheeting I managed to deflect most of the wind to allow some more work on the gantries. After having a think about replacing the other gantry I decided to keep it and replace the next one down the line instead. The gantry for the booster transformers has now been moved 6" down the line and the spare gantry that was next to the road bridge has now been fitted in its place. Sorry about the pic the light was going but should give an idea….


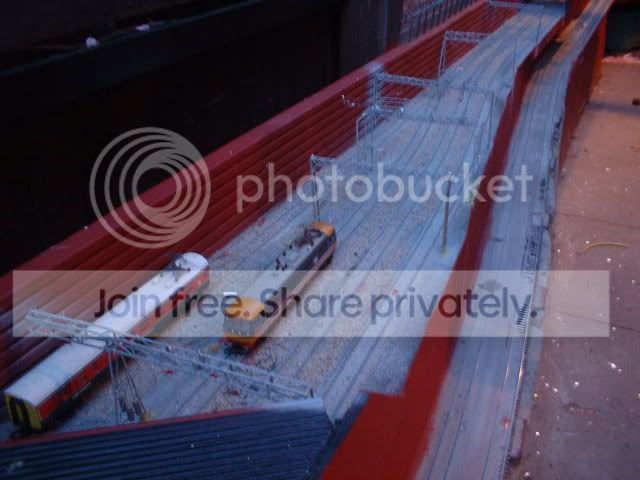
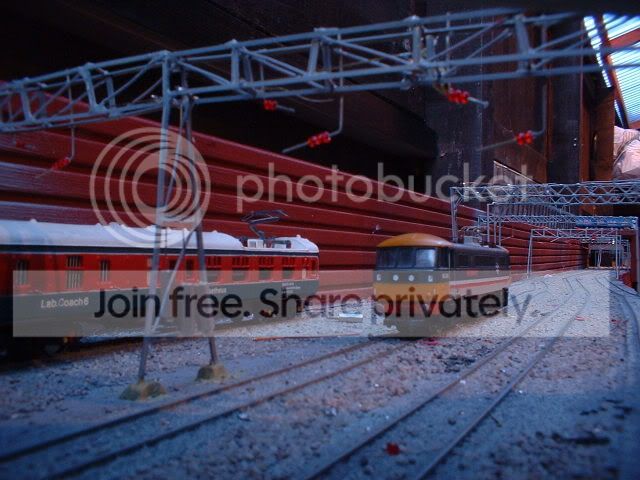
The sequence of gantries should now match the prototype with a heavy next to the bridge followed by normal, booster, normal then heavy. The gantry next to the bridge has also been extended across to reach the loop and I have added some tension weights…..


Back to the top

Post

Posted
Rating:
#47952
Avatar
Full Member
 

I would be proud to have this layout Dave, i don't know how long it has taken you but you can look on it as a wonderful achievement that a lot of people could not have accomplished, aren't you glad you left the baseball bat in the cupboard :question

It's a pity you live so far away, it would be nice to see it "in the flesh"


:doublethumb:doublethumb

'Kev
Online now: No Back to the top

Post

Posted
Rating:
#47956
Guest user
Thanks Kev 2years 7months and counting! Still a long way to go but making a start on fitting the OHLE I see as a turning point. The railway might get a visit from a fellow YMR member in a couple of weeks so it will be intresting to get another railway modellers opinion as so far only my family have seen the layout. Just need a big skip to dump all the rubbish in! :roll: :lol: ;-)
Back to the top

Post

Posted
Rating:
#47957
Avatar
Full Member
 

 I was up there two years ago (April), I come from Stanley, near Consett originally, and used to work at Black and Decker on the Green Lane Ind Est.


'Kev
Online now: No Back to the top

Post

Posted
Rating:
#47992
Guest user
Black and decker is about 10 mins up the road from me. I used to cover the baths at conset and the leisure centre at stanly when I was on call with my last job. ;-)
Back to the top

Post

Posted
Rating:
#48008
Guest user
Dave

What are you making your insulators from on the cable supports are they Some sort of bead or something?

cheers Brian
Back to the top

Post

Posted
Rating:
#48012
Guest user
All those gantries will look great as they pass by in your planned videos, Dave.

 Mike
Back to the top

Post

Posted
Rating:
#48020
Avatar
Full Member
I also agree with Kev, i just wish i lived nearer and i could come over and see it for real. Love the change you done, you make it look so easy as well. 21/2 years thus far, wow what a acievement, you must sit back at times with a tinny and say i built this, with a proud grin on your face mate.

As Kev said i bet your glad the bat never went down now. When you feel low just go out and look at what you have achieved, its something only a few of us dream of doing and here you have realised the dream, keep going mate you are doing a marvelous job.

Phill
Online now: No Back to the top

Post

Posted
Rating:
#48076
Guest user
Thanks guys I needed that. Temp job finished yesterday so today its back on the dole again!! Brian the insulators are glass beads that are threaded on to brass arms. They are slightly overscale but look great when the light catches them. Had a look through some of my railway books the other night and noticed that I have got the legs wrong for the heavy gantries. They should be wider with the tension weights mounted in the middle. Might have a look at mine to see if I can modify them somehow. ;-)
Back to the top

Post

Posted
Rating:
#48078
Legacy Member
They still look great dave ,don't worry too much .:doublethumb

reg
Online now: No Back to the top

Post

Posted
Rating:
#48196
Guest user
Now for something compleatly different and proberly a world first……..


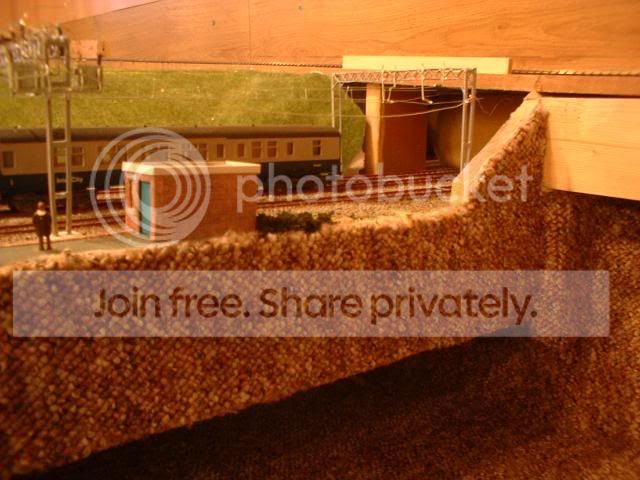
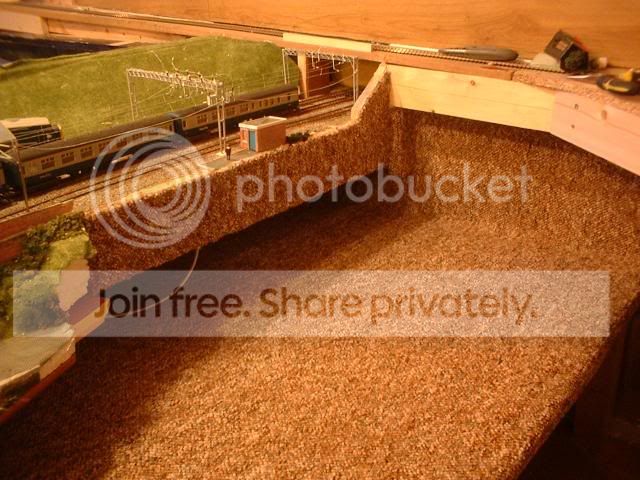
Could this be the first 00 gauge layout to have a carpeted front??

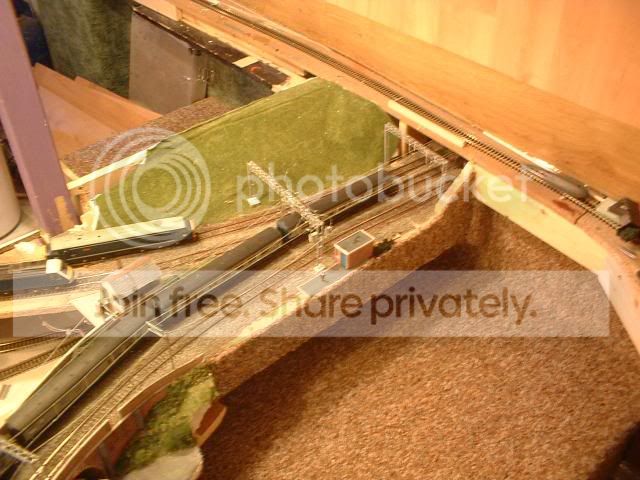
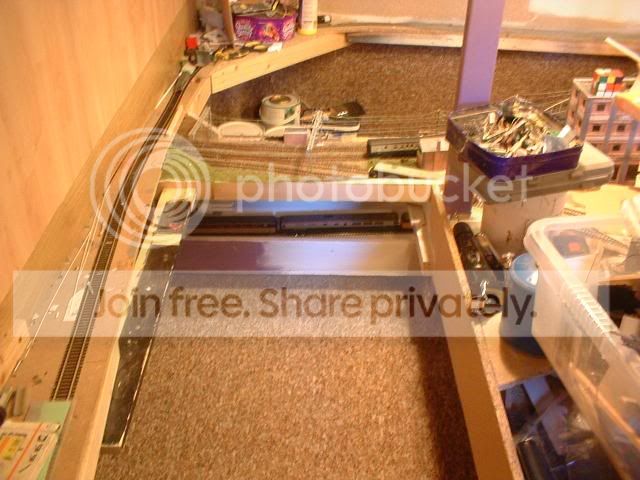
Now for something more constructive here's the new turntable…..


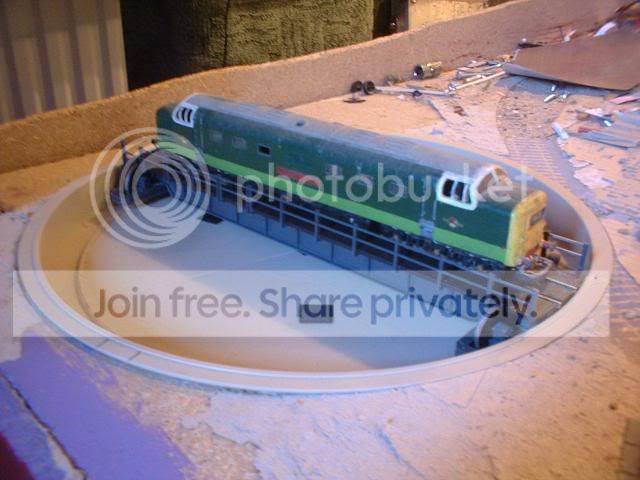
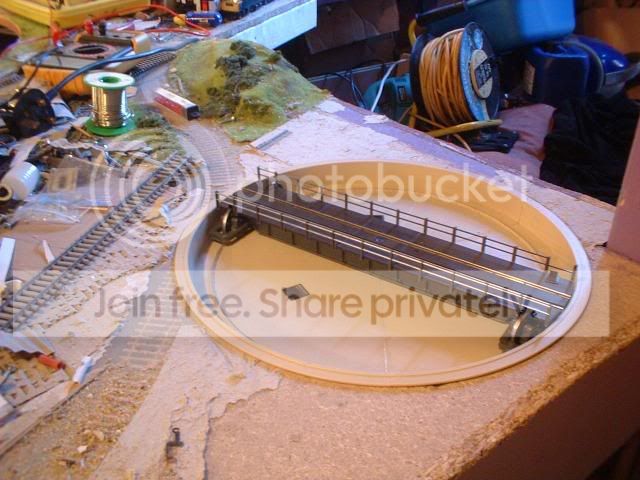
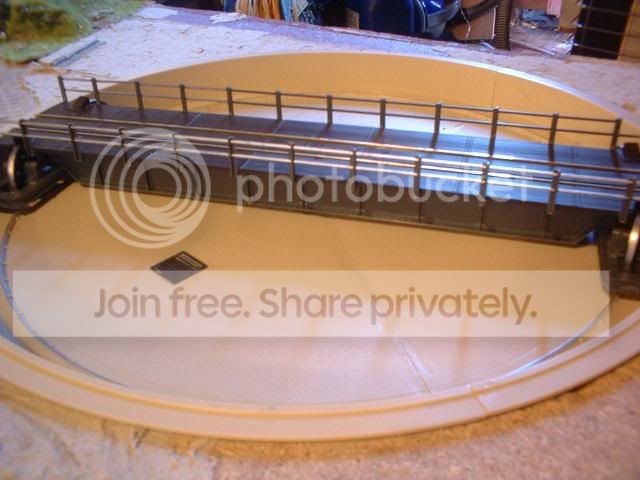
Plan is to cover the side walls with some scalescenes brickpaper.


Back to the top

Post

Posted
Rating:
#48204
Guest user
Dave

With the carpet at least when the trains fly off the track they will have something soft to bounce off.:lol::lol:

I didnt know you had steam locos Dave i thought your we purely modern image stuff so i was surprised to see you adding a turntable

cheers Brian
Back to the top

Post

Posted
Rating:
#48215
Avatar
Inactive Member
It looks good, Dave.  There is a guy here who has carpeted all of his profile boards.  He has put velcro on the backs of his controllers and so they stick anywhere - even on clothes!  Nice work.
Online now: No Back to the top

Post

Posted
Rating:
#48217
Guest user
The turntable was a pressie from rachels dad so I thougt I would find a use for it. Apperently tomorrow I will be taking delivery of a black princess elizebeth so at least I will have somthing to park on it! :roll: ;-)
Back to the top

Post

Posted
Rating:
#48241
Avatar
Full Member
 

 Quit right Dave, keep the turntable and pass the Deltic on to me :mutley

'Kev
Online now: No Back to the top
1 guest and 0 members have just viewed this.