00 Gauge - The Heatherburn Garden Railway.

Post

Posted
Rating:
#29207
Avatar
Full Member
You know i say it each and evry time but this inside outside layout gets better and better. I can spend a age just looking one pic. I find so many things in there its just brilliant.

My mate has a layout indoors and then he has built a outside layout which he joins up when he opens the patio doors, think its the full length of his garden hell of a size and its 00. Had it for 15 years and still building, seen the light and just gone over DCC.

Anyhow thansk for those pics keep them coming and what a brave man saying you dont like blue loco's much, brave man. :pathead

Phill
Online now: No Back to the top

Post

Posted
Rating:
#29209
Guest user
Thanks Phil. Well just nipped outside and fitted the 'outdoor' backscenes mk2! Actualy they dont look that much diffrent from a distance its just the overlaps are more noticable as I wanted to keep the laminated edge. Will find out in the morning if the idea works or not. It has got me thinking though……can I laminate scalescene papers for use outside and if successfull can I laminate a full scalescenes kit! If so there will be another wharehouse on the building program.:lol:
Back to the top

Post

Posted
Rating:
#29211
Guest user
Dave

with laminated things what you have to watch is the edges water can creep in between the laminate and as soon as it touches paper it draws it and makes a complete mess it may pay to check this and perhaps look at using something to seal along the edges around the outside.

cheers Brian.W
Back to the top

Post

Posted
Rating:
#29233
Guest user
Love the night shots, Dave, and your track weathering looks great.

 Mike
Back to the top

Post

Posted
Rating:
#29266
Guest user
Well just poped outside and checked the backscene and am happy to report that all is well. Just to prove it heres some pics……..


Back to the top

Post

Posted
Rating:
#29267
Avatar
Full Member
The bottom right photo shows the scale of what you are trying to achieve Dave and I take my hat off to you, that is some project.

Have you thought of getting the whole backscene printed off on one roll at a print shop? That way you could avoid the joins between the A4 sheet.

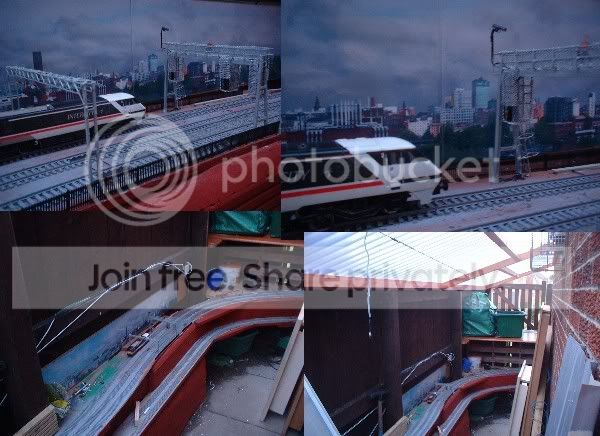
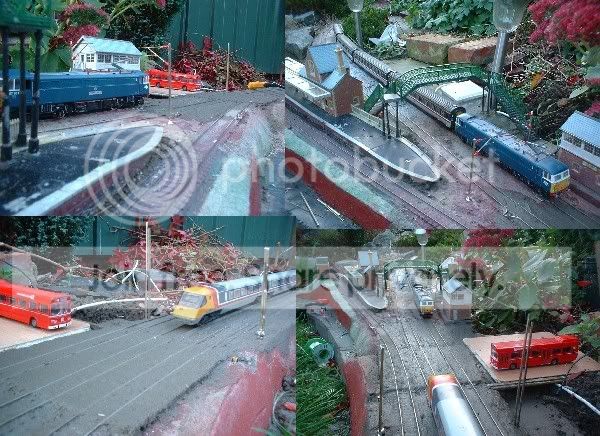
The top right photo is the one for me. I can just about hear the woosh as she roars past.

Marty
N Gauge, GWR West Wales
Newcastle Emlyn Layout.
Newcastle Emlyn Station is "Under construction"
Online now: No Back to the top

Post

Posted
Rating:
#29272
Guest user
like the shots Dave,great space to work in i envy that :mrgreen:
i would like to see it in person when i can drive again.

:cheers:thumbs:thumbs:lol::lol::lol::cool:
Back to the top

Post

Posted
Rating:
#29357
Guest user
Dave with so much track do you get problems with voltage drop?  How many feed wires have you had to install?

 Mike
Back to the top

Post

Posted
Rating:
#29373
Guest user
The only real problem I had was the APT needed 20-24v to get any speed out of it! I did mesure the track voltage when I ran a few test trains in the summer and it wasn't realy much of a problem. The APT on the other hand is in the process of being 'rebuilt'! The track supply is actualy split between supplies. The change over point is parkway station where the track supply is automaticly switched between the the inside controler and the outside supply. This is done using yet more relays and reed switches and works quite well. The down line is wired through a timer unit so trains enter parkway station pull up to the signal then stop. The timer then holds the train for about 30 seconds before changing over the supplies and signal to green. The train then pulls away automaticly and changes the signal back to red. Was a pain in the backside to do but works realy well and looks so cool! Trains on the up line will be held in the station untill the operator takes over control for the run to the terminus. Thats why the down line has a loop to hold additional trains and the whole process is mointored remotley via CCTV.
Back to the top

Post

Posted
Rating:
#29397
Guest user
Cheers, Dave.
 I can just imagine how good the stopping, starting and signal changing looks!
 You just HAVE to get a mini camera and experience it from the driver's perspective.

 Mike
Back to the top

Post

Posted
Rating:
#29446
Guest user
Tonight I assembled another OHLE gantry on the outdoor section bringing the total OHLE gantries now to three. The plan is to install a bridge at each end of the section with the backscene then attach the wires between the bridges. The rest of the evening has been a trip down 'memory lane' as I've been over on the TVGR forum reading over the posts of the layout from the early days of construction. Heres a link to the thread for those wanting a bit more information on the layout…..

http://www.railwayz.co.uk/phpBB2/viewtopic.php?t=1983&start=0

Tomorrow will be my last at work as Im on a 'modeling holiday' next week. Im planing to do quite a bit outdoors next week so expect to see some progress weather permitting of course! Work in the pipeline includes… construction of the station buildings for parkway, finishing off the signaling system, building some ducting for the signal and control cables, instalation of the OHLE masts and gantries, sorting out the power supply for the out door section. Then on the second day I will be shooting a video!:lol:
Joking apart with the dark nights drawing in along with the weather this will proberly be the last opertunity to get some work done outdoors and with the Mrs at work NO DISTRACTIONS!!:thumbs

 
Back to the top

Post

Posted
Rating:
#29594
Guest user
Today I started on yet another project. This time it's the level crossing at Woodham station. I would eventually like to have the crossing 'fully' operational if possible with lifting barriers, etc although how I will do this is yet to be decided! To make the eventual operation easier I have decided to have just one large barrier at each side of the track. The barriers will be linked via a brass rod running under the track bed so the first job this morning was to chisel out the base. The down main at this point had been relayed back in the summer and still required setting in mortar so the track was simply lifted out of the way along with the branch line. The up line however was in good shape so the base was carefully removed from under the track………


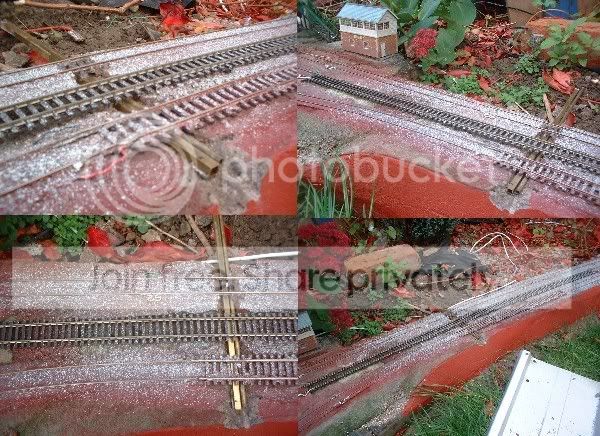
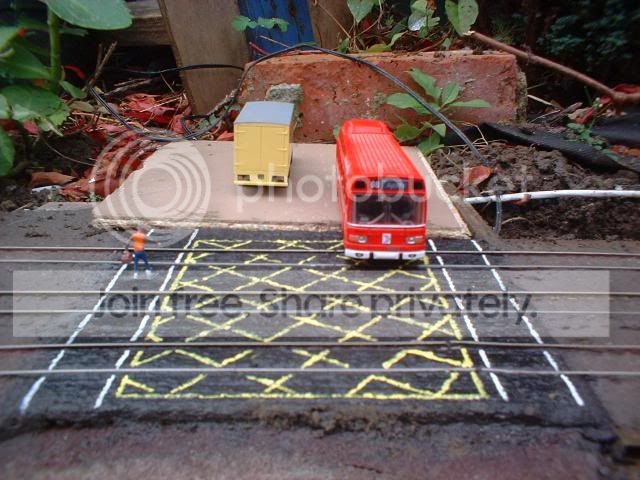
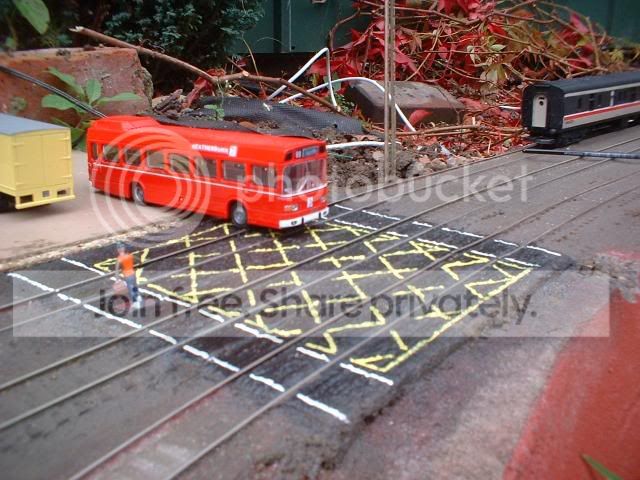
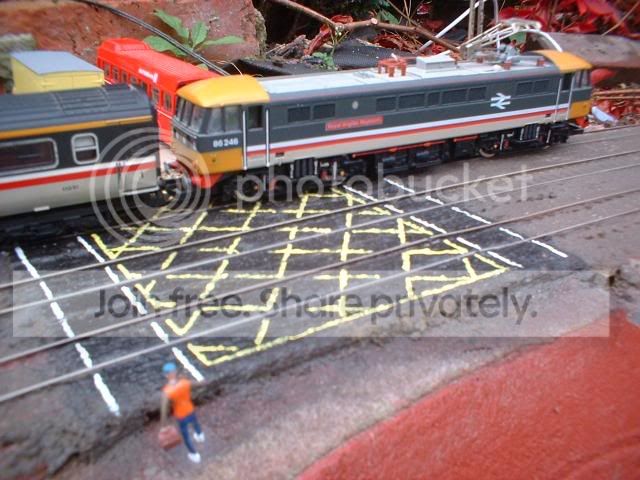
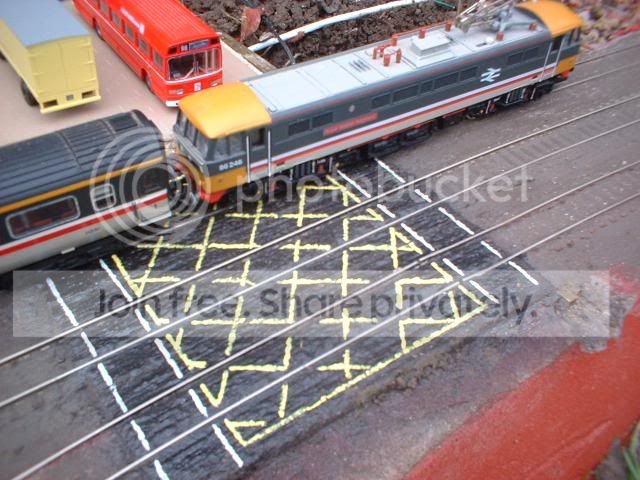
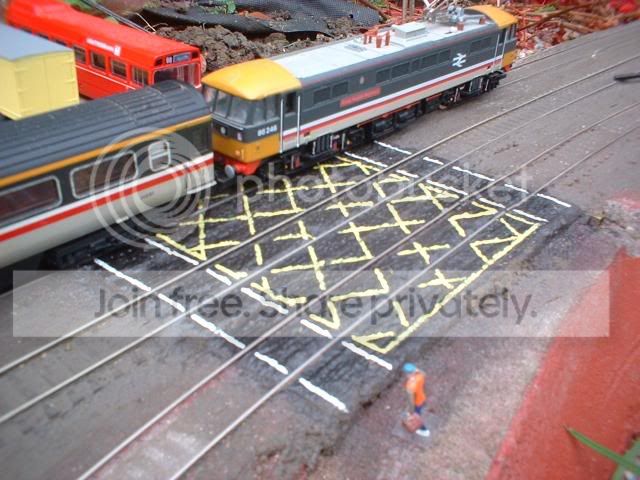
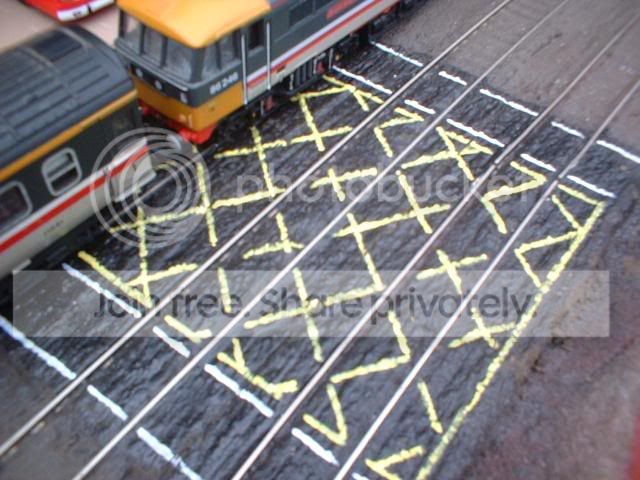
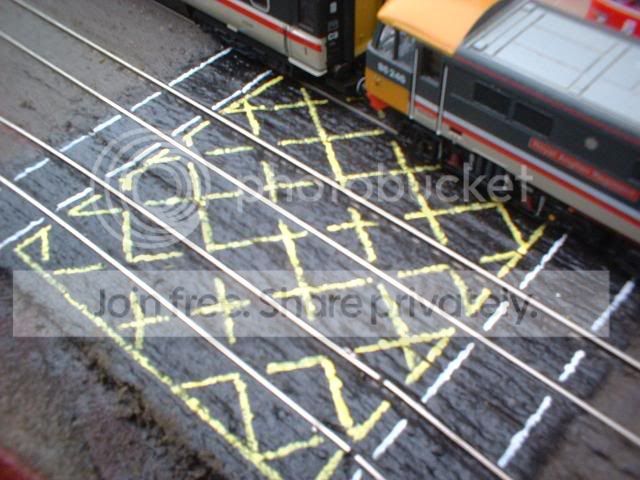
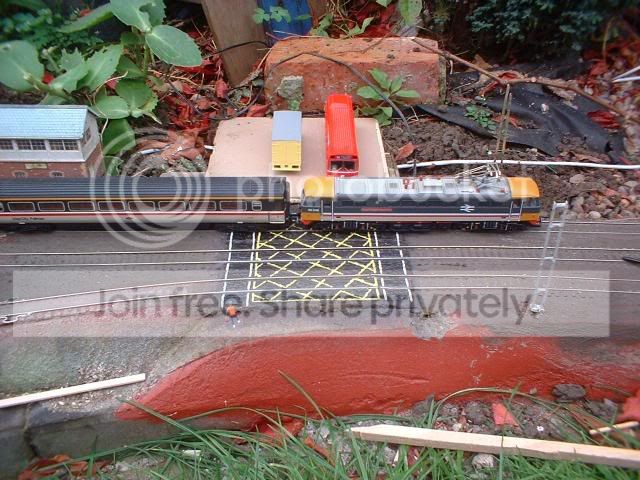
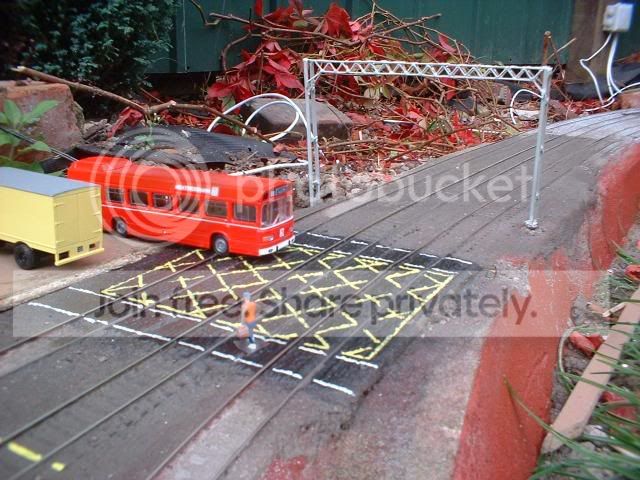
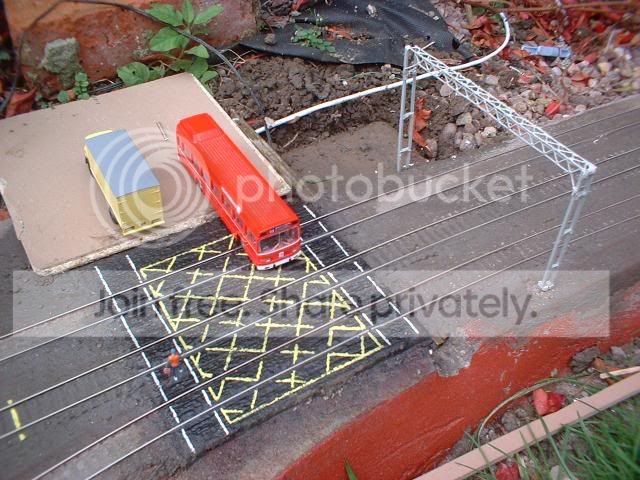
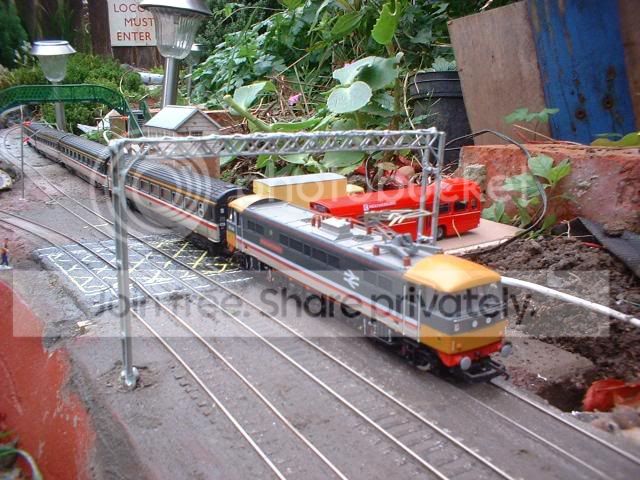
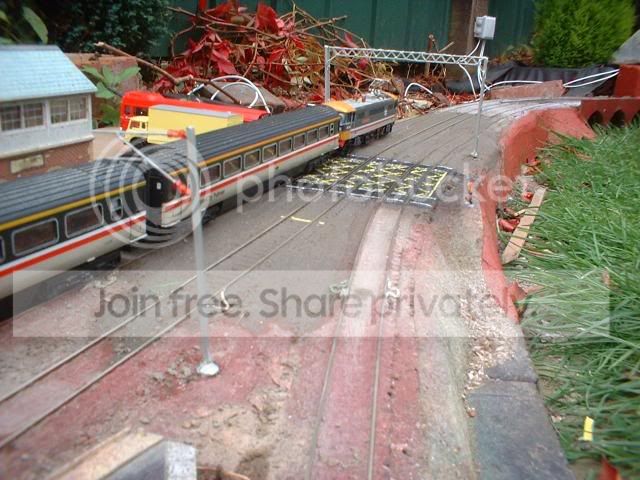
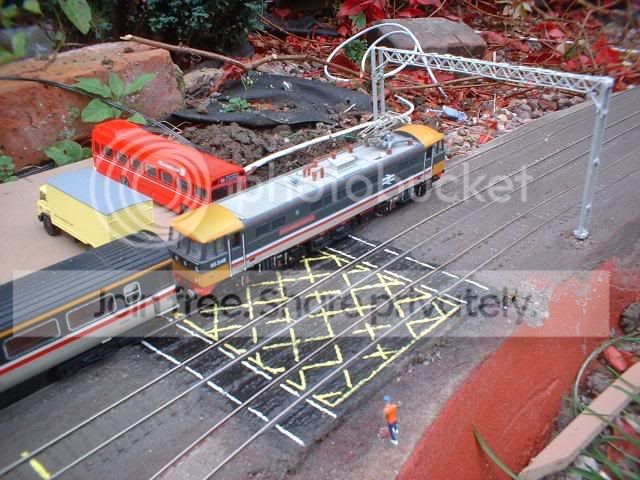
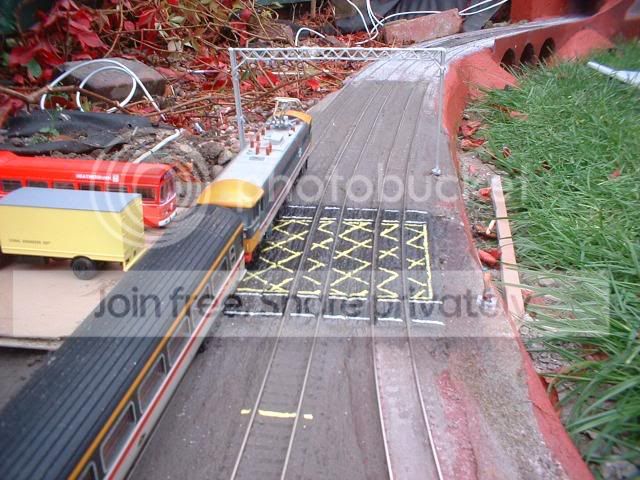
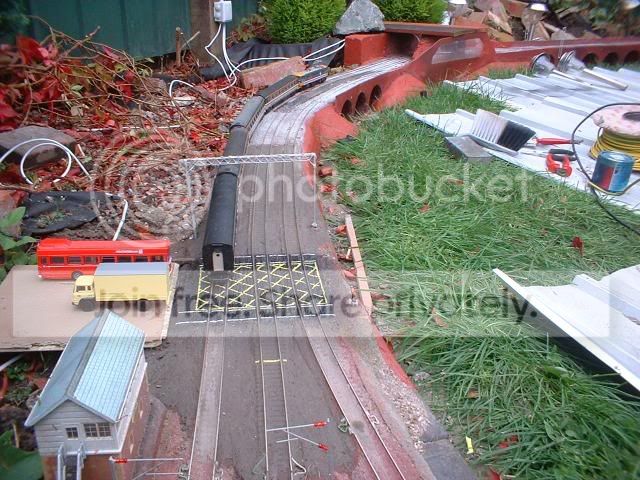
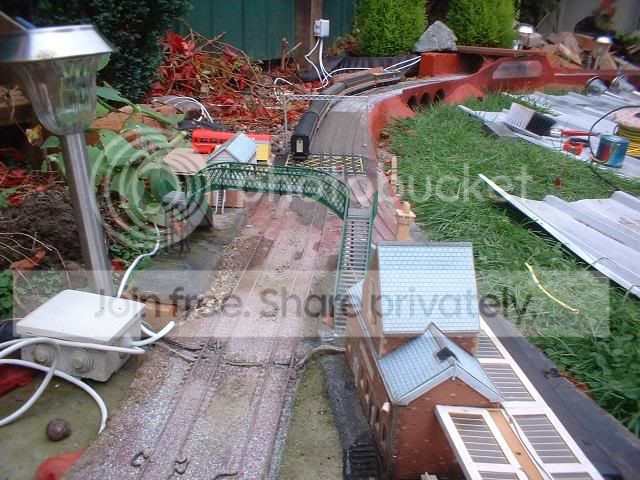
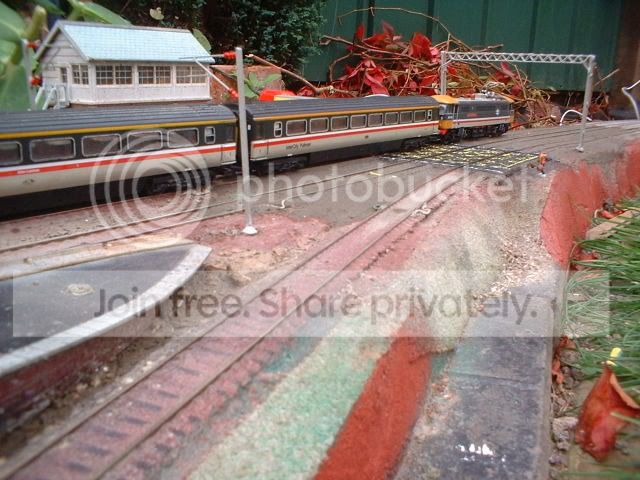
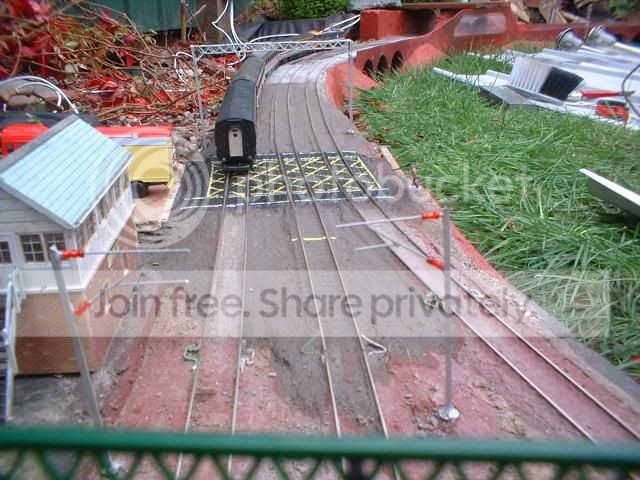
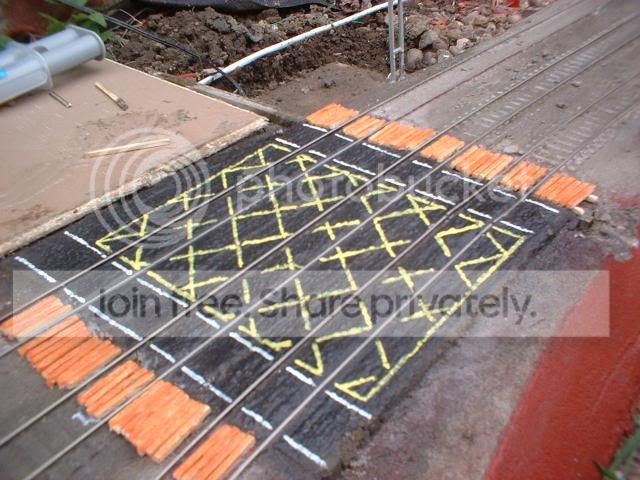
You will note in the pics that there are two brass tubes running side by side. The round one is for the barrier mechanism whilst the square one is for the cabling for the lights. Once the brass tubing had been fitted and the track replaced the roadway was then created using a mix of mortar. The replacement track on the down main was also set at the same time……..


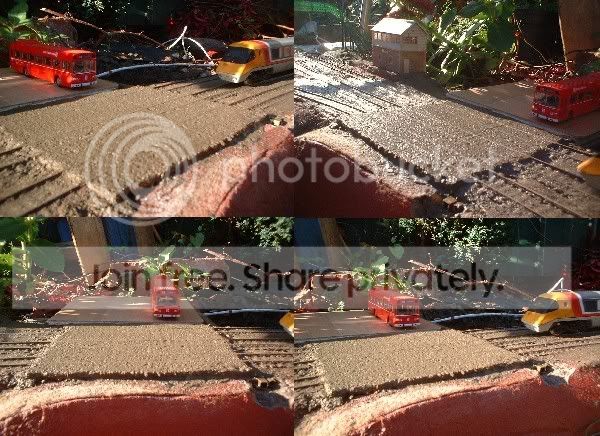
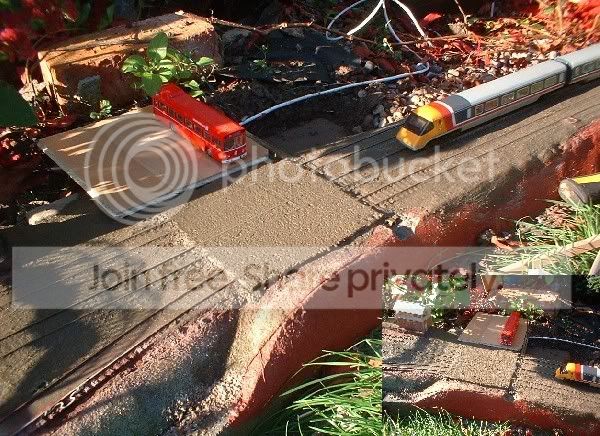
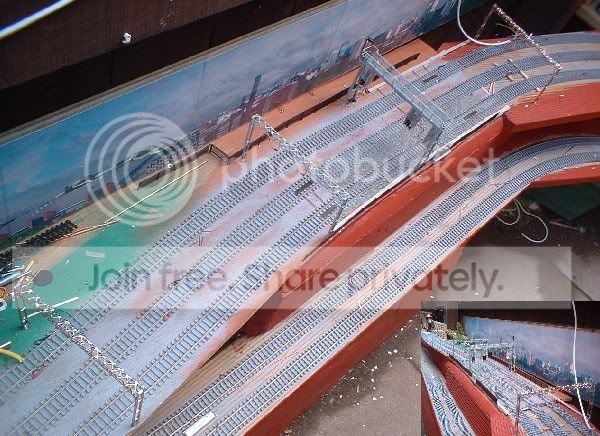
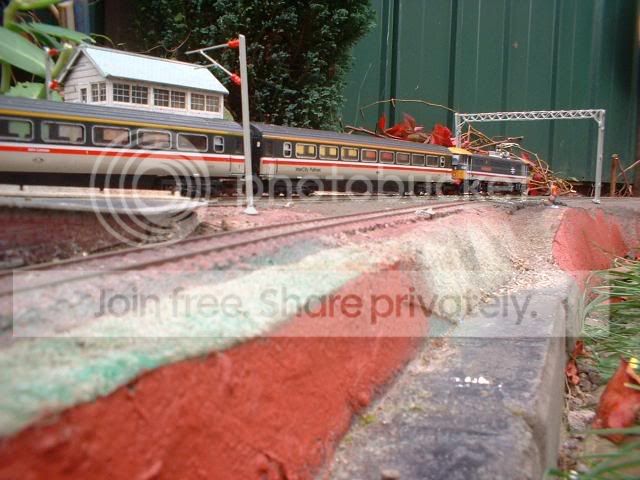
Whilst working on this section I decided to fit the OHLE supports as well. The supports for one side of the gantry were set in the mortar whilst the other side was soldered to a screw. At the other side of the crossing the two single masts were made from scrap rail and brass rod……..


The addition of the crossing has brought the station area to life and has given a good reason for the signal box to have been retained. Weather permitting work will continue on the crossing tomorrow. To finish tonight's update here's a pic of the signal gantry area showing the two new OHLE gantries in place………


Tune in tomorrow night for another update.
Back to the top

Post

Posted
Rating:
#29600
Avatar
Full Member
Dave

A very interesting approach to the construction of the level crossing. It will be interesting watching this develop. Seems a marathon task putting in those OHLE gantries - how many do you have to construct?

Bob(K)
Online now: No Back to the top

Post

Posted
Rating:
#29602
rjr
Guest user
Here is hoping for a fine weather week so we can all enjoy seeing nightly updates from your modelling Holiday.

John
RJR
Back to the top

Post

Posted
Rating:
#29704
Guest user
Dave, I am at Bodmin Show on our remote access laptop and it is taking an age for pictures to load, but it was well worth the wait!

I am really looking forward to seeing how you get working level crossing barriers - something I really want but also have no idea how to achieve it!
Back to the top

Post

Posted
Rating:
#29726
Avatar
Full Member
Nice work Dave, enjoying the updates and storing the info away for my future garden railway (shhhhh, don't tell T)

Marty
N Gauge, GWR West Wales
Newcastle Emlyn Layout.
Newcastle Emlyn Station is "Under construction"
Online now: No Back to the top

Post

Posted
Rating:
#29730
Guest user
Ok this should be intresting. I normaly edit my pics on the PC and resize them before uploading to photobucket. This is one reason that I combine my pics as this process takes ages. However I think I've finaly sussed this photobucket out! So here's a test pic……


Back to the top

Post

Posted
Rating:
#29732
Guest user
Cool looks like that works. Well I hope you all like pics cos heres a few from this afternoon………


Back to the top

Post

Posted
Rating:
#29733
Avatar
Legacy Member
That's great Dave, much better than the montages.
Online now: No Back to the top

Post

Posted
Rating:
#29734
Guest user
I hope that that last lot of pic's loaded OK and didn't take too long!! Well as you can see the crossing has moved on a bit. One thing that I would like to say at this point is if I ever make another one of these I will use car body filler as the mortar finish isn't as smooth as I would have liked. Having said that it still looks ok for a first attempt! First job today was to clear out the cement from the rails. This prover easer that imagined as the cement still hasn't fully set! First I ran a spare bogie over the crossing that left an imprint in the surface. Next I carefully dragged a piece of scrap rail along the sides of the running rails to remove the waste. The roadway was then sprayed with a black aerosol can before the markings were added. These proved to be a pain as the wind was drying the paint whilst it was still on the brush! Once finished I took some pics then decided to finish of the OHLE gantry. Here's a top tip for the day….. don't lean on the level crossing whilst the cement is still damp as the paint comes off and ends up on your fleecy top!! The biggest problem outdoors today was the wind as trying to use a soldering iron outside was proving to be a nightmare. Much mumbeling then followed as I tried to solder the top of the gantry to the posts. More mumbeling followed as I then decided to put some more screws into the trackbase further up the line for the next set of OHLE. This was going OK until I cracked the base! Looks like a job for Mr Aroldite! The last thing that I did was to fix in place the wooden slatts at each end of the crossing to stop any scale animals wandering on to the track. Unfortunatly it didn't stop a spider and a couple of ants! Well now that I've got warmed up it's back out for a bit more modeling. More later…….
Back to the top
1 guest and 0 members have just viewed this.