00 Gauge - Maxmill Junction
Posted

Full Member
Petermac's Railway
Wot they all said!!
Posted
Inactive Member
Cheers
Evan
Posted
Full Member
Excellent work. I take my hat off to your patience
Cheers
Agreed.Evan
Cheers Pete.
Posted

Full Member
I would imagine that with all those girders, even with rattle cans, painting will be a challenge…….which you will doubtless overcome! Looking forward to seeing the end result.
Keep Well
Posted

Full Member
As I said, I'm delighted with it and my thanks to Doug for pointing me in the right direction.
As you say John, painting it will be a challenge - not sure whether to use a rattle can or break out the airbrush. This would be an ideal job for that portable airbrush demonstrated by Twobolt John recently. I was sorely tempted to buy one but didn't - I now regret not doing so !
'Petermac
Posted
Full Member
Posted

Full Member
With the intricate detail of the many structural members intersecting and joining together, you’ll need to get in close (50mm / 2â€) with the airbrush to get into the nooks and crannies at not too high pressure, (try 20lbs psi and adjust if necessary) and make several slow passes to build up the colour density. Start on the underside of the bridge, where it should not be seen, so you can practice.
If you paint from a rattle can at this close range, it will simply bounce back and any which may settle will be blown about to settle where you do not want it and will be a mess. If you get too far away with the can, the paint will never get into the intricate parts of the structure.
This is when a decent airbrush with an adjustable air compressor pays for its living. A cheap airbrush may do the job, but they can lack control and consistency, as performance when new may be acceptable, but cheap airbrushes rarely maintain consistent performance, so don’t mourn not buying that cheap airbrush screwed to the non-adjustable battery powered compressor.
If you are spraying acrylics, use a retarder to help drying paint build-up on the airbrush tip. Make sure you prime, preferably with grey, but white will work, you may just need more top coat paint if going for a dark finish. Passion 132 can send you any painting supplies you need.
If using enamels, don’t bother with expensive thinners, as white spirit works as well as probably anything out there.
Hope this helps and doesn’t sound too scary, as it’s not!
What is your colour scheme?
Best,
Bill
 Last edit: by Longchap
At 6'4'', Bill is a tall chap, then again, when horizontal he is rather long and people often used to trip over him! . . . and so a nickname was born :)
Posted
Full Member
I'm afraid I succumbed to inquisitiveness and ordered one of those USB airbrushes - thanks to Amazon Prime, it should arrive tomorrow ……………….
I do have an airbrush - it's not an expensive one and it, together with the compressor, which isn't too bad I think, are stored somewhere on the mezzanine floor in the garage. As I can't actually see it from ground level, I didn't want to move heaps of boxes looking for it. Whenever I've done that in the past, I've discovered things I'd needed the day before and ended up being horribly side-tracked ……………………….. :oops: :sad:
I do have some Vallejo primer - somewhere ! I've found the white primer but should also have some grey - maybe that's also up on that mezzanine …………….. :roll: :roll:
I know I haven't got any retarder - do you think I really should get some as a priority Bill ? I've only used the airbrush once (100% up on Mr Dew therefore………. :lol:) and that was for weathering track many years ago. This will be the start of a new skill learning exercise ……………. :hmm
'Petermac
Posted

Site staff
Cheers
Matt
Wasnie me, a big boy did it and ran away
"Why did you volunteer ? I didn't Sir, the other three stepped backwards"
"Why did you volunteer ? I didn't Sir, the other three stepped backwards"
Posted
Full Member
Although I've used my airbrush frequently, I've only ever put enamel paint through it. As thinned oil based enamel paint leaves the airbrush, it is drying rapidly and thin mist coats dry very quickly on the workpiece. Acrylics dry even more rapidly, so much so, that they can clog the tip of the airbrush and the paint will spatter and the brush can block. Pinching the tip of the needle with index and thumb can usually clear a blocked tip and the addition of a drop of retarder into the paint mix can help keep it liquid longer to avoid blocking the tip, according to what I've heard.
Give it a try witghout retarder and see how you get on, particularly on the underside of the bridge. If you need some, you know were to go.
Bon courage mon ami,
Bill
Last edit: by Longchap
At 6'4'', Bill is a tall chap, then again, when horizontal he is rather long and people often used to trip over him! . . . and so a nickname was born :)
Posted
Full Member
Amazon delivered the cordless airbrush as promised - it runs at around 17 psi so the bumpf says. It only has the small traditional paint holder on top and, as Twobolt John said, whilst it claims to be dual action, the first action - that of pumping air, starts immediately one turns the machine on - the trigger only controls paint flow. Thinking about it, that's probably no bad thing because one can't release paint without an airflow ………..
It's going to be interesting discovering what it will and won't do ………..
I have also found my bottle of Vallejo grey "Surface Primer" and wonder if I can thin it (if necessary) with water or do I need to buy their thinners ? I'm going to order some retarder as you suggested Bill - what about "flow-aid" or whatever it's called ? It's fortunate that I found the primer because Passion 132 are out of stock at present. ;-)
I did try our local "Joue Club" for paints - the French "Toys are Us type shop - but they don't stock Vallejo and the guy in there didn't strike me as being very knowledgeable about paints.
'Petermac
Posted
Full Member
A retarder simply slows the drying time. As I’ve not yet airbrushed acrylics, I can’t advise on how much to use, but you can always add more, rather than take it away.
If you don’t have an extractor spray booth, wait for a dry, warm and calm day and spray outside with a mask and goggles or visor on, so you can’t inhale any fumes. I always use a full face visor and a double filter half face mask covering mouth and nose. This is simple, no brainer risk avoidance.
Bridge painting: It's probably better to discover what your new toy can do on something other than the bridge, as its underside offers you only so much practice area. Once fully charged, make sure the airbrush functions correctly by filling the colour cup with water and get used to the feel of the controls.
Then find something not too small to spray some paint on, like a plastic bottle (filled with enough water so the airbrush pressure doesn’t blow it over) and clean and degrease it. I use IPA. Now you can see how to control the spray pattern and density by varying the distance of the nozzle from the workpiece. Start at maximum distance, say 200mm / 8†and you get the largest spray coverage. Spray in a straight line, no cheating or wiggling, at about 1†per second and gradually come in closer to 50mm / 2†and you can determine how to get the coverage you need for a particular job in hand.
If you use a curved practice object, follow the curvature of the painted surface to keep a constant distance between nozzle and object.
Then find something as similar as possible to the nooks and crannies of the bridge and repeat the above practise process and if you’ve been at it for 30 minutes or more, recharge the compressor before spraying the bridge, as you don’t want to run out of air half way through.
Have fun and clean the airbrush before putting it away, including the needle, removing it only through the front of the airbrush, otherwise paint is dragged through the internals.
Don't rush or panic, be methodical and have fun.
Best,
Bill
At 6'4'', Bill is a tall chap, then again, when horizontal he is rather long and people often used to trip over him! . . . and so a nickname was born :)
Posted
Full Member
Cheers Pete.
Posted
Full Member
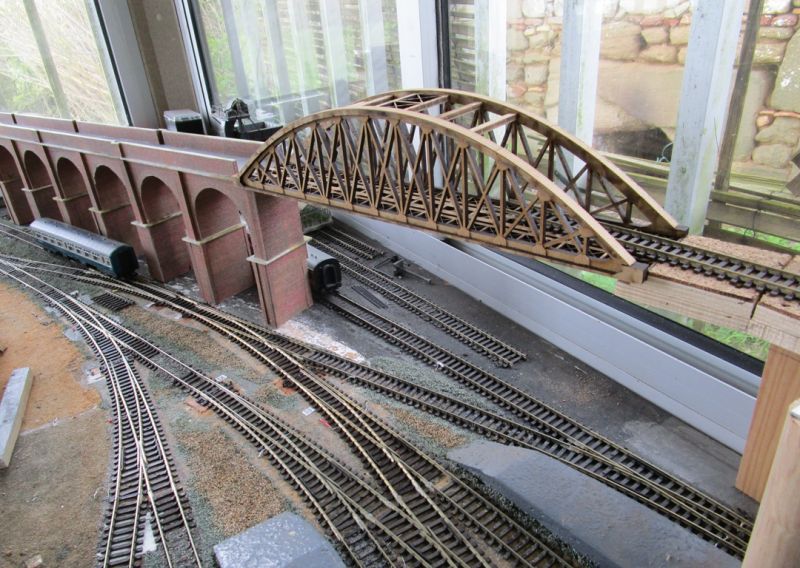
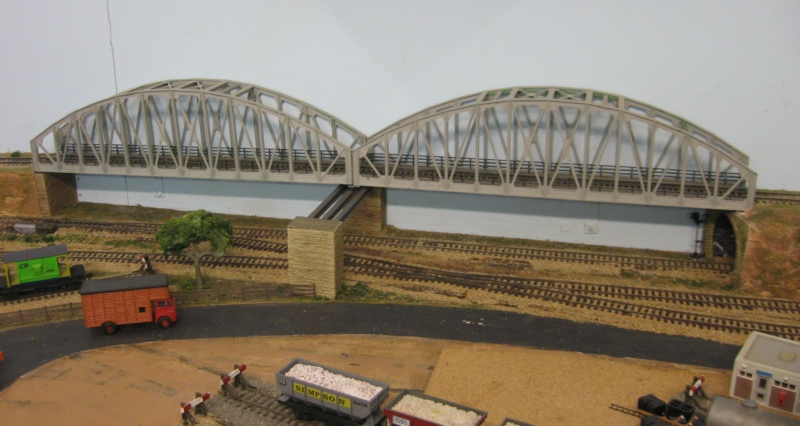
I had to cut back the tongue on the rising track at right to accomodate the bowstring girder bridge ………..
From this:

To this:
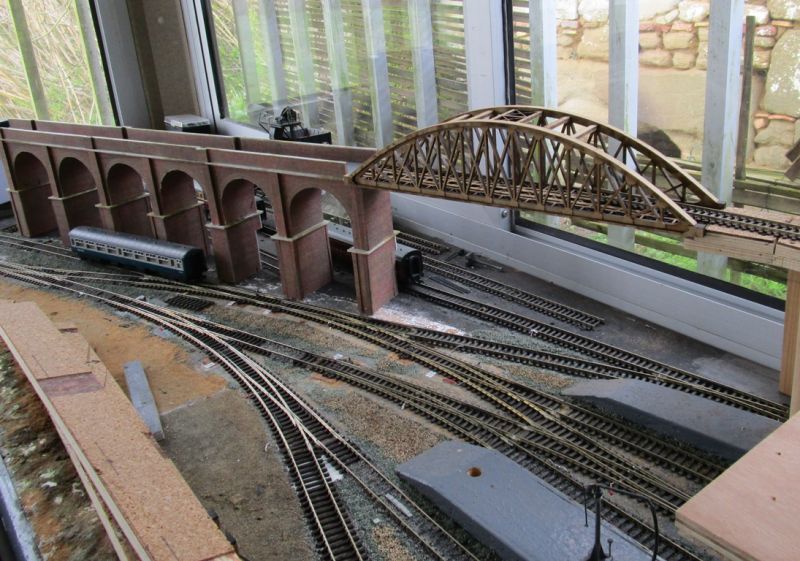
I'm wondering if, at this height, it looks a bit "contrived" …………….. :hmm
I've also done some cladding on the viaduct bridging the lift-up flap at the other end of the layout. I'm delighted to say, not one piercing saw blade broken !! I used a No 2 blade so relatively hefty but followed Phil's advice to a)let the saw do the work, b) keep the sheeting tight to the cutting jig and c) slow and easy vertical sawing action :
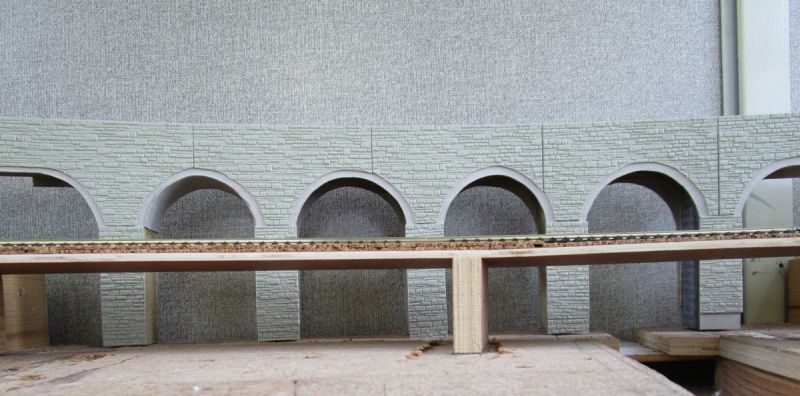
The rebates around the arches are for the soldier course header stones. I had started cutting individual stones from the Wills sheets but, having checked the average life expectancy for bald men, decided I didn't have time so will experiment with my initial idea of card bonded to sandpaper for a bit of texture. Milliput will fill the joins which hopefully, once scribed, will become invisible ………
In this shot, good eyesight should see where I've attacked the arch soffit covering on the left hand arch. I tried all sorts but couldn't really get very far. Your plastic can idea would probably have worked Matt but I simply couldn't find an empty can. All my "empties" are pool chemical buckets and are either extremely brittle (having stored chlorine tablets) or were too "bucket-shaped" for my needs. I eventually tried Michael's Scalescenes method of glueing thin card (Doug's famous Cornflako packet) onto the edge of the side faces. 2 layers should give it sufficient strength to accept whatever stone covering I decide to use - probably Scalscenes paper because it will be exteremely difficult to see once the surrounding buildings and scenics are in place. Still to fit with the coarse stone sheeting are the inner faces of the piers :

I'm putting off painting anything for as long as possible !! It's in the painting that I can usually ruin even the best of models……………………..
'Petermac
Posted
Full Member
Don’t worry about the bridge painting, as if you don’t like it, just flash the airbrush over it for another clean canvas, while you can hand paint a trail section of stone viaduct (on the rear if covered with stone texture?). This is where you bring everything to life and by using a restricted complementary colour palette, all the individual components become a harmonious whole.
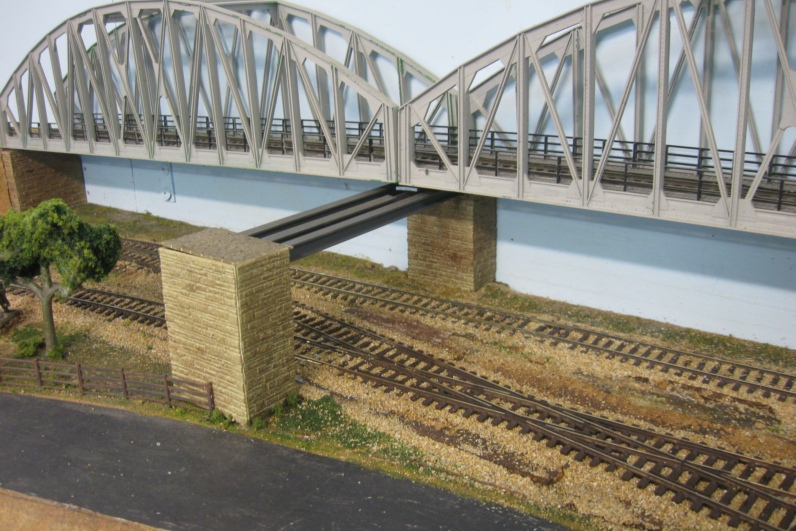
The bridge is self-suggesting a colour scheme to you, which should to be in harmony with the viaduct to bring the layout together, but don’t forget the structural support a prototype bridge would require at the right hand end to remain standing without the aid of modeller’s license.
Superb progress Peter and bon courage for the finishing stages.
Best,
Bill
Last edit: by Longchap
At 6'4'', Bill is a tall chap, then again, when horizontal he is rather long and people often used to trip over him! . . . and so a nickname was born :)
Posted

Full Member
Staying on the thread Kevin.
Posted
Site staff
Cheers
A very knackered from Gardening Matt
Wasnie me, a big boy did it and ran away
"Why did you volunteer ? I didn't Sir, the other three stepped backwards"
"Why did you volunteer ? I didn't Sir, the other three stepped backwards"
Posted

Full Member
The bridge is looking great - very smart cutting and congratulations on not breaking a blade, much better than my first attempt with the piercing saw. The soffit covering also looks spot on in the photos, so an excellent job there and I am sure you are right, once scenery is done will hardly be noticeable, but even if it is, i think it is going to look very good. I have had to widen my own bridge which meant re-fitting the arch stone paper and although not perfect, when in pace it doesn't look as if I have had to do such drastic engineering.
I watched one of the Model Town programmes on YouTube, in which the late Alan Downes showed how he "paints" stonework on plastic sheeting, using wood dye, with talcum powder for the mortar. Sadly, the programmes seem to have disappeared from YouTube now, but it was a quick and effective method which did not require a great deal of technique. And we all know how great his buildings looked when finished.
Michael
Posted

Full Member
Cheers,
Claus
www.wct.payne-ellef.dk
www.flickr.com/photos/ellef/
Claus
www.wct.payne-ellef.dk
www.flickr.com/photos/ellef/
Posted

Site staff
3 very heavy metal beams… all on solid stone pillars
Ron
NCE DCC ; 00 scale UK outline.
NCE DCC ; 00 scale UK outline.
1 guest and 0 members have just viewed this.