00 Gauge - Maxmill Junction
Posted

Full Member
Petermac's Railway
Nothing like a clean sweep Peter! I am convinced it was the right approach. You will be able to set up things so much more efficiently now…….well laid track with accessible electrics. :thumbsLooking at that pile of surplus points reminded me of our house move 12 years ago. I soaked mine overnight in a tub of (initially) warm water and a good dose of washing up liquid. The ballast all fell away and after a good rinse the points were fine and ready for re-use.
Cheers
John

Posted

Full Member
This "skeleton" serves a dual purpose - firstly, as I've already said, it returns the board to the required width and secondly, it will carry the risers for the gradient taking the branch up to the higher level along the wall of the unit..
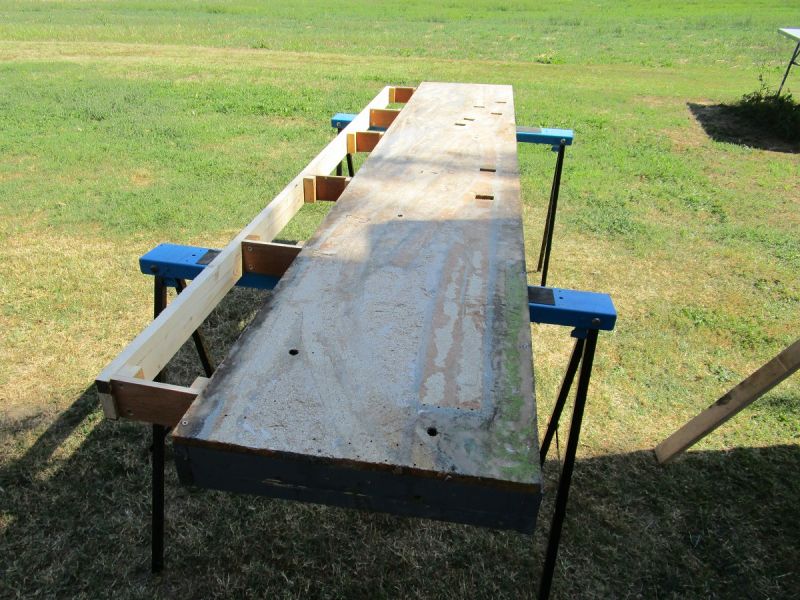
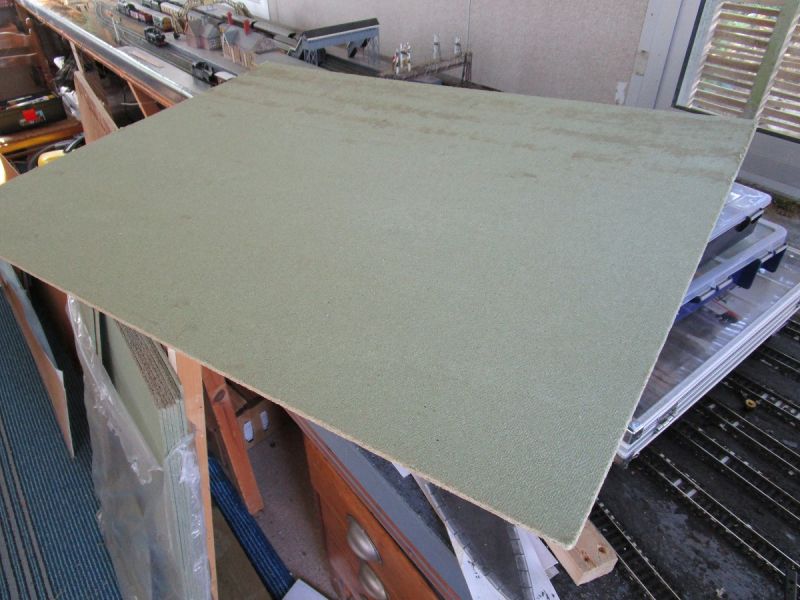
The next job was to cover the board with "clic floor" underlay for the roadbed. This is the product I used - 5mm thick and cheap as chips. It cuts quite easily with a craft knife although you do need plenty of new blades !! :
And less than 10 minutes later, it was all covered. Fixed down using ordinary staples - a good, smooth, sound absorbing surface. If it lasts, I'll be delighted :

Next job is to build a framework for it to sit on. Once that's done, and I find a way to fix it to the walls and floor without drilling holes (maybe "No More Nails" will stick to formica …..), I plan to lay the track and do the wiring with it flipped up on edge then, once completed, I'll lay it down, fix it to the carrying frame and make the rail and electrical connections at each end. A sort of "modular" approach to avoid backache and other hazards working under a 3ft high baseboard when your bones don't bend anymore …………..
'Petermac
Posted

Full Member
ATB
Shaun.
Posted

Full Member
Staying on the thread Kevin.
Posted

Full Member
From my experience, No More Nails et al will only create a good bond with porous surfaces - although they will stick non-porous surfaces, the bond is not as strong. That means you might have to screw a batten to the inside wall of the cabin and the sit the baseboard on top of it. That way, you are not crawling under the baseboard trying to fix it to the wall.
Barry
 Last edit: by Barry Miltenburg
Shed dweller, Softie Southerner and Meglomaniac
Posted
Full Member
…………………………………………in post 482 is that a past layout, or part of the new one? ………………………………………….
Do you mean the bit of a layout you can see under the panel in this photo Kevin ? :
If so, it's part of the new layout. The layout is inside a 20ft portable office unit. I have removed the main board on the left hand side of the unit - the tracks etc. seen in the above photo are part of the right hand side of the unit and will be retained.
'Petermac
Posted
Full Member
I had imagined that would probably be the case - common sense suggests any glue has got to have something to grip onto, however slight it might be.
I will build a free standing sub frame and just use glue as a sort of resistance against the wall. I'm not sure the unit has much in the way of resale value, or when and if that might need to be realised, but something tells me holes in the walls or floor wouldn't do much in the way of increasing that value ………………………… :roll:.
It stood rigid for several years without being fixed to the unit and, if I hadn't bumped it about on the back of a lorry, would probably still be as good as new. It was the ride that did most of the damage …………..
'Petermac
Posted

Full Member
Posted
Full Member
Staying on the thread Kevin.
Posted

Legacy Member
Evo Stik Sticks like Sh*t (That is what its called) that grabs virtually anything porous or not
Brian
OO gauge DCC ECOS Itrain 4 computer control system
Posted
Full Member
Barry
Shed dweller, Softie Southerner and Meglomaniac
Posted

Full Member
If I am following this correctly (no guarantee :lol:) this is about fixing the frame to the floor and walls without screwing/bolting. I was going to suggest contact adhesive where both sides are coated, left to dry, and then contact! Then the other neuron kicked in, and permanent adhesive might not be a good idea. If you simply want to keep them in place (with connections between the boards and frames of the "modules") then heavy duty silicon sealant/caulking ( "marine" grade) might be better. Strong enough to keep things in place, but a bit of flexilibility and easy enough to separate if necessary.
Nigel
©Nigel C. Phillips
Posted
Full Member
That height makes it impossible for me to sensibly work underneath for any length of time. Lying down isn't an option, kneeling quickly cripples me and I don't have a gnome readily to hand.
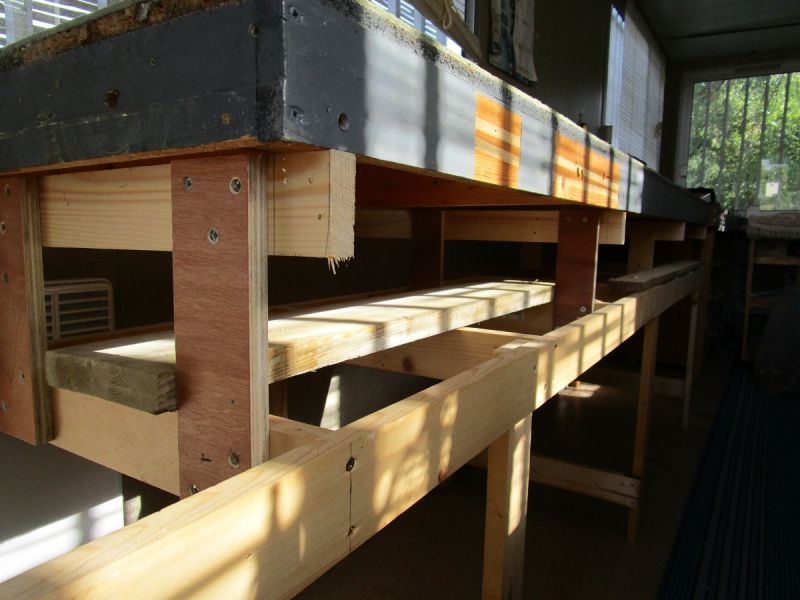
After some consideration, and only for this removed section, I decided the least difficult solution was to build a lower sub frame and mount the proper baseboards on risers. The theory is, I can still store materials in boxes underneath the sub frame and all the "electrics" will be mounted on "panels" on the subframe top, using it as a sort of "table" under the main boards. Soldering and other electrical work can then be done "on the flat" whilst I'm perched on a low stool.
The main boards will be carried on 6" risers above this framework :
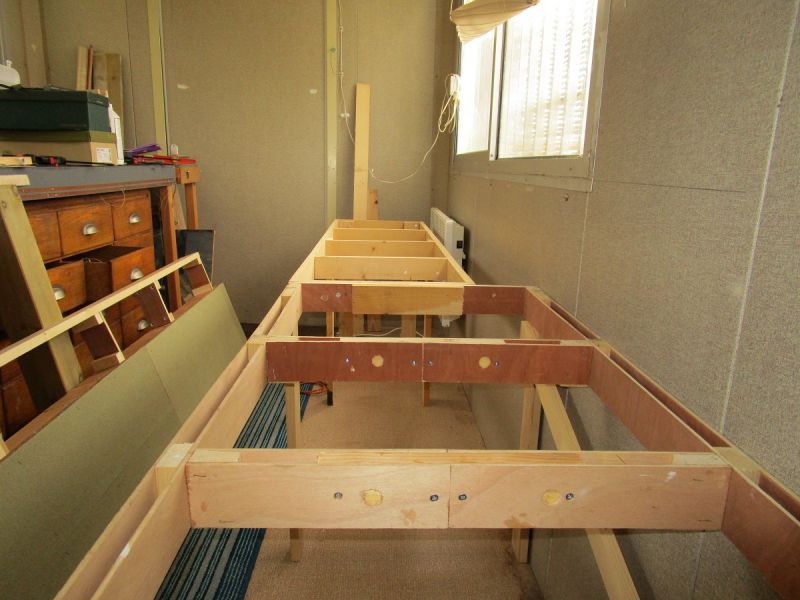
I'm hoping I've left enough clearance between the heater and the baseboard at this end. You can see the different levels between the higher main board (at the far end) and this sub frame - plenty for point motors, manual access and any soldering requirements etc. (at least, I hope so !!!)

This is the area where I wanted to "fix" the frame to the unit wall. Thanks to everyone who came up with suggestions - all taken on board and I did find mastic which said it would stick to "plastic". Not sure what Formica is but I don't think it's "poly" anything, which, understandably, seems to be a no-no for these mastic glues. Whilst the frames are free standing, quite robust and steady, I still usedthe mastic type glue to "stick" it all to the wall for extra stability. I have no idea how strong the bond is but I think it will do for my purposes :
'Petermac
Posted
Full Member
John.
Posted
Full Member
The layout is 3ft off the ground. At that height, I find it very difficult to work underneath a baseboard - it's not high enough to sit under, too high to lie under and kneeling is hard on everything.
Additionally, working under a baseboard suggests looking up to whatever one is doing, with the attendant solder burns etc. etc. I'm hoping with the subframe, I can treat is as a sort of low table, bringing all the wires down from the main board above, to panels fixed to the "table" and make all my connections "on the flat" as it were.
Hopefully, when I get that far, all will be revealed. Of course, there's always the other chance that it simply won't work the way I'm hoping………………….. :cool wink
'Petermac
Posted

Site staff
Cheers
Matt
Wasnie me, a big boy did it and ran away
"Why did you volunteer ? I didn't Sir, the other three stepped backwards"
"Why did you volunteer ? I didn't Sir, the other three stepped backwards"
Posted
Full Member
Nigel
©Nigel C. Phillips
Posted
Full Member
Last edit: by Passed Driver
Staying on the thread Kevin.
Posted
Full Member
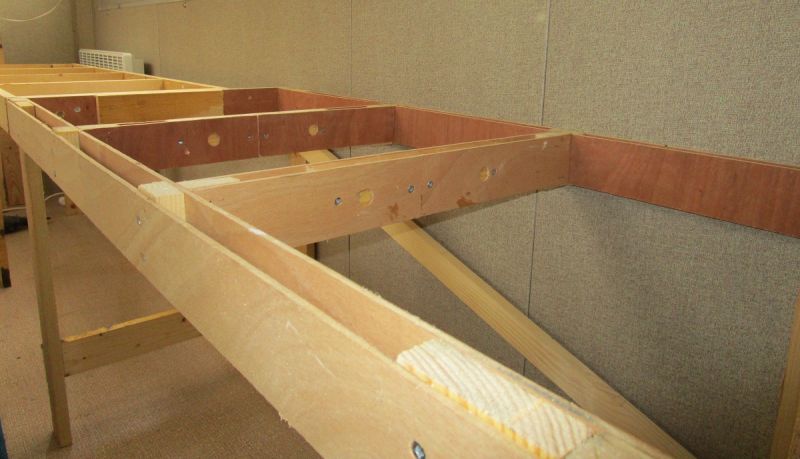
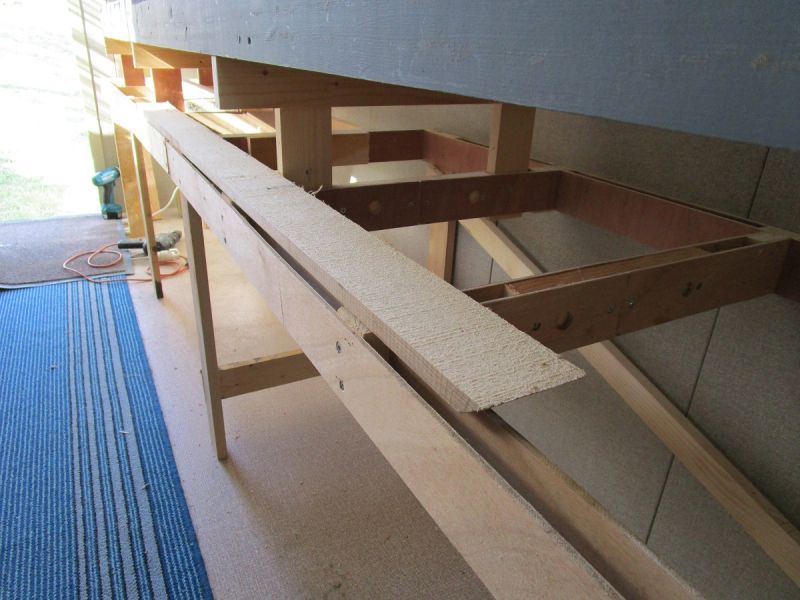
I placed, but didn't fix, the top deck on it's risers above the sub frames ready to take the storage/fiddle yard. The open top part along the wall side will take the risers for the gradient up to the upper level. Coincidentally, it will also allow the heat to escape from the electric convector heater near the door (bottom left off shot) The reason I didn't fix the top deck is that I intend to flip it up onto it's edge once the tracks are in place to fit the point motors. It will then be fastened to it's cross beam bearers :

Shown here are the risers and space between the 2 levels (the hefty bit of timber plank is just "resting" - it doesn't belong !!) Have you got the thinking behind it now John ? (Aussietrains) :
Finally, a mock up of how I intend to mount all the electrics and do any soldering. The sub frame will have a ply "plank" surface onto which all the necessary "gubbins" will be mounted. Droppers will come down from the tracks above and be soldered to lengths of copper tape which in turn, will be attached to the main power bus. I can easily access this area sitting on a low stool - much better than trying to work under the baseboard :
'Petermac
Posted
Site staff
Will the electrics be on a plywood base behind that piece ?. . . My concern is if the electrics WERE on that front plank they would be vulnerable as it would be a convenient dumping place for tools, biscuits, cups of tea etc. But if you were to turn that front piece into an L shaped shelf, and leave it loose, with the electrics behind on their own shelf , It would protect the electrics, give you somewhere for your cuppa and be easily moved if you need to do some electrickery
:thumbs liking the idea though !
Cheers
Matt
Wasnie me, a big boy did it and ran away
"Why did you volunteer ? I didn't Sir, the other three stepped backwards"
"Why did you volunteer ? I didn't Sir, the other three stepped backwards"
1 guest and 0 members have just viewed this.