00 Gauge - Maxmill Junction
Posted
Full Member
Petermac's Railway
Petermac said
Phil.c said
It’s coming together Peter, if I were you I would concentrate on the track ballast etc. before sorting out buildings as the track is the main structure of any layout, get this to look right and you’re half way there
From “Post #289,115”, 30th November 2023, 7:39 pm
You're right Phil - that's one of the things that shouted out from the photo that I'd sort of ignored whilst doing "other things". All of what you see regarding ballast was already there from the original layout, I've just removed bits where I needed to and haven't got round to redoing it. I did however, need to place that central structure before ballasting. There are also several "edges" screaming out to be painted ………………..
From “Post #289,117”, 30th November 2023, 10:48 pm
When you re-ballast Peter, don't make that big mistake of oversize ballast, I used N gauge, think of it this way, each stone should be roughly a little smaller than a figures fist, sometimes on a lot of layouts it's the size of the body!
Phil
Posted
Full Member
Last time I did any, I had awful problems with it, even after misting it with "wet water". It just seemed to go into great blobs. I think it's coconut shell or something similar. Looks good when done properly but it is a learning curve.
I did once use the more common granite ballast but it seemed to be oversize and quickly went green - a reaction with the PVA I'm told ..................
'Petermac
Posted
Site staff

I know I have in the past and it seems to bubble up and go into blobs.
I've also had the going green problem.
One reason why I thought it was a good idea to try Kato Unitrack this time round.
Ed
Posted
Full Member
Someone suggested IPA but that evaporates faster than you can get it out of the mister ….
'Petermac
Posted
Site staff

Ed
Posted
Full Member
Phil
Posted
Full Member
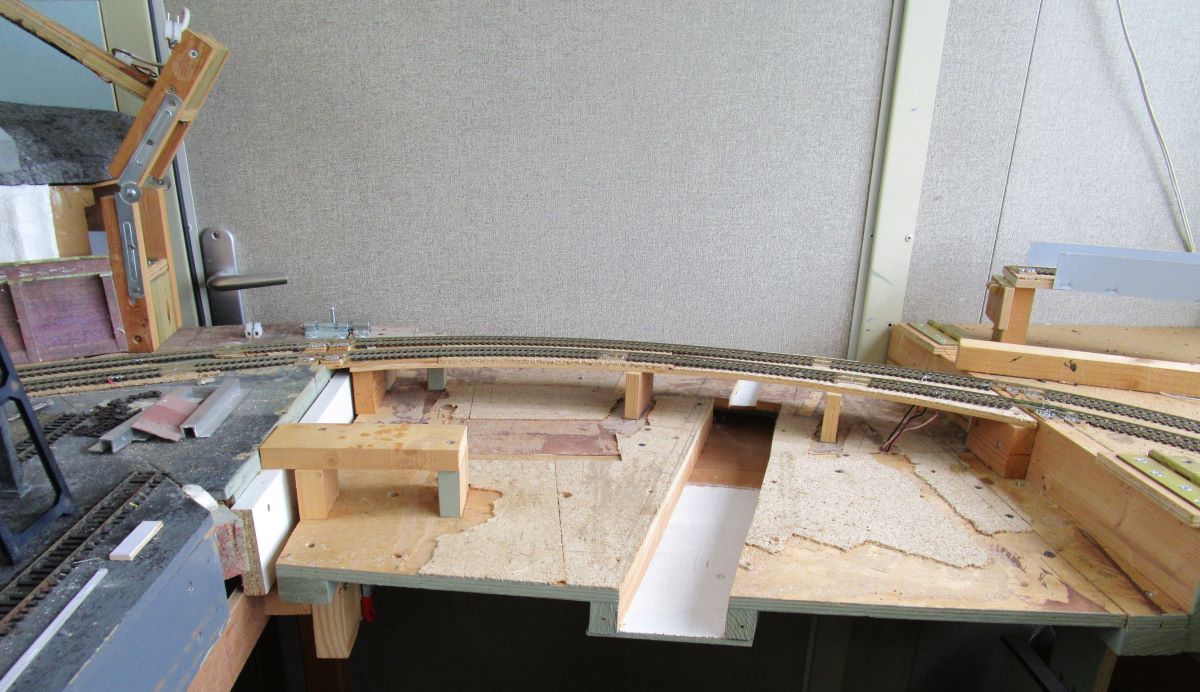
I said I had a double level flap (across the doorway) with both levels on a curve - a difficult lift-up to align properly particularly as the framework on the main part of the layout isn't actually fixed to either the walls or the floor. The track ends at both sides are soldered to some copper-clad plates which is then gapped to avoid a short
The lower level, double track, which will eventually become a canal scene, is hinged to the right and (almost) fixed in place by a slide bolt and latch fastener on the left. Here it is in place awaiting the upper level flap:

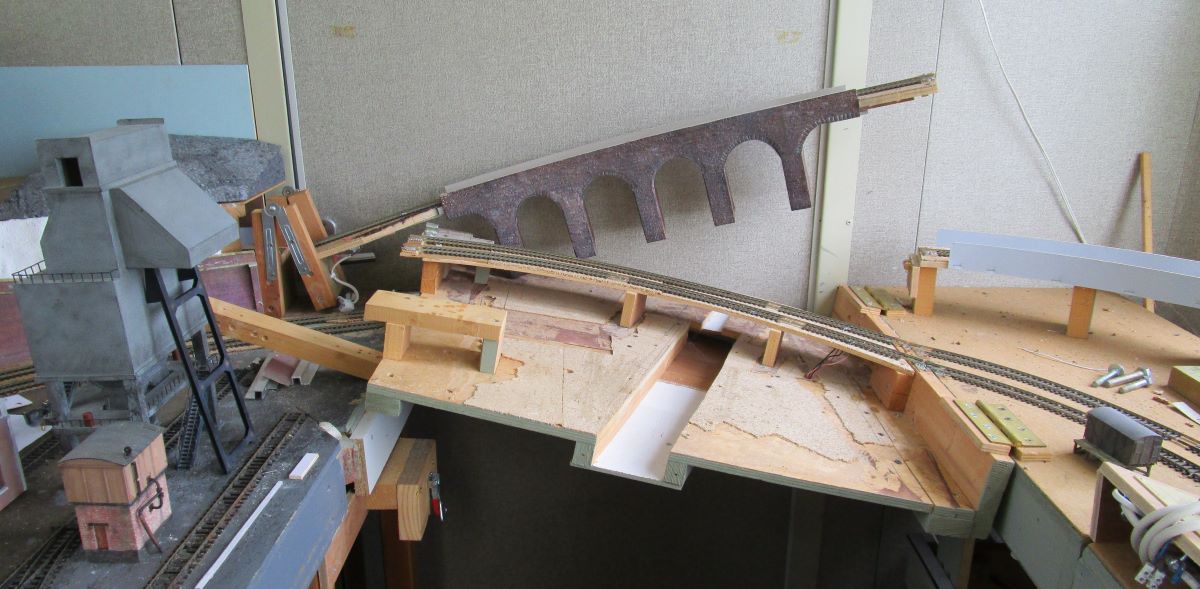
The upper level (a viaduct) is hinged to the left and clips onto the rising trackwork on the right via a ball catch. Strangely, this flap is quite easy to line up positively, presumably because the lower level is already in place. This is a single track gently rising all the way around the unit to create sufficient clearance to access the storage sidings on the lower level.
This shot shows how the 2 levels "fold" over each other - a picture is worth a thousand words - although naturally, the lower level must be fixed in place before folding the upper level down.

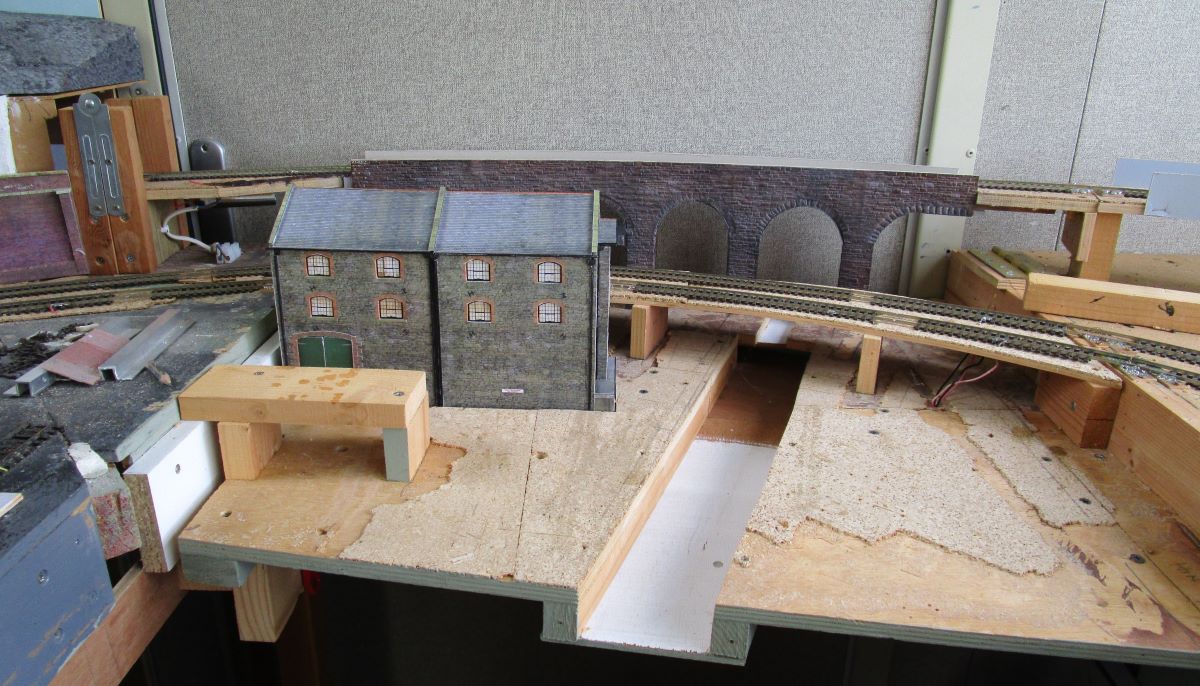
This shot shows both flaps in position and, once I've correctly "jiggled" the left hand end of the lower level, works well (most of the time).

Marty, I think, suggested a removable section of track (which I used very successfully on Maxmill Mk1) but I'll need to find some set-track of the correct radii, or find some means of "fixing" a curve on flexitrack. If I can find some, then I'll opt for that method of bridging the gap.
 Last edit: by Petermac
'Petermac
Posted
Full Member
Posted
Full Member

Phil
Posted
Full Member
I'm impressed with your solution to what was obviously a complex problem arranging for multi level tracks across an access bridge. Especially if it works most of the time!!
If you were to, maybe, slid a bit of cardboard under the flexitrack that you use as a connector peice over the gap, bend the flexi to the correct shape and then use CA (superglue) to bond the sleepers to the cardboard, that might keep the track radius that you need? You could also ballast the track so that it blends in better on the layout.
I like the canal basin there too.
Posted
Full Member

Marty - that's an excellent idea with the card base - I have both 1mm and 2mm card in stock so I'll definitely give it a try. In theory, it should work well. I'll report back.
'Petermac
Posted
Full Member
Phil
Posted
Full Member
Grabbing my popcorn…

Posted
Full Member

Phil
Posted
Full Member
Cheers,John.B.
Posted
Full Member

'Petermac
Posted
Full Member
When you get around to tarting up the area with scenic work and brick papers/arches etc etc,you won't even notice the woodwork.Can't wait to see how you tackle it.
cheers,John.B.
Posted
Full Member
'Petermac
1 guest and 0 members have just viewed this.

