00 Gauge - 'Kelly Bray', nee Callington
Posted

Banned
Build of a layout based on Callington
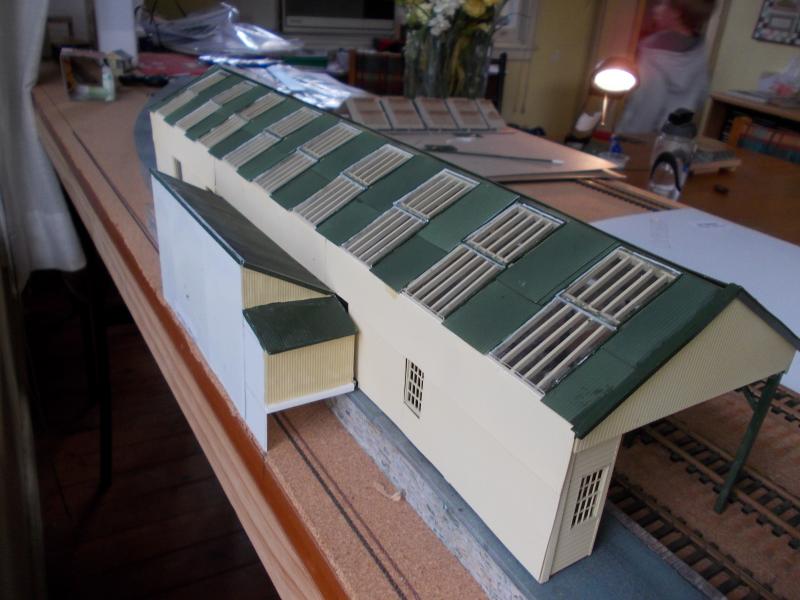
Just an update on the station overall roof or is it a train shed or just a station canopy…?Been not so busy lately but have been getting back into it again over the last few days. Some back wall framing, end wall and frame and door ways to access the small loading dock and station entrance has been created. The main structure has also been primed and a top coat or two has been applied, prior to fixing the corrugated iron sheeting (which isn't done just yet !).
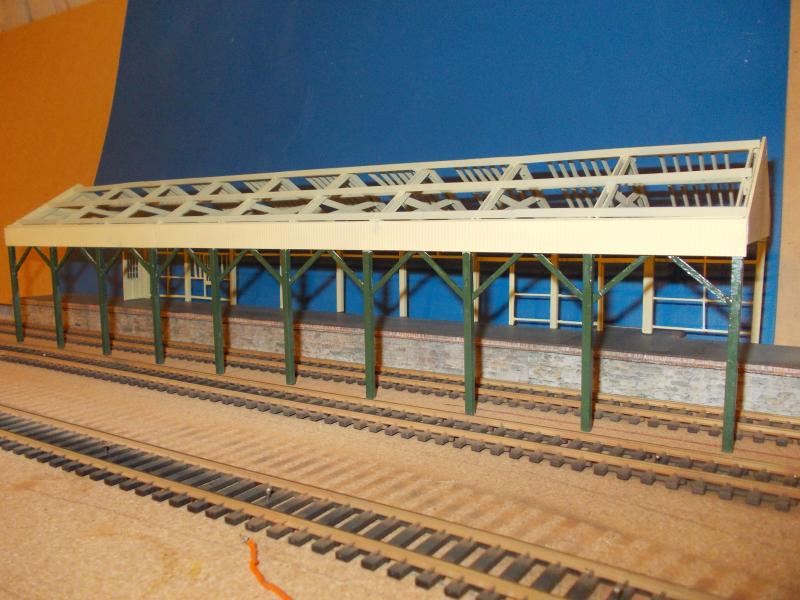
^ The overall roof painted. Painting had to be completed on the frame before installing the glazing and corrugated iron on the roof and corrugated iron on the back wall. It would have been a nightmare trying to airbrush only from the bottom up.
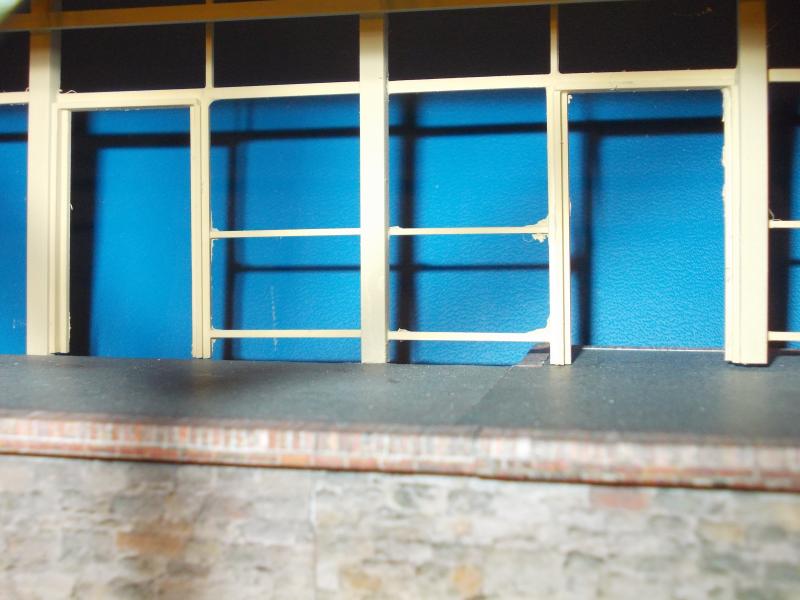
^ Close up of some of the visible framing on the back wall and the end wall. Again, windows are from the Tichy Train Group box. The frames are made of 1.5 x 1.0mm and 1.0 x 0.75mm styrene. The end wall is a piece of weatherboard (clapboard) as used on the signal box mentioned previously.
Photos can be cruel ! I just noticed the crooked framing bar above the window, which can be re-glued when I attach the corrugated iron. But how big does that hair look ? This will be plucked out in good time !
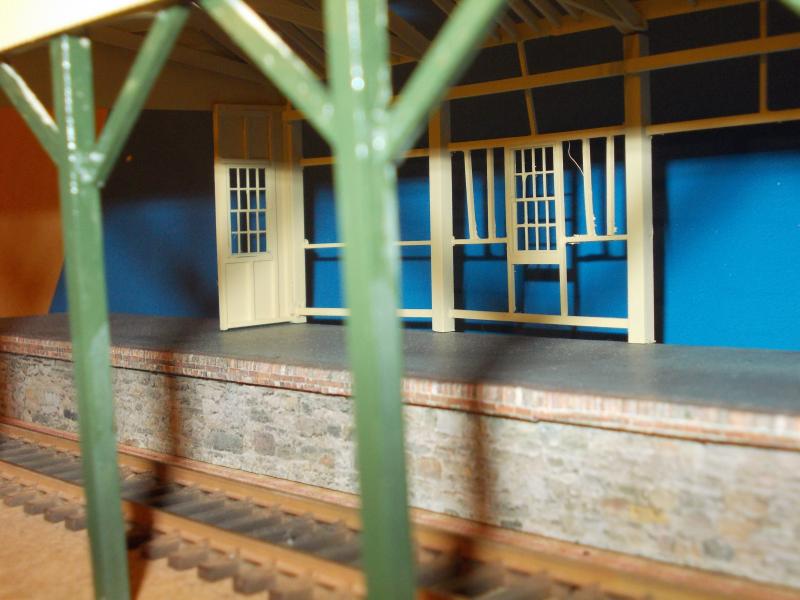
^ The framing around the loading/small goods dock and station entrance. Looks like a little cleaning up needs to be done in the corners of the frame. I must admit it is quite fiddly. The frames are made with 2.5 x 0.75, 1.5 x 1.0mm and 1.0 x 0.75mm styrene.
Cheers, Gary.

Posted
Banned
The guttering, down pipes, flashing, ridge capping still needs doing, as does the area below the building needs filling in (also the gap in the back wall just above the lean-to.
I have been working on assembling the smoke ducts for the roof top. This actually puzzled me for some time on how to build the vents, seen in pic below. This scan of a pic was courtesy of a chap in the UK and is only 1/8th of the pic. Sorry about the fuzziness.

The idea is to recreate these vents in styrene. After reading an article on RMweb, I built myself a simple jig out of card with the same pitch angle as the roof on Kelly Bray (30*).
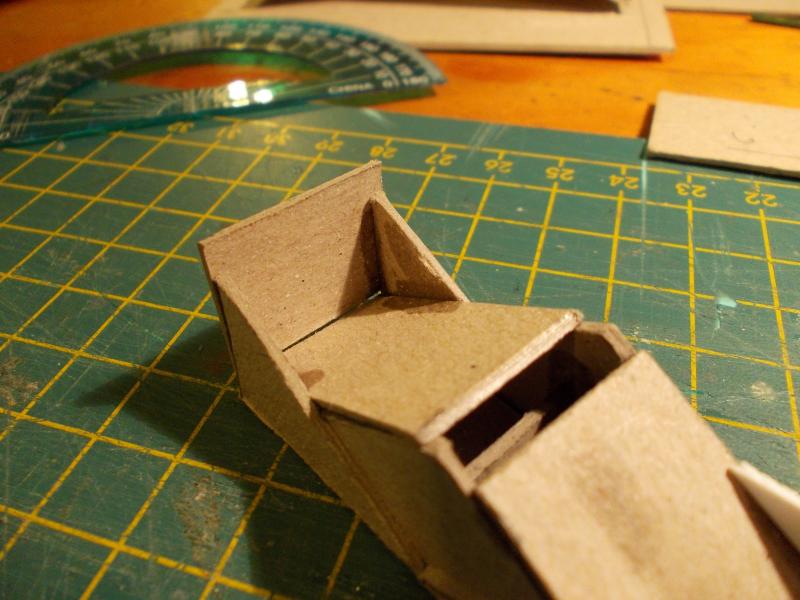
This was built double ended so that I can put two vents together at once. Below shows a louvre being made up. The sides are scribed styrene. The lower sections of the scribed styrene have been cut at 30* and 16mm long, scale 4'. A small scrap piece of 30thou styrene (spacer) sits at the base, followed by a piece of 10thou styrene. The 30thou is set back atleast 2mm from the front edge, whereas the 10thou louvre piece is pushed right up against the flat verticle backing plate. Repeat this process, of 4 x spacers and 4 x louvres.
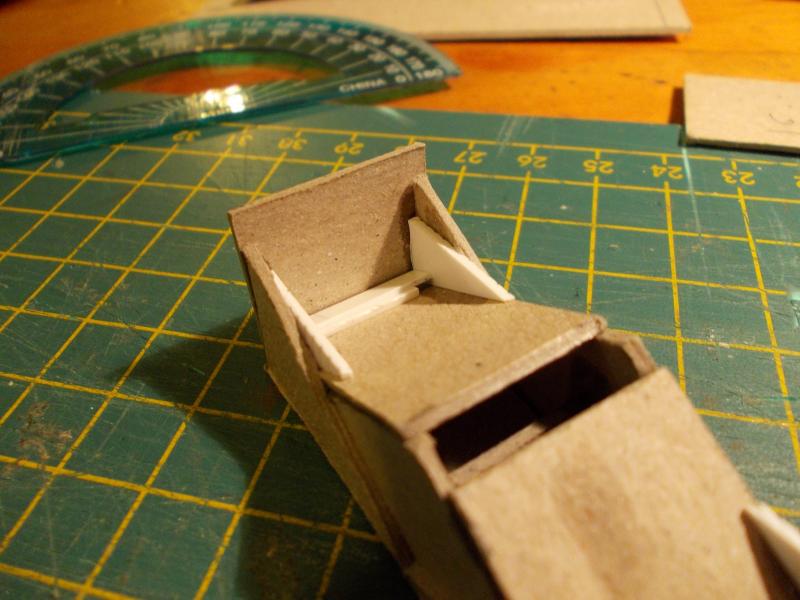
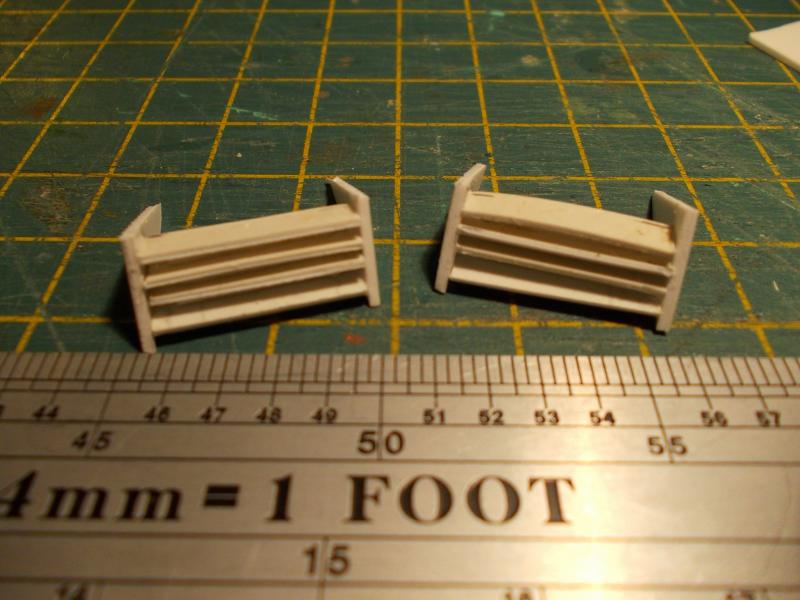
Two semi complete vents just about ready to be positioned on the roof. Each lourve is 17mm long with an overall length (outside to outside) of 20mm, a scale 5'. A small portion of the top will need filing down from front to back (about 10*), for the roof top (run-off). I'm having second thoughts as there needs to be some outside framing for the roofing iron, which will hide the flat top of the scribed walls. More work to do now, another 14 vents in fact !
Cheers, Gary.
Posted

Full Member
Great idea with the jig ;-)
Phil
 Last edit: by Phil.c
Phil
Posted
Banned
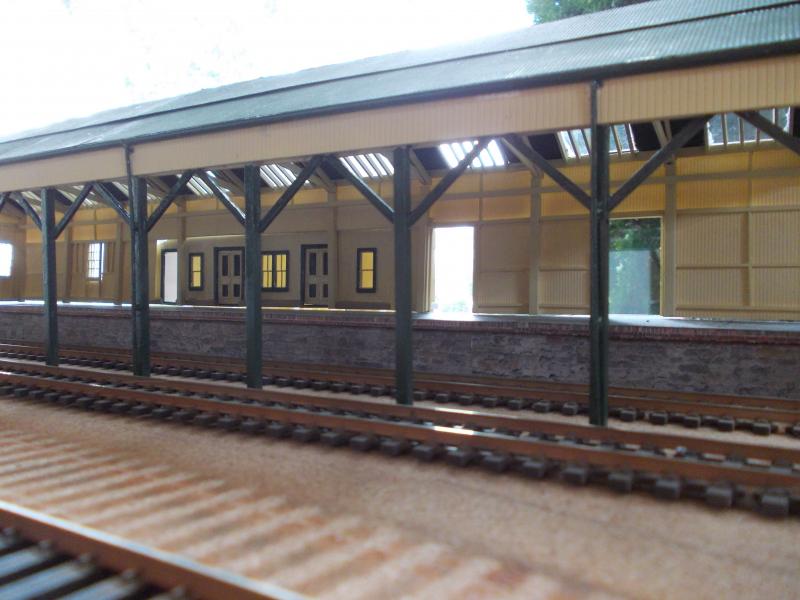
Although thety don't look painted, the trusses are actually cream in colour, the same as the rest of the building. I had to paint (airbrush) all the framing prior to sheeting and fixing skylights. It must just be our glorius spring sunshine down under, bleaching out the colour !
I have now completed all 16 smoke vents. They are now awaiting the roofing iron and paint, before fixing in place. Once these are fixed in place, the ridge capping/flashing will be completed. Then I shall begin on the guttering/downpipes on the rear of the building.
Cheers, Gary.
Last edit: by Gary
Posted
Full Member
Don't forget the hairbrushed soot on them :)
Phil
Phil
Posted
Banned
Cheers, Gary.
Posted

Full Member
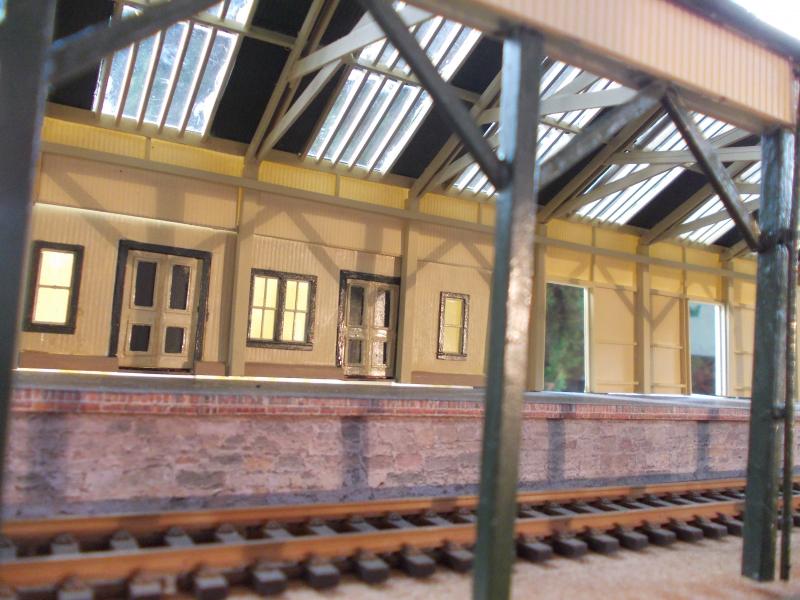
Really like this Picture Gary :doublethumb , The Shadows really bring it to life, If it wasn't for the lack of ballast I would say that your cheating by trying to pass off Pictures of really places as your models

Posted
Guest user
Looking forward tossing it bedded into the layout and also the engine shed and goods shed that you've mentioned.
Cheers
Toto
Posted
Banned
I'm not going to ballast until I have all buildings made up so that I can sit them in place and work out whether I need to make any ground/surface changes. Nothing worse than ripping up ballasted track just to move it a few milimeters left or right, let alone trying to change the surface levels or textured surfaces.
Cheers, Gary.
Posted

Site staff
Really like this Picture Gary :doublethumb , The Shadows really bring it to life, If it wasn't for the lack of ballast I would say that your cheating by trying to pass off Pictures of really places as your models
My thoughts exactly,i'm almost expecting someone to walk along the platform at any time.Excellent work Gary.
Regards
Alan
Born beside the mighty GWR.
Alan
Born beside the mighty GWR.
Posted
Full Member
Terry
Posted

Full Member
Mike
Pig Hill Yard - a small Inglenook shunting layout for my boys, in 00.
Pig Hill Yard - a small Inglenook shunting layout for my boys, in 00.
Posted
Banned
When I complete the build, I'll post a pic of the original station as a comparison.
Cheers, Gary.
Posted
Inactive Member
It really looks the part.
Also I like your rail rust colour!
regards,
Derek
Posted

Inactive Member
Posted
Banned
Derek, the rust colour I used was either Humbrol no.62 Leather matt. Mick, any pics of the branchline are a bonus.
Latest update on the trainshed (?) is that the roof top vents I made were not upto scratch. Ofcourse I didn't really notice how bad they were until after I had glued them to roofing iron. Looking at the individual vents they looked ok, but grouped together they looked as if Stevie Wonder had made them. So off with the old vents and roofing iron and on with the making of new vents.
Cheers, Gary.
Posted
Inactive Member
http://freepages.nostalgia.rootsweb.ancestry.com/~cyberheritage/saltoldie1.htm
Posted
Banned
Cheers, Gary.
Posted

Full Member
As a beginner, I am in awe of your modelling skills. I would love to think that one day I may be capable of creating something like this, I am just practicing building the freebies from Scalescenes as a start and hope to gradually progress to scratchbuilding eventually.
Keep up the great work..
Paul
Posted
Banned
Scratchbuilding can be quite adventurous at times, but with a lot of modelling materials readily available, it does make building such models a lot easier. It is basically knowing what is available to you when you plan to build the model. Luckily for me, I have had a little experience in scratchbuilding and have done so, for about 20 years. I'm no expert and if you wish to see some excellent scratchbuilding, check out Allan Downes thread ;
http://yourmodelrailway.net/view_topic.php?id=11535&forum_id=13 …and Dooferdogs Bears End layout thread ;
http://yourmodelrailway.net/view_topic.php?id=3303&forum_id=21&highlight=bears+end
Both men are 'FANTASTIC' modellers.
Cheers, Gary.
1 guest and 0 members have just viewed this.