00 Gauge - 'Kelly Bray', nee Callington
Posted

Full Member
Build of a layout based on Callington
Looks the business to me Gary, well done indeed.
Always try to look on the bright side of life!
Barney
Barney

Posted

Banned
So what's holding you up with the rest of it :lol:
Nice job ;-)
Phil
Hopefully today I will have the posts on and be able to pick up some paint. I've got Monday off work as well, which will help with the build.
Deciding between SR green and a tan/buff colour ?? :hmm Although green posts with a tan/buff truss wouldn't look too bad. I don't have a lot of coloured pics of the original building, but if I'm right it had chocolate brown on the lower 4'-5' of the posts and buff above, almost GWR colours…. gulp ! Then again, it's my railway. How do you think purple and yellow would look… :shock:… just joking ! Thanks for all the comments chaps !
Cheers, Gary.
Posted
Banned
The answer was Lego and a few rubber bands !
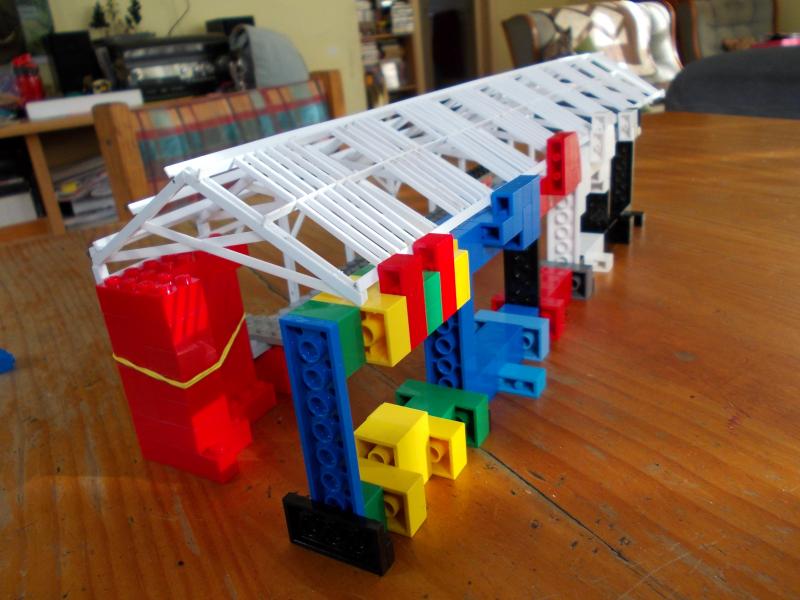
above. Bit of a techni-colour hotch pot, but it works !
below. The overall roof frame in place with a card mock-up station building in place.

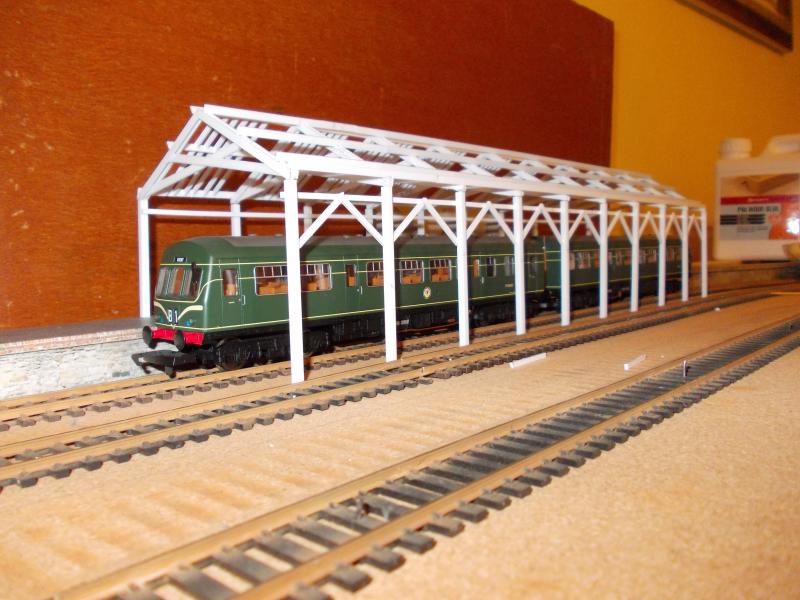
above. Now use your imagination… The structure is clad in timber and iron, the glazing is firmly fixed, all painted and fences etc installed, the track and 6' is ballasted… and there is no bottle of glue in the background…
Cheers, Gary.
 Last edit: by Gary
Posted

Full Member
It really does look excellent. :thumbs
'Petermac
Posted

Full Member
Now use your imagination… The structure is clad in timber and iron, the glazing is firmly fixed, all painted and fences etc installed, the track and 6' is ballasted… and there is no bottle of glue in the background…
Cheers, Gary.
Nice work Gary. Who's Lego is it ? Yours ?

Never mind the imagination though. Let's see it happen !! :pedal
Last edit: by Chinahand
Regards,
Trevor
Trevor
Posted

Full Member
Phil
Phil
Posted

Site staff
Regards
Alan
Born beside the mighty GWR.
Alan
Born beside the mighty GWR.
Posted
Banned
Peter, I can tell you at times it felt as if I had to dig deep into that barrel of patience ! :twisted:
Trevor, Lego, what a great medium for kids learning and skill, and yes I enjoy playing Lego with my boys. In a matter of fact, I still have a bag full of it that is over 35 years old ! Now my boys play with it as well as there newer bricks seen above. :mrgreen:
Phil, just a little bit of colour. As they say Southern for Colour, opps Sunshine… :lol:
Alan, I have a few more (5) days off soon ! So hopefully by then a lot more will have been done. :thumbs
Out of curiosity, does anyone know of the rough dimensions for a BR precast concrete goods store ??:hmm
Cheers, Gary.
Posted
Banned
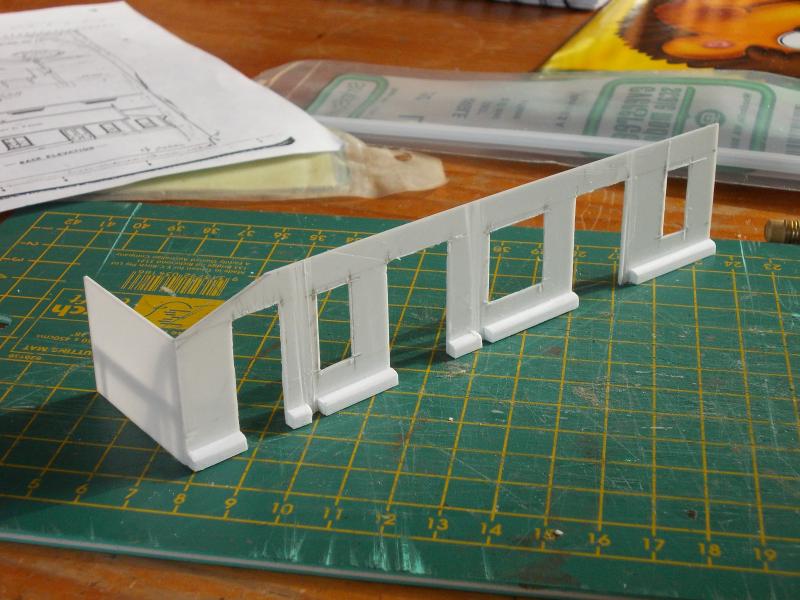
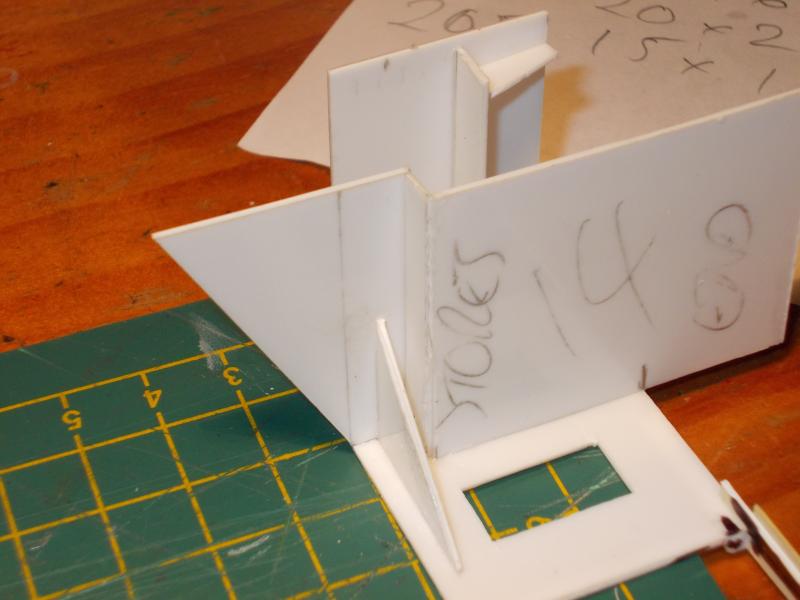
So, to calm my boredom, I got stuck into the station building itself. As can be seen in one of the above pics, I made up a card mock-up of the building to see how it would sit. This was drawn up to scale from plans and the usual thing happens, the doorways and windows don't line up with the posts on the canopy ! Back to measuring up and re-drawing the plans, I got it right.
As with the goods shed I built, I like to use commercially available windows (Tichy Train Group), but I don't have the exact windows as used on the original building, so a little poetic license can be used. The building was made up of 20 thou, 30 thou and 40 thou styrene sheet. Got to love styrene !
First up, cut out front wall, window & door openings. Also, the lower stone edge has been shaved and added
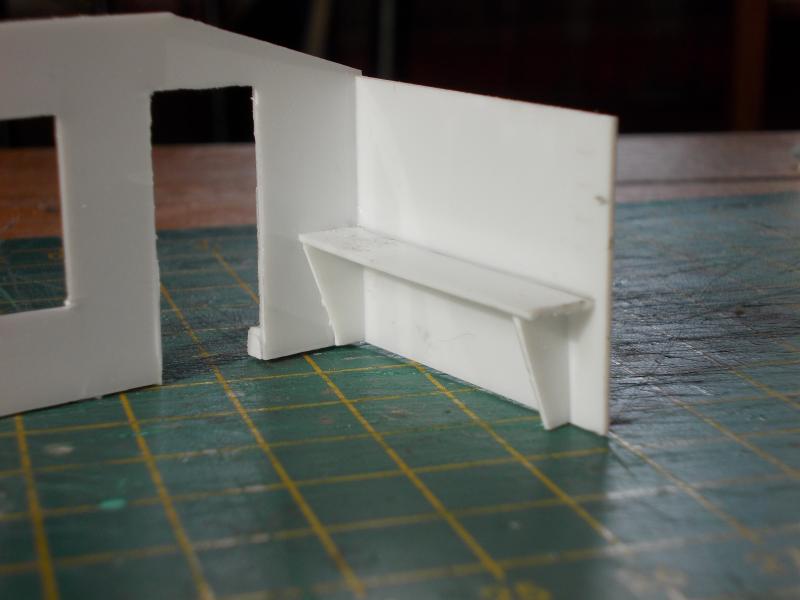
v A shelf has been added. This acts as a square/corner brace for the side wall. Further on I decided not to go with a full interior as it wont be seen from under the canopy.
v Test fitting within the posts of the canopy.

Making the doors. I decided to make my own as Tichy doors are a little undersize for OO. The back of the door is 30 thou styrene, whilst the raised panels are 20 thou.

v Horizontal panels going in. These are cut oversize and will be trimmed down when the side vertical panels go on.

v Vertical panels fitted. The horizontal panels were shortened to 6mm. Once all glue was dry, a light sanding was needed to smooth the paneling out. The side panels are oversized, but will be hidden behind the door frames. This creates a larger fixing area. A groove has been scored down the centre ?? :shock: This will definately require a little more filing !
Doors test fit. Windows fitted, but not glued in, both held in with masking tape. Starting to look like a building now ! As can be seen, the double window is not accurate as the original does not have the large vertical centre. The smaller windows has had the vertical centre glazing bars removed. Maybe I should do the same with the double window, just to keep continuity.

v Internal walls going in. Some tricky carpentry skills required as this wall need fitting around the store room door and to reach where the skillion roof (above store room) matches the main building.
v Pic of the store room roof former from the rear.

v Fitting all roof formers. These are located where the internal walls would be. The steps have been blackened to hide the bracing styrene, which can be seen above, fixed to the internal wall. This way, once the doors are in, it should look like the doors are raised slightly over the floor boards.
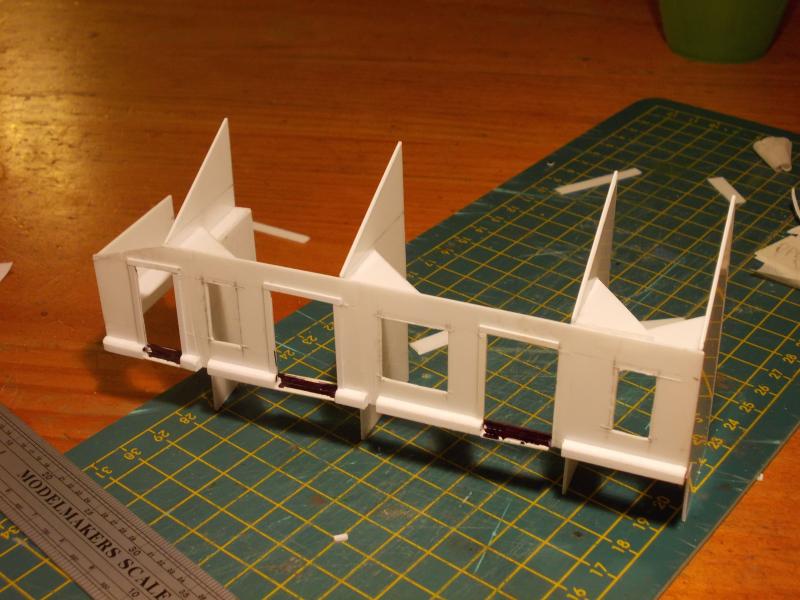
v The back wall and roof piece fitted. The roof formers/walls are extended so that the building sits on the edge of the platform and firmly on the basebaord. Now, just waiting on the delivery of corrugated card !
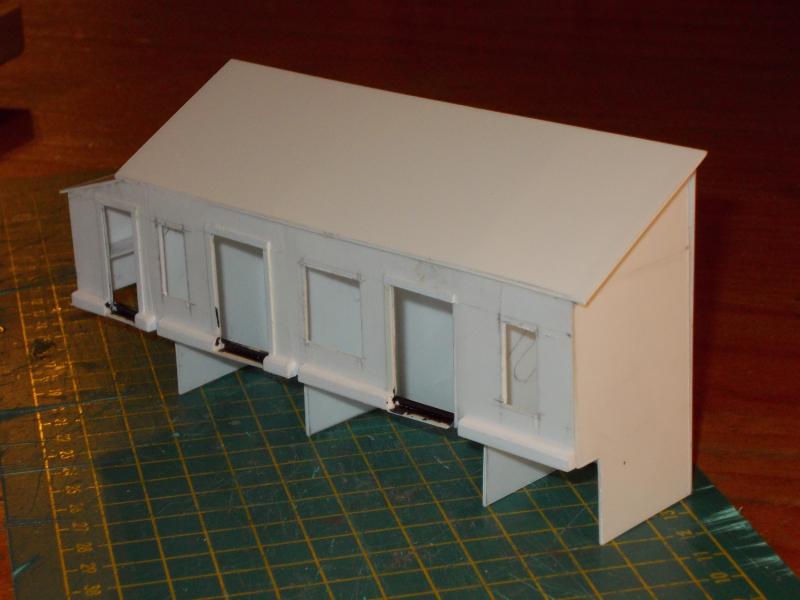
The building will be covered in corrugated card, painted, windows and doors installed. Then, it will be fitted to the canopy.
As I said earlier, you gotta love styrene !
Cheers, Gary.
Posted

Full Member
Cheers
Marty
Posted
Banned
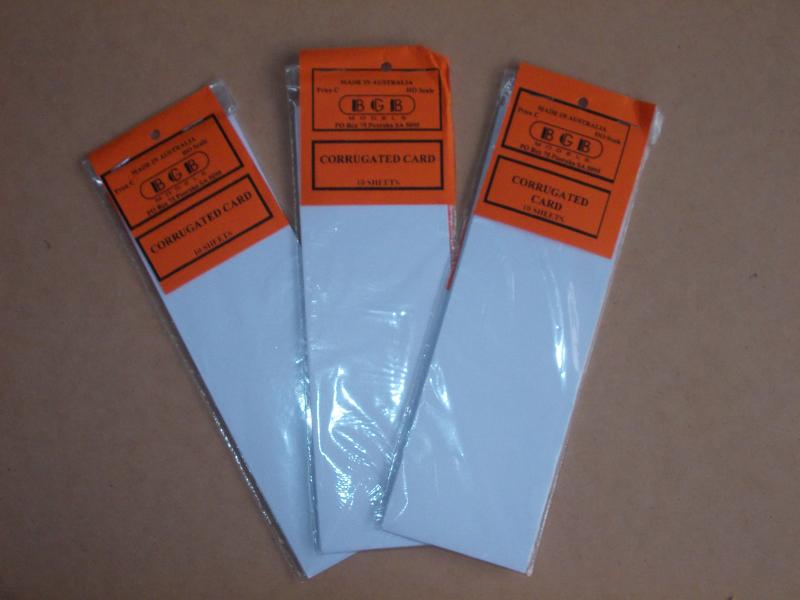
Although through the plastic it doesn't look corrugated, I can assure you it is. This is the same corrugated card I used on the Goods Shed in a previous post, http://yourmodelrailway.net/view_topic.php?id=11066&forum_id=14
Cheers, Gary.
Posted
Full Member
As Marty said, the station building is a great looking project. :thumbs
'Petermac
Posted
Banned
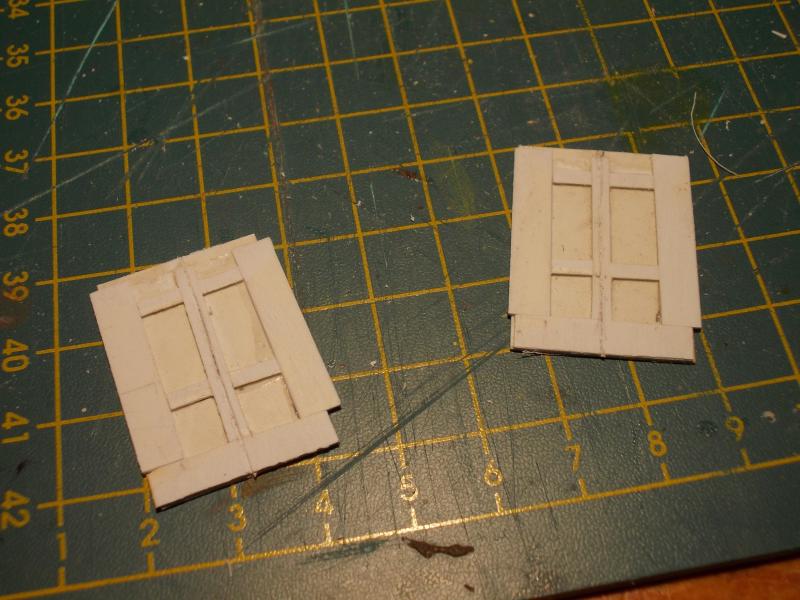
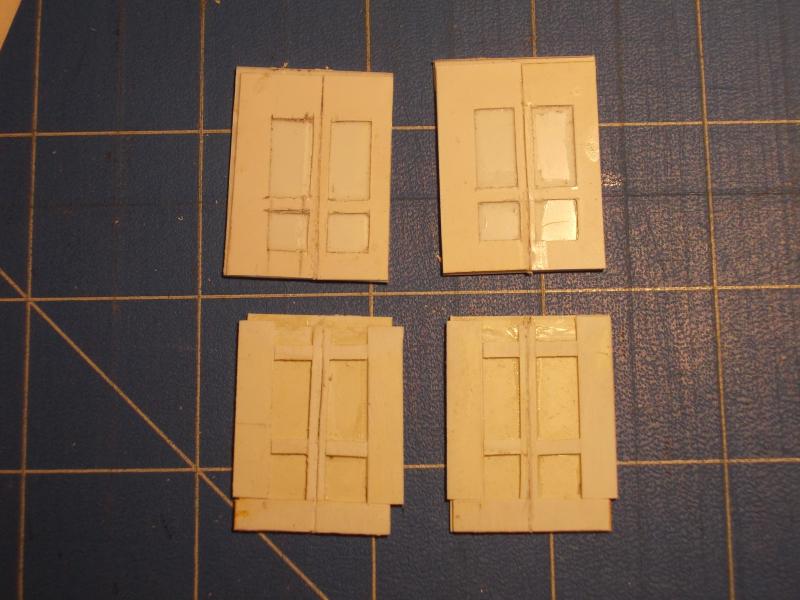
I decided I wasn't happy with the double doors I made as there were too many joins in the styrene between the panels, so I decided to make some more. This time I used even thinner styrene sheet (10 thou) and cut out the 2 rectangles panels for the four individual doors.
Below is a comparison and yes, they do look a little grotty as the glue needs a little cleaning up around the panel edges with a hobby knife. The new doors are the top two. Once cleaned up and painted they should look better than the bootom two.
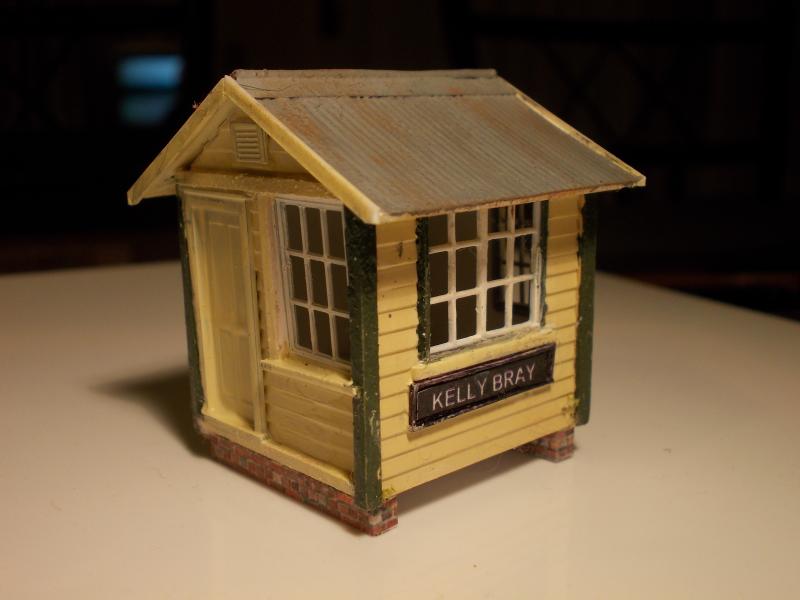
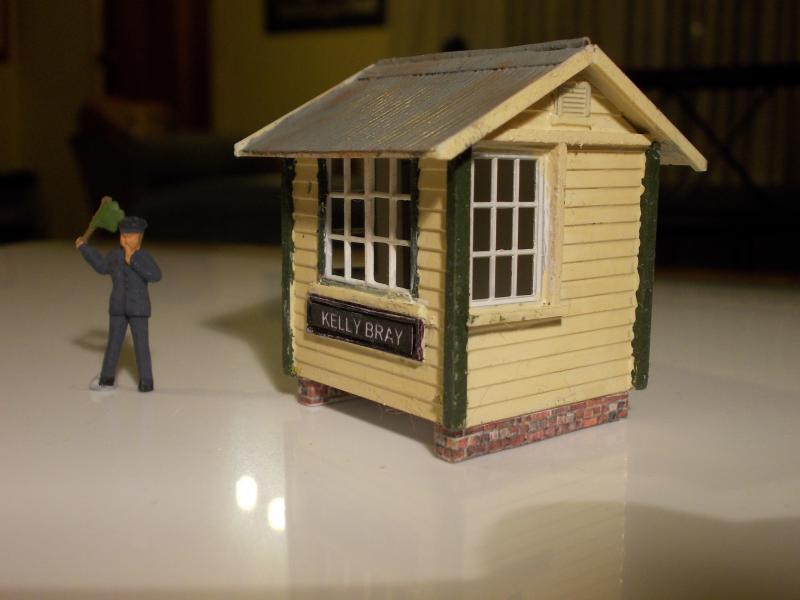
Another little project I undertook during the week nights was to construct one of the two Signal Boxes for Kelly Bray. I obtained some diagrams from a member of another forum, that he had used on his own layout. Yes I had quite a few pics, but unfortunately nothing as much as a close-up of the signal boxes !
The box was constructed with styrene (Evergreen sheet and clapboard), Tichy Train Group & Ratio windows, door from TTG as well, Broad Gauge Bodies corrugated card and Scalescenes brick paper.
The front window is two Ratio signal box windows (139), with one outside frame filed thin on each, so that they could be joined together. This way they look like one 16 pane window, rather than two 8 pane windows. The side windows are not 100% correct, but near enough. The clapboard (weatherboard) is scale 6", so that is as correct to the prototype. Corrugated iron (card) is actually HO scale, but it looks alright. The piers are styrene wrapped in Scalescenes brown brick. The name on the board was printed on the PC and glued to a framed and blackened styrene backboard. The windows still need glazing and I'll use Testors Clear Cement and Window Maker to fill the panes in.
Altogether, I'm happy with the final outcome, although close-up pics can be cruel as the paint doesn't look that bad from normal viewing distance !
Cheers, Gary.
Posted
Full Member
You must be proud of it.
'Petermac
Posted
Site staff
Regards
Alan
Born beside the mighty GWR.
Alan
Born beside the mighty GWR.
Posted
Banned
Thanks Peter, I do like the little building. As you know the smaller the building, the more difficult it gets. I don't know how the N gauge fraternity here does it !
Alan, if you mean the panelling on the doors yes, it is styrene. If you mean the signal box, the clapboard panelling is Evergreen styrene. What I didn't say previously, was that the vents below the roof line are actually HO scale window shutters, cut and shut, to represent vents. Near enough I say ! The external framing on the building corners and around the windows, apart from the lower sills are all North Eastern Lumber (wood). Majority of North Eastern products are made for the US HO scale market, but do just as well on OO. I have many packets of this great modelling medium as well as Evergreen styrene sheet, strips, angle, I beams, H beams etc and I don't mind mixing them up a bit either.
Cheers, Gary.
Last edit: by Gary
Posted
Full Member
'Petermac
Posted
Banned
Cheers, Gary.
Posted
Full Member
'Petermac
Posted
Full Member
I haven't tried it myself yet though.
Simon
1 guest and 0 members have just viewed this.