00 Gauge - 'Kelly Bray', nee Callington

Post

Posted
Rating:
#156590
Avatar
Banned

Build of a layout based on Callington

Well, all the roof trusses, ten in total, are completed. The ends have been shortened only enough so that they allow me to file off any excess/overhang. The bottom points of the trusses will need squaring off so that they will sit flush on their posts.


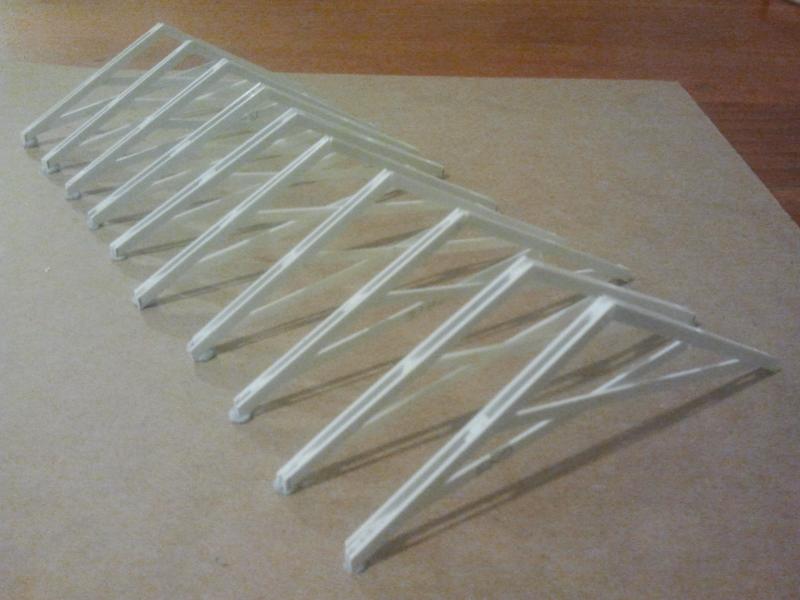
Next will be making up a jig for the individual trusses to sit in, equally spaced at 12' centres. This 'hopefully' will make it easier to attach the joists that run longitudinally along the tops, which support the corrugated iron roof.

Cheers, Gary.


Online now: No Back to the top

Post

Posted
Rating:
#156597
Avatar
Full Member
This is turning into a seriously good build Gary and I will be watching it with great interest.

Regards,
Trevor
Online now: No Back to the top

Post

Posted
Rating:
#156598
Avatar
Full Member
Brilliant stuff Gary :thumbs

As Trevor says, this is really going to be something worth watching.  Building a model in prototypical style is always very ambitious but you seem to be succeeding admirably so far.  :pathead

'Petermac
Online now: No Back to the top

Post

Posted
Rating:
#156656
Avatar
Banned
I knocked up a jig today so that I could space the individual truss sections and to set the joists up on. I decided to make the jig for only 5 trusses at a time. This makes handling a little easier, especially when I need to move it off the dinning room table..! Lucky for me SWMBO is away for 3 days ! I used full lengths of styrene (14" or 355mm) for the joists and these overhang one end. The excess will overlap onto the second set of trusses. I deliberately have not glued the bottom joists on as they will be glued to the second section, tomorrow. I will need to cut up some joist extensions as the overall roof is 19" (480mm) long, or a scale 120'.


^ It's amazing how handy the dress makers pins are.. The trusses set up ready for the joists to be glued in place.


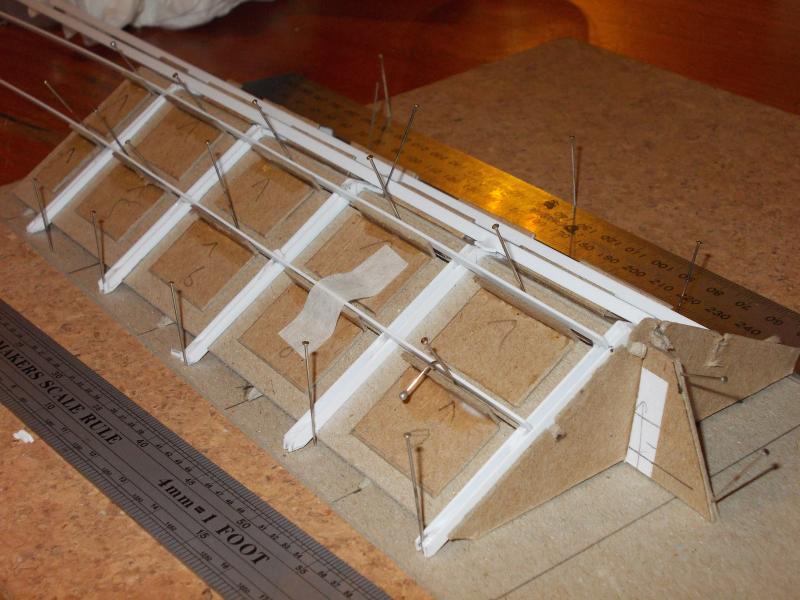
Joist positioned in place, waiting for glue to dry. Once all is dry (tomorrow) I will start on the second half. You can clearly see the joists overhang the far end, which will eventually be attached to the second set.

Cheers, Gary.

 
Online now: No Back to the top

Post

Posted
Rating:
#156660
Avatar
Full Member
Looking good Gary. :thumbs

What's your building board made from and did you use card for the jig ?

'Petermac
Online now: No Back to the top

Post

Posted
Rating:
#156663
Avatar
Banned
The jig is made of stiff card. I cut some 30* triangles to hold up the card spacers. The card spacers actually sit on the triangles lower than the trusses themselves, enabling me to glue the joists to the truss, not touching any card. Some spacers required a pin just to stabalise whilst the glue set.  More card was used to block in the joist supports. The board underneath is the same 6mm cork tile I used to pin the trusses to on the templates.

Cheers, Gary.
Online now: No Back to the top

Post

Posted
Rating:
#156667
Avatar
Full Member
It's coming along nicely Gary and it's good to see you going about it in such a very methodical way.

Regards,
Trevor
Online now: No Back to the top

Post

Posted
Rating:
#156857
Avatar
Banned
Progress has been steady this weekend. It's amazing what you can do when SWMBO goes away for a weekend ! I have 95% finished off the 'overall' roof frame and completed the rail side roof supports/posts.


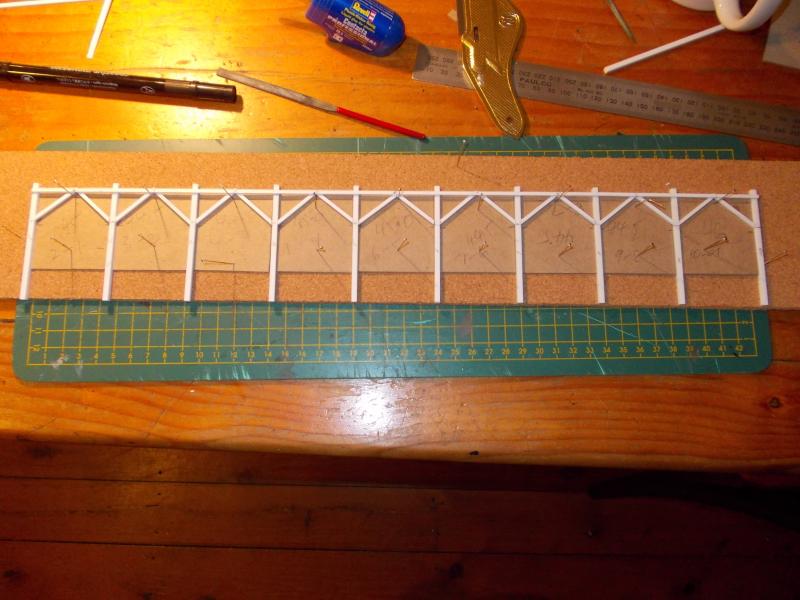
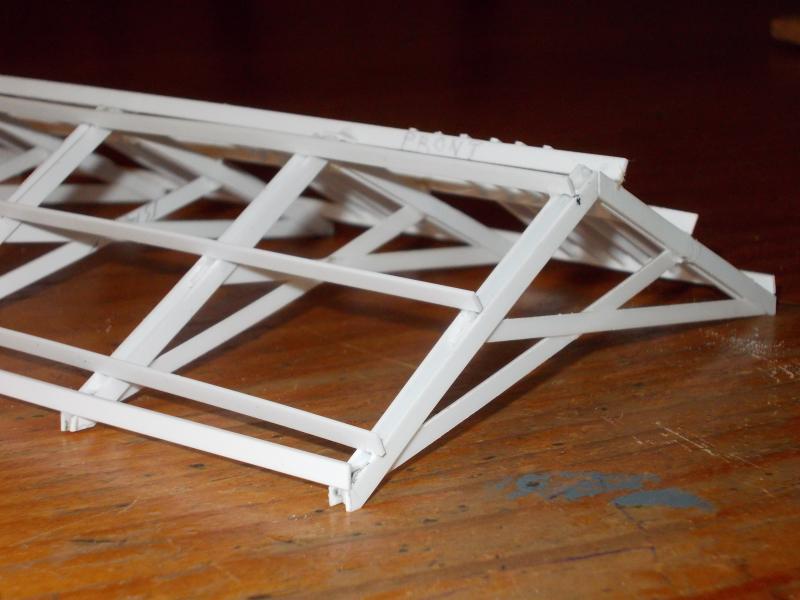
^ The very lowest edge of the trusses need another joist to be run along the full length. All frames are 99.8% square to each truss. There are a few little extra pieces of styrene glued in to help set the joists sit correctly on some of the trusses. These will not be noticeable once the roofing iron is on.

v The railside supports or posts still in the jig until tomorrow. Another set of post will also be made up for the platform side. The posts are 3.2mm square styrene and the cross bracing and bearer is 1.5 x 2.0mm strip.


Cheers, Gary.
Online now: No Back to the top

Post

Posted
Rating:
#156868
Avatar
Full Member
Coming on a treat Gary.Love your methodical approach in making the jig.If only I had your patience…

Cheers,John.B.:thumbs
Online now: No Back to the top

Post

Posted
Rating:
#156870
Guest user
Looks like you spend more time getting the jigs right than on the trusses..:mutley:mutley:mutley
Really a superb effort mate……
Back to the top

Post

Posted
Rating:
#156878
Avatar
Banned
G'day Alan,

You're right about getting the jigs right and the time it takes sorting them out. In the end, hopefully, a good model will be produced. Unfortunately this morning when I removed the posts from the jig, a few of the post didn't line up with the base of the trusses… Hmmm ?? So, to overcome this (no I didn't trash them), I cut out a fine slither with the razor saw between where the braces meet the bearer, followed by some fine filing and then setting them up again and re-gluing. This time it lines up nicely with each roof truss. :roll:

John,

Yes methodology does play a big part, but sometimes small mistakes will pop their heads up, as I found out this morning. Also, patience, plenty of it is needed, especially when it doesn't go your way !! :oops:

Cheers, Gary.
Online now: No Back to the top

Post

Posted
Rating:
#157702
Avatar
Banned
Well not a lot has been done recently due to other matters, but I managed to get a little more done today on the canopy roof frame. I have been cutting, filing, cutting, shortening and more filing to get the roof rafters in place that support the glazing. There are 108 individual pieces to be positioned and glued. I have now glued 80 of them in place, 28 to go !!


I now realise it would have been easier to fix these individual pieces to the 3 bearers first, then glue the whole section to the trusses… Live and learn ! ;-);-) …and soldier on ! :mrgreen:

Cheers, Gary.
Online now: No Back to the top

Post

Posted
Rating:
#157706
Avatar
Full Member
Looks good to me Gary.

Phil

Phil
Online now: No Back to the top

Post

Posted
Rating:
#158077
Avatar
Banned
Finally I have all 108 glazing bars in place. I am so glad I made up the guillotine a while back as it has saved me a lot of time ! The next step will be to glue the supporting posts to this then paint the lot prior to fitting the corrugated iron (card) and roof glazing. I guess I should paint the corrugated iron prior to fixing otherwise it may be a tad difficult getting a paint brush in between all the framing timbers. Over 3 1/2 packets of Evergreen styrene strip went into the making of the overall roof canopy frame.


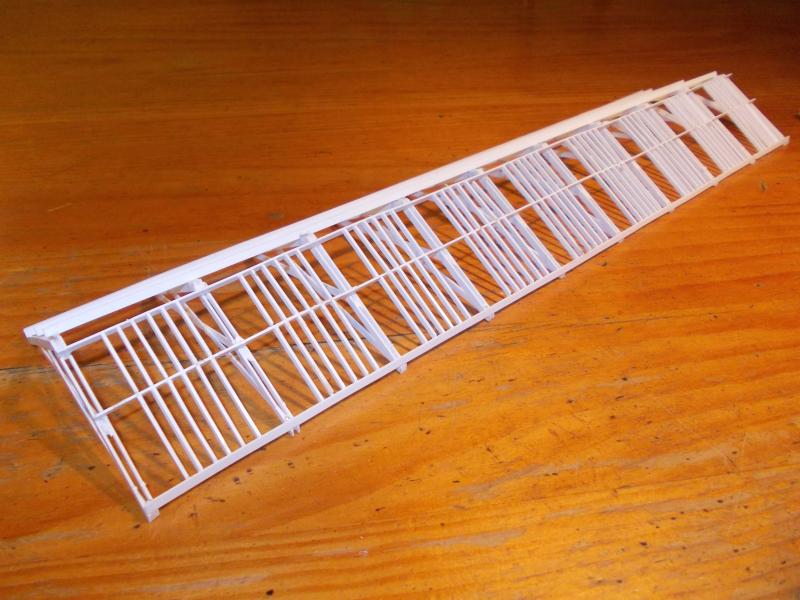
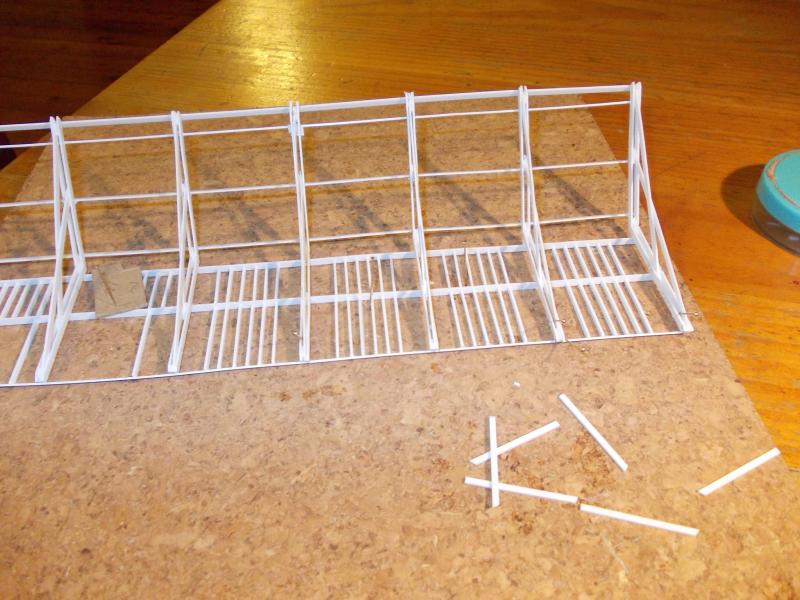
above  All glazing bars now in place.  below A close-up of the many pieces of styrene that went into the build.


I'm just glad all the fiddly bits are now complete on this build. Well that is until I build the wall and roof frames for the engine shed !

Cheers, Gary.

Online now: No Back to the top

Post

Posted
Rating:
#158078
Full Member
Looks great Gary.  Coming along nicely.
 
Terry
Online now: No Back to the top

Post

Posted
Rating:
#158079
Avatar
Legacy Member
This topic certainly shows how patience pays off. You also have that certain doggedness Gary that's also needed to stop you from throwing the towel in when things don't go your way.
Online now: No Back to the top

Post

Posted
Rating:
#158089
Avatar
Full Member
If I had one Gary, I'd take my hat off to you - that's a brilliant bit of building.  I suspect it's as strong as an ox now it's all fitted together and will look great on the shed.

Very well done indeed Sir. :pathead:pathead:pathead

'Petermac
Online now: No Back to the top

Post

Posted
Rating:
#158092
Avatar
Full Member
Lovely work Gary and something to look back on with pride.

Regards,
Trevor
Online now: No Back to the top

Post

Posted
Rating:
#158095
Avatar
Site staff
spurno is in the usergroup ‘Super-moderators’
Fantastic modelling Gary.Above and beyond the call of duty.

Regards

Alan


Born beside the mighty GWR.
Online now: No Back to the top

Post

Posted
Rating:
#158097
Avatar
Full Member
So what's holding you up with the rest of it :lol:

Nice job ;-)

Phil

Phil
Online now: No Back to the top
1 guest and 0 members have just viewed this.