00 Gauge - 'Kelly Bray', nee Callington
Posted
#150531
(In Topic #8349)

Banned
Build of a layout based on Callington
G'day all,Well, finally I have made a start on my layout 'Kelly Bray', that I have based on Callington. The layout is a revised version of the actual track plan that existed at Kelly Bray, although it was known as Callington, (only in Cornwall… :lol:)
Callington is approximately a mile or so up the road from Kelly Bray, and is where the Callington Branch terminated. I decided that I should change the name to Kelly Bray as it is not a 100% representation of the real track plan, but Callington is a station that I admire, being a branchline terminus with a nice station with over-all roof, 2 road engine shed, goods services, and it was run by the LSWR/SR before eventual take over by BR. The location provided coal, arsenic, tin, farm produce, etc as its main traffic and often the line hosted a lot of holiday seekers during summer over the years of its existence, before Beeching decided to axe the line from Gunnislake to Callington…


Above. Track plan drawn up using Anyrail. I have posted this pic previously in 'Members Ideas For Layouts'.
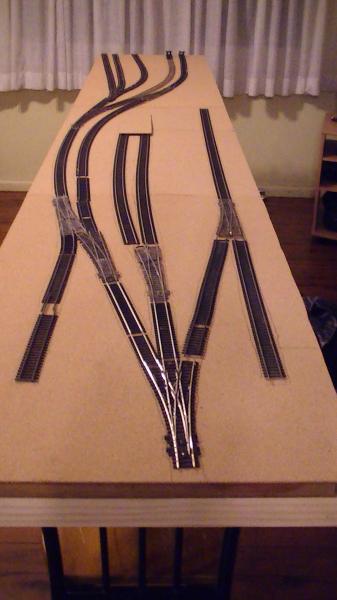
Above. Pieces of track placed down to get an overall feel of the layout and spacial effectiveness. The base boards are 2 old light weight wardrobe doors (1520 x 510mm), on a 19 x 42mm frame, with a 3mm layer of cork glued on top. The doors are of hollow design using 2 layers of 3mm ply sandwiched over a softwood frame.
Yet more to continue…
Cheers, Gary.

Posted

Legacy Member
Posted

Full Member
Always try to look on the bright side of life!
Barney
Barney
Posted
Inactive Member
Interesting design you have there, a little bit of recycling as well I see with some of the pointwork.
How will you operate the points?
Have you decided to go with the simple " just two wires" approach !!??
Look forward to seeing more progress pictures.
Kim
Posted
Full Member
Terry
Posted

Site staff
Looks like a standard Peco Code 100 3 way point. SL99/ SLE99Looks good Gary. Who produces the three-way point?
Terry
Ron
NCE DCC ; 00 scale UK outline.
NCE DCC ; 00 scale UK outline.
Posted
Banned
Yes it will be the '2 wire' method. Just recently bought the NCE Powercab from DCC Concepts. As for points operation, I have a bunch of 2nd hand Peco point motors which I'll use. It will be the standard DC affair with them, 2 push bottons on a control panel !I gues I'll have to sort out the leds for the chosen route… The majority of points have been recycled, except for the 2 x Peco Code 100 3-way points. All are insulfrog and I did spend a previous weekend wiring them properly for good power supply. There is a heap of 2nd hand flexi track pieces in the above pic, but it will al be replaced with the new stock I have. The less joins the better.
Cheers, Gary.
Posted

Full Member
Looking forward to your scenics, especially the ballasting of that three-way!
ATB
Shaun.
Posted
Banned
Well, I have started laying track on Kelly Bray. Started with the yard throat and worked down the outside rail, installing points as I go, then filling in any gaps. The points will be operated via Peco motors, which are secured to the track rather than the base board itself. All the terminals on the point motors will be concilled between the sandwiched base board, only having the wires exposed as they travel off to the switches. Here is a pic of the progress. Little bit slow on the build as I want to get it right, hopefully !
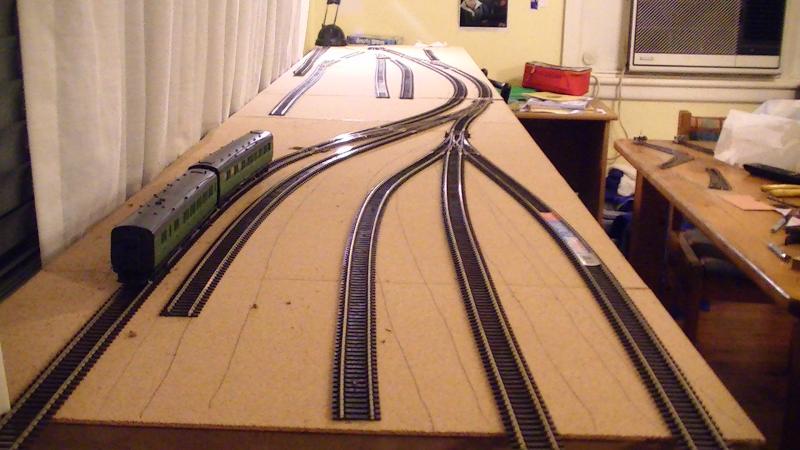
Station will be where the coaches are parked up. Still some rail trimming annd extending to do this end.
I started here at the 3-way and worked down the left hand side. The siding to the left, the end shed road (centre road of 3-way) and the goods siding (right side of 3-way) still needs completing, but that's for tomorrow… Photos can be cruel, the track laying isn't that bad… :oops: !
Cheers, Gary.
Posted
Banned
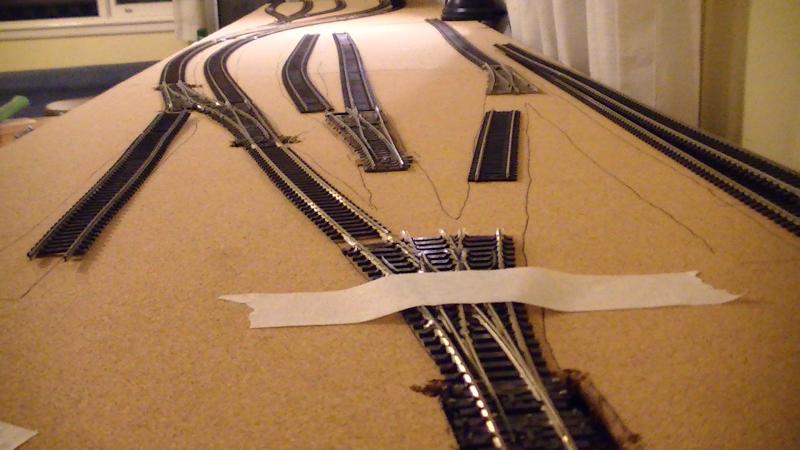
Having laid and tacked track down the track to final resting position, now I'm at the stage of wiring for dcc. All the droppers are in place ready to be connected/soldered to the bus wires.
The droppers… the two black lines through the middle are guide lines for the bus wires. The red, white and green wires are from the Peco point motors, to be wired up later. I'm waiting on delivery of some momentary push buttons and a CDU. I have seen what others on YMR have done with dcc and it looks a little daunting, although compared to the pic below of an old dc control panel from a previous layout, well…

Top side and below, underneath…!
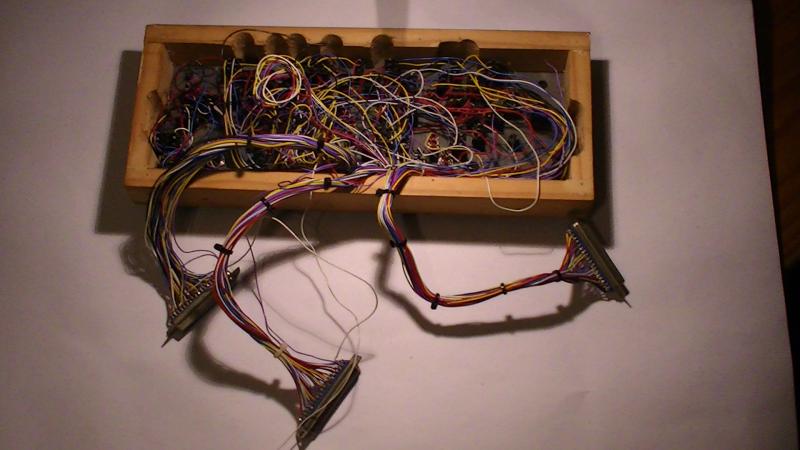
I must admit, that what I'm aiming at now, is nothing like the above pic ! The new layout will have a 'simple' panel for point and possible signal operation. Kelly Bray (Callington) as far as I know, only had two signals, a departing and home.
Now, back to the wiring…
Cheers, Gary.
Posted

Full Member
Will you be using bare wire for the bus or will you use short lengths soldered to the tabs you have in place?
Posted
Banned
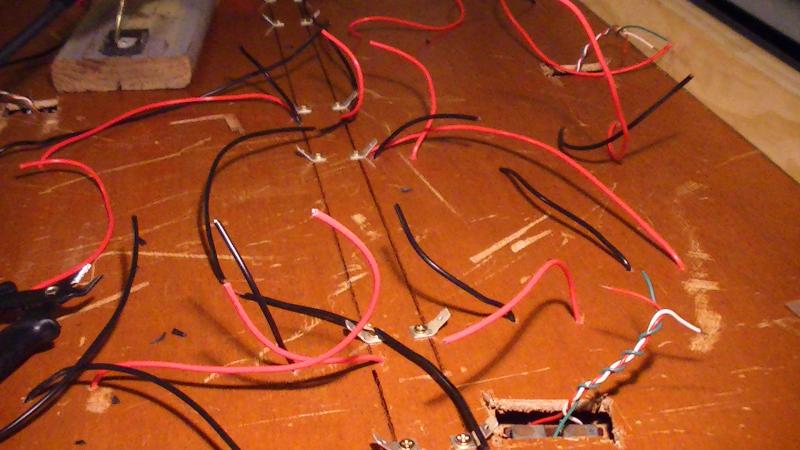
I have used one continuous length of shielded wire for the entire length, with the sheath removed in sections along the length where the tabs are located. This pic best explains what I have done.
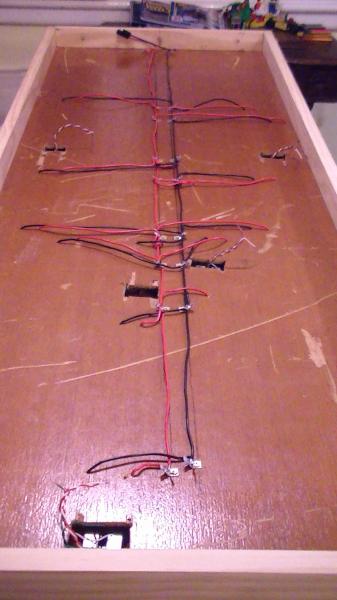
The foreground is the end of the bus wires. Waiting on bus suppressors from DCC Concepts. I have left 1/2" of wire this side of the tabs to solder the suppressors to. At the other end is a connector for the bus wire to connect to the 2nd board. The tabs are also a point where I can connect the droppers.
Cheers, Gary.
 Last edit: by Gary
Posted
Banned
I managed to solder up all my wiring today and everything runs smooth with no faults ! :doublethumb Woo hoo !!
I decided to hook up my very old transformer to test the track wiring out. I think this is a good idea as if there was a fault, I did not want to do my new Powercab any harm. Anyway, here is a link to the 'First Train to Kelly Bray', http://youtu.be/vNcSHVYGQ5M This is a very short video, so enjoy while it lasts !!
Cheers, Gary.
Posted
Inactive Member
Now the best part can begin .
Kim
Posted

Full Member
I like the sweeping curve into the station. Will there be a second platform between the twin track and PS 1 ?
Oh, nearly forgot - your DCC wiring looks very neat. ;-)
'Petermac
Posted
Banned
Thanks for the nice comments regarding the sweeping curve and neat wiring. There will be no 2nd platform between the twin track and PS1. Although there looks to be room there, the 3 sidings PS1, 2 & 3 are just private sidings for coal merchants etc. Take a look at this link ; http://www.youtube.com/watch?v=wTCwe-oj6LA Scroll through to 28mins, 25 secs. From there on you'll get a fell for what I'm aiming for.
Cheers, Gary.
Posted

Full Member
Regards,
Trevor
Trevor
Posted
Banned
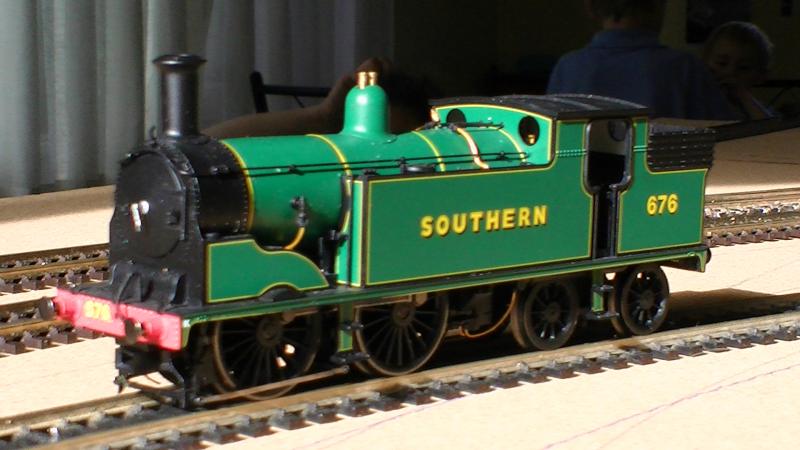
With a few mods to the model, it'll certainly look the goods on Kelly Bray. Now I'm waiting on my M7 in Southern green to turn up from Rails…
Cheers, Gary.
Posted

Full Member
Posted
Banned
Cheers, Gary.
1 guest and 0 members have just viewed this.