00 Gauge - Jeff Lynn / SRman's New Layout
Posted

Full Member
Progress (or otherwise) on Jeff's new layout
Hi Jeff. Back in the day, there was one job that I was never happy with, that was preparing an electric train on a shed road, which of course meant unplugging the overhead leads. Not necessary on a model Railway. Best wishes Kevin
Staying on the thread Kevin.

Posted
Full Member
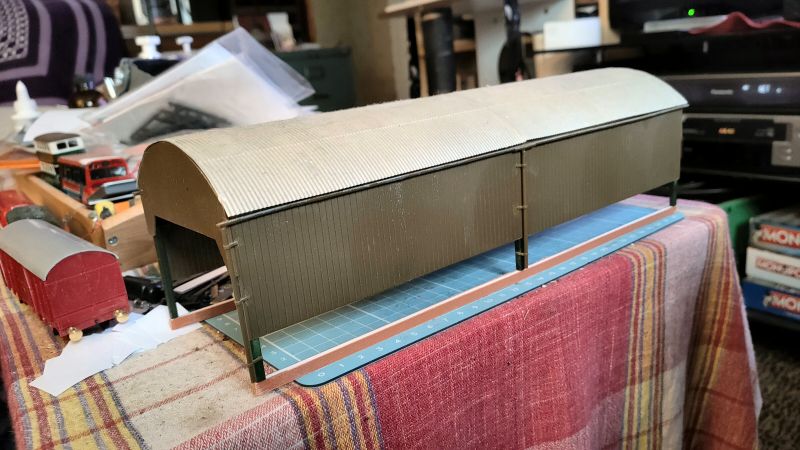
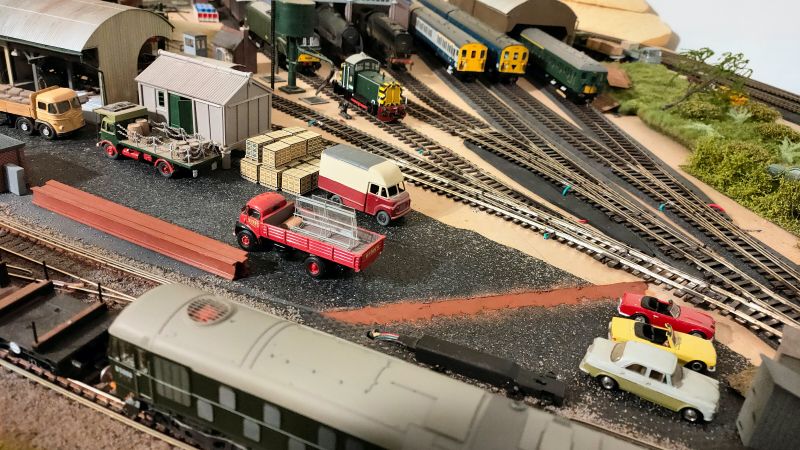
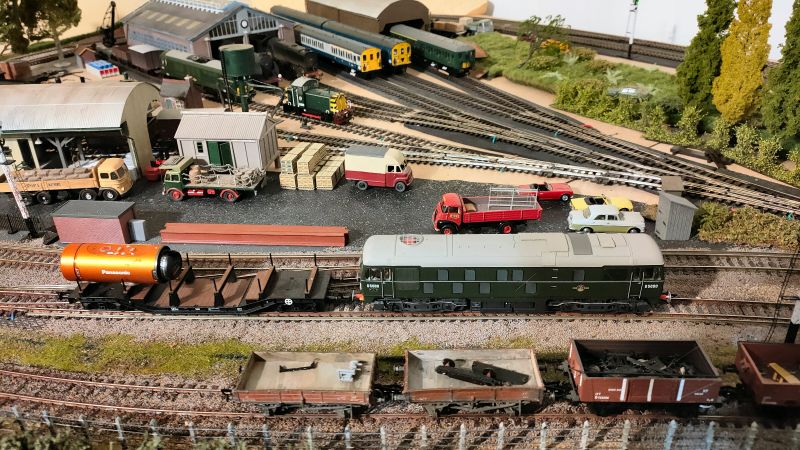
Why am I thinking Titfield Thunderbolt?!Not resting on my laurels (yet!), I have constructed a couple of low brick walls to raise the Ratio carriage shed. Each wall is made up of two thicknesses of plastic sheet, and two layers of Slater's plastic brick sheet. They have 5½ rows of bricks, and any gaps at the bottom will be hidden by landscaping textures once I get to the scenic side of things. I still need to add some wall capping between the support pillars.

Looks a lovely model.
Alan
Posted

Full Member
When I built the carriage shed for my old layout, one side was against an embankment wall, so for some reason I left off two support pillars. Since I never throw any spare parts away, they must still be hiding somewhere in all my boxes or drawers. At present, one side of that shed has five pillars, the other (showing in the photos) has only three.
 Last edit: by SRman
Jeff Lynn,
Amateur layabout, Professional Lurker, Thread hijacker extraordinaire
Amateur layabout, Professional Lurker, Thread hijacker extraordinaire
Posted
Full Member
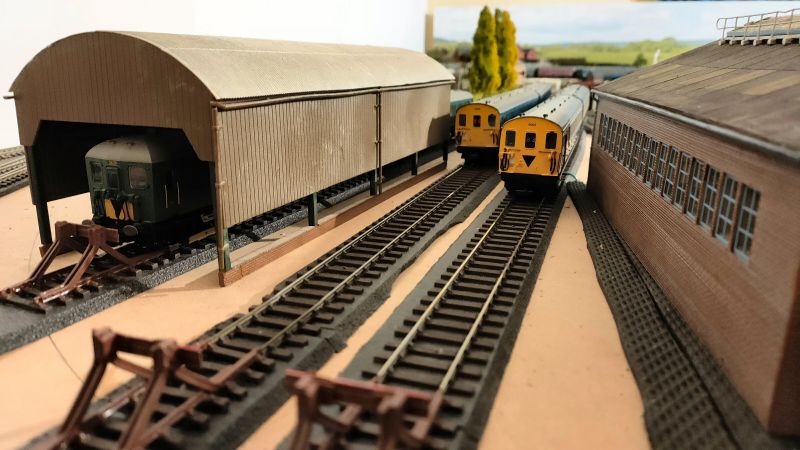
Mine will be even more dangerous eventually. I intend running third rail into the carriage shed and the two roads beside it, plus along the line on the left of the engine shed too, to allow class 71s to enter an leave on their own power - there is one parked there in the photos. It is tempting to model a short section of tramway overhead for that, but I think I'll stick to the more robust third rail, which will be less prone to damage from my clumsy hands and elbows.Hi Jeff. Back in the day, there was one job that I was never happy with, that was preparing an electric train on a shed road, which of course meant unplugging the overhead leads. Not necessary on a model Railway. Best wishes Kevin
Last edit: by SRman
Jeff Lynn,
Amateur layabout, Professional Lurker, Thread hijacker extraordinaire
Amateur layabout, Professional Lurker, Thread hijacker extraordinaire
Posted
Full Member
Staying on the thread Kevin.
Posted
Full Member

Last edit: by SRman
Jeff Lynn,
Amateur layabout, Professional Lurker, Thread hijacker extraordinaire
Amateur layabout, Professional Lurker, Thread hijacker extraordinaire
Posted

Full Member
You definitely get the most out of our current lockdown in Melbourne :lol:
Cheers,
Claus
www.flickr.com/photos/ellef/
Claus
www.flickr.com/photos/ellef/
Posted
Full Member
Hi Jeff,
You definitely get the most out of our current lockdown in Melbourne :lol:
Well, that plus retirement!

Jeff Lynn,
Amateur layabout, Professional Lurker, Thread hijacker extraordinaire
Amateur layabout, Professional Lurker, Thread hijacker extraordinaire
Posted

Site staff
If you find a photo, save it to your computer first then upload into YMRC Gallery.
Ron
NCE DCC ; 00 scale UK outline.
NCE DCC ; 00 scale UK outline.
Posted
Full Member
Let's have another go!
In the film The Titfield Thunderbolt the villagers moved a train shed by hand over the tracks for the train to stable under overnight. Looking at the clips it's not quite the same - no side walls, but the general structure was close enough to trigger my memory.

Taken from the website:
The Titfield Thunderbolt 1953 | Obscure Train Movies (wordpress.com)
Alan
Posted
Full Member
I do like the curved roof Ratio provided, and that does resemble the Titfield Thunderbolt version.
Jeff Lynn,
Amateur layabout, Professional Lurker, Thread hijacker extraordinaire
Amateur layabout, Professional Lurker, Thread hijacker extraordinaire
Posted
Full Member
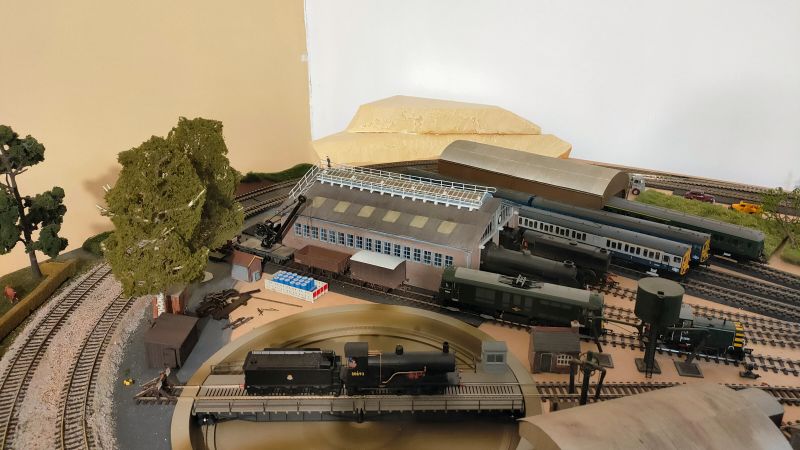
It gives a driver's eye view of each of the lines in the motive power depot and goods sidings, and also shows trains being driven into the appropriate roads for storage.
I edited out the big hand from the sky changing the points throughout the video session.
[yt]3DQ6LHsJCEs[/yt]
Last edit: by SRman
Jeff Lynn,
Amateur layabout, Professional Lurker, Thread hijacker extraordinaire
Amateur layabout, Professional Lurker, Thread hijacker extraordinaire
Posted
Full Member
That's the plan. It's a long way off completion, though!
Jeff Lynn,
Amateur layabout, Professional Lurker, Thread hijacker extraordinaire
Amateur layabout, Professional Lurker, Thread hijacker extraordinaire
Posted

Full Member
great video and amazing progress you've made since I visited you, towards end of May.
Colin
Last edit: by Colin W
Posted
Full Member
Staying on the thread Kevin.
Posted
Full Member
Having sat down and looked at my own photos and video, I went back to the train room and fixed up a few of the problems and glitches highlighted in those.
The dead point frog was traced to a loose wire - I may well have disturbed it while I was still poking around under the layout before. I repaired it with a dab of solder then tested with a Hatton's Andrew Barclay 0-4-0ST and it passed with flying colours.
There were two rough spots of track where I had left small spots of solder; a flat needle file took care of those.
I removed the baseplate on the Heljan 07, pulled the wheels out and tweaked the electrical pickups. I replaced the wheels and ensured the pickups were all touching the wheel backs properly, even on their full side to side play, and then tested that through all the points. Again, it passed with flying colours. I still have to check the Arthur's pickups, but that can wait.
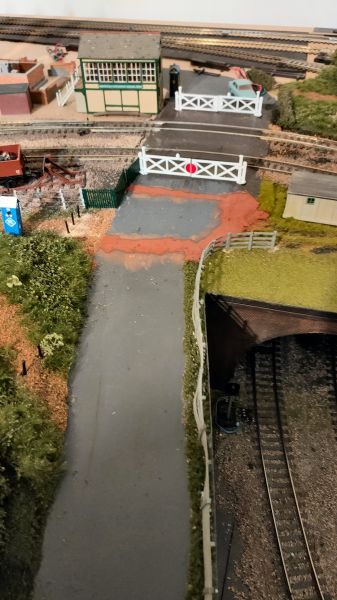
Then to those board joins and rough spots on the roads in the goods yard and level crossing areas: a bit of DAS air-drying clay has been spread around the bits that needed filling. Once dried and painted, they will look a lot better.
And finally, just to show how the video was done, here are a couple of shots of the SLW class 24 D5000 with the camera wagon. D5000 was allocated to Hither Green on the Southern Region for a few years from 1959.

Last edit: by SRman
Jeff Lynn,
Amateur layabout, Professional Lurker, Thread hijacker extraordinaire
Amateur layabout, Professional Lurker, Thread hijacker extraordinaire
Posted
Full Member
Staying on the thread Kevin.
Posted
Full Member
Lenz Standard+ for the Hornby BILs and HALs.Hi Jeff. Another reply, seeing your 2 HAL in action reminds me that I am yet to purchase a decoder for both my 2HAL & my 2BIL both 8 pin, after leaving the choice of decoder to Hattons staff when they fitted the Bachmann “ Motor Luggage Van “ for me, can you recommend a better decoder. Best wishes Kevin
Lenz Silver+ 21 for the Bachmann units (EPBs, CEPs, MLVs).
Jeff Lynn,
Amateur layabout, Professional Lurker, Thread hijacker extraordinaire
Amateur layabout, Professional Lurker, Thread hijacker extraordinaire
Posted
Full Member
Cheers Pete.
Posted
Full Member
Staying on the thread Kevin.
1 guest and 0 members have just viewed this.