00 Gauge - Jeff Lynn / SRman's New Layout
Posted

Full Member
Progress (or otherwise) on Jeff's new layout
To add to the already many pleasures and benefits of living in here Melbourne, yesterday I was most fortunate to visit Jeff and Agnes at their home and to see Newton Broadway in the flesh. An all too brief tour of the railway room and operations left me with many insights, more questions bubbling around and ideas for lots of possible things I can do back here. My overall impression was of a great layout and the marvelous economy and utilisation of space compared to the room I had imagined. It also gave me hope that my initial plans for Project Green Light are in no way unrealistic, in fact I might now well squeeze in more :twisted:Thanks again Jeff, I've already taken first steps to getting my PowerCab set up for Braking.
Colin

Posted

Full Member
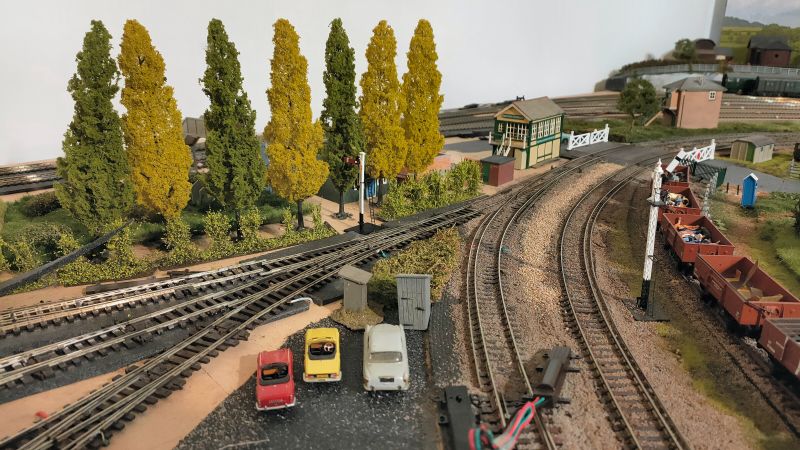
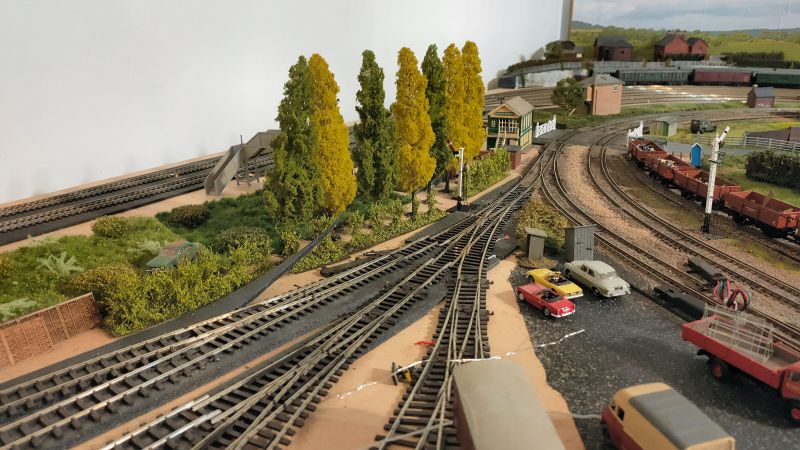
As you saw, Newton Broadway is still very much a work in progress.
All layouts have their compromises, with space always being the limiting factor that defines many of the parameters that go into a model railway. My criteria included having a layout that I didn't have to crawl under just to operate it, and also trying to get a long enough run to allow reasonable length main line trains to be run. Another, rather severe limitation was my total inability to deal with gradients (from my experience of my past attempts).
Jeff Lynn,
Amateur layabout, Professional Lurker, Thread hijacker extraordinaire
Amateur layabout, Professional Lurker, Thread hijacker extraordinaire
Posted
Full Member
While I still have two more points to wire up (one 3-way, one 2-way), plus installing the track feeds for all lines, this is a major step forward towards completing all track wiring on Newton Broadway.
I took a short video showing a test run with a Hornby 700 class 0-6-0, 30693. The loco was turned on the turntable, then run through all the point frogs involved to join the main lines, then reversed back on to the turntable. All successful! The engine shed tracks are not pinned or fastened down in any way, yet, apart from the one track leading onto the turntable, so there was room for the track to float a bit and upset the loco's pickups.
[yt]xowSPzQU1sY[/yt]
Jeff Lynn,
Amateur layabout, Professional Lurker, Thread hijacker extraordinaire
Amateur layabout, Professional Lurker, Thread hijacker extraordinaire
Posted

Full Member
Staying on the thread Kevin.
Posted
Full Member
Thanks for the compliments, Kevin. I actually used 'Sarah Siddons' for the initial tests, but turning a double-ended electric loco on the turntable seemed a bit pointless.Hi Jeff. Another excellent video of your Railway Empire, top marks for both the turntable and the Loco. Another stunning Loco, can be seen, Sarah Siddons, idling in the background. Best wishes Kevin

 Last edit: by SRman
Jeff Lynn,
Amateur layabout, Professional Lurker, Thread hijacker extraordinaire
Amateur layabout, Professional Lurker, Thread hijacker extraordinaire
Posted

Site staff
[user=1801]Passed Driver[/user] wrote:Thans for the compliments, Kevin. I actually used 'Sarah Siddons' for the initial tests, but turning a double-ended electric loco on the tirntable seemed a bit pointless.Hi Jeff. Another excellent video of your Railway Empire, top marks for both the turntable and the Loco. Another stunning Loco, can be seen, Sarah Siddons, idling in the background. Best wishes Kevin
Thats an easy one Jeff. . . The maintenance crew wanted her turned so they could check the headlight on each end was properly aligned and dipped, against the back wall of the engine shed, She needed the check for her MOT, and that cantankerous old git of a driver on the 4.20 am Milk run had been complaining That the light on that "newfangled electricated thingy" was blinding him :thumbs
Enjoyed the video, So nice to see your hard graft finally paying off :cheers
Cheers
Matt
Wasnie me, a big boy did it and ran away
"Why did you volunteer ? I didn't Sir, the other three stepped backwards"
"Why did you volunteer ? I didn't Sir, the other three stepped backwards"
Posted
Full Member
Haha, yes. Thanks, Matt.Thats an easy one Jeff. . . The maintenance crew wanted her turned so they could check the headlight on each end was properly aligned and dipped, against the back wall of the engine shed, She needed the check for her MOT, and that cantankerous old git of a driver on the 4.20 am Milk run had been complaining That the light on that "newfangled electricated thingy" was blinding him :thumbs
Enjoyed the video, So nice to see your hard graft finally paying off :cheers
Cheers
Matt
:cheers
Jeff Lynn,
Amateur layabout, Professional Lurker, Thread hijacker extraordinaire
Amateur layabout, Professional Lurker, Thread hijacker extraordinaire
Posted
Full Member
Cheers Pete.
Posted
Full Member
I am quite pleased with the results so far. I must remember to vacuum out the debris from the turntable well before doing any more videos, though.The TT and the loco run nice and smoove. :)
Jeff Lynn,
Amateur layabout, Professional Lurker, Thread hijacker extraordinaire
Amateur layabout, Professional Lurker, Thread hijacker extraordinaire
Posted
Site staff
Wasnie me, a big boy did it and ran away
"Why did you volunteer ? I didn't Sir, the other three stepped backwards"
"Why did you volunteer ? I didn't Sir, the other three stepped backwards"
Posted
Full Member
Naw. Sawdust! Probably leaked from my head.Biscuit crumbs ?? :)
Jeff Lynn,
Amateur layabout, Professional Lurker, Thread hijacker extraordinaire
Amateur layabout, Professional Lurker, Thread hijacker extraordinaire
Posted
Full Member
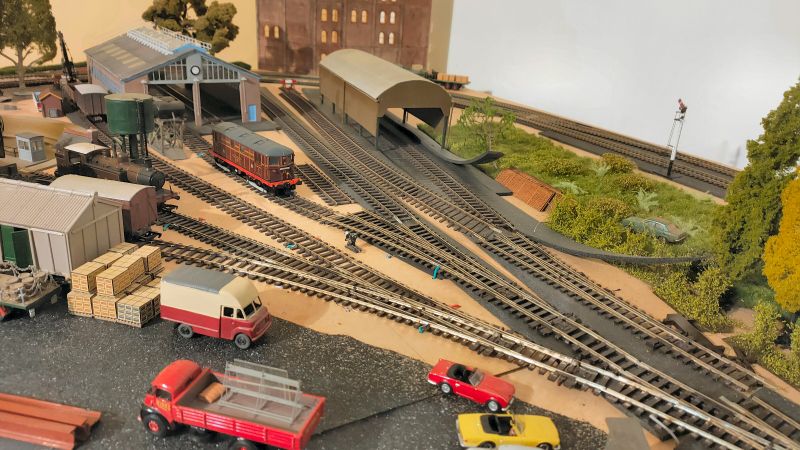
The points chosen for this swap over were all of the points leading into the fiddle yard loops at the eft-hand end (six points in all), plus the two formin the crossover on the main lines in front of the locomotive shed area.
A thorough test with a Heljan Hymek through every point involved was carried out, followed by some random tests with the Hornby Peckett 0-4-0ST. All went perfectly to plan.


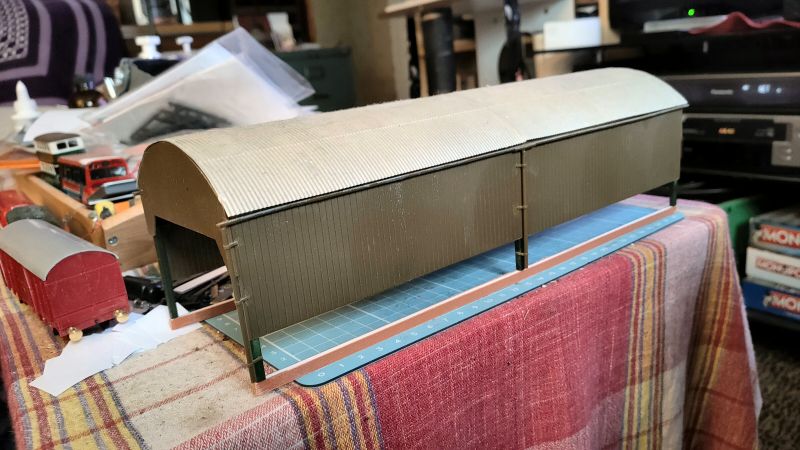
The previous evening was partly spent constructing a couple more of the Mike's Models white metal buffer stops, which now require painting. I wanted these finer types for a couple of the engine shed roads, while the more solid-looking Peco sleeper-built units will sit on the ends of the tracks that actually go through the engine shed.

Last edit: by SRman
Jeff Lynn,
Amateur layabout, Professional Lurker, Thread hijacker extraordinaire
Amateur layabout, Professional Lurker, Thread hijacker extraordinaire
Posted
Full Member
The track on the closer side in the video is also live.
The mess in the foreground is the result of my having to clear enough space to swing the small hammer and generally have enough room to work on the tracks.
[yt]o1XNZwO4Sls[/yt]
Jeff Lynn,
Amateur layabout, Professional Lurker, Thread hijacker extraordinaire
Amateur layabout, Professional Lurker, Thread hijacker extraordinaire
Posted
Full Member
I have not done any more track laying or wiring yesterday or today. The bits and pieces out of place were the result of me moving things to get at the signal's position and also being bounced around by the drilling operations.
Last edit: by SRman
Jeff Lynn,
Amateur layabout, Professional Lurker, Thread hijacker extraordinaire
Amateur layabout, Professional Lurker, Thread hijacker extraordinaire
Posted
Full Member
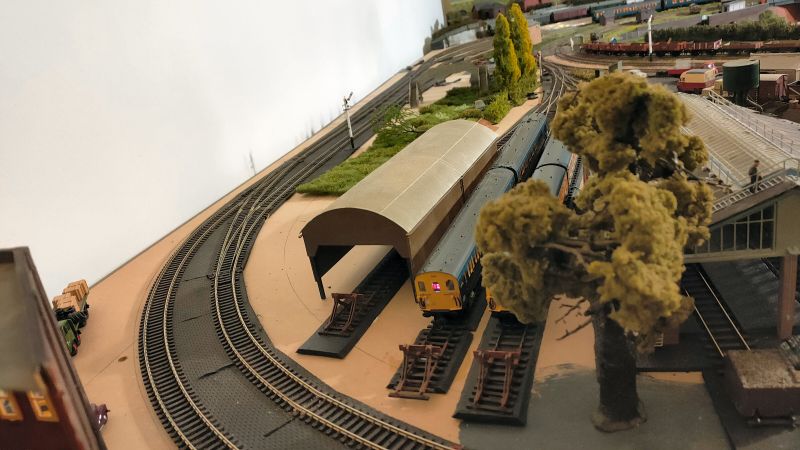
The view at the back of the engine shed shows I have trimmed the track and added a Peco sleeper-built buffer stop recycled from a much older layout. I may have to get a couple of new ones and paint and weather them properly.
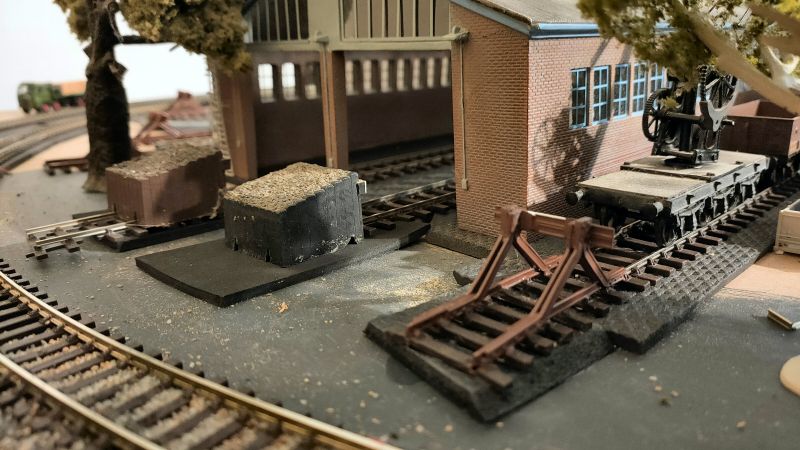
Also visible over the far side is one of three further buffer stops I assembled from Mike's Models white metal kits last night. The one on the right, above, was one of the first two I did prevously for this area. The very first one terminates the siding on the other side of the main running lines, and was built last year. While these are simple kits, it is difficult to keep them square because there are absolutely not locating pips or holes to keep parts together while the glue dries - I used small clamps, but they could, and did slip on occasions.

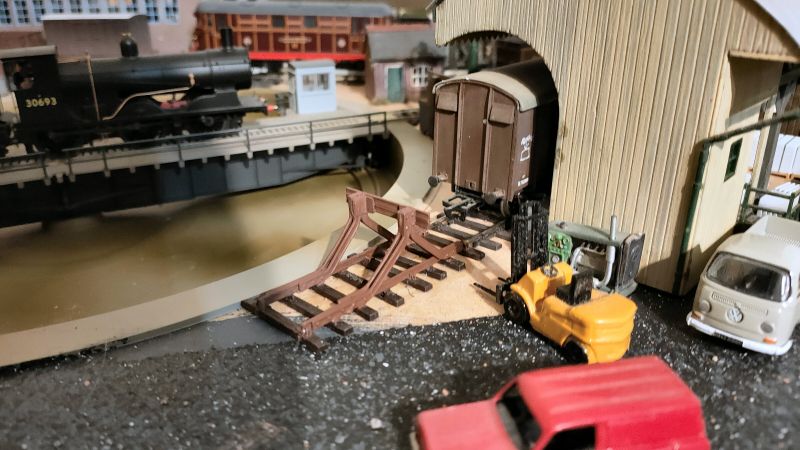
P.s. I must glaze the windows in that red Bedford HA van (a Taylor Precision Models car kit).
Last edit: by SRman
Jeff Lynn,
Amateur layabout, Professional Lurker, Thread hijacker extraordinaire
Amateur layabout, Professional Lurker, Thread hijacker extraordinaire
Posted
Full Member
I'm guessing the buffer stops were an old purchase, given changes at Mikes Models? They are good, are there other options for decent Buffers still available?
Colin
Last edit: by Colin W
Posted
Full Member
Very old. I bought them while I could, and kept them in a drawer. There were four in one pack and two in single packs, so now I have built and used all six.Jeff
I'm guessing the buffer stops were an old purchase, given changes at Mikes Models? They are good, are there other options for decent Buffers still available?
Colin
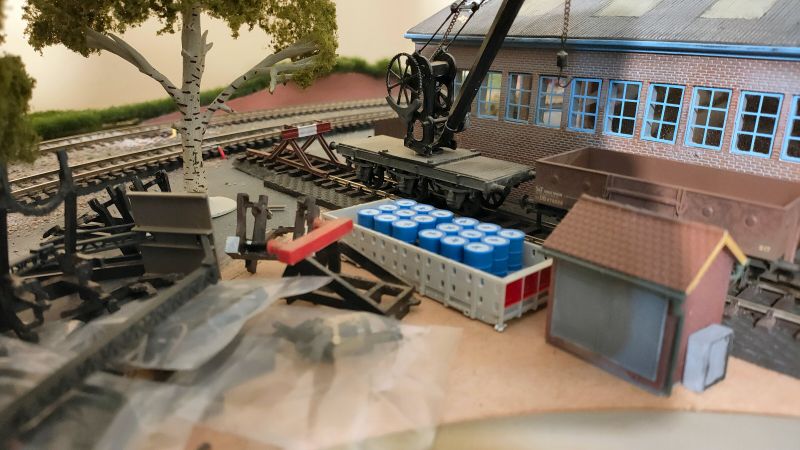
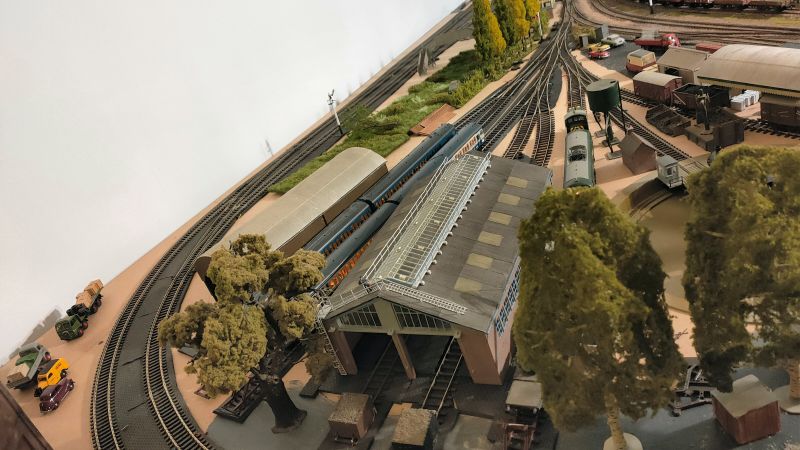
The metal water tank and cranes are also from old Mike's Models kits, as is the 6-wheel crane wagon. I still have an unbuilt water tower, and 4-wheel crane wagon squirrelled away.
Last edit: by SRman
Jeff Lynn,
Amateur layabout, Professional Lurker, Thread hijacker extraordinaire
Amateur layabout, Professional Lurker, Thread hijacker extraordinaire
Posted
Full Member
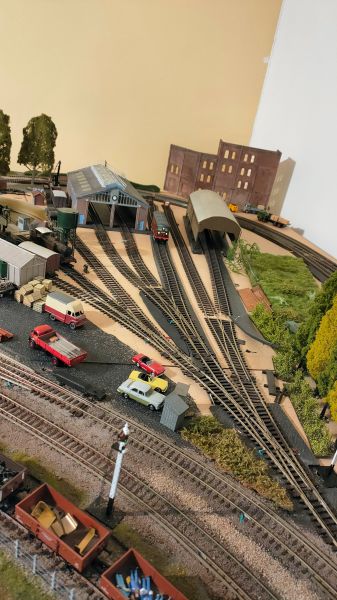
Only one point and two more lines to go. The works have disturbed a few things but I'll fix those up once I finish my labours on the track.
Last edit: by SRman
Jeff Lynn,
Amateur layabout, Professional Lurker, Thread hijacker extraordinaire
Amateur layabout, Professional Lurker, Thread hijacker extraordinaire
Posted
Full Member
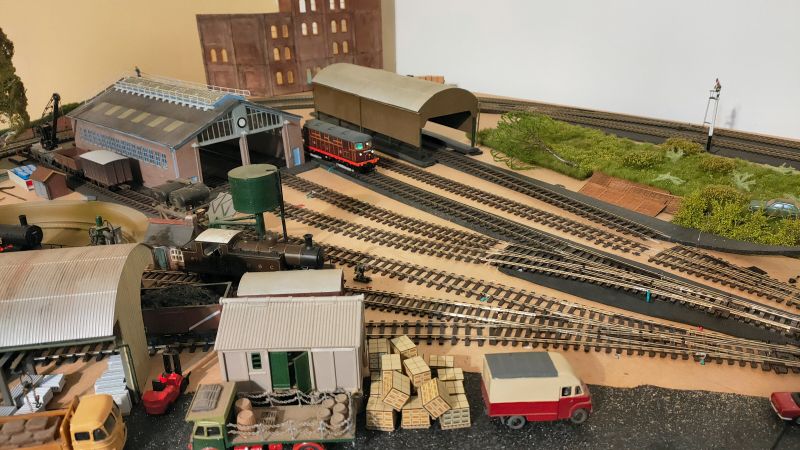
I have populated the shed, with every single loco and unit having been driven in under its own power, so I now have quite a sense of achievement.
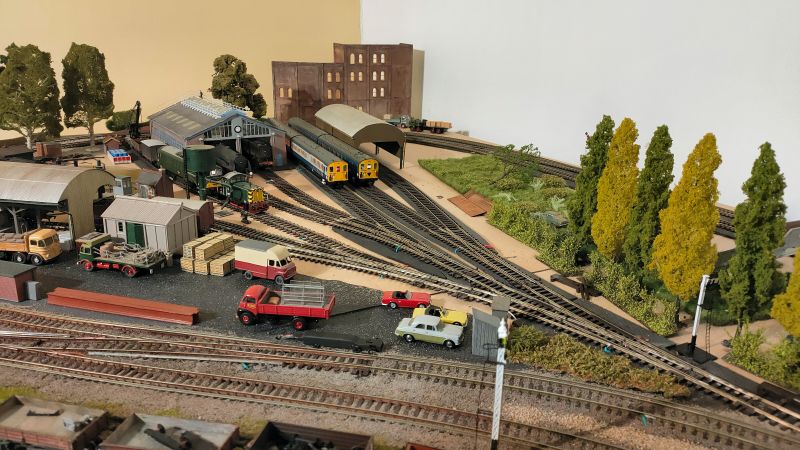

Of course, I now have to paint and ballast the track, although I want to give the effect of cinder bed for the shed area, plus a little bit of hard standing in front of the shed. The carriage shed sits a tad low, so needs to be raised a bit. I'm thinking of building a couple of low brick walls for it to stand on.
For the layout upper level as a whole, the next stage is to create a control panel, and wire up all the point motors. I will use the tried and true probe and stud contacts, as per the underground section before.
Last edit: by SRman
Jeff Lynn,
Amateur layabout, Professional Lurker, Thread hijacker extraordinaire
Amateur layabout, Professional Lurker, Thread hijacker extraordinaire
Posted
Full Member

Jeff Lynn,
Amateur layabout, Professional Lurker, Thread hijacker extraordinaire
Amateur layabout, Professional Lurker, Thread hijacker extraordinaire
1 guest and 0 members have just viewed this.