00 Gauge - Jeff Lynn / SRman's New Layout
Posted

Full Member
Progress (or otherwise) on Jeff's new layout
I like that lane Jeff. :thumbsGood luck with the gardening ……………how are you going to do the "muck hill" ? :lol:
'Petermac

Posted

Full Member
It'll be "off stage"!I like that lane Jeff. :thumbs
Good luck with the gardening ……………how are you going to do the "muck hill" ? :lol:

Jeff Lynn,
Amateur layabout, Professional Lurker, Thread hijacker extraordinaire
Amateur layabout, Professional Lurker, Thread hijacker extraordinaire
Posted
Full Member

P_20200129_090238_vHDR_On by Jeffrey Lynn, on Flickr
P_20200129_094719_vHDR_On by Jeffrey Lynn, on Flickr

P_20200129_090226_vHDR_On by Jeffrey Lynn, on Flickr
Jeff Lynn,
Amateur layabout, Professional Lurker, Thread hijacker extraordinaire
Amateur layabout, Professional Lurker, Thread hijacker extraordinaire
Posted

Full Member
Hi Jeff Looking good .The farm scene has been positioned in its back corner of Newton Broadway. While there are still a few minor tweaks I can do to improve it, quite a bit of the detail is hidden from normal view anyway … but I know it's there.
P_20200129_090238_vHDR_On by Jeffrey Lynn, on Flickr
P_20200129_094719_vHDR_On by Jeffrey Lynn, on Flickr
P_20200129_090226_vHDR_On by Jeffrey Lynn, on Flickr
Like you I do details nobody can see but I know they are there!
Cheers,
Claus
www.flickr.com/photos/ellef/
Claus
www.flickr.com/photos/ellef/
Posted
Full Member

P_20200213_221059_vHDR_Cropped by Jeffrey Lynn, on Flickr

P_20200213_221151_vHDR_On by Jeffrey Lynn, on Flickr
And this is what it looked like before:
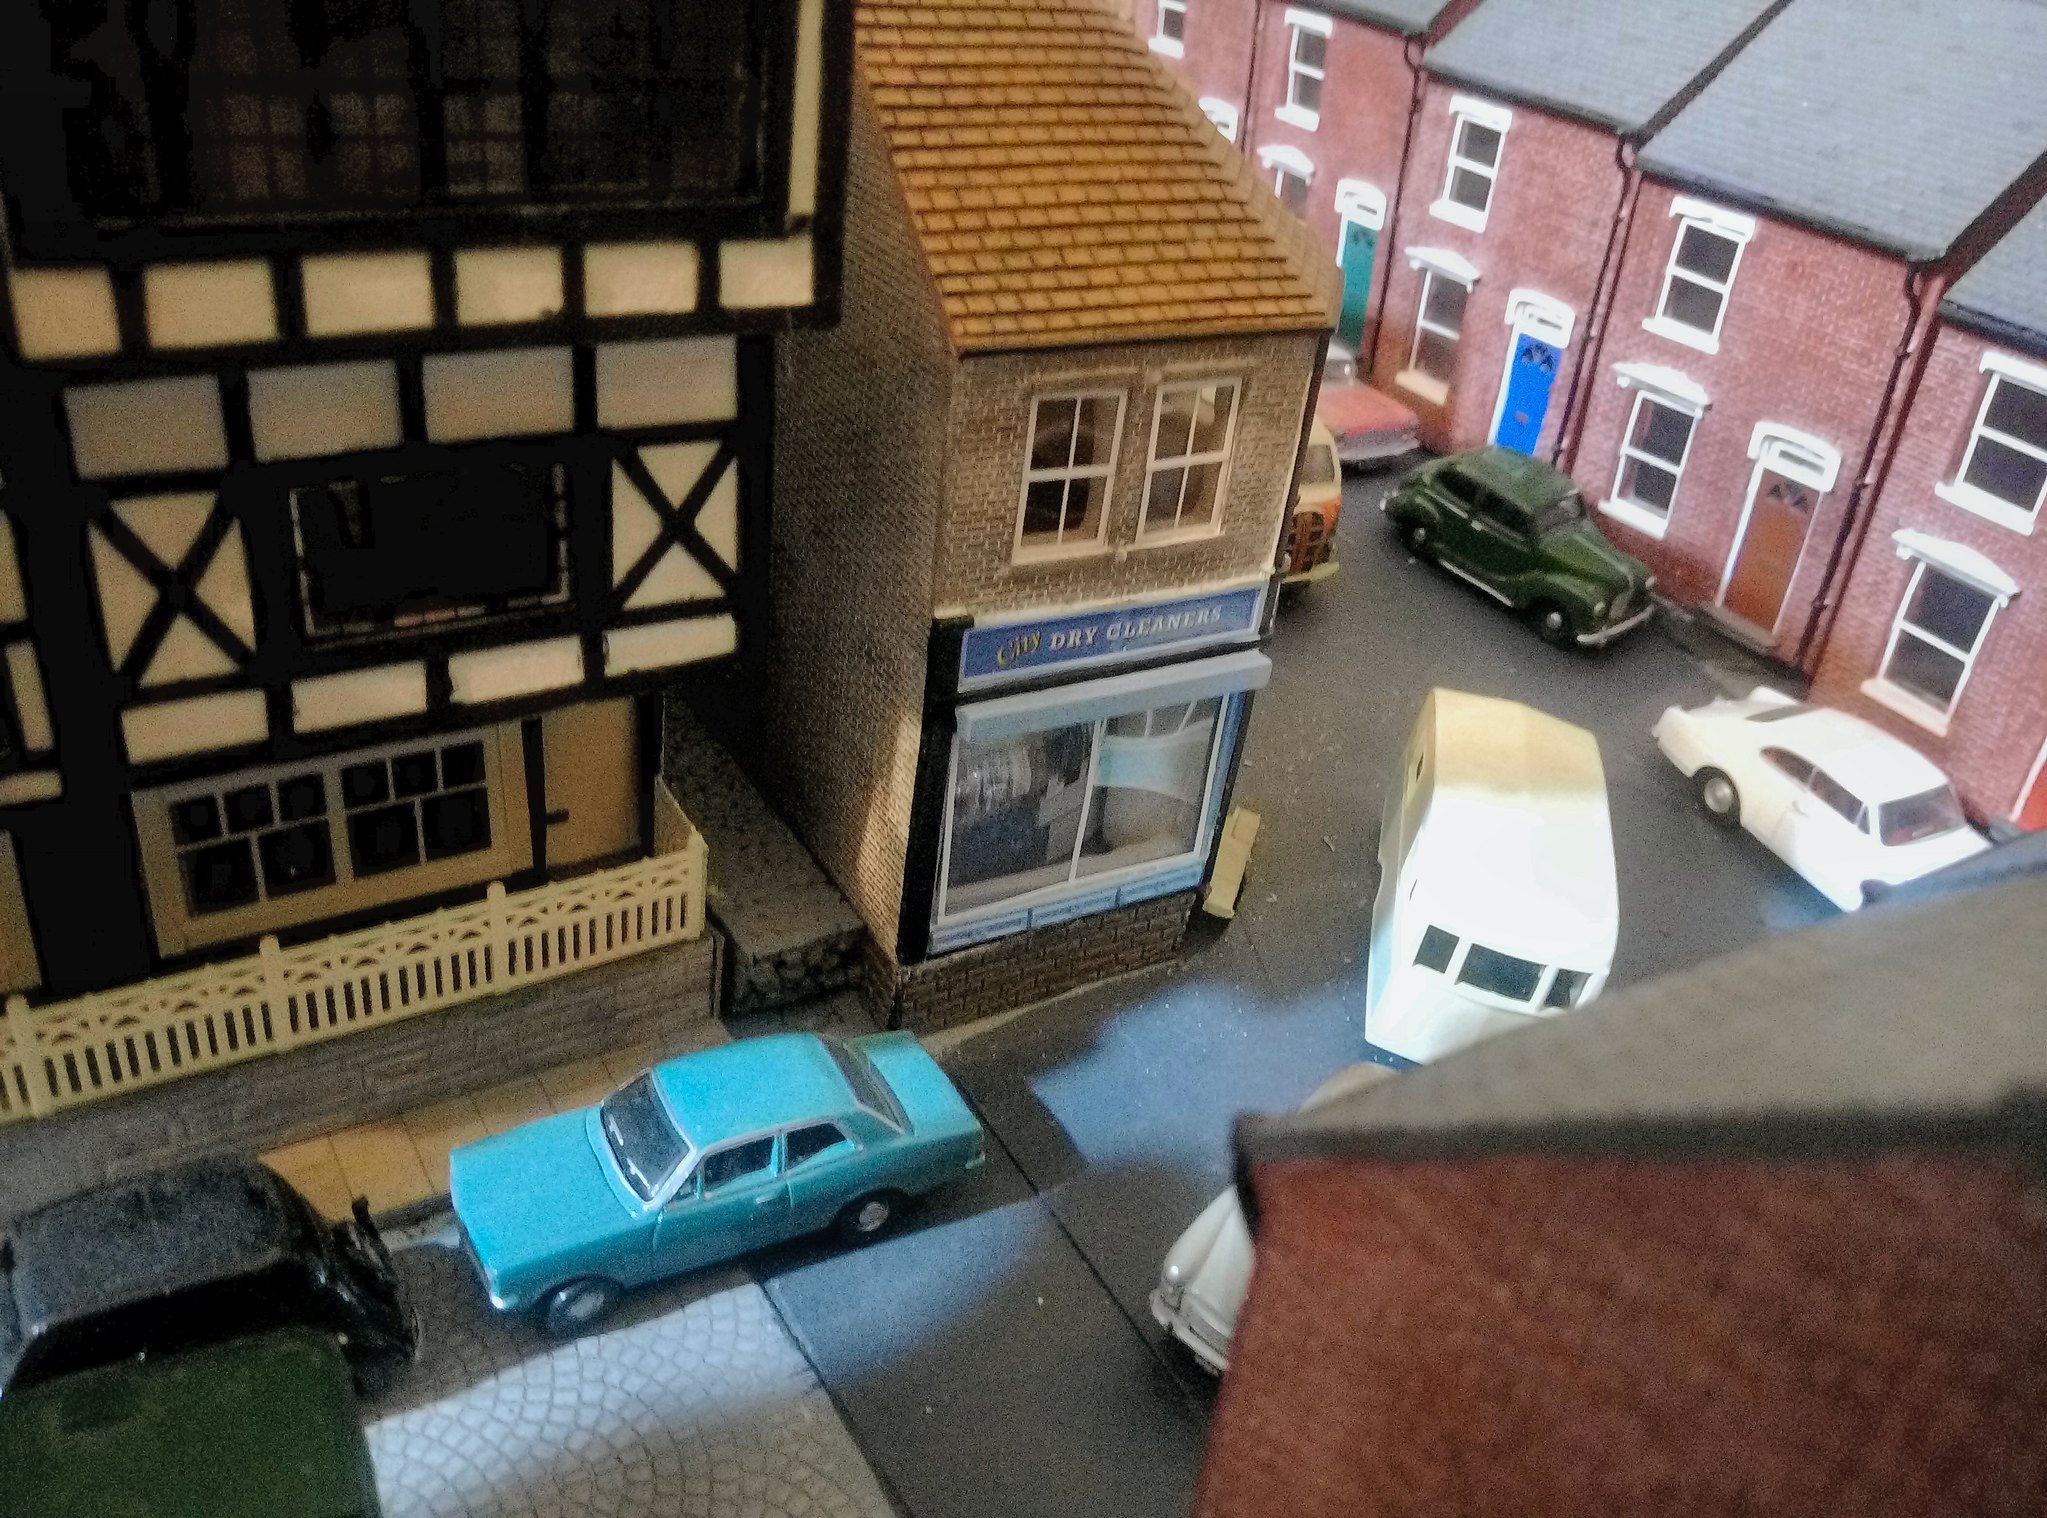
Corner Shop Improvements - 2 by Jeffrey Lynn, on Flickr
Jeff Lynn,
Amateur layabout, Professional Lurker, Thread hijacker extraordinaire
Amateur layabout, Professional Lurker, Thread hijacker extraordinaire
Posted

Site staff
Nice hotel, but I wouldn't want to stay there because of all the noise and fumes from the traffic :lol:
Ed
Posted
Full Member
A good move Sir. :pathead
'Petermac
Posted
Full Member
Yup, that looks good :thumbs
Nice hotel, but I wouldn't want to stay there because of all the noise and fumes from the traffic :lol:
Ed
It's a one-way system through the village, so the noise and fumes only come from one direction!
:twisted: :twisted: :twisted:
Jeff Lynn,
Amateur layabout, Professional Lurker, Thread hijacker extraordinaire
Amateur layabout, Professional Lurker, Thread hijacker extraordinaire
Posted
Full Member
 Last edit: by SRman
Jeff Lynn,
Amateur layabout, Professional Lurker, Thread hijacker extraordinaire
Amateur layabout, Professional Lurker, Thread hijacker extraordinaire
Posted
Full Member
Must come up with a name for the hotel too. :)

P_20200214_123056_vHDR_On by Jeffrey Lynn, on Flickr

P_20200214_123106_vHDR_On by Jeffrey Lynn, on Flickr

P_20200214_123046_vHDR_On by Jeffrey Lynn, on Flickr
Jeff Lynn,
Amateur layabout, Professional Lurker, Thread hijacker extraordinaire
Amateur layabout, Professional Lurker, Thread hijacker extraordinaire
Posted
Full Member

P_20200215_141711_vHDR_On by Jeffrey Lynn, on Flickr

P_20200215_141723_vHDR_cropped by Jeffrey Lynn, on Flickr
Jeff Lynn,
Amateur layabout, Professional Lurker, Thread hijacker extraordinaire
Amateur layabout, Professional Lurker, Thread hijacker extraordinaire
Posted
Full Member

P_20200215_161857_vHDR_cropped by Jeffrey Lynn, on Flickr

P_20200215_161830_vHDR_cropped by Jeffrey Lynn, on Flickr
Jeff Lynn,
Amateur layabout, Professional Lurker, Thread hijacker extraordinaire
Amateur layabout, Professional Lurker, Thread hijacker extraordinaire
Posted
Full Member
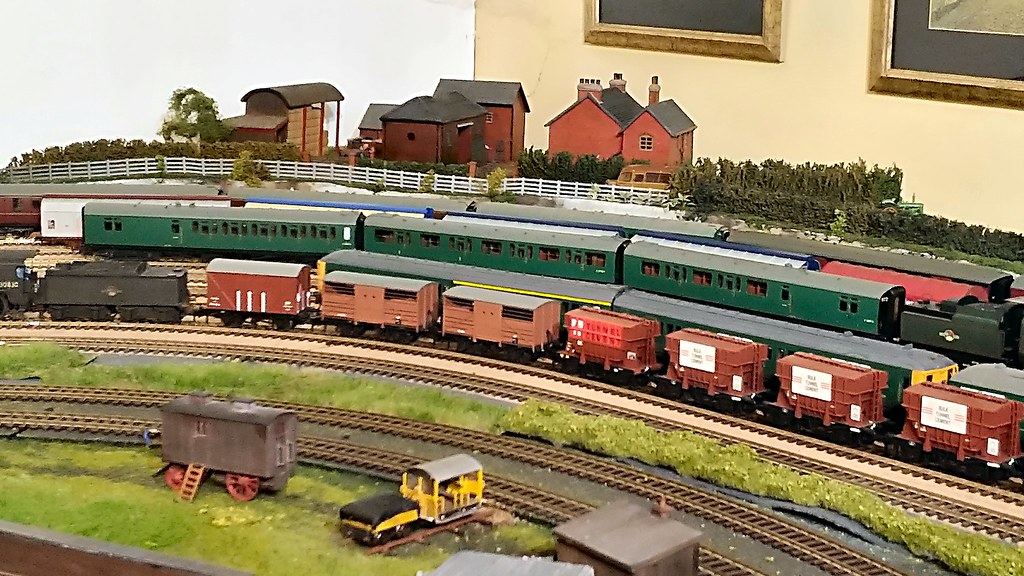
The units are, from back to front:
Class 455/8 5835 in Network South East (NSE) livery;
Class 319/1 319 174 in NSE livery;
Class 319/3 319 368 in Thameslink livery;
Class 455/9 5907 in South West Trains (SWT) livery;
Class 456 456007 in NSE livery.
The Thameslink 319 and SWT 455 are both unfinished as they have not yet had their underframe details fitted. 5907 is also still undergoing adjustments to its livery. This uses Electra Railway Graphics vinyl overlays but I have been painting the end 'swoops' and cab fronts by hand.
The unpowered class 456 usually runs attached to 5835.

P_20200315_111402_vHDR_On by Jeffrey Lynn, on Flickr

P_20200315_111334_vHDR_On by Jeffrey Lynn, on Flickr
Last edit: by SRman
Jeff Lynn,
Amateur layabout, Professional Lurker, Thread hijacker extraordinaire
Amateur layabout, Professional Lurker, Thread hijacker extraordinaire
Posted
Full Member
 P_20200315_163411_vHDR_cropped by Jeffrey Lynn, on Flickr
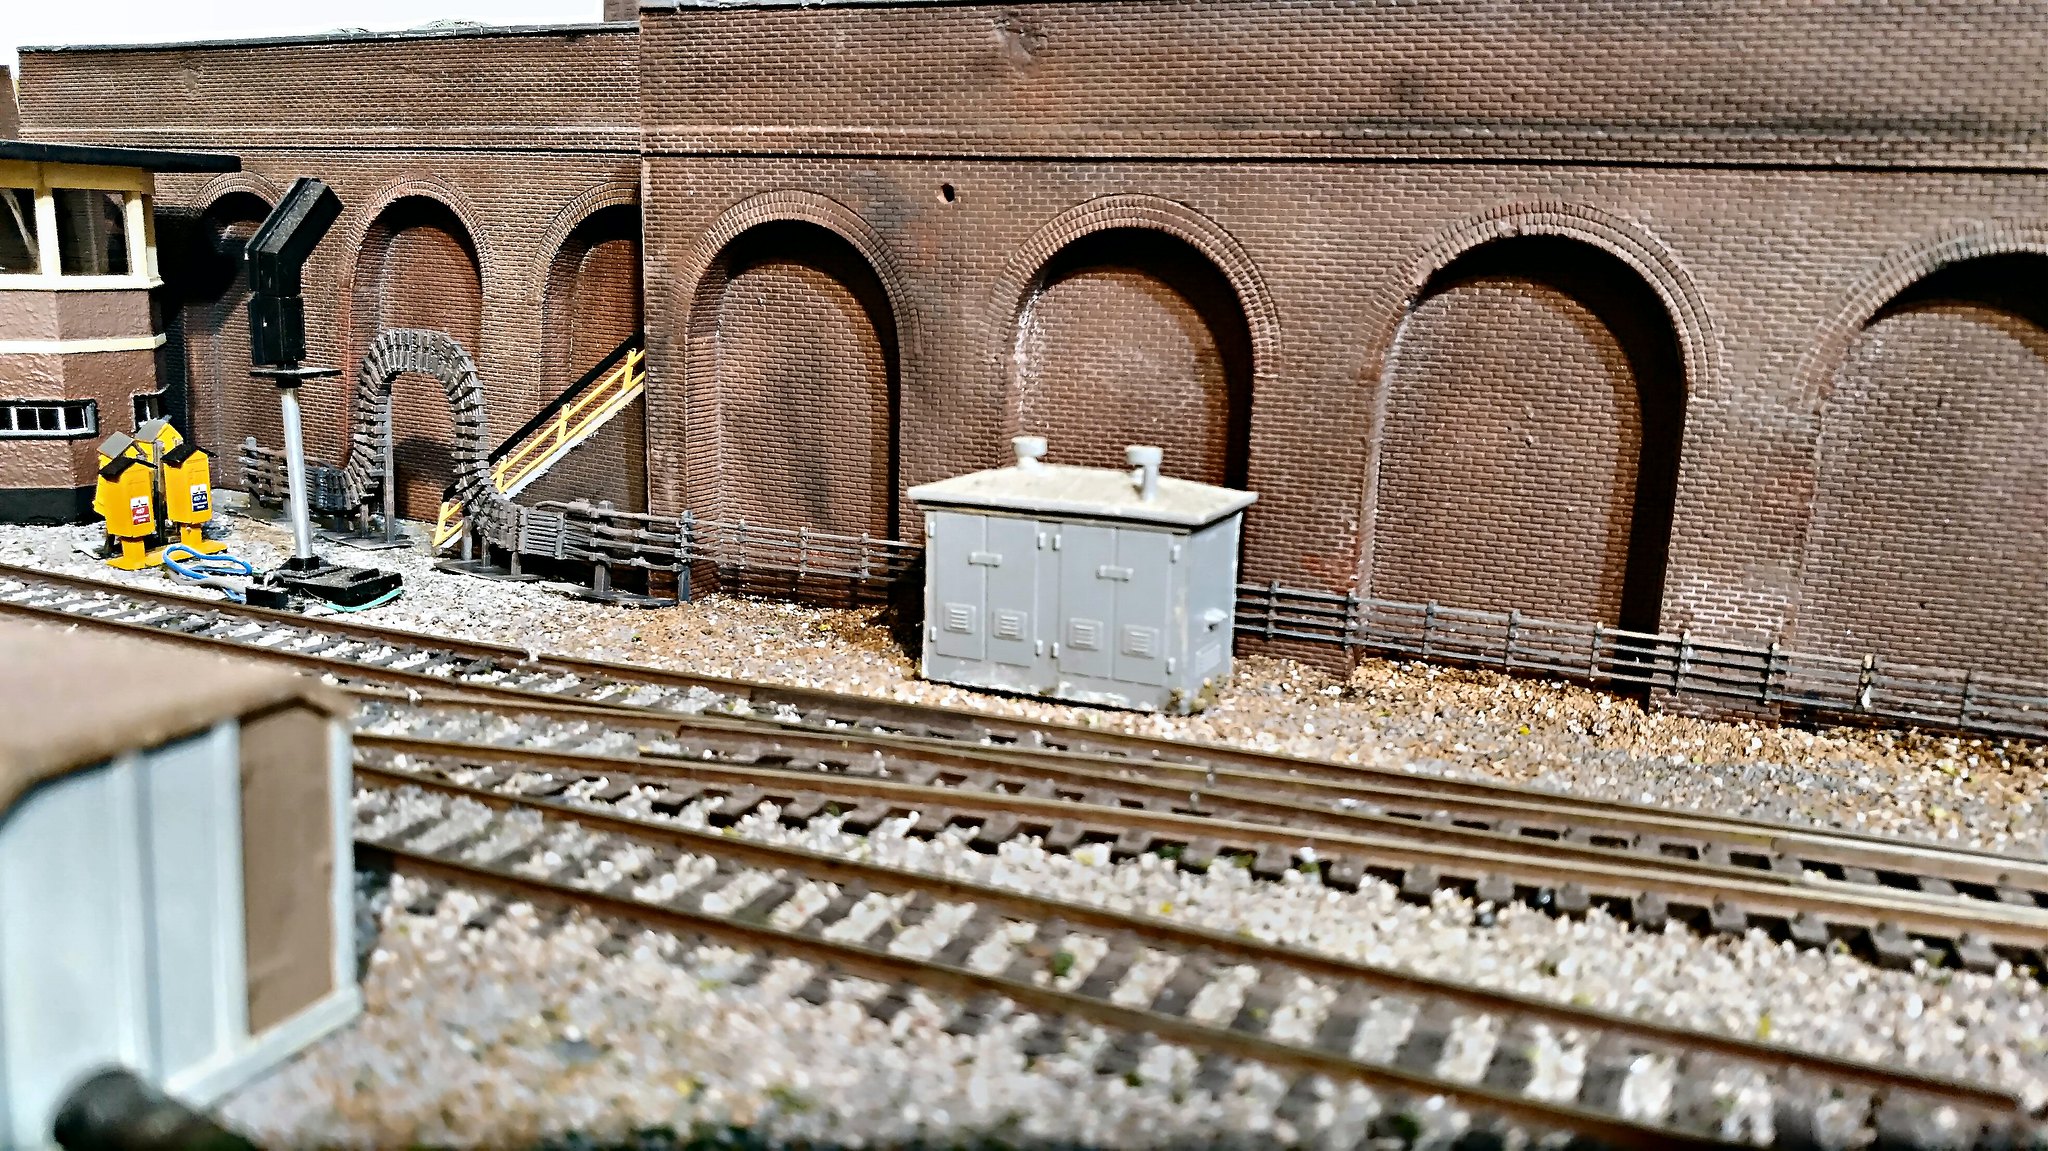
P_20200315_163358_vHDR_On by Jeffrey Lynn, on Flickr
Jeff Lynn,
Amateur layabout, Professional Lurker, Thread hijacker extraordinaire
Amateur layabout, Professional Lurker, Thread hijacker extraordinaire
Posted
Full Member
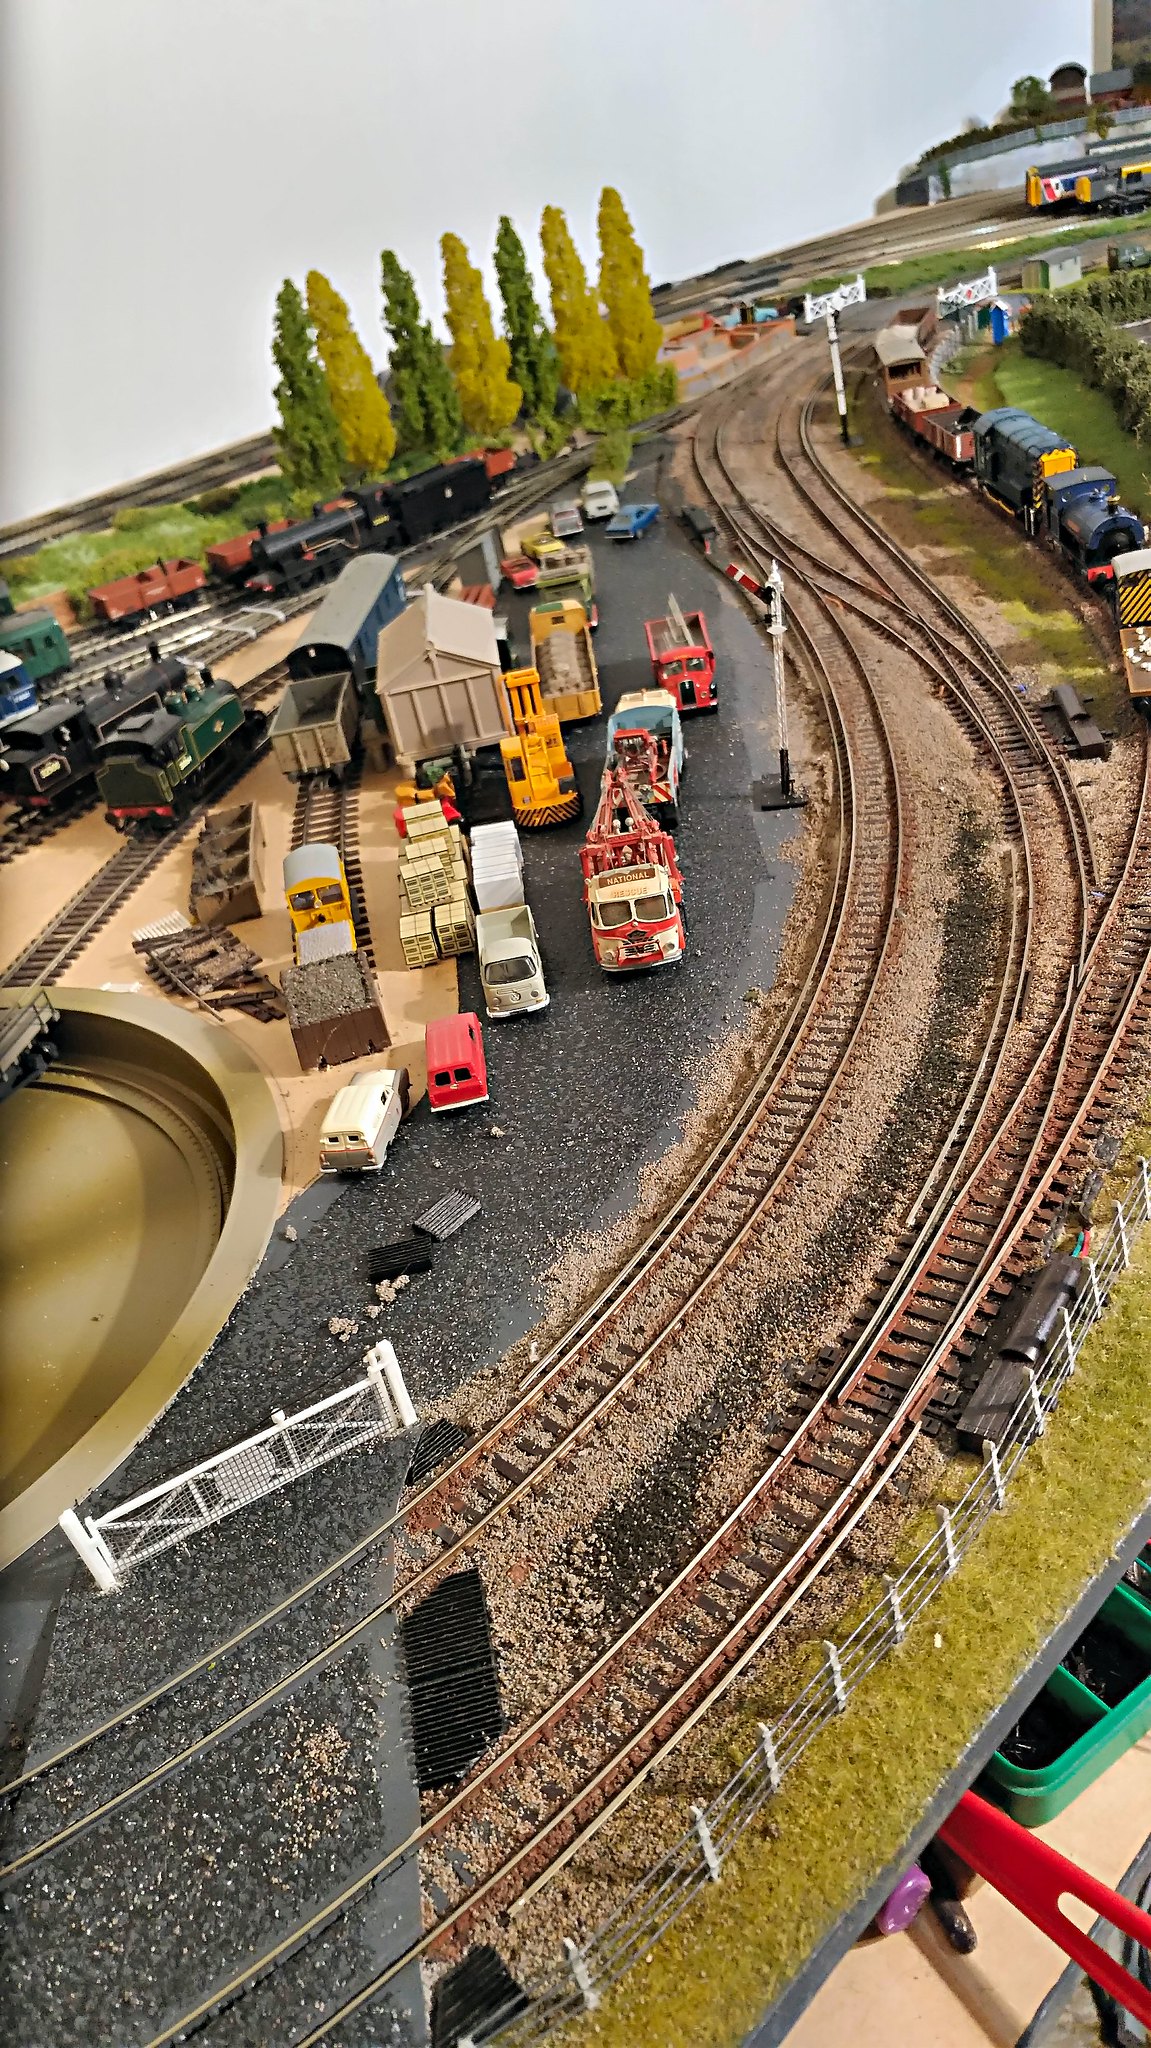
Also in the photos are the Ratio yard hut which was a freebie from Railway Modeller magazine (not its final position, but I still need to work on the engine shed area where it will end up if all goes to plan), and the workman's caravan from Oxford Diecast, which I have weathered and dulled down somewhat, but forgot to treat the steps!
As always (this is almost a mantra!) there is still much to do to complete the effects properly and get rid of bits of bare boards or cork sheeting showing through.

P_20200327_171140_vHDR_On by Jeffrey Lynn, on Flickr

P_20200327_171204_vHDR_On by Jeffrey Lynn, on Flickr
Last edit: by SRman
Jeff Lynn,
Amateur layabout, Professional Lurker, Thread hijacker extraordinaire
Amateur layabout, Professional Lurker, Thread hijacker extraordinaire
Posted
Full Member
This shot is particularly good:
'Petermac
Posted
Site staff
Ed
Posted
Full Member
I did have to put a driver in the Mescherschmidt, seeing as the canopy is so clear.
Jeff Lynn,
Amateur layabout, Professional Lurker, Thread hijacker extraordinaire
Amateur layabout, Professional Lurker, Thread hijacker extraordinaire
Posted
Full Member
I also posted a video on YouTube showing a couple of the LT trains from the late 1950s and early 1960s period running. In this video the cable arches are unpainted, but in the photo that follows, I have started painting. They still need a little light weathering, and some minor variations in the cable colours to really bring them to life.
[yt]gj-OI-TXXAs[/yt]

P_20200401_110445_vHDR_On by Jeffrey Lynn, on Flickr
Last edit: by SRman
Jeff Lynn,
Amateur layabout, Professional Lurker, Thread hijacker extraordinaire
Amateur layabout, Professional Lurker, Thread hijacker extraordinaire
Posted
Full Member

P_20200404_161613_vHDR_On by Jeffrey Lynn, on Flickr
In the meantime, on the upper level, this is purely experimental at present, but I have decided to try a less labour-intensive method of adding third rail. I still have a heap of Peco code 75 rail salvaged from my old layout, where it was used with the Peco third rail insulator 'pots'. Those 'pots' are very fiddly to slide onto the rails, and tend to ping off into the distance or break just as one is trying to feed them into the pre-drilled holes and glue them in. For this experiment, I am dispensing with the 'pots' altogether, and gluing the code 75 rail directly to the sleeper ends. This meant clearing a little bit of stray ballast that had stuck to some of the sleeper ends. It also means bending the rail to match the line profile, and setting the distance out by eye, although if I adopt this method for the rest of the layout, I'll make up a spacer template. For the glue, I am trying out a Tiger Grip glue, which resembles a PVA but promises to bond all materials including plastics and metals. So far it seems to grip very well, but I'll have to see how it fares for durability over a longer term. The appearance is not too bad, as the lack of 'pots' is barely noticeable at normal viewing distances.
P_20200404_154721_vHDR_On by Jeffrey Lynn, on Flickr
Last edit: by SRman
Jeff Lynn,
Amateur layabout, Professional Lurker, Thread hijacker extraordinaire
Amateur layabout, Professional Lurker, Thread hijacker extraordinaire
1 guest and 0 members have just viewed this.