00 Gauge - Jeff Lynn / SRman's New Layout
Posted

Full Member
Progress (or otherwise) on Jeff's new layout
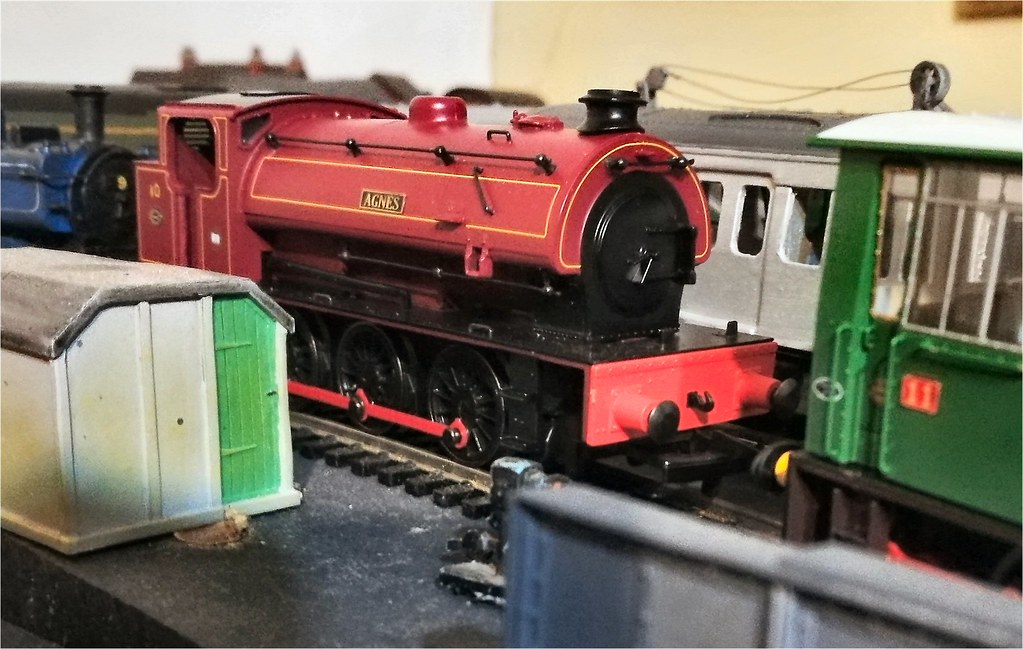
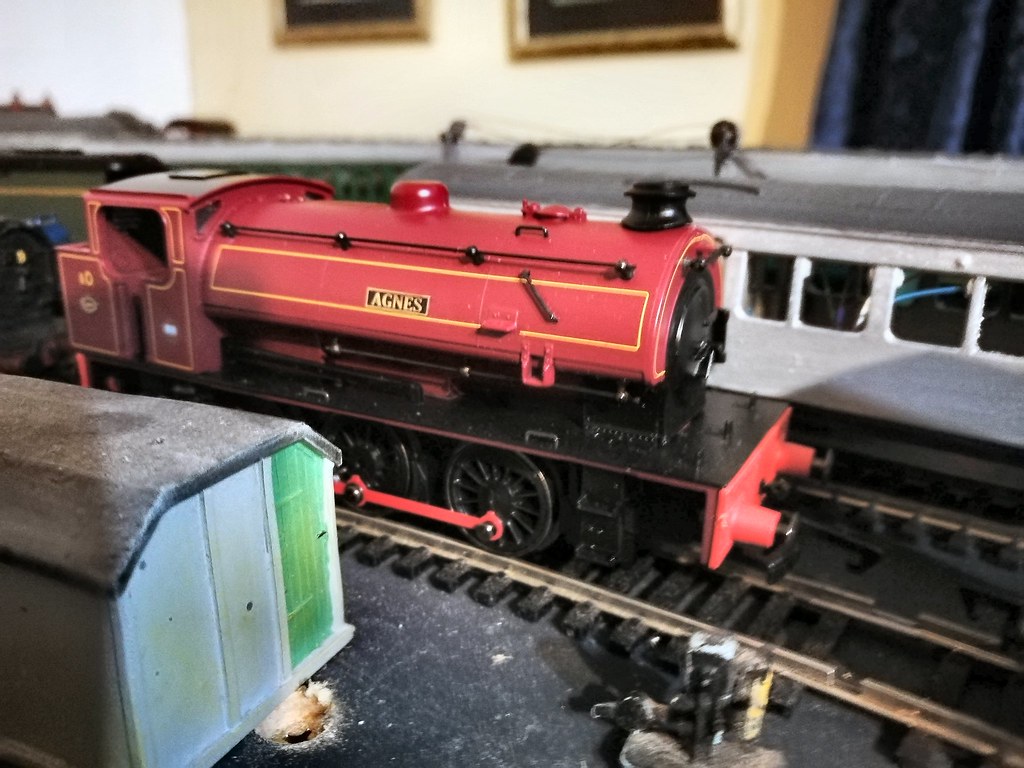
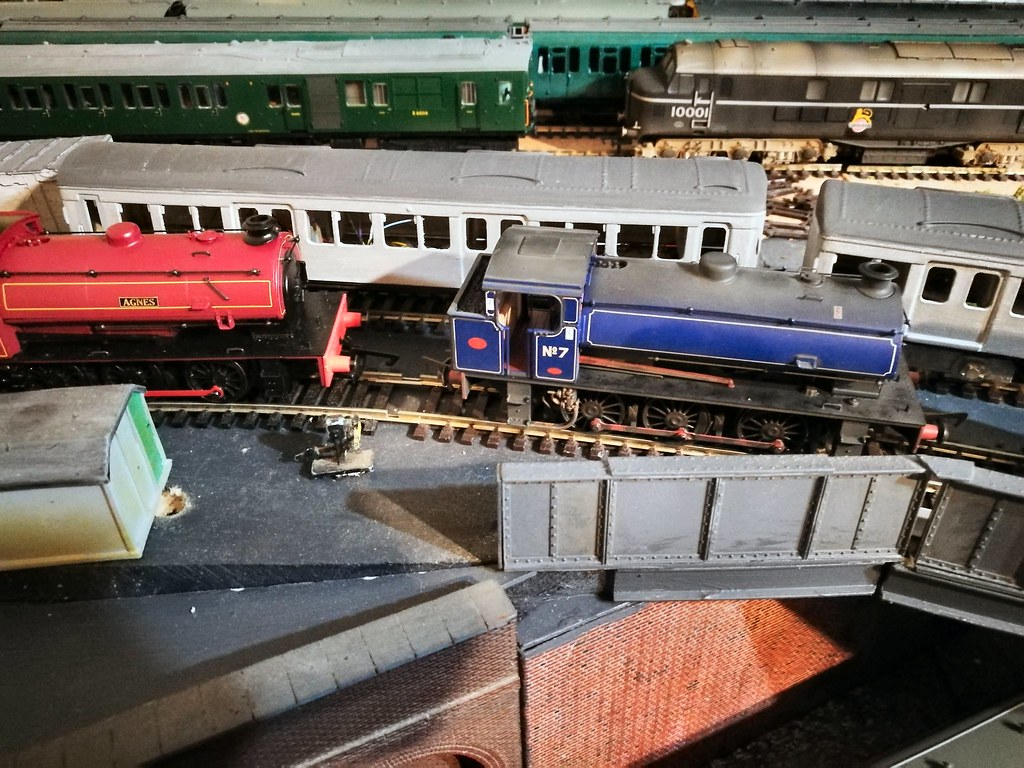
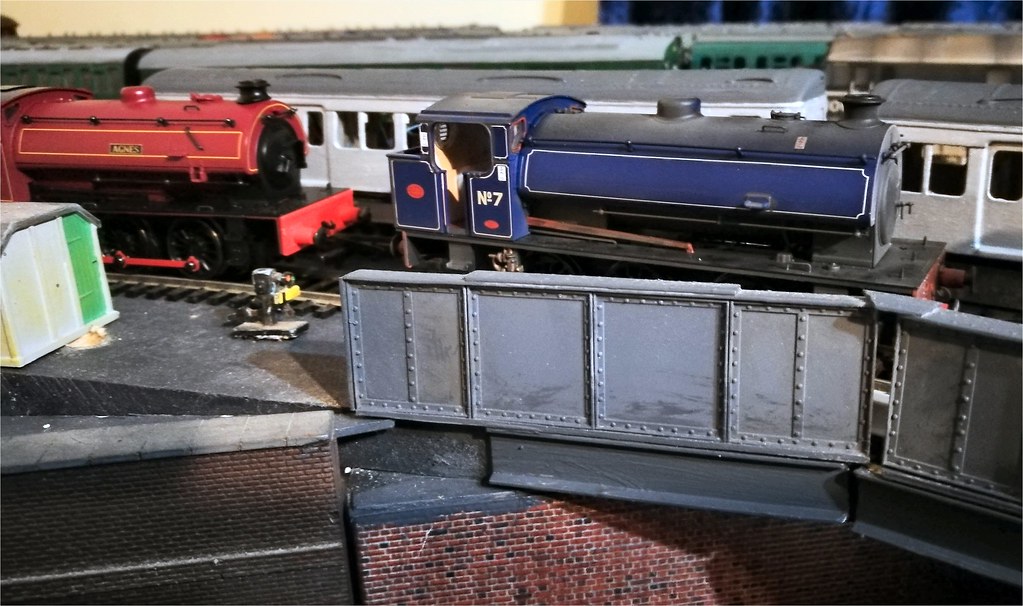
Continuing my industrial locomotive theme of female names beginning with 'A', I bought some more nameplates, works plates and number plates from Narrow Planet (the service was excellent, as always).The Hornby J94, Harry, was renumbered a while ago using Bulleid 'sunshine' style numerals, and now has the name Agnes, named after my wife who insisted I buy this locomotive when it came up for sale at a local BRMA meeting.
The Heljan class 05 in Bulmers light green, Formerly #2, Cider Queen, is now number 11, Arabella.
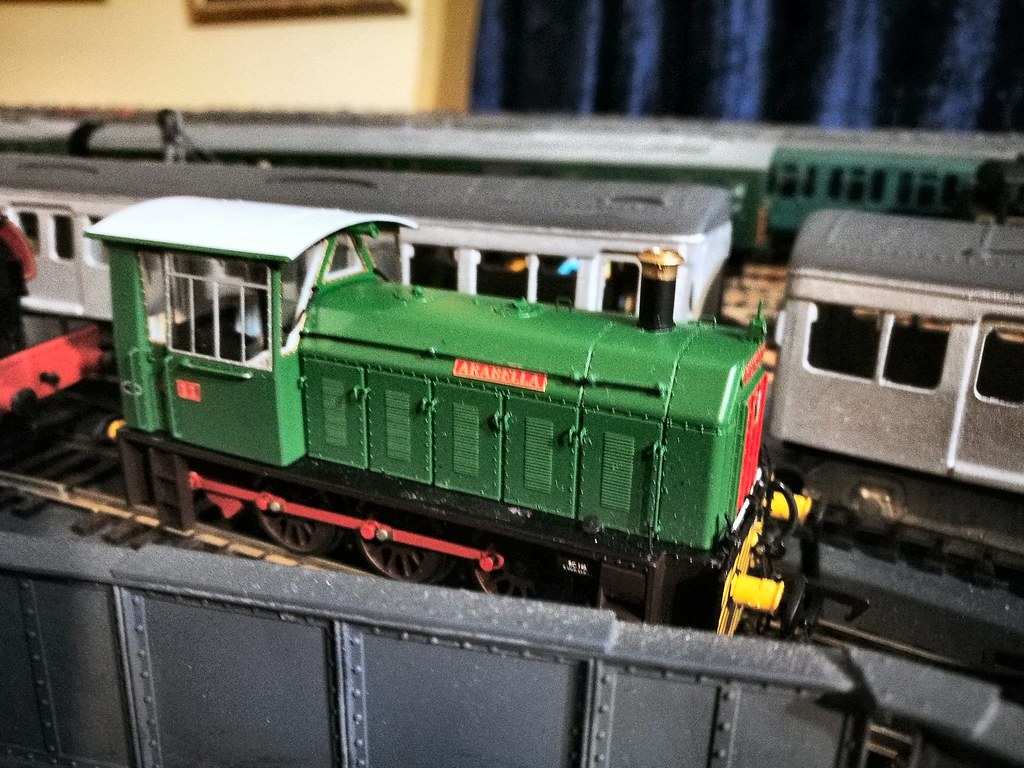
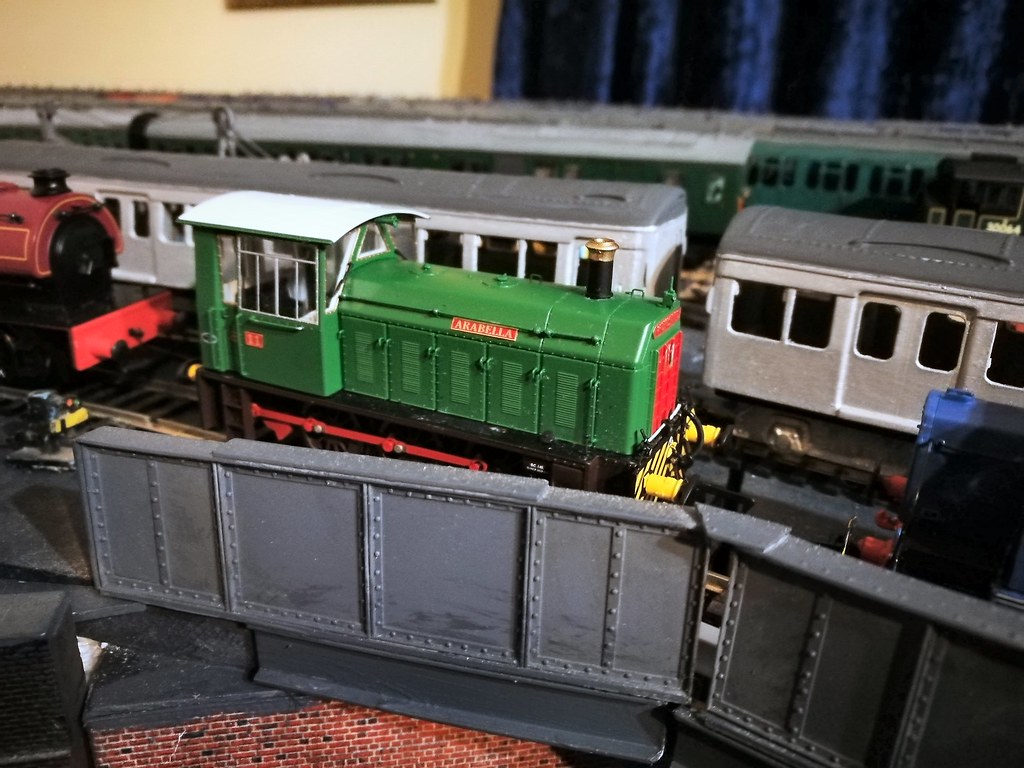
Sorry these are a little blurry; I snapped them off rather hastily on the phone camera. If I take better ones later, I'll edit the post and stick those in.
18/10/2017: Edited to resize the photos and also to replace the first one of the J94 with a slightly better one.
 Last edit: by SRman
Jeff Lynn,
Amateur layabout, Professional Lurker, Thread hijacker extraordinaire
Amateur layabout, Professional Lurker, Thread hijacker extraordinaire

Posted
Full Member
This evening, I stopped thinking about it and actually did something about it. I cut off the four pin plug and identified which wire was which by trial and error on a DC controller. Linking the pairs of wires resulted in forward or reverse motions (good!). Each pair was carefully teased to one side or other to keep the two halves separate. I then tried one wire on one side touching one from the other side, with the controller set at near full voltage. If nothing happened then one or other, or both wires led to the brushes. Only the two track feeds would short out. Once those were identified, I labelled them with coloured heat-shrink tubing.
Next, a DCC Concepts S4SA decoder had its 8-pin plug cut off, the blue, yellow and white wires cut short and sealed off with some more heat-shrink tube, and the remaining wires soldered to the correct, matching 'labelled' locomotive wires.
A quick test on the programming track indicated that all was well and the address and other CVs could be read and written to. This chassis was then tested on DCC and actually ran in the correct directions, more by luck than skill!
The wires were tidied up and tacked to the motor and housing, the decoder was roughly secured ahead of the motor, and the white metal Wills body was carefully lowered on and secured. Another test was carried out on the programming track to ensure there were no short-circuits from the metal body. Again, all was well.
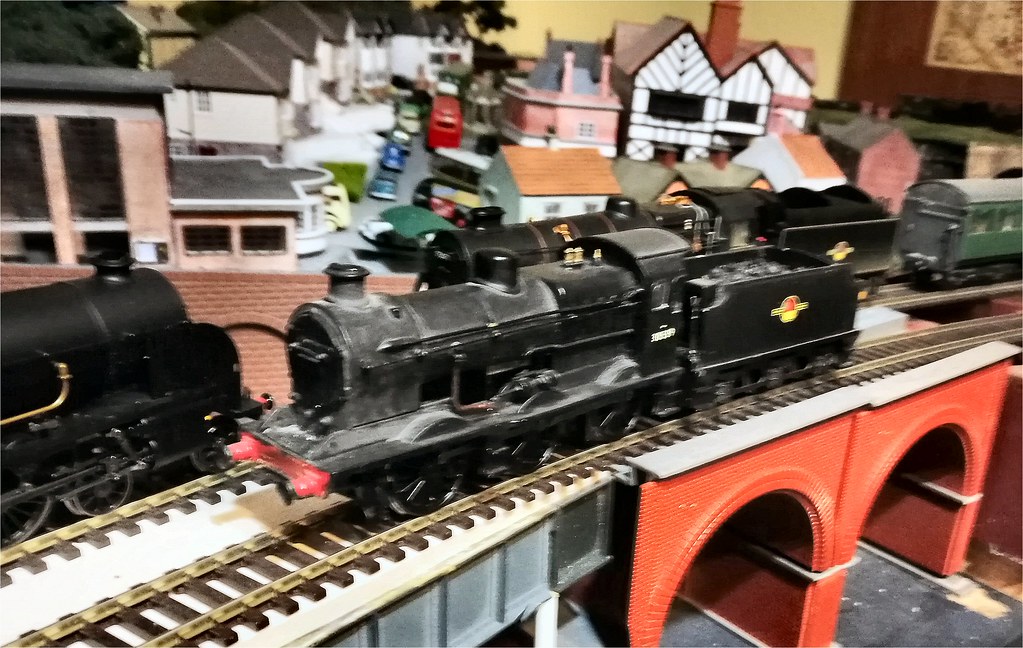
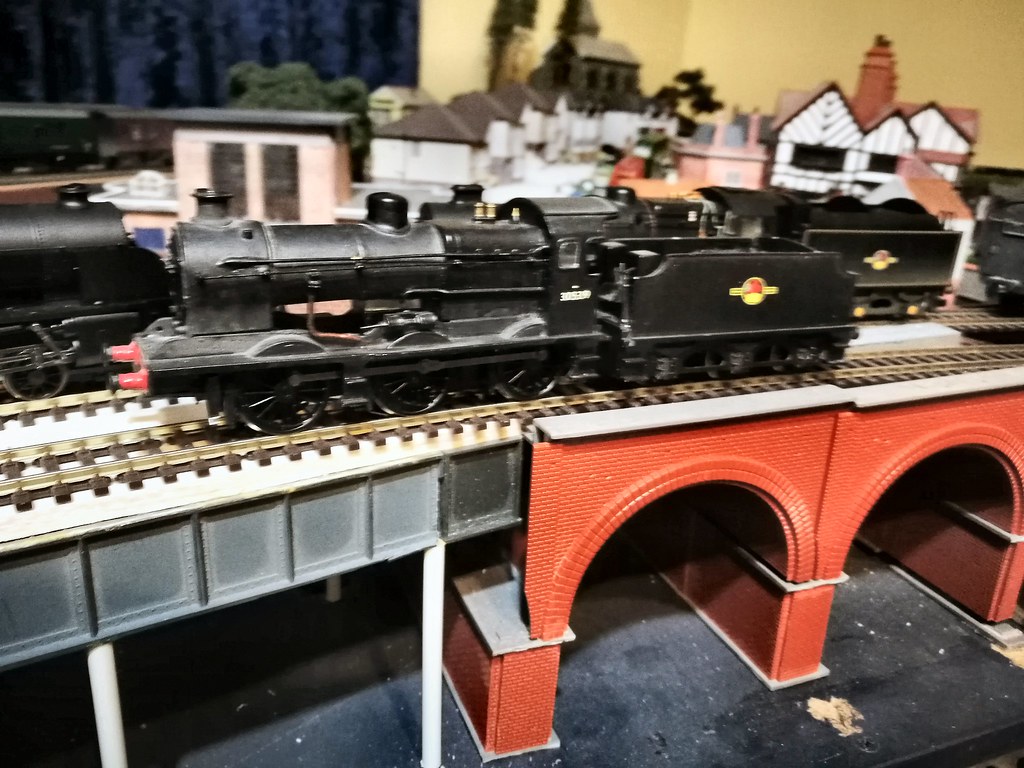
The wheels were given a good cleaning and then 30539 was sent off for a couple of circuits of Newton Broadway in both directions on the smallest radius (i.e. inner) track. I can say it was a complete success and runs extremely smoothly and quietly, although I tweaked the starting voltage in CV2 very slightly.
The loco body and tender had their liberal layers of dust cleaned off and some photos were taken. There is still some work to do to finish off the model and its detailing (e.g. a boiler bottom curve section, and a firebox backhead), but it is now fully operational.
Jeff Lynn,
Amateur layabout, Professional Lurker, Thread hijacker extraordinaire
Amateur layabout, Professional Lurker, Thread hijacker extraordinaire
Posted
Full Member
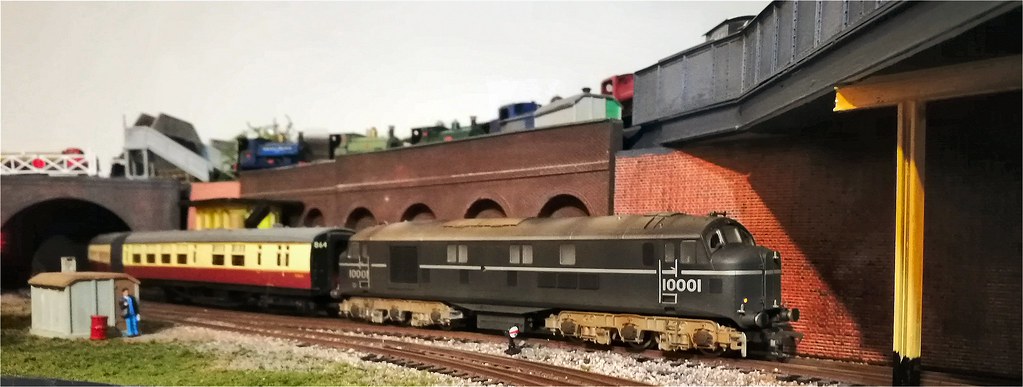
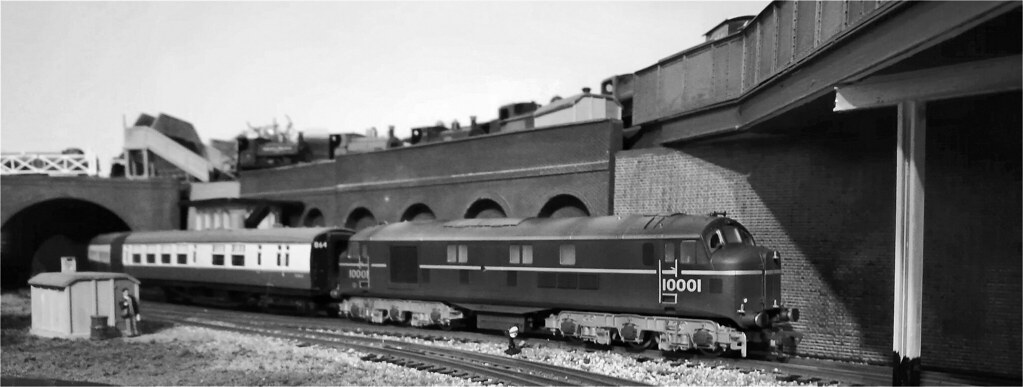
Anyway, 10001 was run for a few hours on the rolling road on DC power (longer than I intended as I forgot about it!). I have now fitted a Hatton's 21-pin decoder, which works all of the lighting functions (head and tail lights plus cab lights - both ends not independent). I haven't even opened the detailing pack yet, so it is seen in the photos as it came out of the box. I intend to "Southern-ise" it a bit, with extra lamp irons and a large BR crest on each side. I have found one photo so far showing the position for the crest on one side, but have yet to locate a pic of the other side for the correct period.
I have also had a little play around with the photos to try to take them back to the early-mid 1950s; these follow the coloured originals.


Jeff Lynn,
Amateur layabout, Professional Lurker, Thread hijacker extraordinaire
Amateur layabout, Professional Lurker, Thread hijacker extraordinaire
Posted
Full Member
A session on the programming track showed that I needed to up the starting voltage on the decoder (CV2) which now has a value of 11 in it. This is higher than I usually have to put in, but may be because the mechanism is still a little tight. Some proper, continuous track running may improve things further. It will crawl along smoothly at low speed on step 1 of the controller (NCE Power Pro), but could go a little slower still once it has fully run-in.

On a different topic, I swapped a Lenz decoder into 4TC unit 404 to make it easier to consist with 416 (which already had a Lenz fitted). For some reason the headcodes on 404 didn't want to light up, so I played around on the programming track, even resorting to a decoder reset. This was made more difficult because the Lenz decoders won't read without a motor in circuit, so I was programming blind, so to speak (the Zimo MX634 decoder I had in 404 temporarily did read properly without a motor in circuit). I eventually gave up on this and took the decoder out to put it temporarily into a locomotive (I chose a DJM class 71 as the bodies just clip off easily). Once I could see what I was doing, the fix was very easy; for some reason, the decoder was set to 14 speed steps. Switching it to 28/128 fixed the headcode lights. The decoder was reinstalled in the TC and all was well.
Last edit: by SRman
Jeff Lynn,
Amateur layabout, Professional Lurker, Thread hijacker extraordinaire
Amateur layabout, Professional Lurker, Thread hijacker extraordinaire
Posted
Full Member
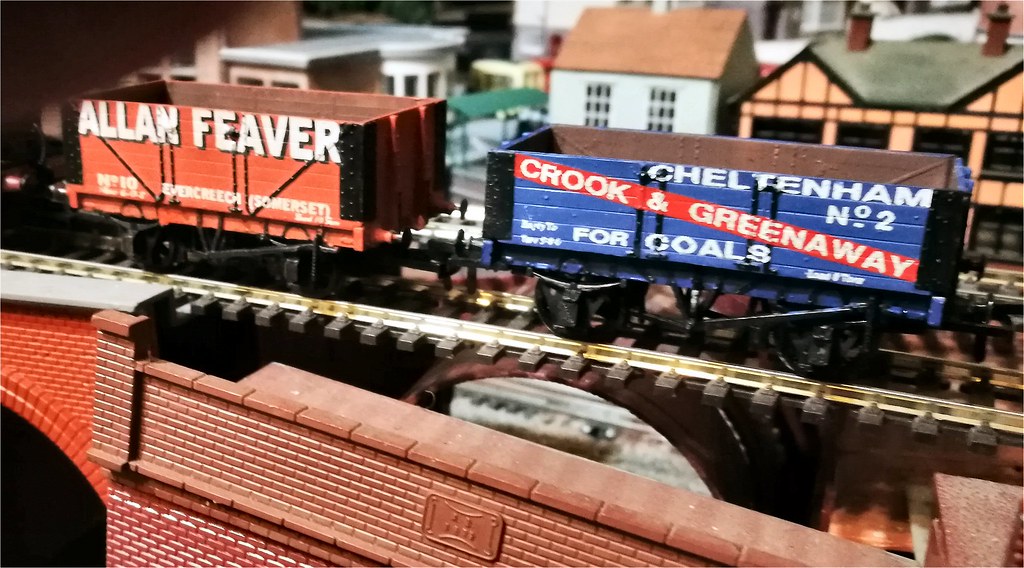
I bought three Slaters wagon kits off eBay. They all have pre-painted and decorated sides and ends (POWsides?), but require some detail painting of the solebars and insides. Two of the kits were of an 1887 Gloucester RCW design, and the third was a 1907 RCH design. I have built one each of the two designs so far: a Crook & Greenaway 1887 type in a rather fetching blue livery, closely matched with a Revell blue (Oxford blue?); and an Allan Feaver wagon to the 1907 design - the packaging very kindly listed Humbrol #100 as being a match for the side colour. The builds were straightforward, although I added brass bearings and replaced the plastic wheels with metal ones from Hornby and Kean Maygib.
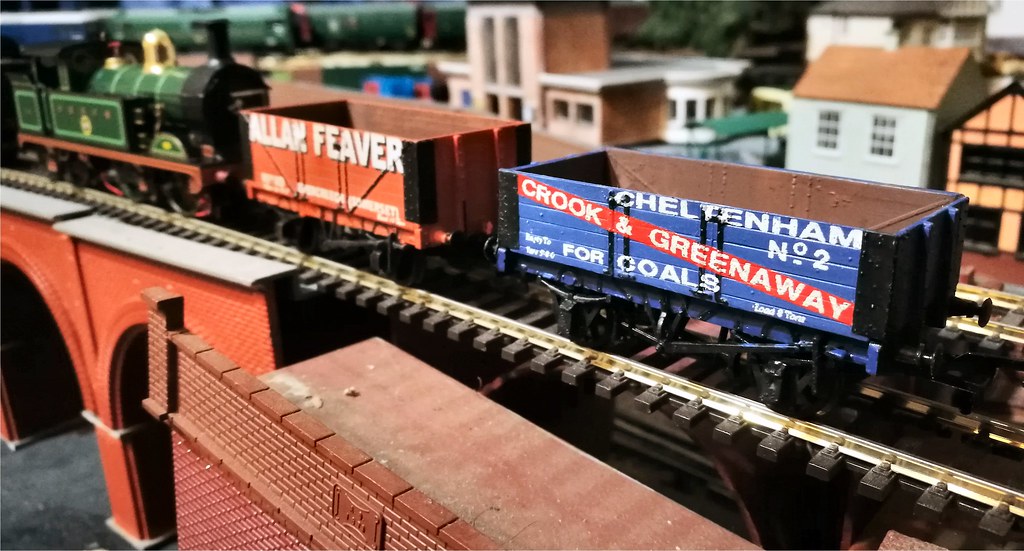
I also received a sodden package from Hatton's - it seems to have suffered from our recent flooding rain. Any way, much of the cardboard packaging was wet and falling apart, but all of the actual contents seem to have survived unscathed. The one that could possibly have suffered the most was a DJM J94, but, luckily it only had a few drops of water on its upper surfaces, and the rest was bone dry. A test on DC on the rolling road showed it was fine. I then lubricated the gears and axles as a precaution, then ran it in on the rolling road for a while. It was then 'chipped' with a Bachmann 36-568 6-pin decoder and tested again. It runs very sweetly with this decoder.
It is a nice looking model, enhanced by the blue livery and light weathering. It also makes an interesting comparison to the Hornby J94 behind it in the photos.
Jeff Lynn,
Amateur layabout, Professional Lurker, Thread hijacker extraordinaire
Amateur layabout, Professional Lurker, Thread hijacker extraordinaire
Posted
Full Member
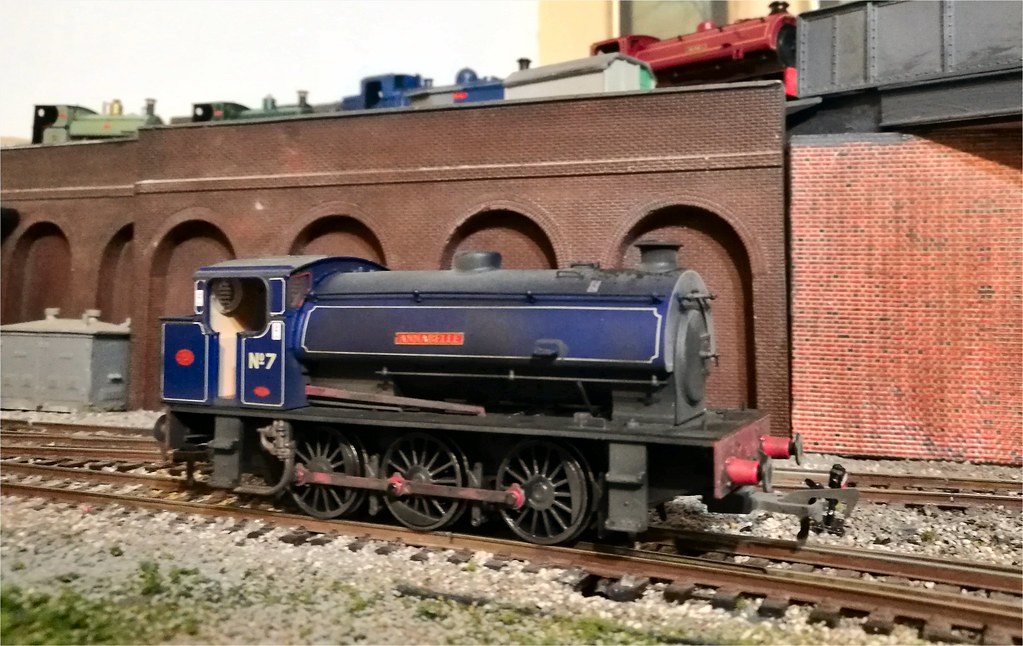
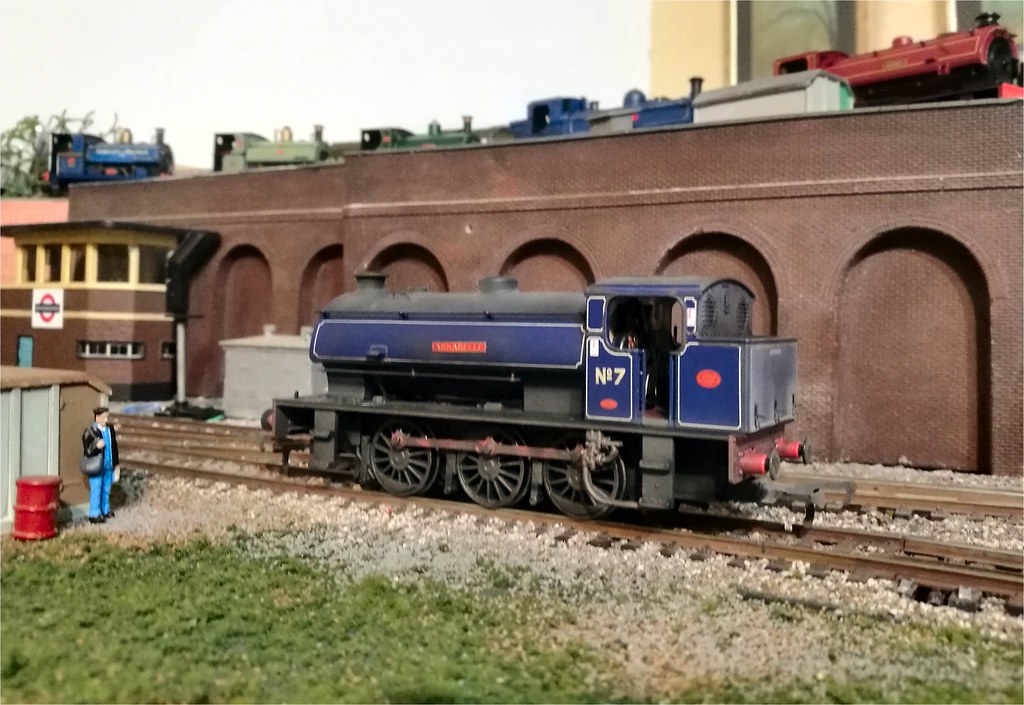
The DJM J94 has now received nameplates from Narrow Planet, and is called Annabelle, continuing with the theme of girls names starting with 'A'. I think the least satisfying aspect of this model is the over-thick injector pipe mouldings; I intend to attack these with some files in the near future.
The Gate Stock has now had some running, with the Kernow O2 both pulling and pushing. I settled on using Hornby close couplings between the two coaches but Kadees between the locomotive and leading coach - #18 on the loco and #19 on the Gate Set coach.

And some NPCCS that I'm not sure I have photographed before: four BR mark 1 horse boxes from TMC. Two in BR(S) green, two in maroon, with one each of the latter from the LMR and the WR. Between them they have all the variations on original condition through various bits of reinforcement added in later lives.
Last edit: by SRman
Jeff Lynn,
Amateur layabout, Professional Lurker, Thread hijacker extraordinaire
Amateur layabout, Professional Lurker, Thread hijacker extraordinaire
Posted
Full Member

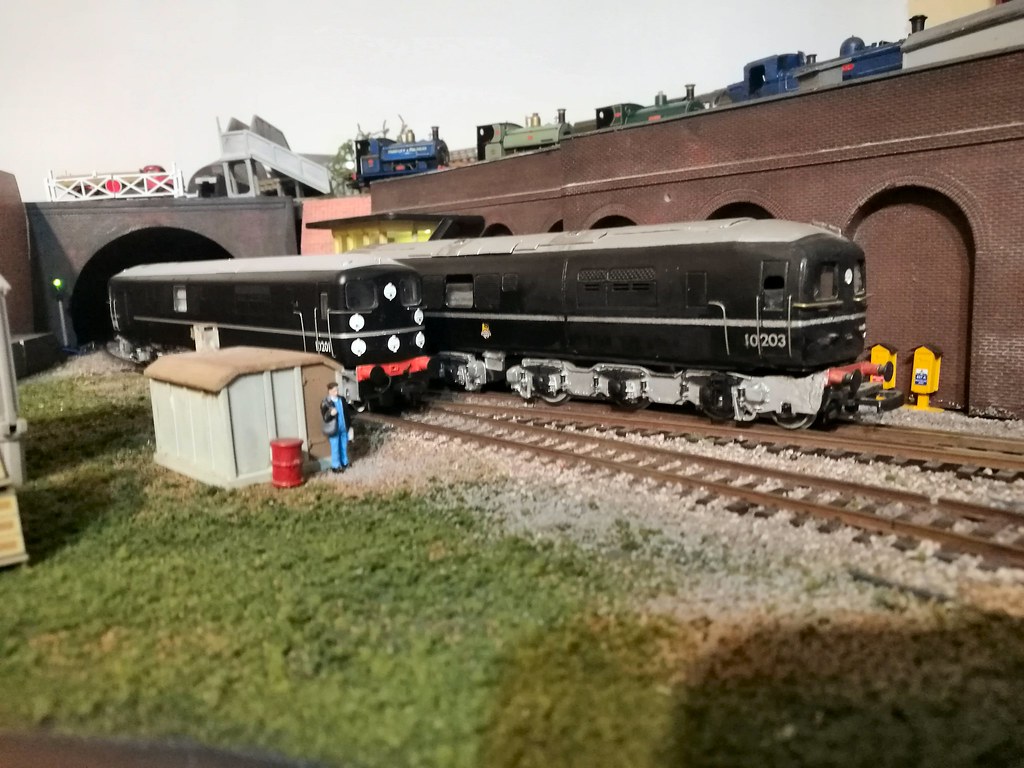
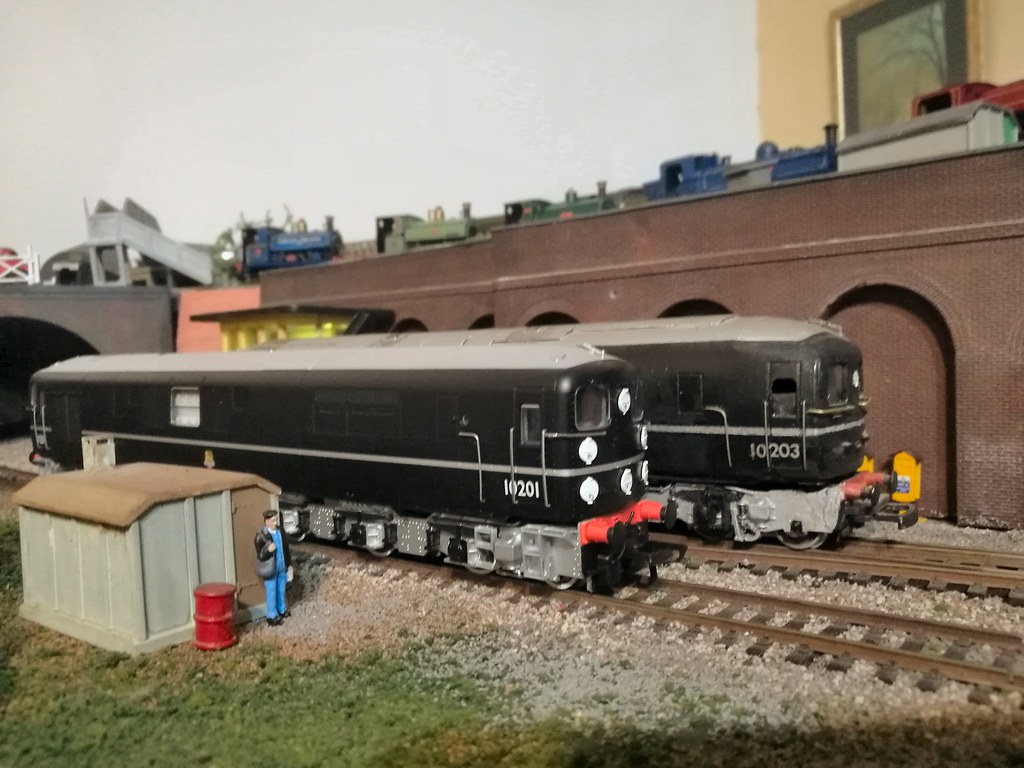
My Kernow 10201 arrived this morning. After a suitable running in session on the rolling road, I fitted a Lenz Silver+ 21-pin decoder, which works beautifully, although forwards seems to be the non-radiator end. I know I can change this by adding 1 to whatever value is in CV29, but has anyone else noted this on their Bulleid diesels when DCC fitted?
Anyway, I posed 10201 with my ancient MTK 10203. 10203 will never run on DCC with its current Mainline 'Peak' chassis! I didn't do too bad a job with the MTK kit, but it does show up as being a little oversized when compared to the Kernow model. 10201 is shown here straight out of the box - I'll change the headcodes later. For running qualities there is absolutely no comparison - a Rolls Royce compared to a lawn mower! :D
Jeff Lynn,
Amateur layabout, Professional Lurker, Thread hijacker extraordinaire
Amateur layabout, Professional Lurker, Thread hijacker extraordinaire
Posted

Full Member
Posted

Full Member
I ordered it so long ago that I had forgotten all about it until I received an email saying it was on its way :)
Posted
Full Member
Yes, it has been a long wait, Dave (gdaysydney). I wasn't expecting to see mine before Christmas, but was pleasantly surprised when it landed on my doorstep immediately after the Christmas public holidays. Believe, me, it was well worth the wait; you'll like yours when it arrives.
Last edit: by SRman
Jeff Lynn,
Amateur layabout, Professional Lurker, Thread hijacker extraordinaire
Amateur layabout, Professional Lurker, Thread hijacker extraordinaire
Posted
Full Member
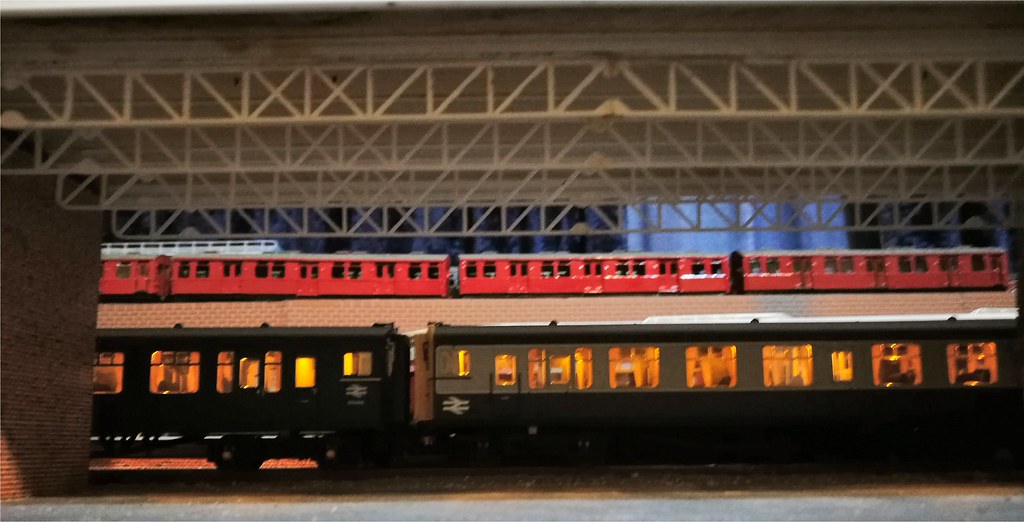
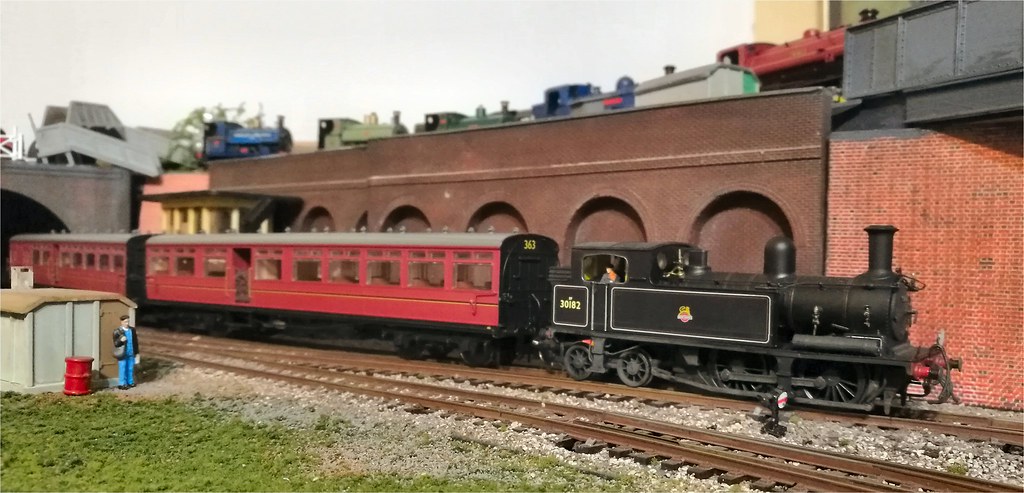
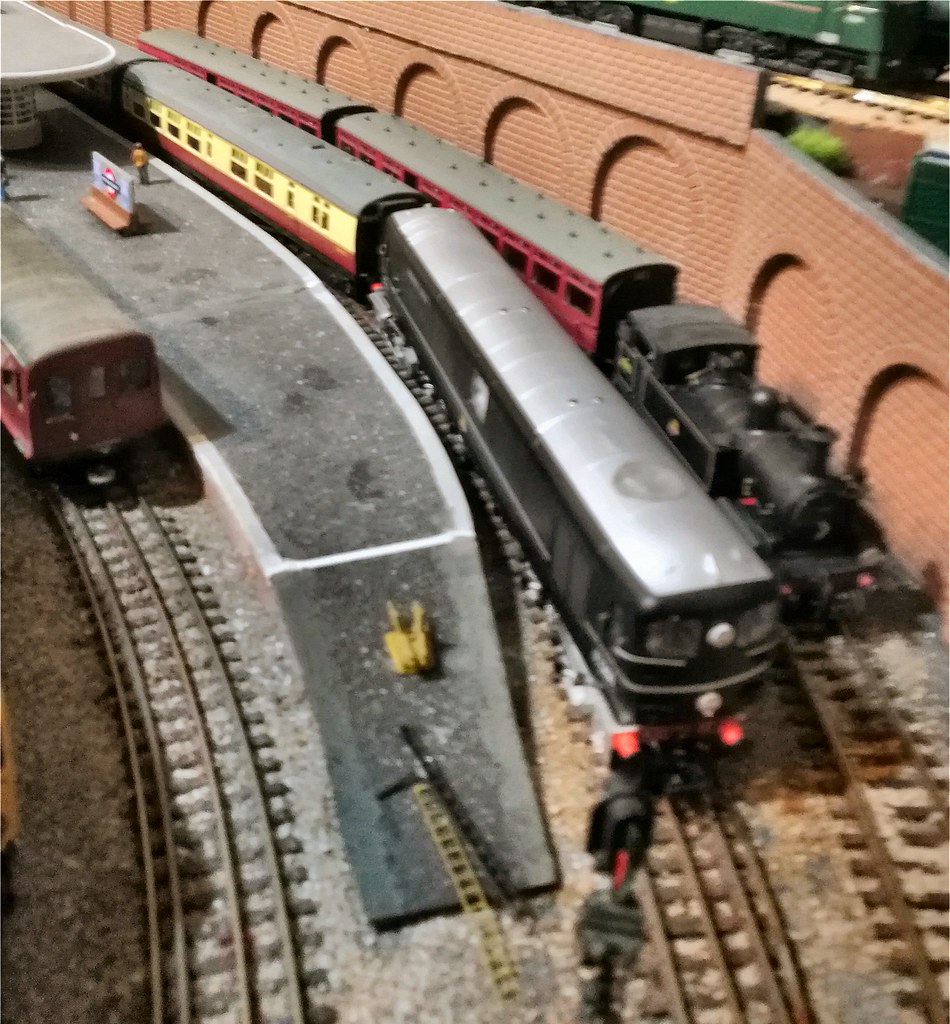
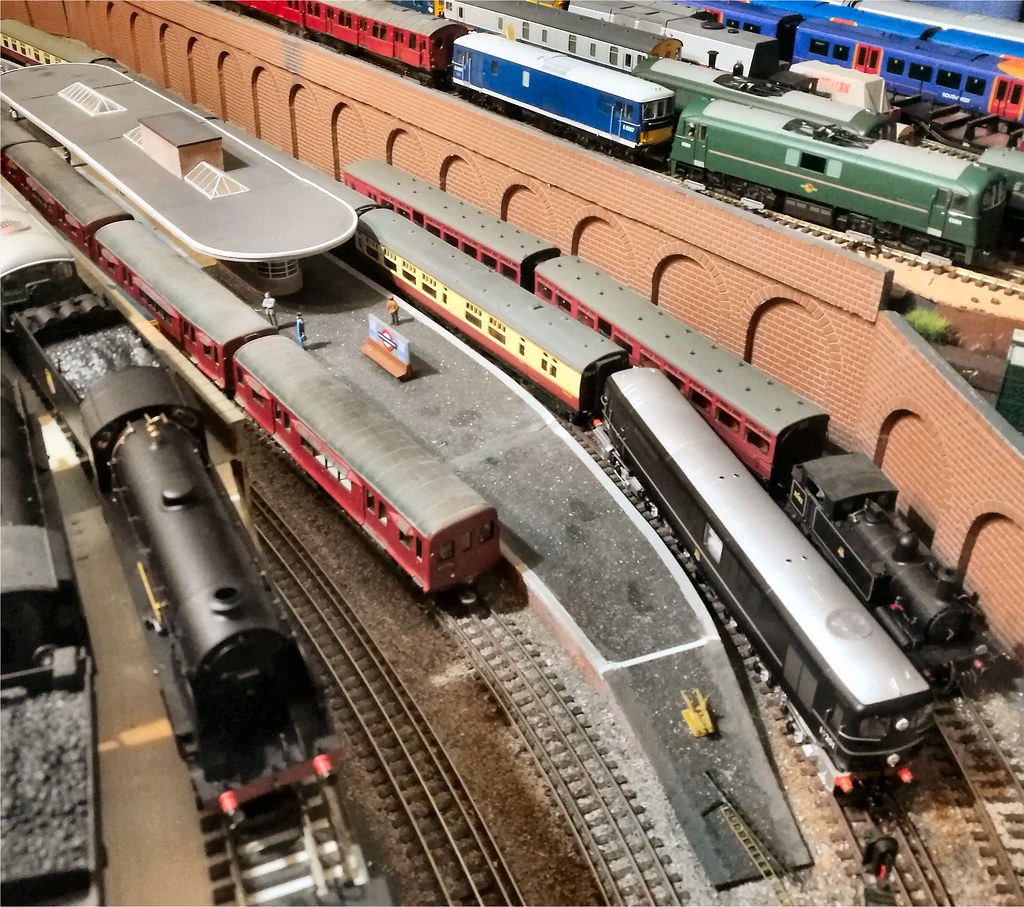
O2 30182 is seen beside the train with gate stock pull-push set 363. On the other platform, a London Transport train of 1938 CO/CP stock can be seen.
Please ignore the out of period stock visible on the upper level.
Jeff Lynn,
Amateur layabout, Professional Lurker, Thread hijacker extraordinaire
Amateur layabout, Professional Lurker, Thread hijacker extraordinaire
Posted
Full Member
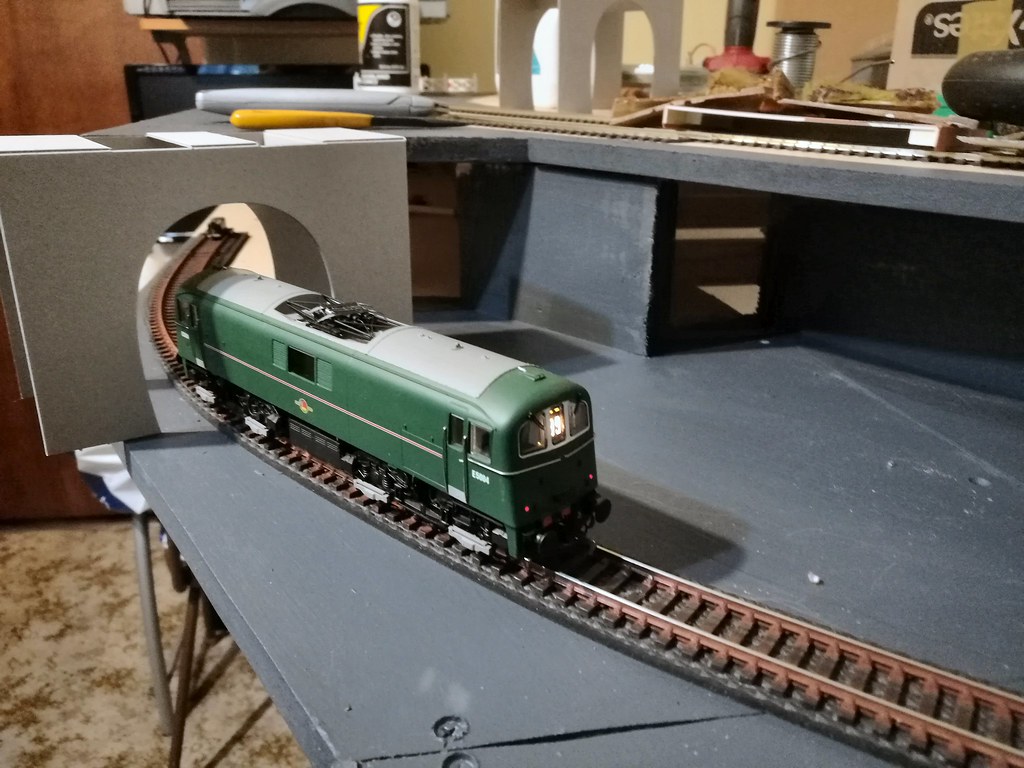
The whole layout is shifted away from the wall at present, so I can get in there and work on it at the back.
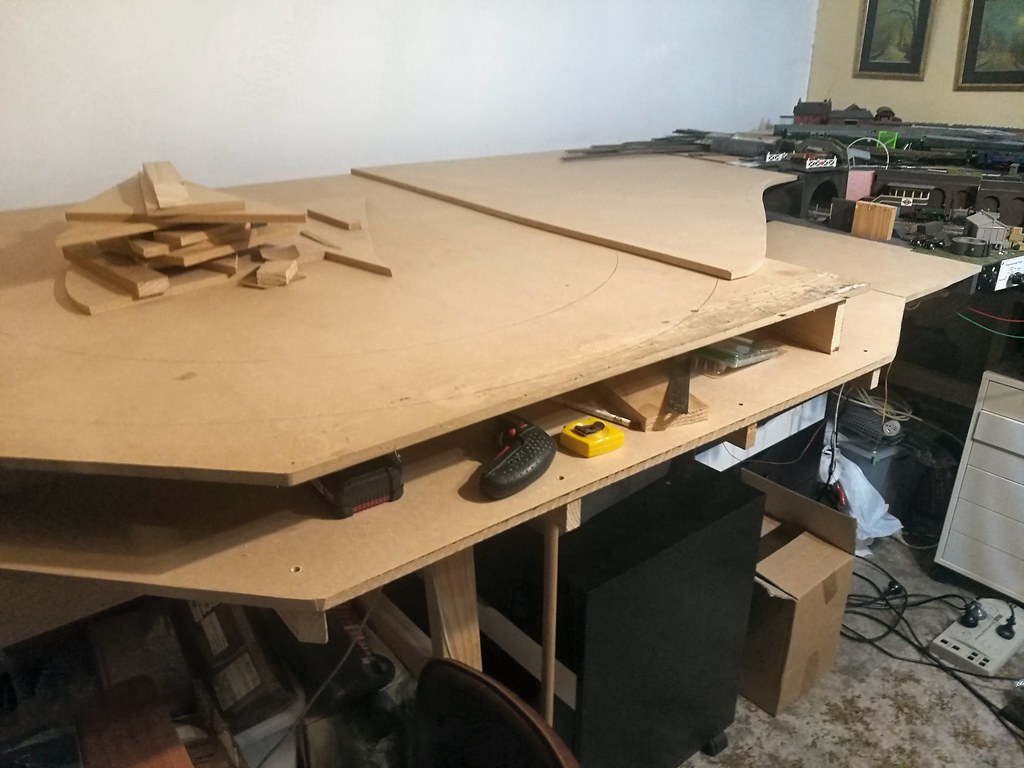

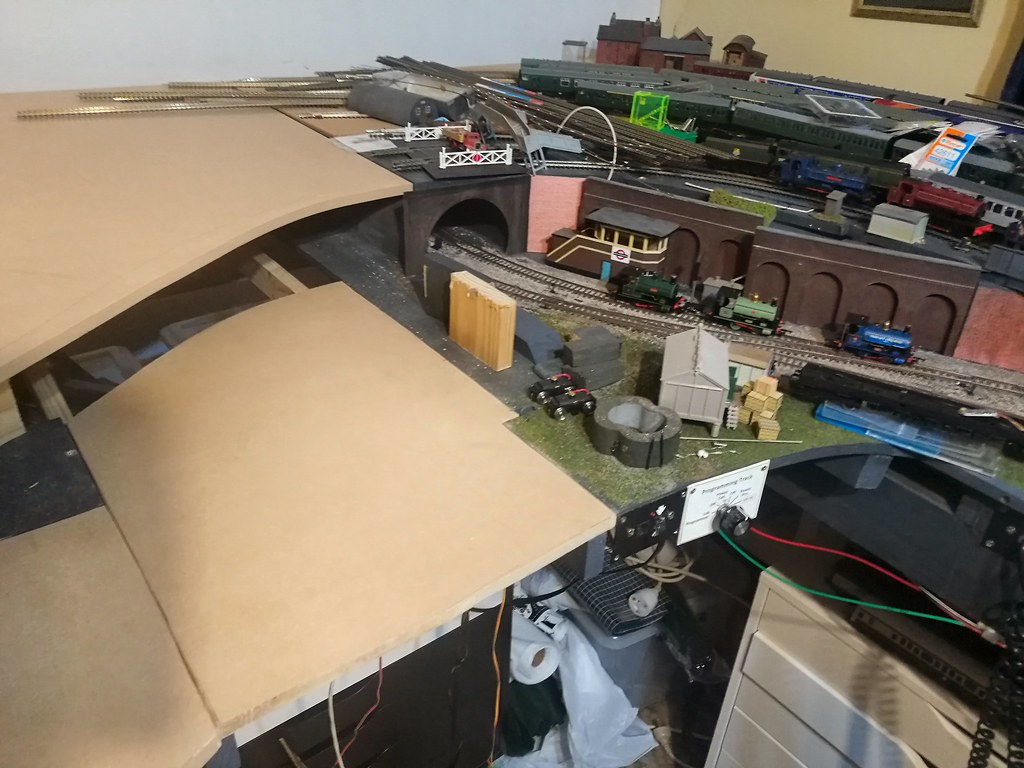
You can now see clearly where I am going with all this. Once I have the track in place with temporary pins, I can then work out how the turntable and storage lines will fit in in the middle.
Jeff Lynn,
Amateur layabout, Professional Lurker, Thread hijacker extraordinaire
Amateur layabout, Professional Lurker, Thread hijacker extraordinaire
Posted
Full Member

Jeff Lynn,
Amateur layabout, Professional Lurker, Thread hijacker extraordinaire
Amateur layabout, Professional Lurker, Thread hijacker extraordinaire
Posted
Full Member
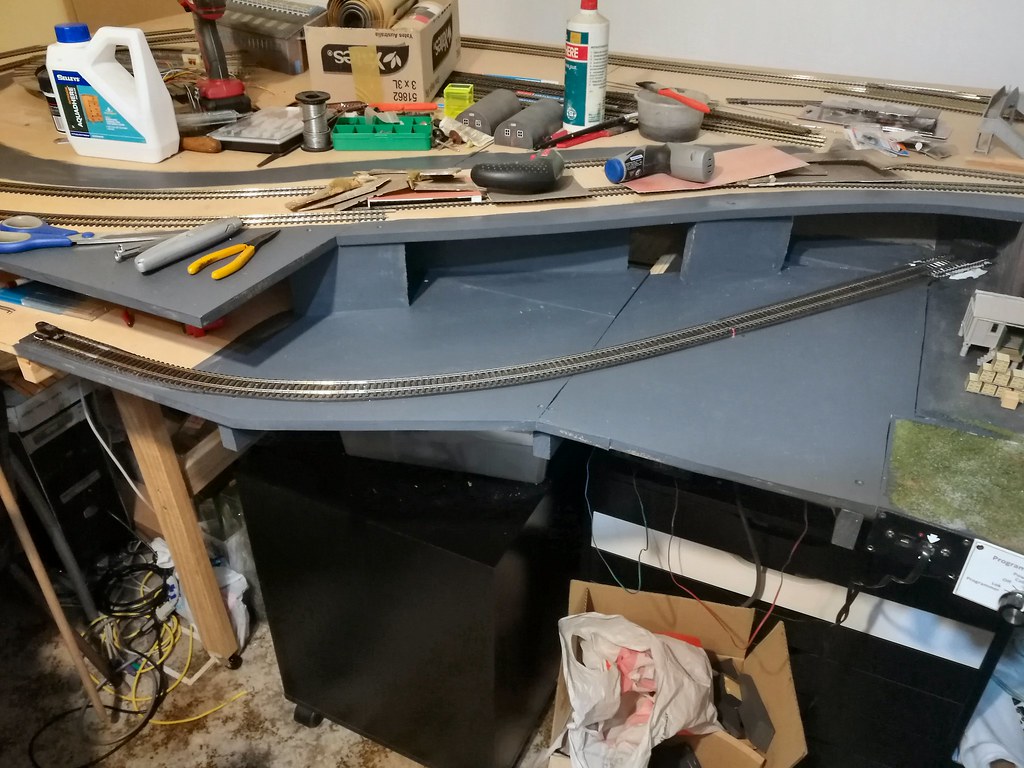
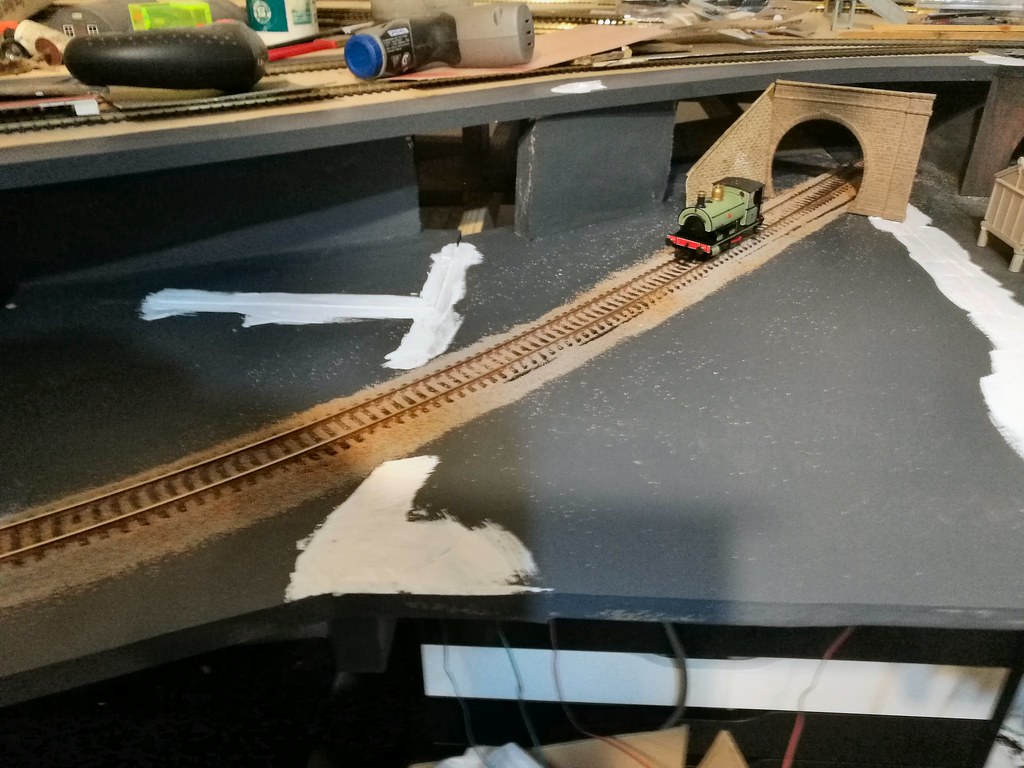
I will paint and ballast this track. The Kadee gauge is on the extreme left end, with insulated joiners on its short piece of track, although I will paint the top surfaces of that bit of track as well, just as a precaution.
Last edit: by SRman
Jeff Lynn,
Amateur layabout, Professional Lurker, Thread hijacker extraordinaire
Amateur layabout, Professional Lurker, Thread hijacker extraordinaire
Posted

Site staff
http://www.brunelhobbies.com.au/kadee/kadee.htm
Insulated height gauge
that way, it can be used anywhere on the layout
Ron
NCE DCC ; 00 scale UK outline.
NCE DCC ; 00 scale UK outline.
Posted
Full Member
Demonstrating that I have power!
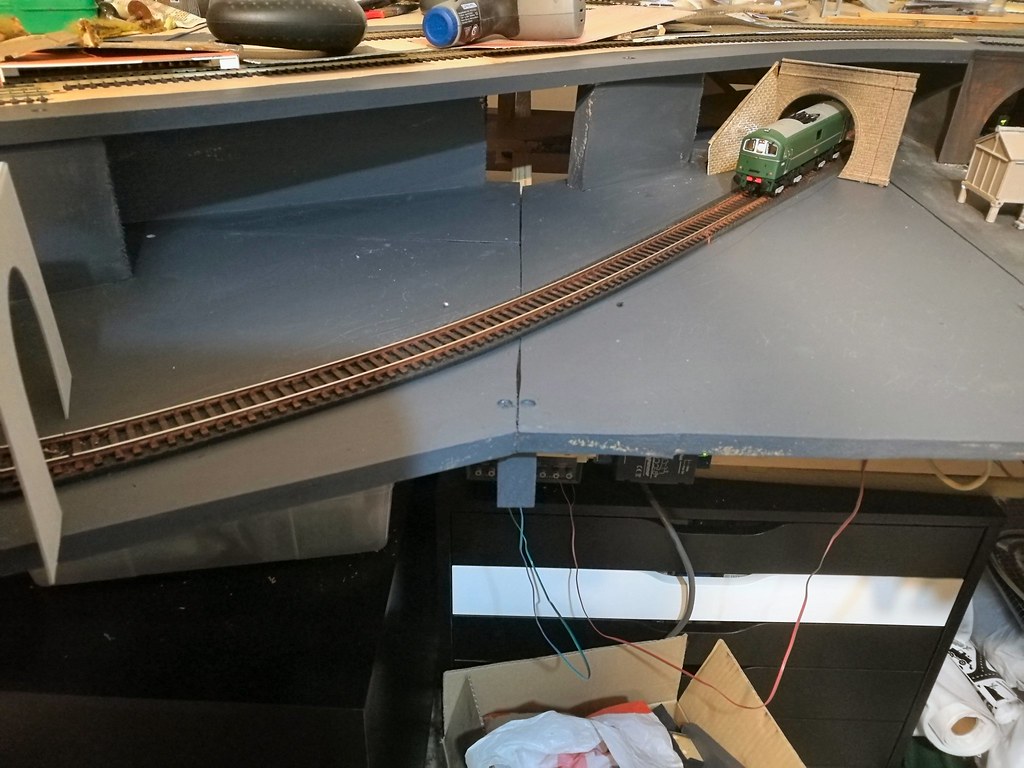
And now with ballast being applied but not yet glued down. I do intend weathering it to a darker colour and adding some weeds when I add the rest of the scenery, while ensuring that nothing will interfere with the ability to use the track for testing. I have also applied a little filler to the gaps in the boards where they join.
Jeff Lynn,
Amateur layabout, Professional Lurker, Thread hijacker extraordinaire
Amateur layabout, Professional Lurker, Thread hijacker extraordinaire
Posted

Inactive Member
Have you taken over another one?
You've got an amazing amount of stuff going on. :)
Max
Port Elderley
Port Elderley
Posted
Full Member
It's the same room you saw. I have organised it so it's a bit like those slider puzzles; you have to slide one piece over before you can move the next piece, then you can move the bit you want!

Jeff Lynn,
Amateur layabout, Professional Lurker, Thread hijacker extraordinaire
Amateur layabout, Professional Lurker, Thread hijacker extraordinaire
Posted
Full Member

Jeff Lynn,
Amateur layabout, Professional Lurker, Thread hijacker extraordinaire
Amateur layabout, Professional Lurker, Thread hijacker extraordinaire
Posted
Full Member

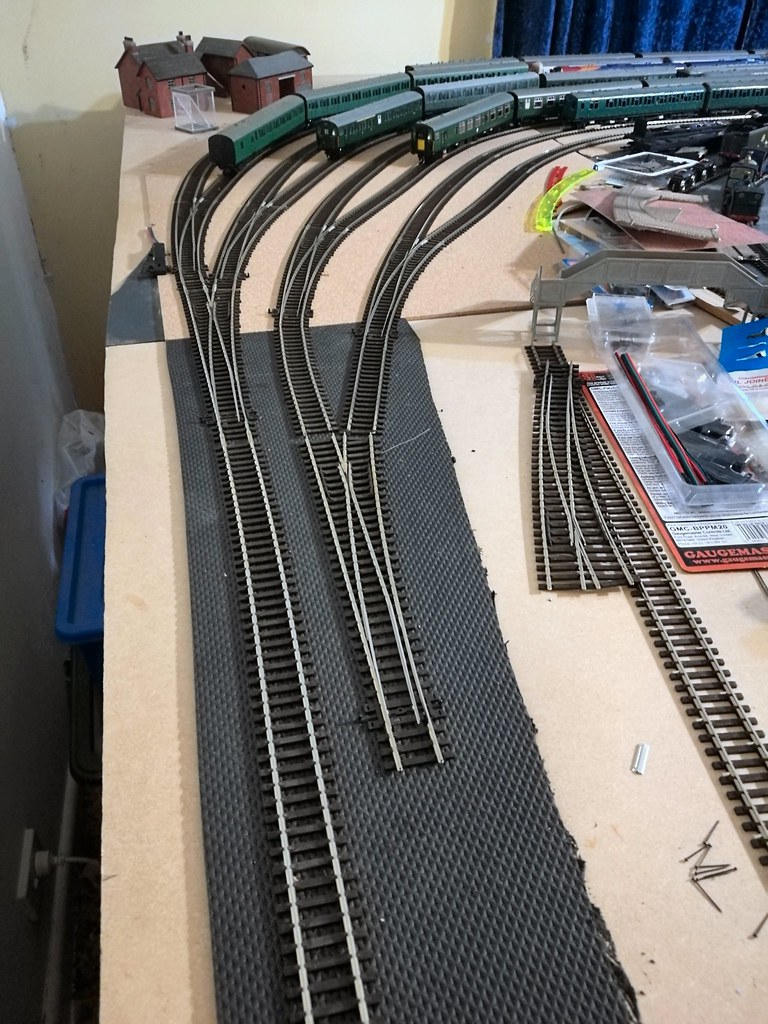
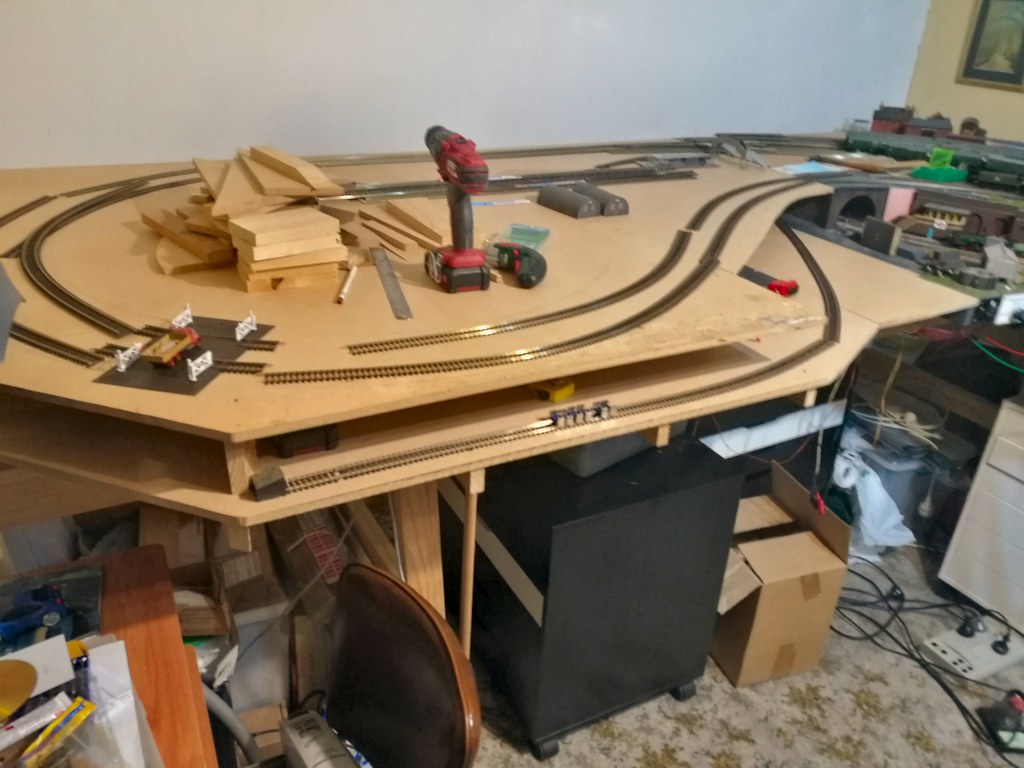
There will be a crossover in the foreground of the second pic, allowing trains to exit the far side of the fiddle yard 'wrong road' then cross to the 'proper' running line.
There are a couple of minor kinks to iron out from the curved lines in the loops, and, in spite of appearances, no curve goes under my minimum 3rd radius, or approximately 20" radius.
The loop lengths were dictated by my desire to allow two 4 CEP units + an MLV to be stored and run. That translates to a locomotive and eight coaches for non-multiple unit stock.
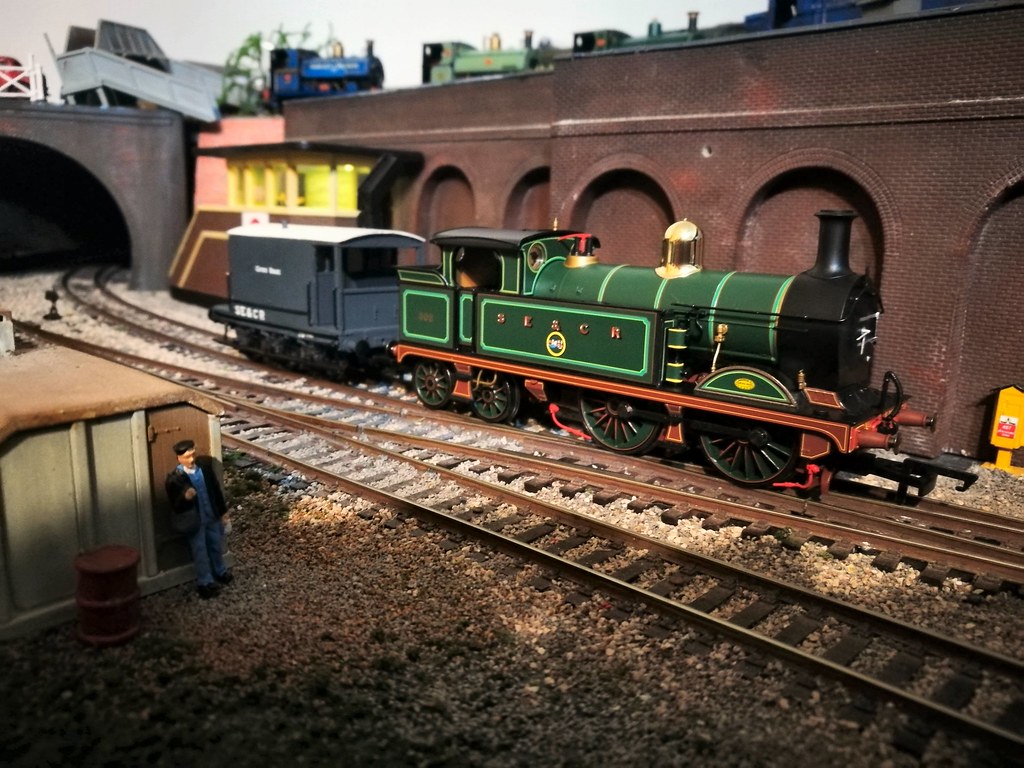
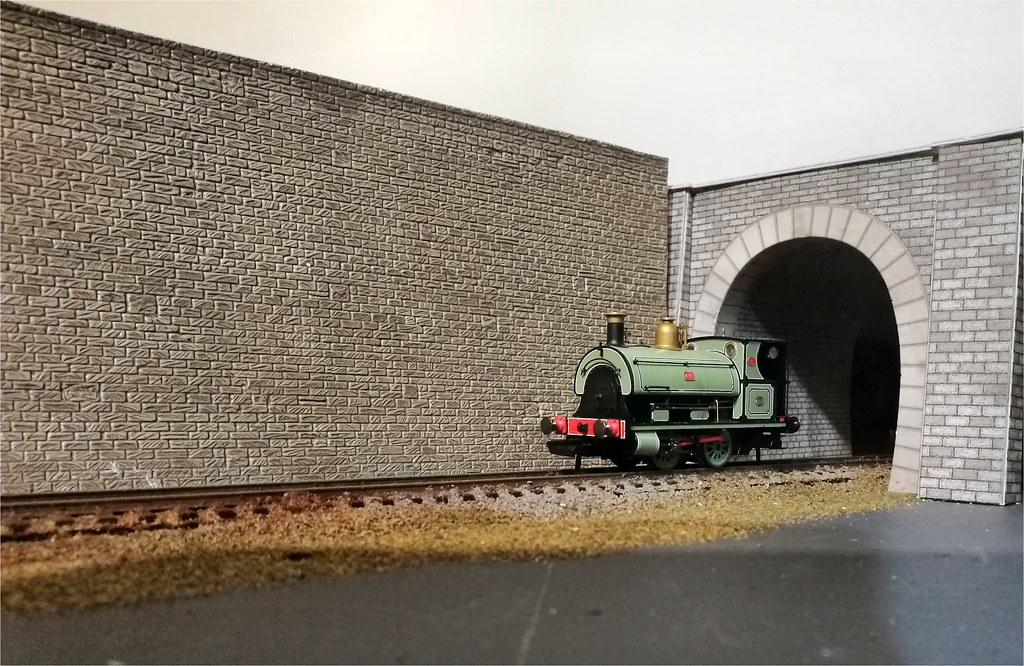
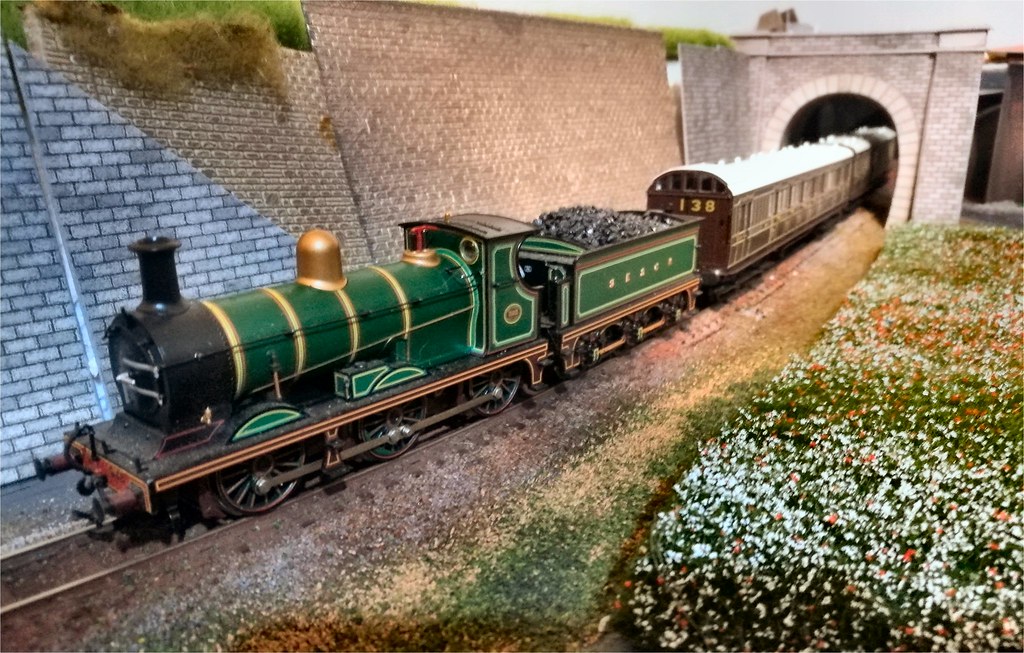
On a slightly different tack, I used the programming track to pose my Bachmann SE&CR C class with the matching birdcage stock, with slightly better lighting angles than in my usual photographic location. The stone walls are all simply propped there to hide the bare white polystyrene.
Jeff Lynn,
Amateur layabout, Professional Lurker, Thread hijacker extraordinaire
Amateur layabout, Professional Lurker, Thread hijacker extraordinaire
1 guest and 0 members have just viewed this.