00 Gauge - Jeff Lynn / SRman's New Layout
Posted
Inactive Member
Progress (or otherwise) on Jeff's new layout
My word you have made a lot of progress Jeff,The railway is really coming together.
I am glad Toby is still keeping manners on the trains for you!
regards,
Derek

Posted

Full Member
The roofs and underframes could really do with some weathering too but that is still on the agenda for later.

Jeff Lynn,
Amateur layabout, Professional Lurker, Thread hijacker extraordinaire
Amateur layabout, Professional Lurker, Thread hijacker extraordinaire
Posted
Full Member
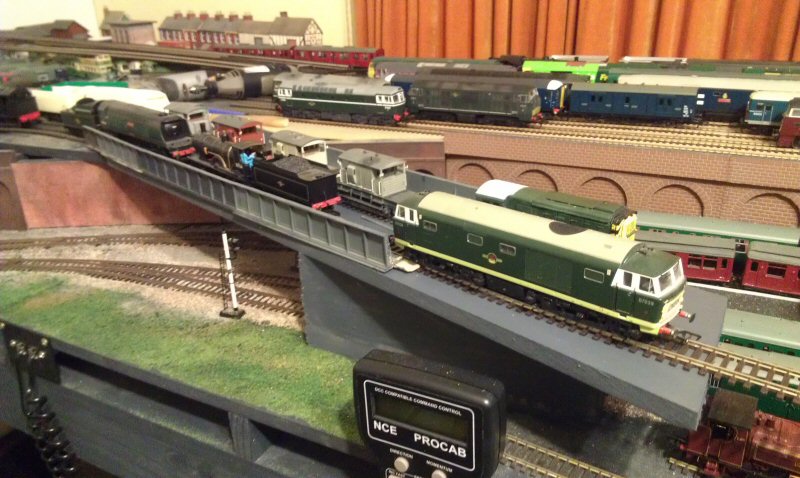
The next stage will be to cut the plate girders to suit the new configuration and mount some 'H' girders underneath those. There will also need to be a middle support and all supports will need to be covered in embossed brick sheets (Vollmer card or Slaters plastic - either will do but all support piers will need the same textures).
Here are some initial views of the work in progress. The side girders are only propped there to gain a rough representation of the final appearance.

Jeff Lynn,
Amateur layabout, Professional Lurker, Thread hijacker extraordinaire
Amateur layabout, Professional Lurker, Thread hijacker extraordinaire
Posted

Banned
Cheers, Gary.
Posted
Full Member
The Oxted bridge does actually appeal to me but I can't find any kits that would resemble the British ironwork - the excellent German made kits have a fair variety of styles but none comes close.
:hmm
Jeff Lynn,
Amateur layabout, Professional Lurker, Thread hijacker extraordinaire
Amateur layabout, Professional Lurker, Thread hijacker extraordinaire
Posted
Banned
Cheers, Gary.
Posted
Full Member
:thud

Jeff Lynn,
Amateur layabout, Professional Lurker, Thread hijacker extraordinaire
Amateur layabout, Professional Lurker, Thread hijacker extraordinaire
Posted
Full Member
As a civil (sometimes) engineer, I have to say that the plate girder is insufficeint to carry the load.
Sorry, too much Pinot ! :lol:
The Newcastle Model Railway Club
Newcastle Model Railway Club
Newcastle Model Railway Club
Posted
Full Member
This is only the beginning …
:cool:
 Last edit: by SRman
Jeff Lynn,
Amateur layabout, Professional Lurker, Thread hijacker extraordinaire
Amateur layabout, Professional Lurker, Thread hijacker extraordinaire
Posted

Full Member
'Petermac
Posted
Full Member
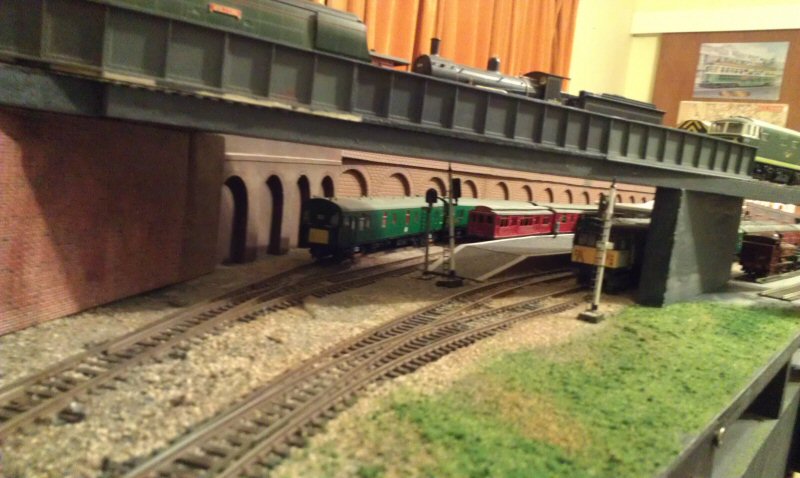
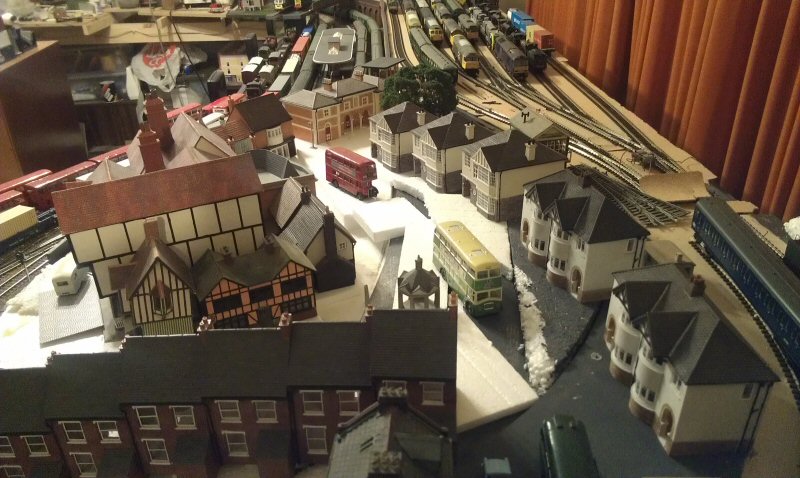
A slight variation on that would be to do like I did with my old layout's over-line building at High Cross. I used a series of 'H' or 'I' section girders to act as supports along the length (or was that width?) of the raft supporting the building and road.
You can see some of the supports in this photo.

Jeff Lynn,
Amateur layabout, Professional Lurker, Thread hijacker extraordinaire
Amateur layabout, Professional Lurker, Thread hijacker extraordinaire
Posted
Full Member
'Petermac
Posted
Full Member
The train has container wagons from Dapol (FEA-B, Megafret and KQA 'pocket' wagon), Realtrack Models (FLA) and Hornby (KFA), while the containers come from the same sources plus C=Rail.
Once again I apologise for shaky camera work as I was working the controller and the camera at the same time - that zoom right near the start was accidental! At least this time I used the 'proper' video camera and a tripod. :cool:

Last edit: by SRman
Jeff Lynn,
Amateur layabout, Professional Lurker, Thread hijacker extraordinaire
Amateur layabout, Professional Lurker, Thread hijacker extraordinaire
Posted
Full Member
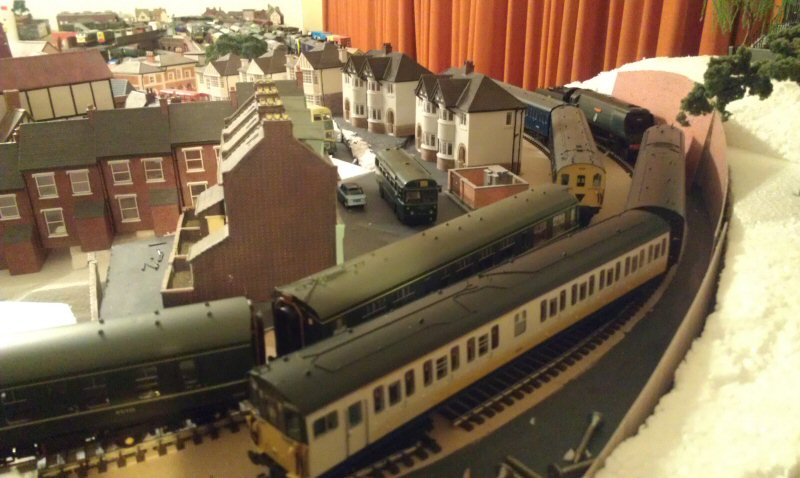
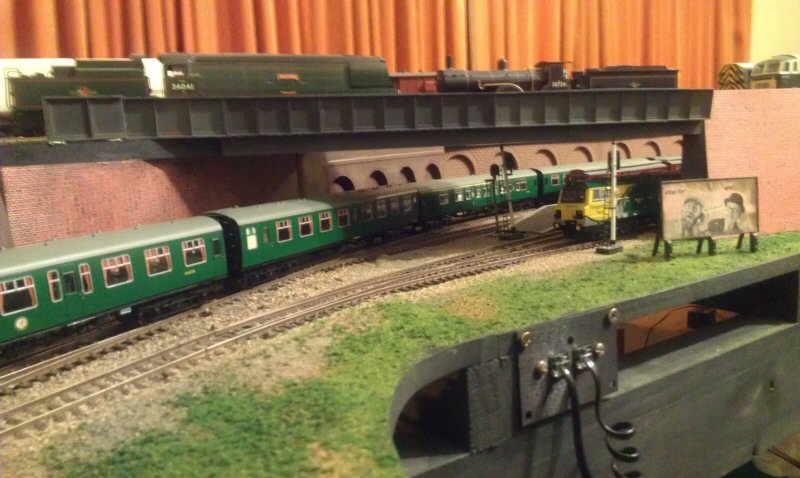
I also purchased a Lenz Silver 21-pin decoder to go in the new unit so, after a quick test on DC, I fitted the decoder and set 7128 off in multiple (consist) with 7126, with the green Motor Luggage Van (MLV), 68006 bringing up the rear.


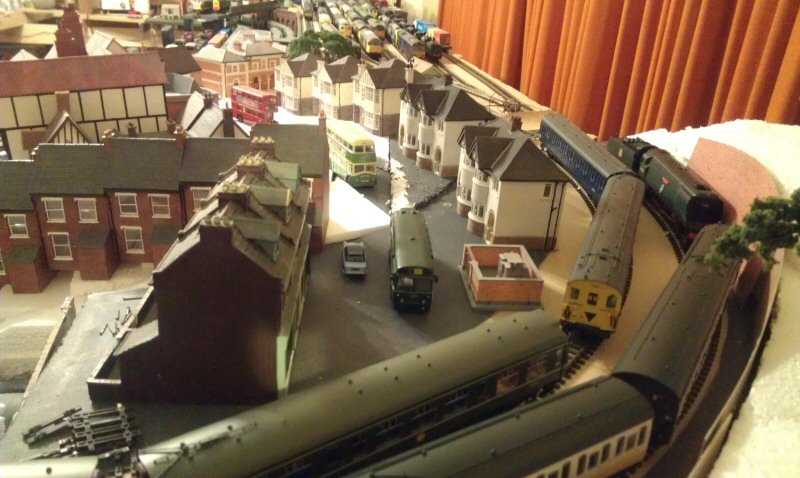
Of course, this train is really too long for the Underground tracks but will look more at home when the main lines on the upper level are complete. This isn't the first time I have done this though: here is an earlier shot of a similar train made up with blue and grey stock, this time with MLV 68009 leading units 7113 and 7114.

Last edit: by SRman
Jeff Lynn,
Amateur layabout, Professional Lurker, Thread hijacker extraordinaire
Amateur layabout, Professional Lurker, Thread hijacker extraordinaire
Posted
Full Member
]
Jeff Lynn,
Amateur layabout, Professional Lurker, Thread hijacker extraordinaire
Amateur layabout, Professional Lurker, Thread hijacker extraordinaire
Posted
Full Member
The lower girders will probably have to be a bit deeper than the depth of the MDF forming the bridge base.
I have also added a little of the Vollmer embossed brick sheet to lead into what will be brick arched viaduct. As I envisage it, there will be a small rise in the ground to the foreground and up the base of the brick wall, making the area of brick shallower than in the photos.
For the last one I removed the ProCab to improve the view. The controllers will eventually be moved to a lower and different location when I get the control panels in place.
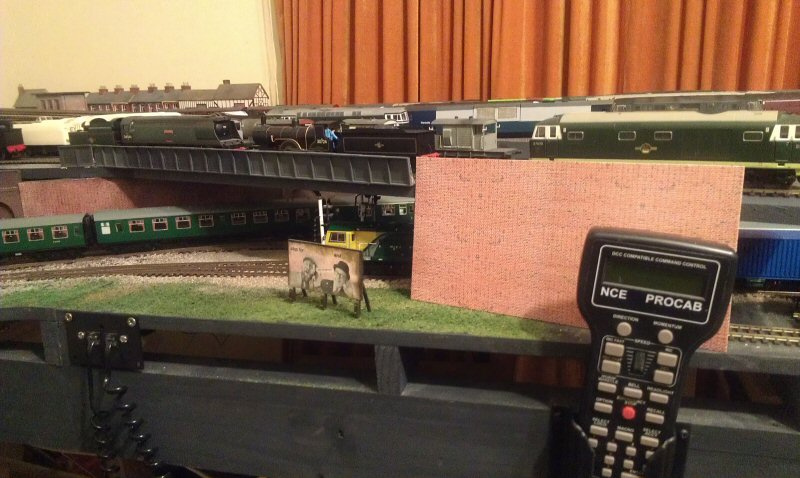

This is intended to give some impression of what I have in mind.
Last edit: by SRman
Jeff Lynn,
Amateur layabout, Professional Lurker, Thread hijacker extraordinaire
Amateur layabout, Professional Lurker, Thread hijacker extraordinaire
Posted
Full Member
The foreground will look much better when you get some contour into it as you've suggested and the bridge will improve no end once you've got some kind of pillars around the half-way point. I'll be inerested in seeing what you have planned for the control panels. I'm still pondering mine ………………

'Petermac
Posted
Full Member
Jeff Lynn,
Amateur layabout, Professional Lurker, Thread hijacker extraordinaire
Amateur layabout, Professional Lurker, Thread hijacker extraordinaire
Posted
Full Member
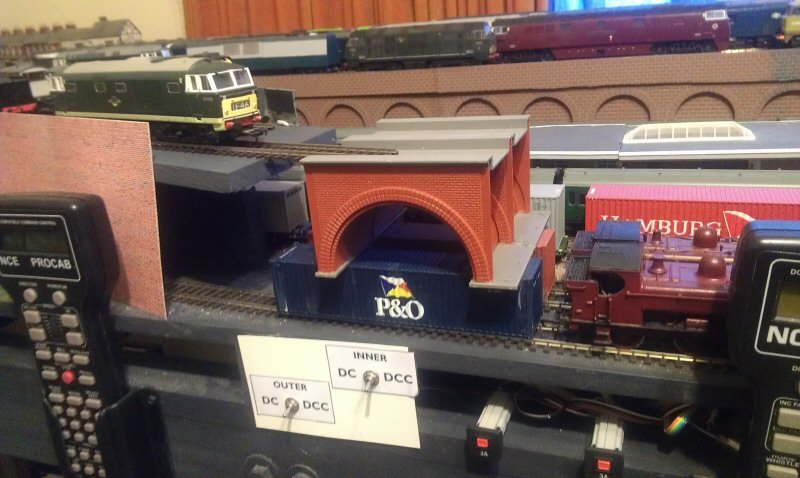
Recently I spotted a Vollmer HO kit for a brick arched viaduct, single tracked with three arches in the kit. What's more I found some in Miniatur Wunderland's online shop for half price so ordered two (after ascertaining that postage was reasonably priced too). I then ordered a couple of the extension arches from another German dealer, with a view to hacking these into a four arched double tracked viaduct.
The extensions arrived first, today, so I set about experimenting to make a singe double tracked arch, just to see if it could be done. This has only the basics in place and none of the extra walls or the supporting piers yet - the piers will need their height cut down a little to suit my location. I would deem the experiment successful!
The German kit comes with parapet railings but I will make some brick walls up to replace those, in due course.
The arches are a little narrower across than I really wanted but the brick texture is so much better than printed paper can provide. I may well order another couple of the three-arched version to extend this one. As I haven't done the supporting iers yet, a couple of recently constructed containers are providing support, coincidentally, at just the right height!!
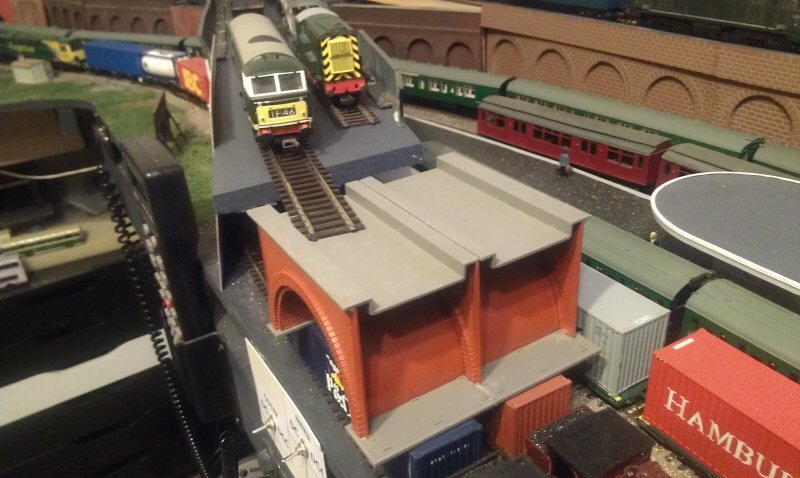

Because of the way I have used the side walls/arches, I will end up with one spare from each arch (I'm using three walls per double track set). The spares may well provide arches further down the track.
Last edit: by SRman
Jeff Lynn,
Amateur layabout, Professional Lurker, Thread hijacker extraordinaire
Amateur layabout, Professional Lurker, Thread hijacker extraordinaire
Posted
Banned
Cheers, Gary.
1 guest and 0 members have just viewed this.