00 Gauge - Jeff Lynn / SRman's New Layout
Posted

Full Member
Progress (or otherwise) on Jeff's new layout
I'm not sure I'm with you on this one Jeff ……………..:oops::oops::???:Why are there 2 lines scribed rather than just the one for the white edging stones and what do you use to guide the scrawker along the edge of the plasticard ?
Whatever the reasons, the edging looks great. :thumbs
'Petermac

Posted

Full Member
The square edge of the skrawker sits against the edge of the platform and, if you look carefully at the photo, is set at a slightly deeper level than the points of the 'saw-tooth' parts (I did think carefull about the design before cutting it out). If I had some finer tinsnips I could have done more teeth closer together to achieve the multiple grooves. I should also have soldered a bit more brass to give more of a 'handle' to grip, but overall it did what it was intended to do.
Jeff Lynn,
Amateur layabout, Professional Lurker, Thread hijacker extraordinaire
Amateur layabout, Professional Lurker, Thread hijacker extraordinaire
Posted
Full Member
I hadn't noticed the extra depth on the square end and, for some reason, had thought the platforms were for overland (but also used by LT :oops:)
'Petermac
Posted
Full Member
Jeff Lynn,
Amateur layabout, Professional Lurker, Thread hijacker extraordinaire
Amateur layabout, Professional Lurker, Thread hijacker extraordinaire
Posted

Full Member
talking of the upper level what percentage incline are you planning? I have an interest as "not Mutley" will have inclines going in opposite directions ( one out of view) and I've gone with 1% on curves and 2% on the straights
Posted
Full Member
My original, more ambitious plan called for some gradients and would have given a much longer run but I am really not confident of my ability to deal with gradients, so I simplified the plans with a view to trouble free running. If I had stuck with the original ideas, I would have had something close to 1 in 50 at one end and 1 in 60 at the other.
Jeff Lynn,
Amateur layabout, Professional Lurker, Thread hijacker extraordinaire
Amateur layabout, Professional Lurker, Thread hijacker extraordinaire
Posted
Full Member
Those grades sound fairly generours Dave. :roll:Hi Jeff,
talking of the upper level what percentage incline are you planning? I have an interest as "not Mutley" will have inclines going in opposite directions ( one out of view) and I've gone with 1% on curves and 2% on the straights
My planned grade - on the straight - will be around 1 in 70 (I hope !!) but I think the recommended maximum is 1 in 45 - i.e. a whisker steeper than you plan. I'm told grades on curves are very difficult if they're not flat ……….:lol::lol::lol:
'Petermac
Posted
Full Member
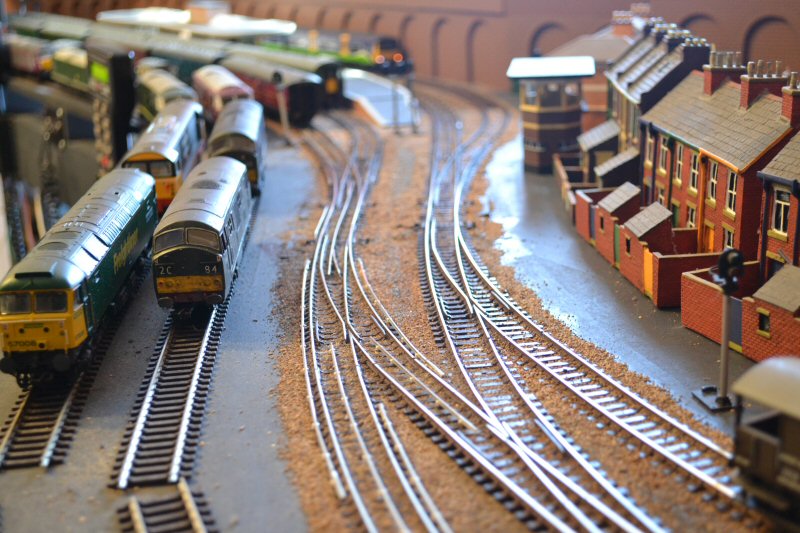
I managed to glue all of the ballast down last week, in readiness for the meeting. While working on a resin Merchant Navy body shell, drilling out the chimney, I slipped slightly and chipped an edge off the chimney rim. I had to patch it with a little Milliput, so I used the remaining Milliput to fill the gaps at the joints in the platform edging, then hastily touched in the paint, again in readiness for the meeting.
Overall, I would deem the day a success, and our old friend Murphy didn't seem to make any appearances. :cool:
 Last edit: by SRman
Jeff Lynn,
Amateur layabout, Professional Lurker, Thread hijacker extraordinaire
Amateur layabout, Professional Lurker, Thread hijacker extraordinaire
Posted
Full Member
I think it was Rick (Gwiwer) who used to say that, with proper maintenance and a dust free atmosphere, your layout will perform perfectly …………….until someone arrives to see it :lol::lol::lol:
'Petermac
Posted
Full Member
Incidentally, Rick was one of the members to visit - it was good to catch up with him (and all the others, of course). BRMA meeting attendance numbers vary a bit, anything from around a dozen people up to over 30.
It is very gratifying (and flattering) when one or two of the people who attended also emailed afterwards to say they enjoyed the meeting. It is quite exhausting though, so I was glad of a quiet day on Sunday.
Next week I will be assisting on a Victorian Railways O gauge layout at the AMRA Caulfield exhibition all day - any YMR members who happen to be there are welcome to stop by and have a bit of a natter.
Jeff Lynn,
Amateur layabout, Professional Lurker, Thread hijacker extraordinaire
Amateur layabout, Professional Lurker, Thread hijacker extraordinaire
Posted
Full Member
I haven't got my map handy Jeff - is that far from Bergerac ? :hmm……………………………..
Next week I will be assisting on a Victorian Railways O gauge layout at the AMRA Caulfield exhibition all day - any YMR members who happen to be there are welcome to stop by and have a bit of a natter.
'Petermac
Posted

Legacy Member
Posted
Full Member
 . .
. . Bob: I'll try to remember to take the camera. I do sometimes forget what with all the other gear I have to take normally. This time I should have far less to remember.
Last edit: by SRman
Jeff Lynn,
Amateur layabout, Professional Lurker, Thread hijacker extraordinaire
Amateur layabout, Professional Lurker, Thread hijacker extraordinaire
Posted
Full Member
'Petermac
Posted
Full Member
:twisted: :hmm
Last edit: by SRman
Jeff Lynn,
Amateur layabout, Professional Lurker, Thread hijacker extraordinaire
Amateur layabout, Professional Lurker, Thread hijacker extraordinaire
Posted

Full Member
Just been playing catch-up on this thread and I really must say how impressed I am with how the layout is coming on.
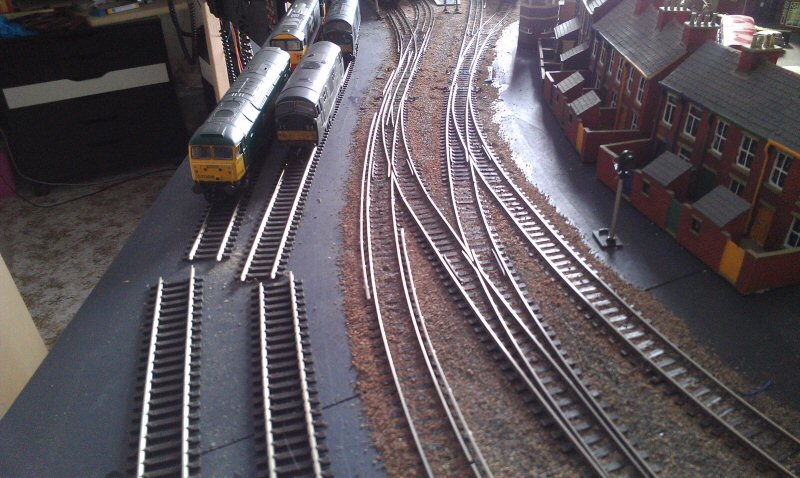
While enjoying a video though,I noticed you have a lot of locos precariously close to the edge of your layout!
For gawd's sake,please put a lip/wall along that edge before a loose sleeve or whatever snags a loco and sends it crashing to the floor…
……I speak from experience as a man who drove a Collett 0-6-0 off the end of my layout at the YMR show at Carn Brea!!:roll::lol:
Lovely work,mate!
Cheers,John.B.:thumbs
Posted
Full Member
In practice, the locos are sufficiently far from the edge to not be in too much danger - most of the time I tend to push them inwards if leaning across. Along the front I also have the temporary pockets holding the Power Cabs and Power Pro controllers, which also act as barricades. Once the embankments and viaducts are built along that stretch, they will, of course, have railings or walls, and that stretch will be a main line so nothing will actually be stored along there.
My friend Doug dropped in this evening with some more mdf sheet so I can complete the baseboard woodwork for the main lines - he has a towbar on his car and a trailer so he is able to handle the size of sheet I wanted. My previous car, a Holden Commodore, had a towbar and connections so I could borrow the trailer when I needed it but with my current car (a Mitsubishi Lancer) I decided it would never be a good towing vehicle so I eschewed the option of a towbar. Anyway, it looks like I'll be doing a bit of cutting of wood on Sunday (Saturday is out because of the exhibition), if for no other reason than I need to be able to stow the wood out of the way until I am ready to measure and cut it to suit my needs. The first task will be the track bed on the right of the layout, forming the rest of the Underground tunnel plus the trackbed around the curve where some of those locos are currently sitting - I want to be able to create this as one piece, if possible, to the point where it angles back in towards the station area.
Jeff Lynn,
Amateur layabout, Professional Lurker, Thread hijacker extraordinaire
Amateur layabout, Professional Lurker, Thread hijacker extraordinaire
Posted
Full Member

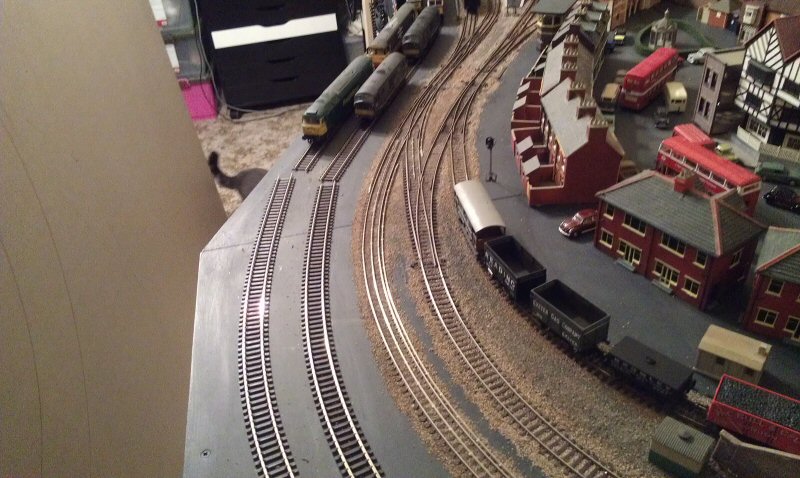

With the woodwork, you can now get a better idea of how the lower level will interact with the upper level with retaining walls and then a tunnel mouth roughly where the end of the (temporary) brick wall I have placed for the photo. I may have to use a simple girder and brick 'cut and cover' style tunnel entrance here.

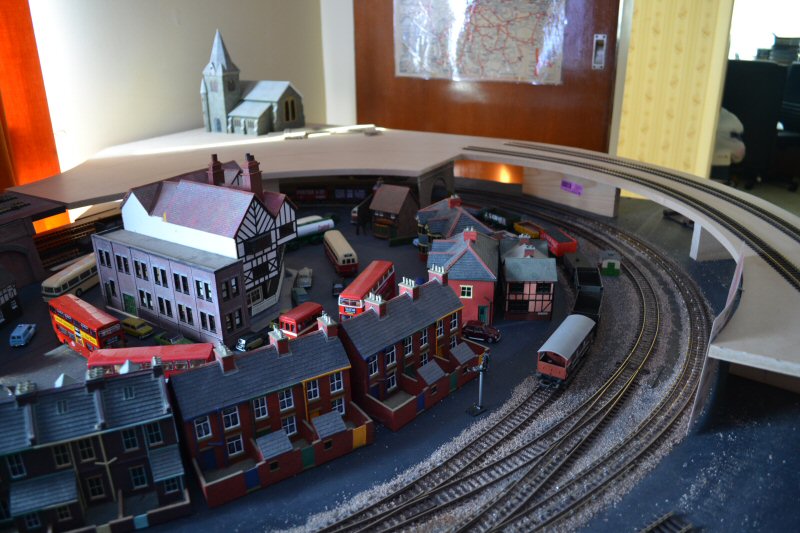

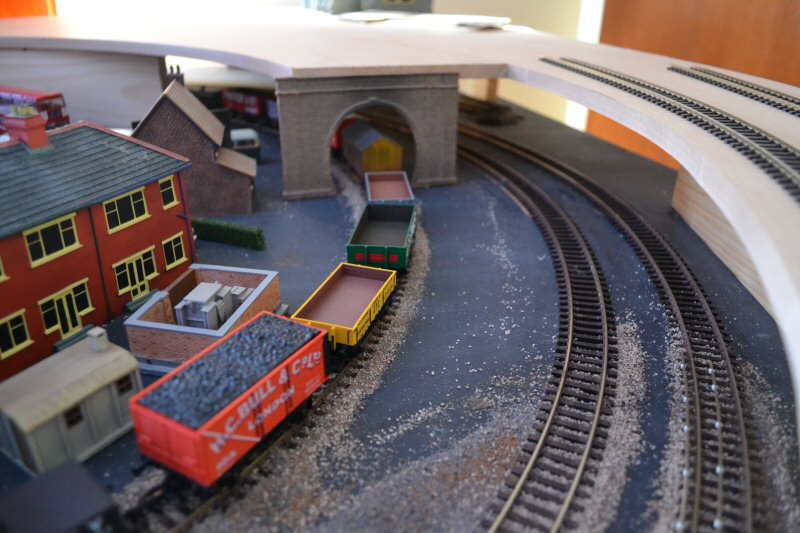
It doesn't look much but I am very happy with the result as it all comes together.
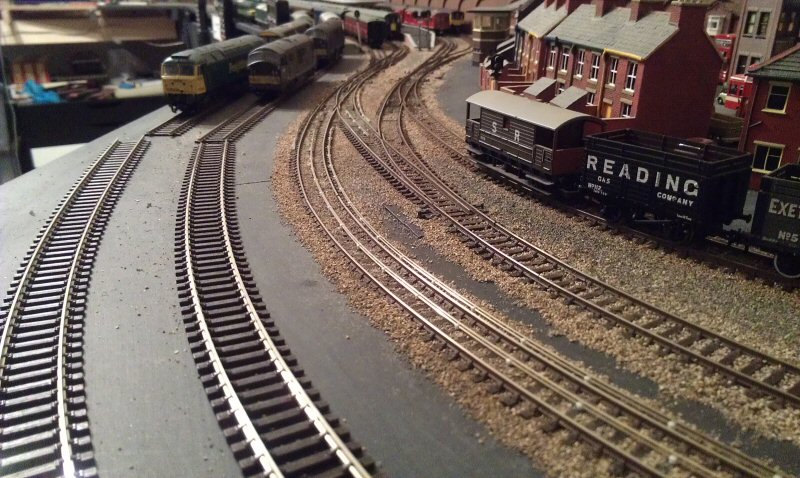
One thing that does strike me is how much the third and fourth rails contrive to disguise the 'narrow gauge' look of OO track.
Last edit: by SRman
Jeff Lynn,
Amateur layabout, Professional Lurker, Thread hijacker extraordinaire
Amateur layabout, Professional Lurker, Thread hijacker extraordinaire
Posted
Full Member
It seems a pity to hide the village/town in that "hole" but I do like your curved woodwork - how did you cut that - with a router and trammel bar ?
'Petermac
Posted
Full Member
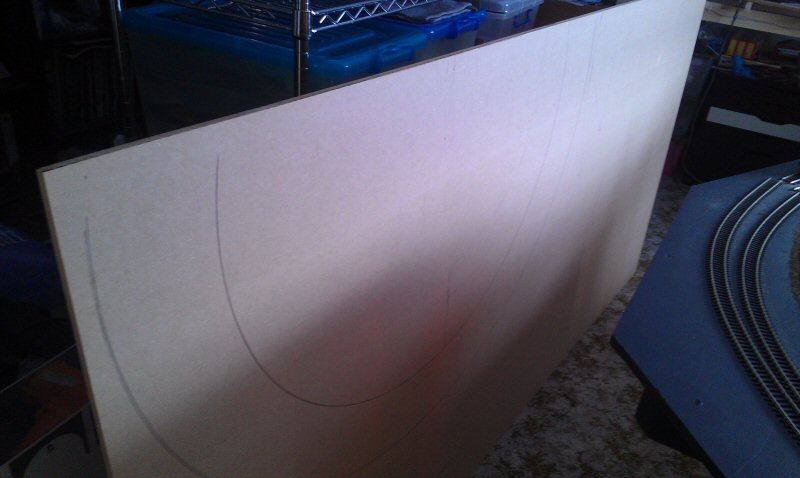
The village will eventually be on a rising hillside - there will not be a hole there in the longer term and it probably won't look anything like what's there right at the moment. That's still for the future but once the upper track bed is screwed into place, I can start building up the scenery formwork.
Note to all: I have added a couple of extra pics in my previous post to illustrate an intermediate stage of laying the extra rails with a third rail only in place.
Last edit: by SRman
Jeff Lynn,
Amateur layabout, Professional Lurker, Thread hijacker extraordinaire
Amateur layabout, Professional Lurker, Thread hijacker extraordinaire
1 guest and 0 members have just viewed this.